Most people believe a modern kitchen remodel means ripping everything out and spending six figures on a full gut job. Renovation shows repeat it. Design magazines make it look inevitable — every “after” photo shows a completely new room. Here’s what 14 years of converting industrial lofts, warehouse apartments, and urban kitchens taught me: the changes that make a space feel genuinely modern are rarely the biggest ones. They’re the specific ones. A poorly proportioned hood, wrong-scale pendants, or outdated hardware can drag an otherwise good kitchen back a decade. Fix those, and suddenly the bones look intentional.
This list is built on that principle. Some of these modern kitchen remodel ideas cost a few hundred dollars and a Saturday afternoon. Others are larger investments that anchor a full renovation. Each one stands independently — you don’t need to do all 16. Even three or four of these changes, chosen selectively, can make a real difference. I’ve included specific materials, brands, and dimensions throughout, because vague advice about “adding texture” doesn’t help you at a hardware store.
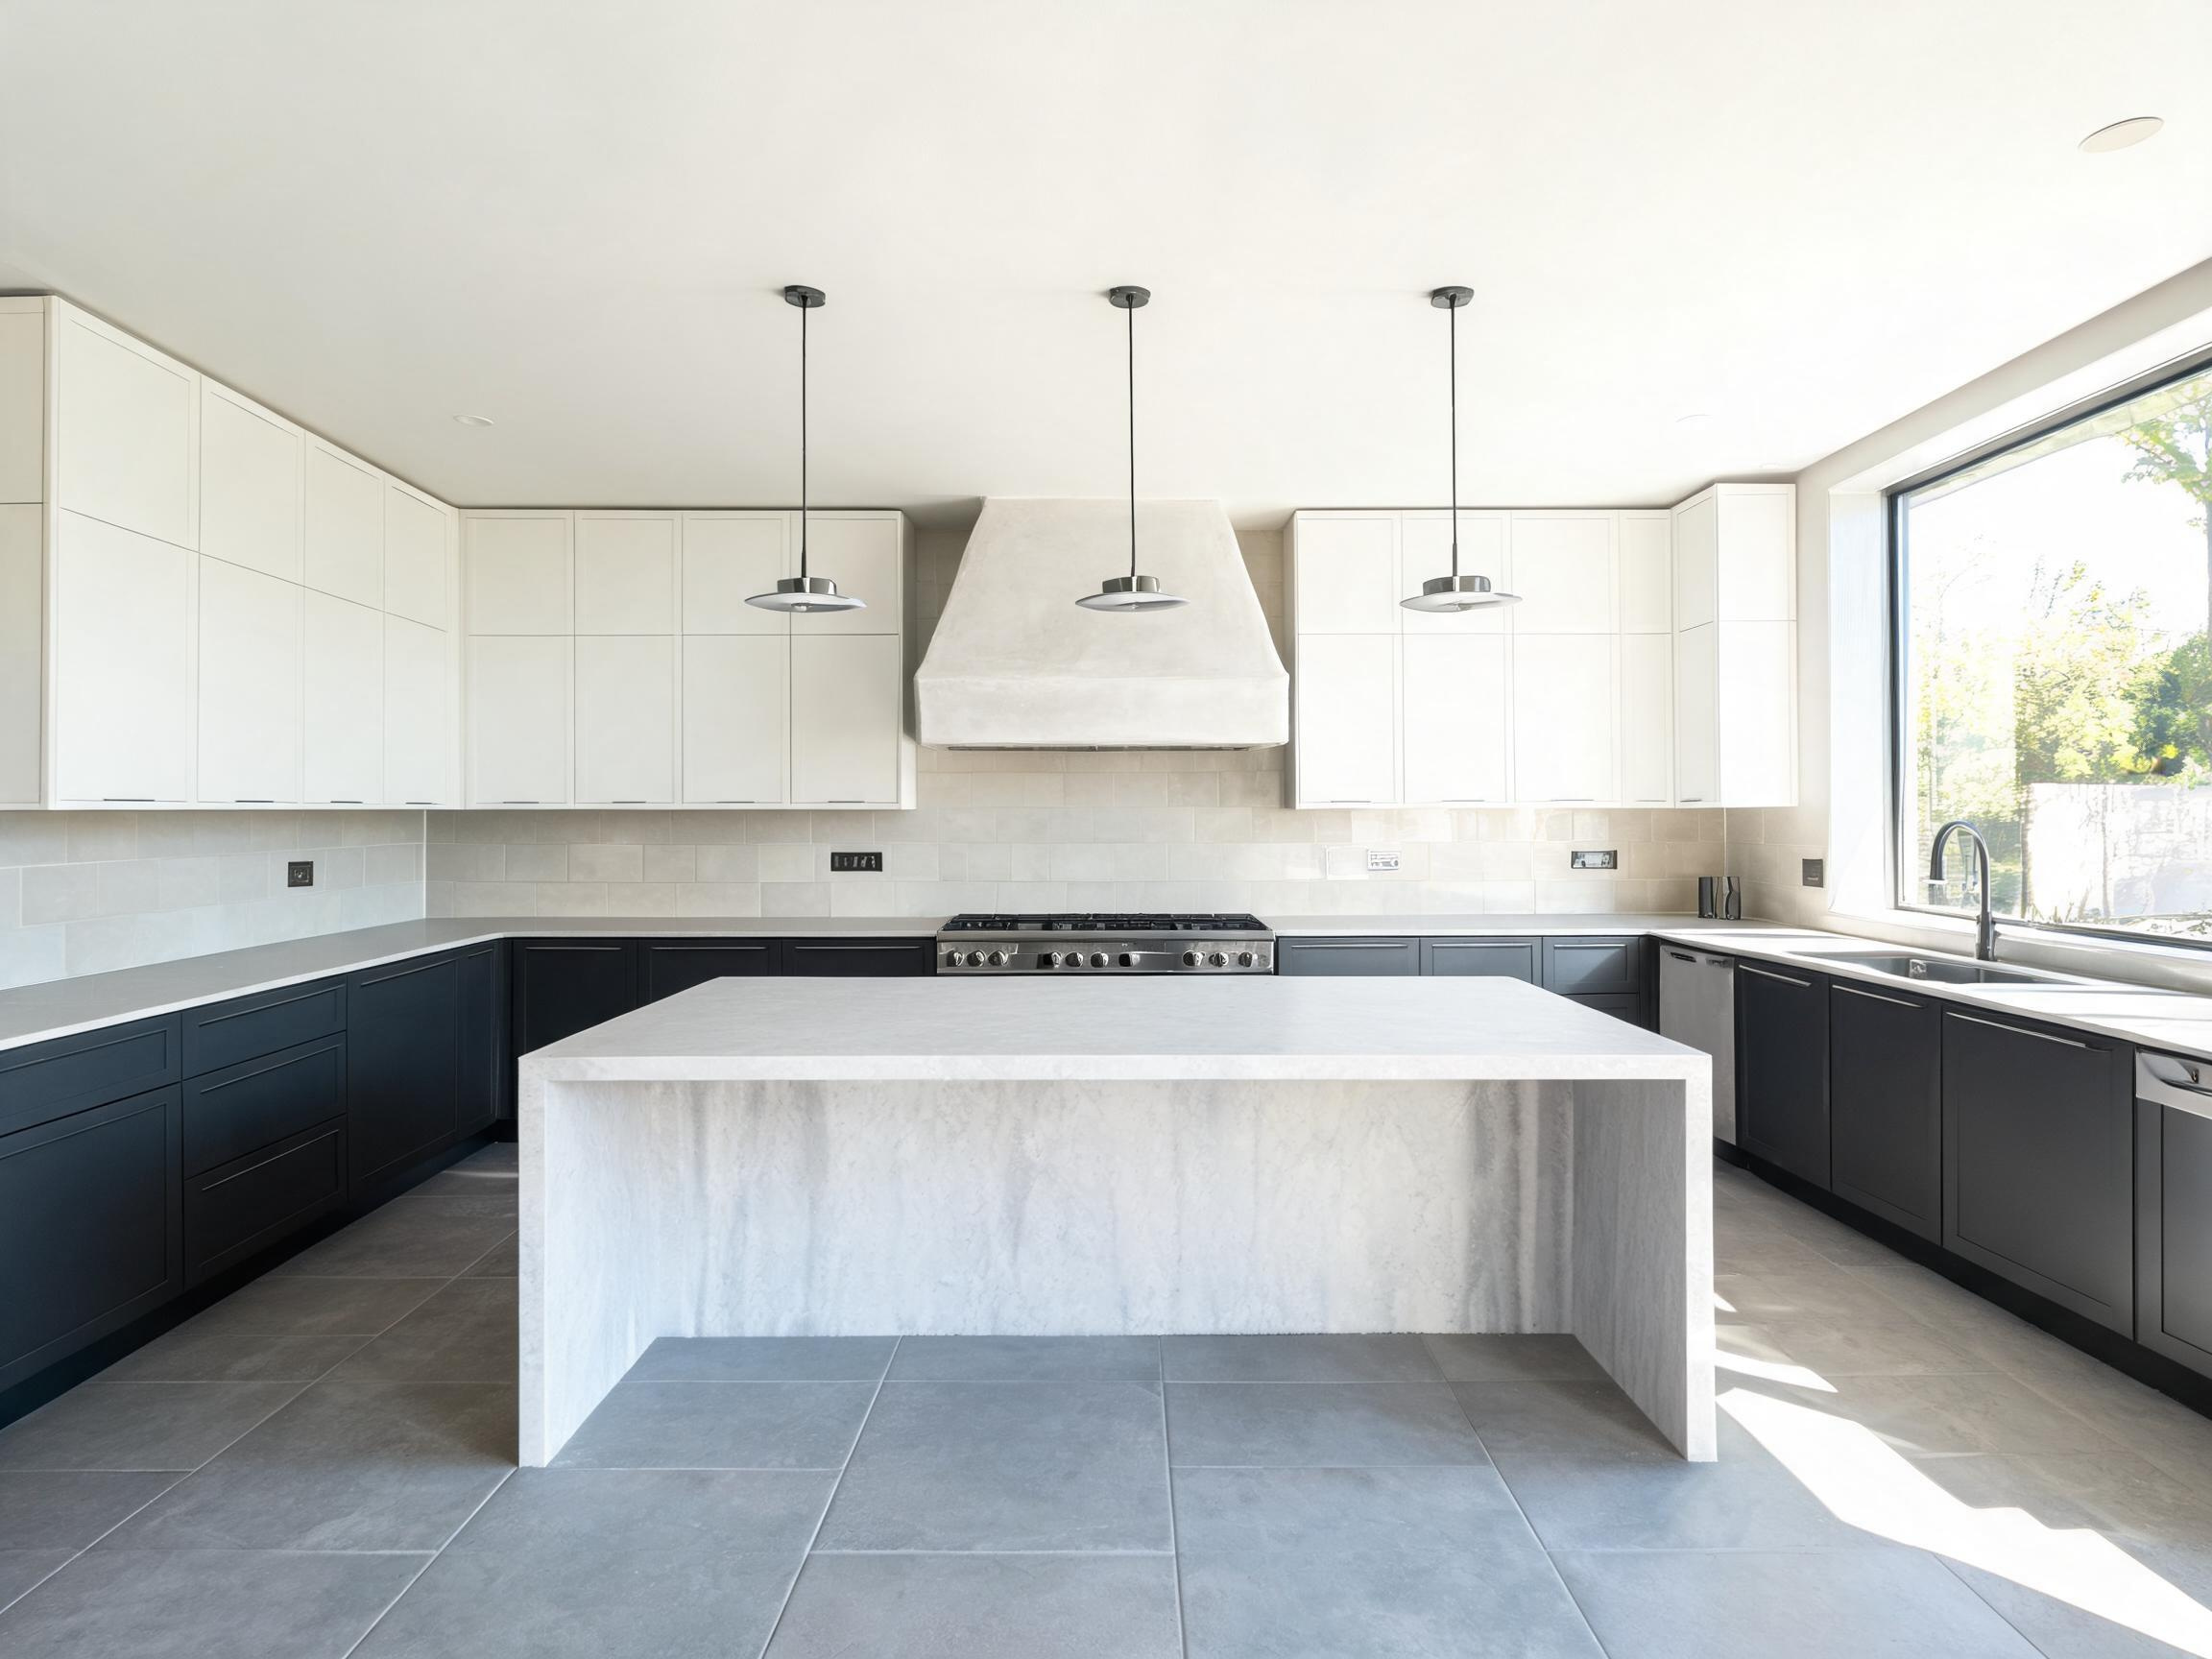
1. Two-Tone Cabinet Finishes That Trick the Eye Into Seeing More Space
Two-tone cabinetry is one of the most architectural moves available in a kitchen remodel, and most people execute it badly. The classic mistake is treating upper and lower cabinets as two separate colour decisions when they’re actually one composition. Done right, darker lowers and lighter uppers create a visual base that grounds the room and draws the eye upward — the same principle that makes a room feel taller.
Why the Upper/Lower Contrast Works Architecturally
The contrast introduces visual hierarchy — the same principle that makes a wainscotted wall feel finished. Lower cabinets function like a plinth: a deeper tone there (charcoal, navy, dark brown) makes the upper zone feel airier. White uppers reflect more light and reduce the sense of cabinetry crowding the room.
Best Colour Pairings for Modern Kitchens in 2025
Pairings that photograph and age well: Farrow & Ball Railings (lower) with Pointing (upper); Benjamin Moore Wrought Iron with White Dove; Sherwin-Williams Iron Ore with Pure White. If you prefer warmer tones, a terracotta lower against an off-white upper works well in kitchens with warm-toned wood floors. Avoid high-contrast combinations on cheap cabinet boxes — the contrast draws attention to imperfect door gaps.
How to Execute Without a Full Repaint
Solid wood or MDF cabinets with a smooth painted finish can be refinished, not replaced. Sand lightly, prime with a bonding primer (Zinsser Bulls Eye 1-2-3 is reliable), and use a cabinet-specific enamel. This approach costs roughly $800–$2,500 for a professional refinisher, or $200–$400 in materials if you’re doing it yourself. Budget an extra day for drying between coats — rushing it is the most common source of brush marks.
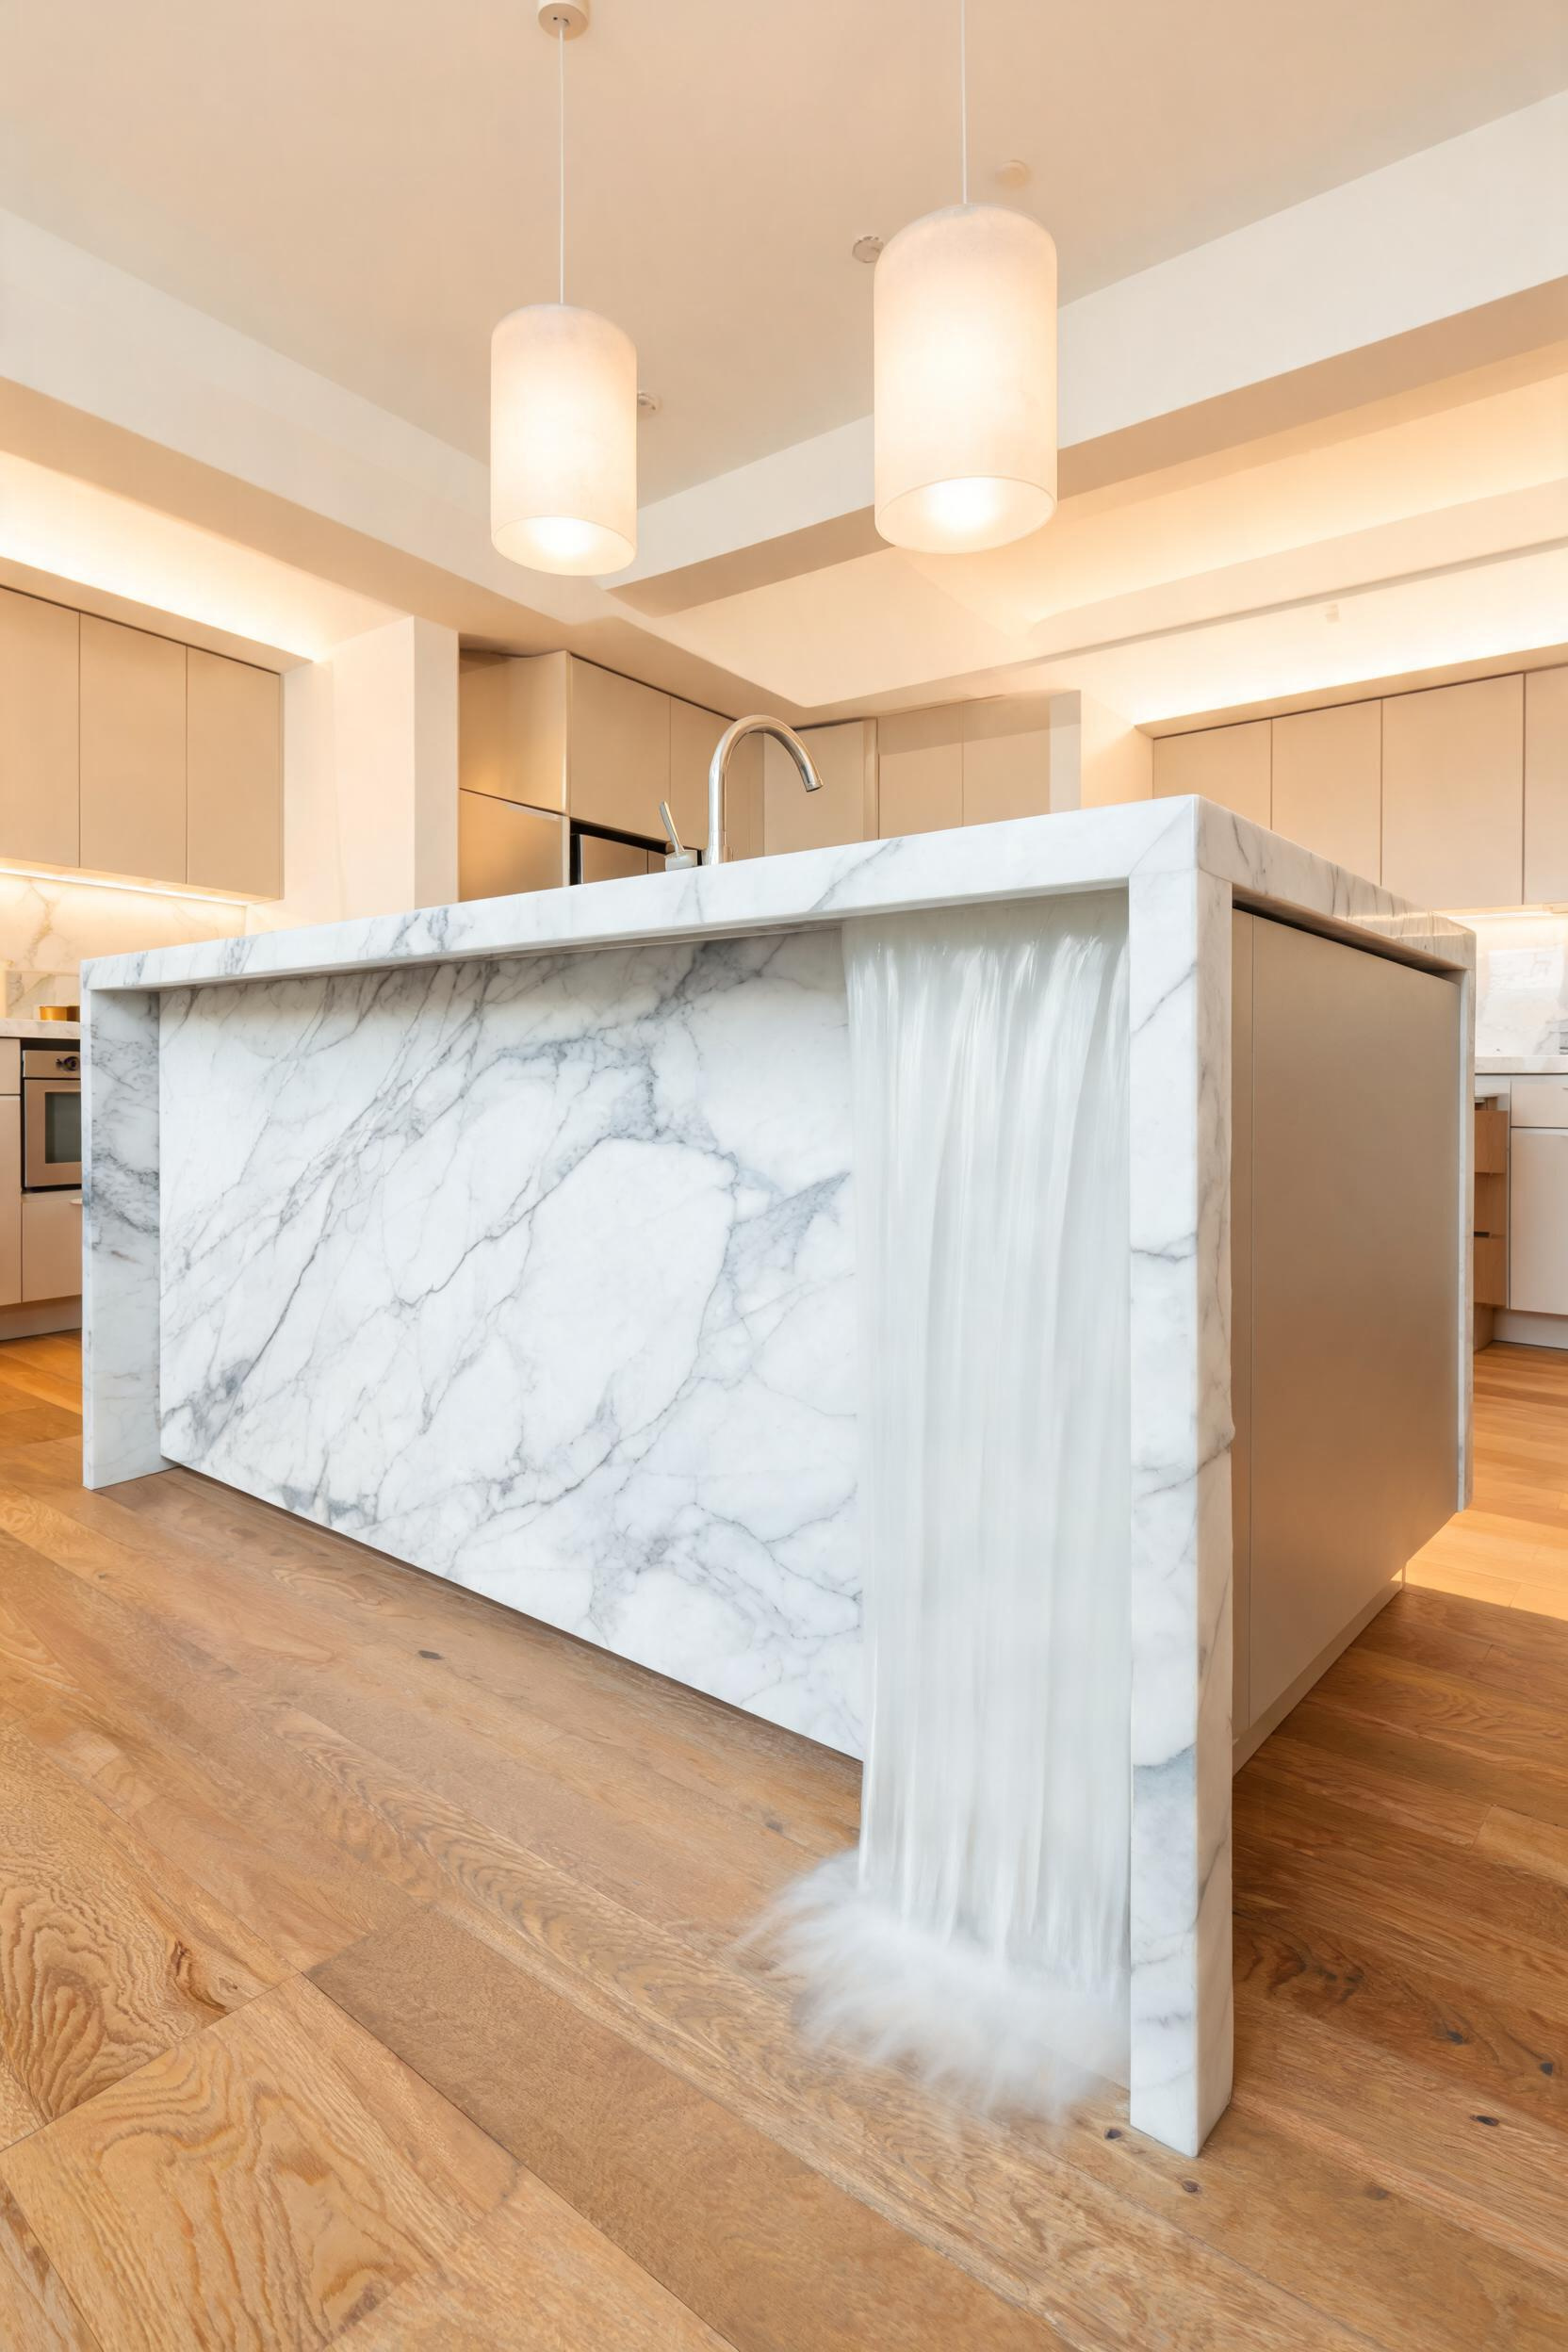
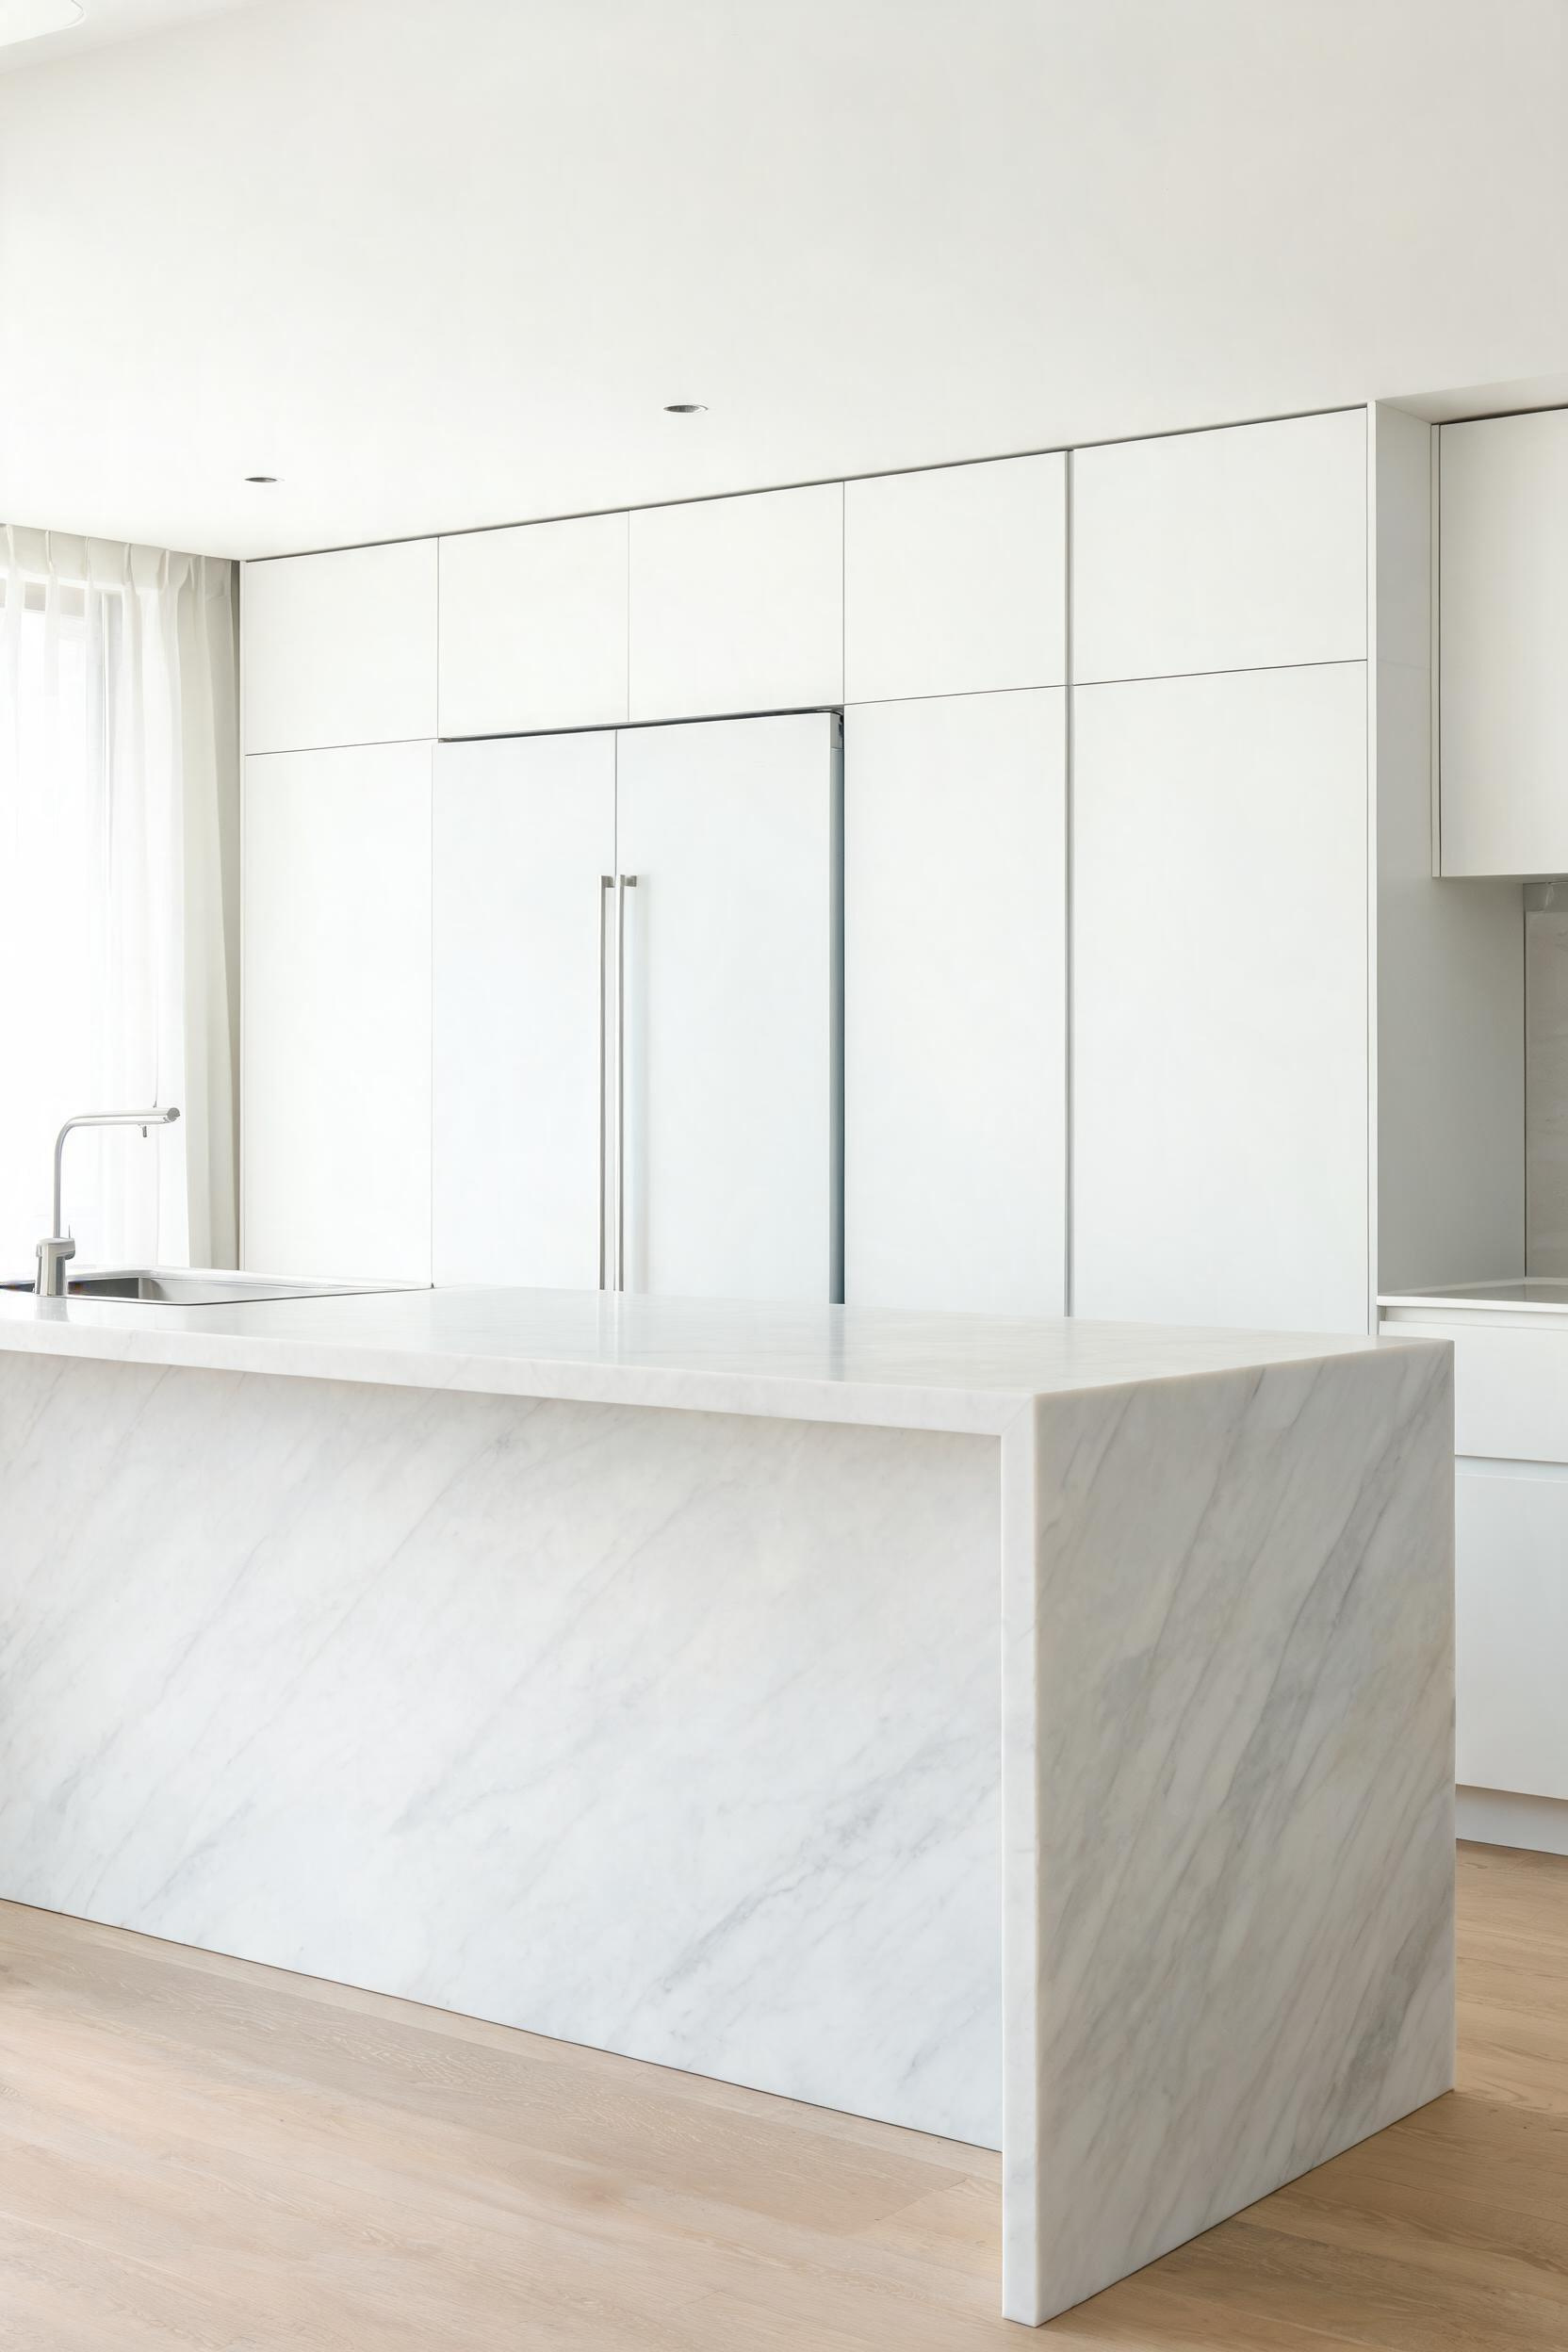
2. Waterfall Countertop Edges as a Statement in Contemporary Design
The waterfall edge continues countertop material vertically down the side of an island — the detail that separates custom-feeling kitchens from showroom ones. Executed well, it creates a sculptural moment. Done carelessly, it looks like someone ran out of base cabinets.
What the Waterfall Edge Communicates Architecturally
A waterfall edge works because it treats the countertop as an object rather than a surface. It signals that the material was chosen deliberately, not just to cover a horizontal span. It performs best on islands, where it’s visible from multiple angles. A single waterfall island in an otherwise restrained kitchen is often more sophisticated than a fully wrapped room.
Materials That Work Best
Quartz is the most forgiving material for a waterfall edge — consistent thickness and easy book-matching. Caesarstone’s Calacatta Nuvo and White Attica slabs are popular choices. Natural quartzite and marble work but need a fabricator skilled with mitre joints — natural stone has inherent variation that engineered quartz doesn’t. Butcher block creates a warmer, more casual waterfall — it suits kitchens leaning Scandinavian or farmhouse-modern rather than urban loft. For more countertop options worth considering, the 20 Magnificent Kitchen Countertop Ideas guide covers material trade-offs in more depth.
Sizing and Overhang Specs to Get It Right
The waterfall panel should match your countertop thickness — 3 cm (1.25 inch) reads most substantial and is worth the premium on an island. The seam between horizontal and vertical panels should be a 45-degree mitre joint, not a butt joint. Budget $150–$250 per linear foot for the vertical drop fabrication, on top of standard countertop pricing.
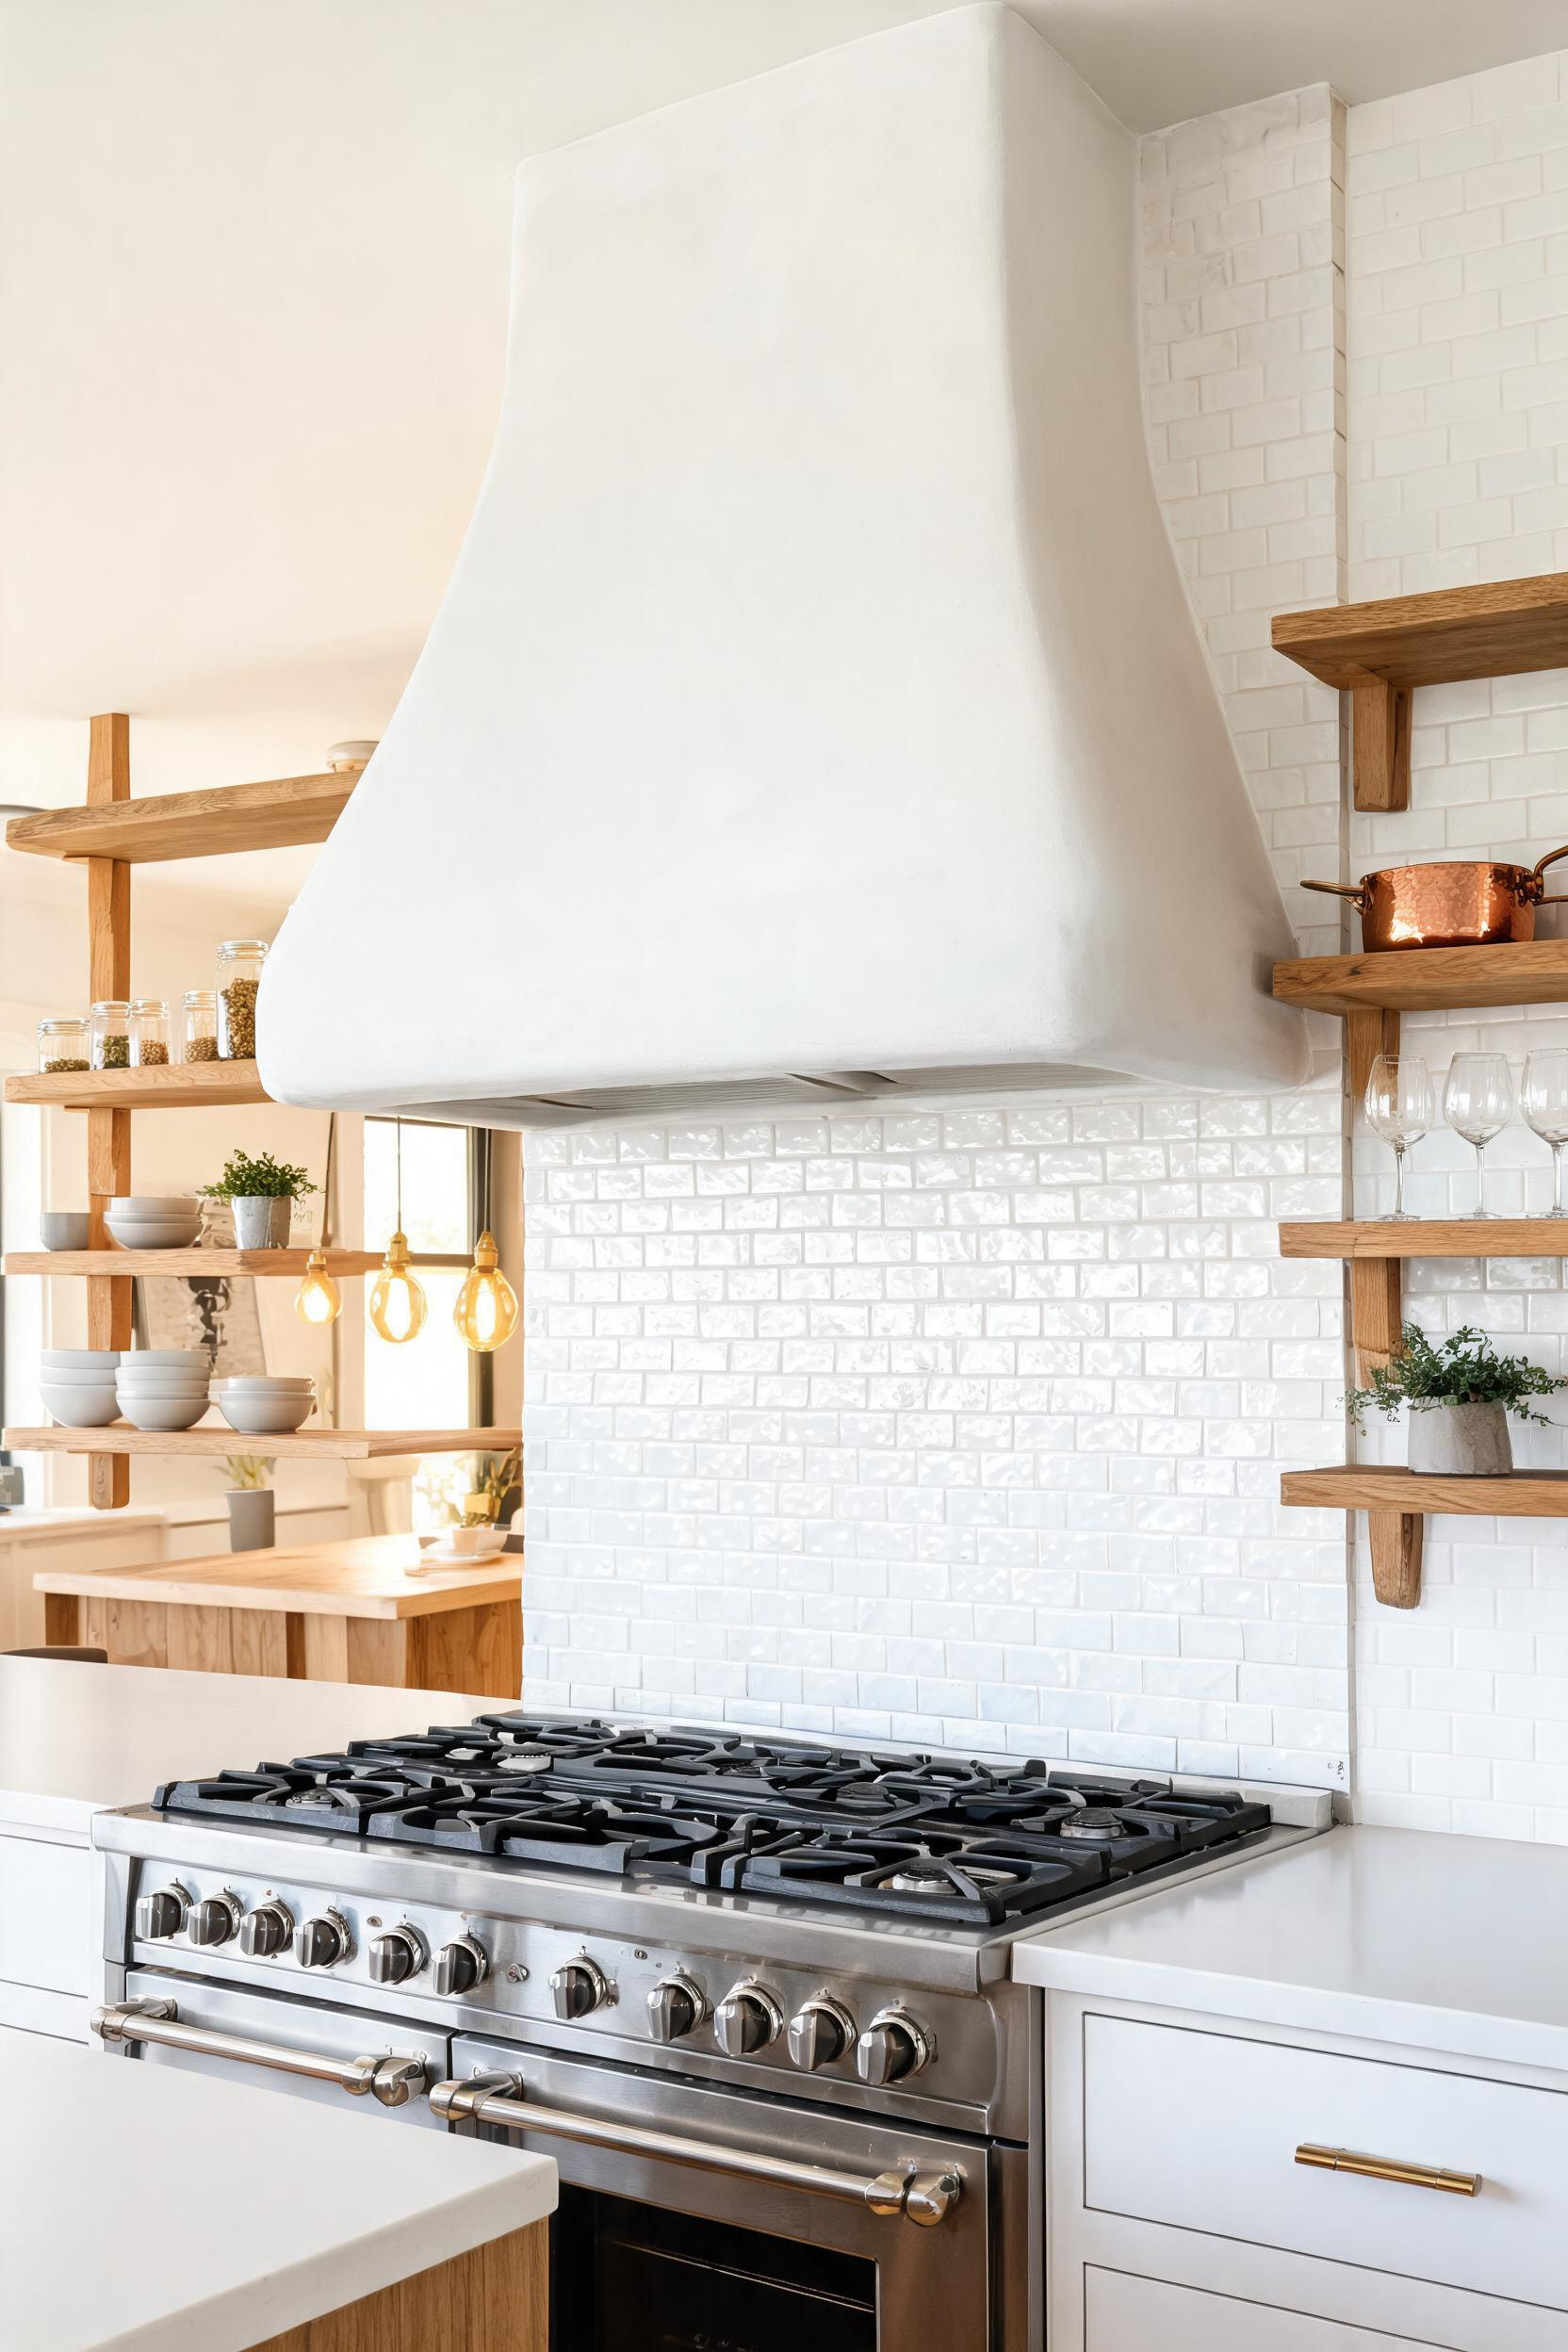
3. Statement Range Hoods That Justify Your Modern Kitchen Remodel Budget
Of all the investments I’ve seen pay off in a kitchen, the range hood ranks highest for visual impact. The hood sits at eye level when you’re standing at the range — it’s unavoidable. A thin, undersized, or builder-grade hood makes the entire cooking zone look like an afterthought. A properly scaled, well-designed hood makes the same cooking zone feel intentional, even architectural.
Why the Range Hood Became the Kitchen’s Focal Point
In older kitchen designs, the hood was hidden — tucked into a soffit or covered with a matching cabinet. The shift to exposed, oversized hoods came with open-plan living — once kitchens merged with main living spaces, the appliances needed to look intentional. Also, the hood is one of the few truly custom elements you can add without structural changes. You’re adding something, not replacing something — which makes it a lower-risk investment.
Plaster, Steel, and Wood Canopy Options With Real Prices
Plaster hoods cost $1,500–$4,000 installed, built over a metal liner — no two look identical. Custom steel hoods (blackened or brushed) suit industrial kitchens; Zephyr and BEST both make insert liners for custom fabricators. Wood canopy hoods (walnut, white oak, or painted MDF) are the most DIY-accessible at $400–$900 in materials. Whatever material you choose, the hood should extend 3–6 inches wider than the range on each side.
Ventilation Specs That Go Beyond Looks
A hood that looks good but doesn’t vent properly is a failure. For a 30-inch gas range, aim for at least 400 CFM. For a 36-inch or 48-inch professional range, 600–1,200 CFM is appropriate. External (ducted) venting is always preferable to recirculating; if your remodel allows for duct routing through the ceiling or wall, it’s worth the additional cost. Noise levels matter too — look for hoods rated at 1.5–3.0 sones at medium speed.
4. Integrated Appliances That Disappear Into Your Cabinetry
The most common complaint I hear after a major remodel: “It still looks like a kitchen.” That sounds absurd, but it’s real. The refrigerator is obviously a refrigerator; the dishwasher has a stainless panel that belongs in a different decade. Integrated appliances solve this. When done well, the fridge blends into the cabinet run; you have to know where to look to find it.
Panel-Ready vs. Built-In: What the Difference Actually Costs
Panel-ready appliances accept a custom cabinet panel on their door face, matching the surrounding cabinetry. Built-in appliances are fully flush-mounted with no visible gap. Panel-ready covers more price points: Fisher & Paykel’s dishwashers start around $1,200; their French door fridge runs $3,500–$5,000. True built-in refrigerators (Miele, Sub-Zero, Liebherr) start at $7,000 and rise quickly. Visually, the result is similar; the price difference is substantial.
Which Appliances Are Worth Integrating
For visual return, the refrigerator and dishwasher are the clear priority — they’re the largest stainless surfaces in a typical kitchen. A drawer microwave below the counter is worth integrating if it’s visible from the main living area. However, leave the range and hood visible: the range is the kitchen’s deliberate focal point. Integrate the supporting cast and let the range perform.
Installation and Clearance Requirements to Plan For
Panel-ready doors add weight — check the manufacturer’s maximum panel weight before ordering. Most dishwashers accept panels up to 12–15 lbs. Refrigerators need 1/8-inch clearance on each side for the panel to hang flush. Also match the appliance panel reveal to your cabinet door gaps — typically 3/32 to 1/8 inch. A mismatch makes the panel read as an afterthought.
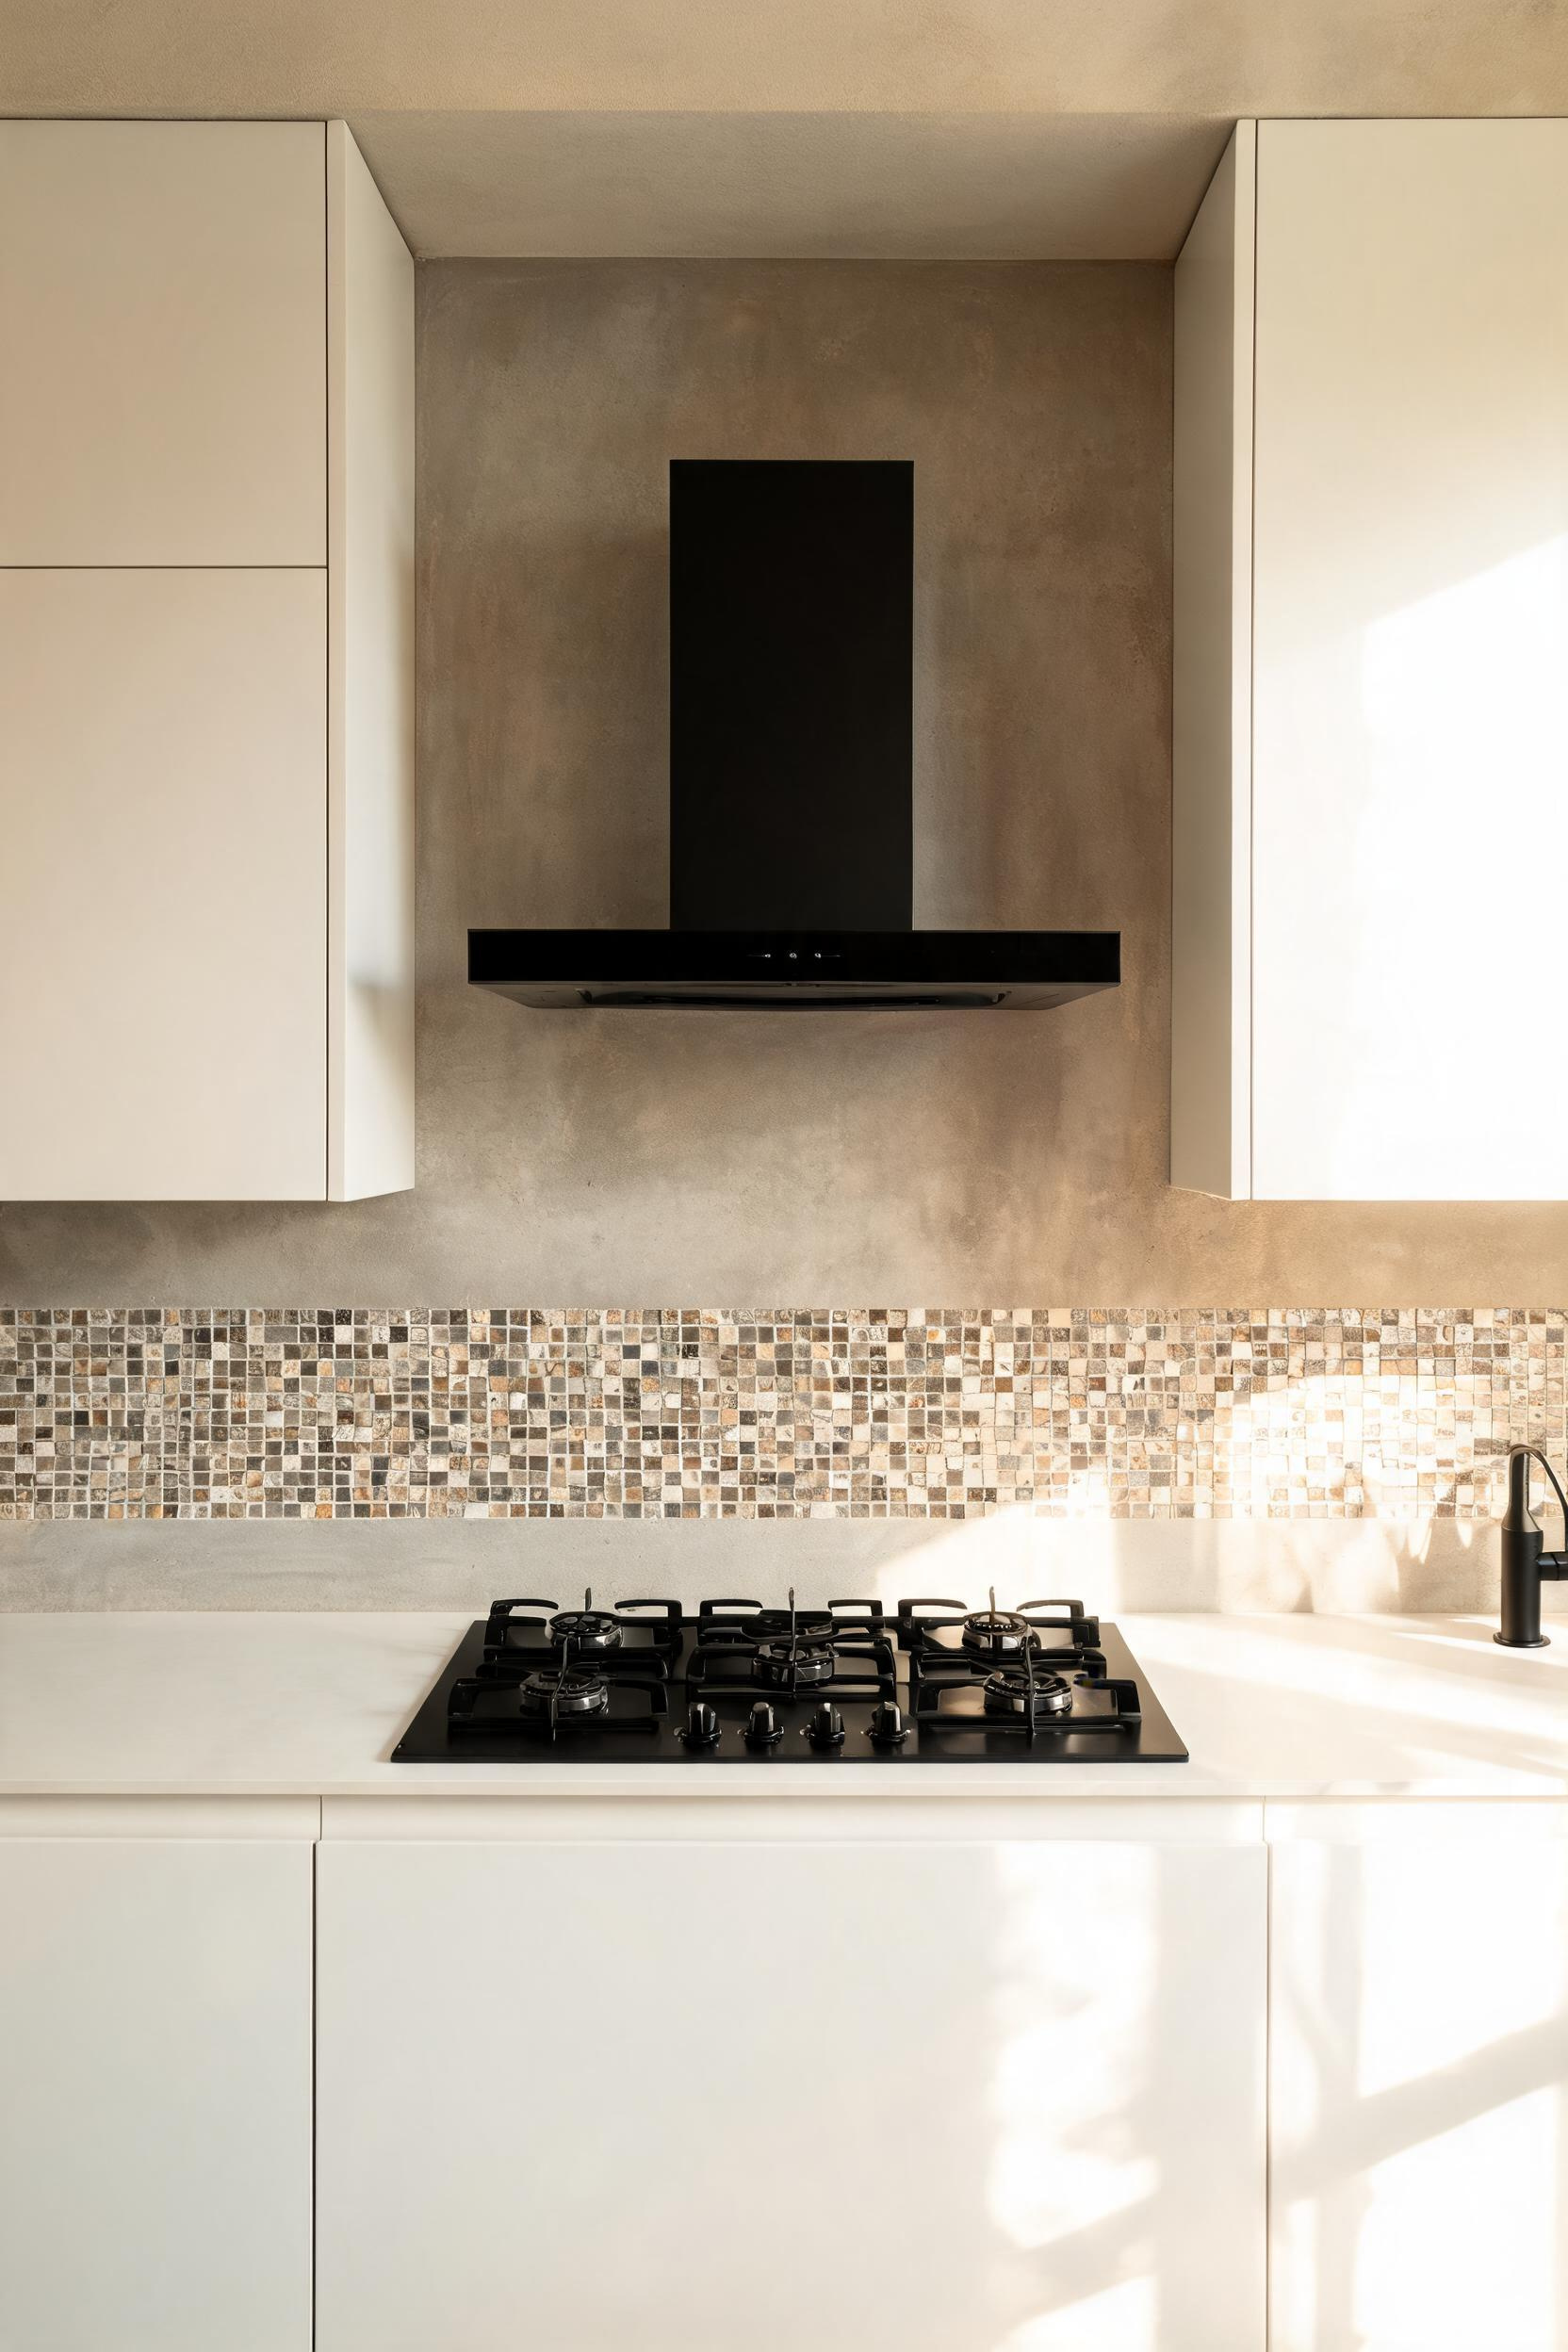
5. Exposed Concrete or Limewash Walls Behind the Cooking Zone
One lesson from loft conversion work: perfectly smooth surfaces read as cheap unless the materials are genuinely premium. The painted drywall behind most ranges is just there — it’s not a design choice. A textured surface (microcement, limewash, or exposed plaster) introduces depth that makes surrounding cabinets look more considered by comparison.
How Raw Texture Creates Depth in Flat Modern Kitchens
When a wall has texture, light moves across it differently at different times of day. Morning sun rakes across the surface and creates shadow; afternoon light flattens it. This variation is what makes rooms feel alive rather than static. In a restrained remodel where surfaces are glossy or matte-flat, a single textured wall behind the range provides contrast that makes everything else read as intentional.
Limewash vs. Microcement: What to Know Before Choosing
Limewash (brands: Portola Paints, Bauwerk Colour) is a paint-like application that anyone comfortable with a brush can apply. It creates a soft, layered, slightly luminous finish. It’s not waterproof on its own, so in a backsplash application you’ll want to seal the area behind the range. Cost: $60–$120 per gallon, typically 2–3 coats. Microcement (Topciment, Pandomo, Novacolor) is a multi-layer system that requires a professional applicator in a cooking zone — the topcoat needs correct heat and grease resistance. Cost: $18–$35 per square foot installed.
Sealing Requirements Near Heat and Splatter Zones
Both finishes need a penetrating sealer within 18 inches of the cooktop. Limewash takes a water-based polyurethane over the final coat; microcement includes a polyurethane or epoxy topcoat as part of the system. Reseal annually in a high-use kitchen and maintain the standard 30-inch clearance from cooktop to combustible surface.
6. Open Shelving: A Modern Kitchen Remodel Staple Worth Reconsidering
Open shelving works brilliantly in some kitchens and fails badly in others. Some loft kitchens use it to great effect. Others end up cluttered within six months. The difference is almost always context, not preference.
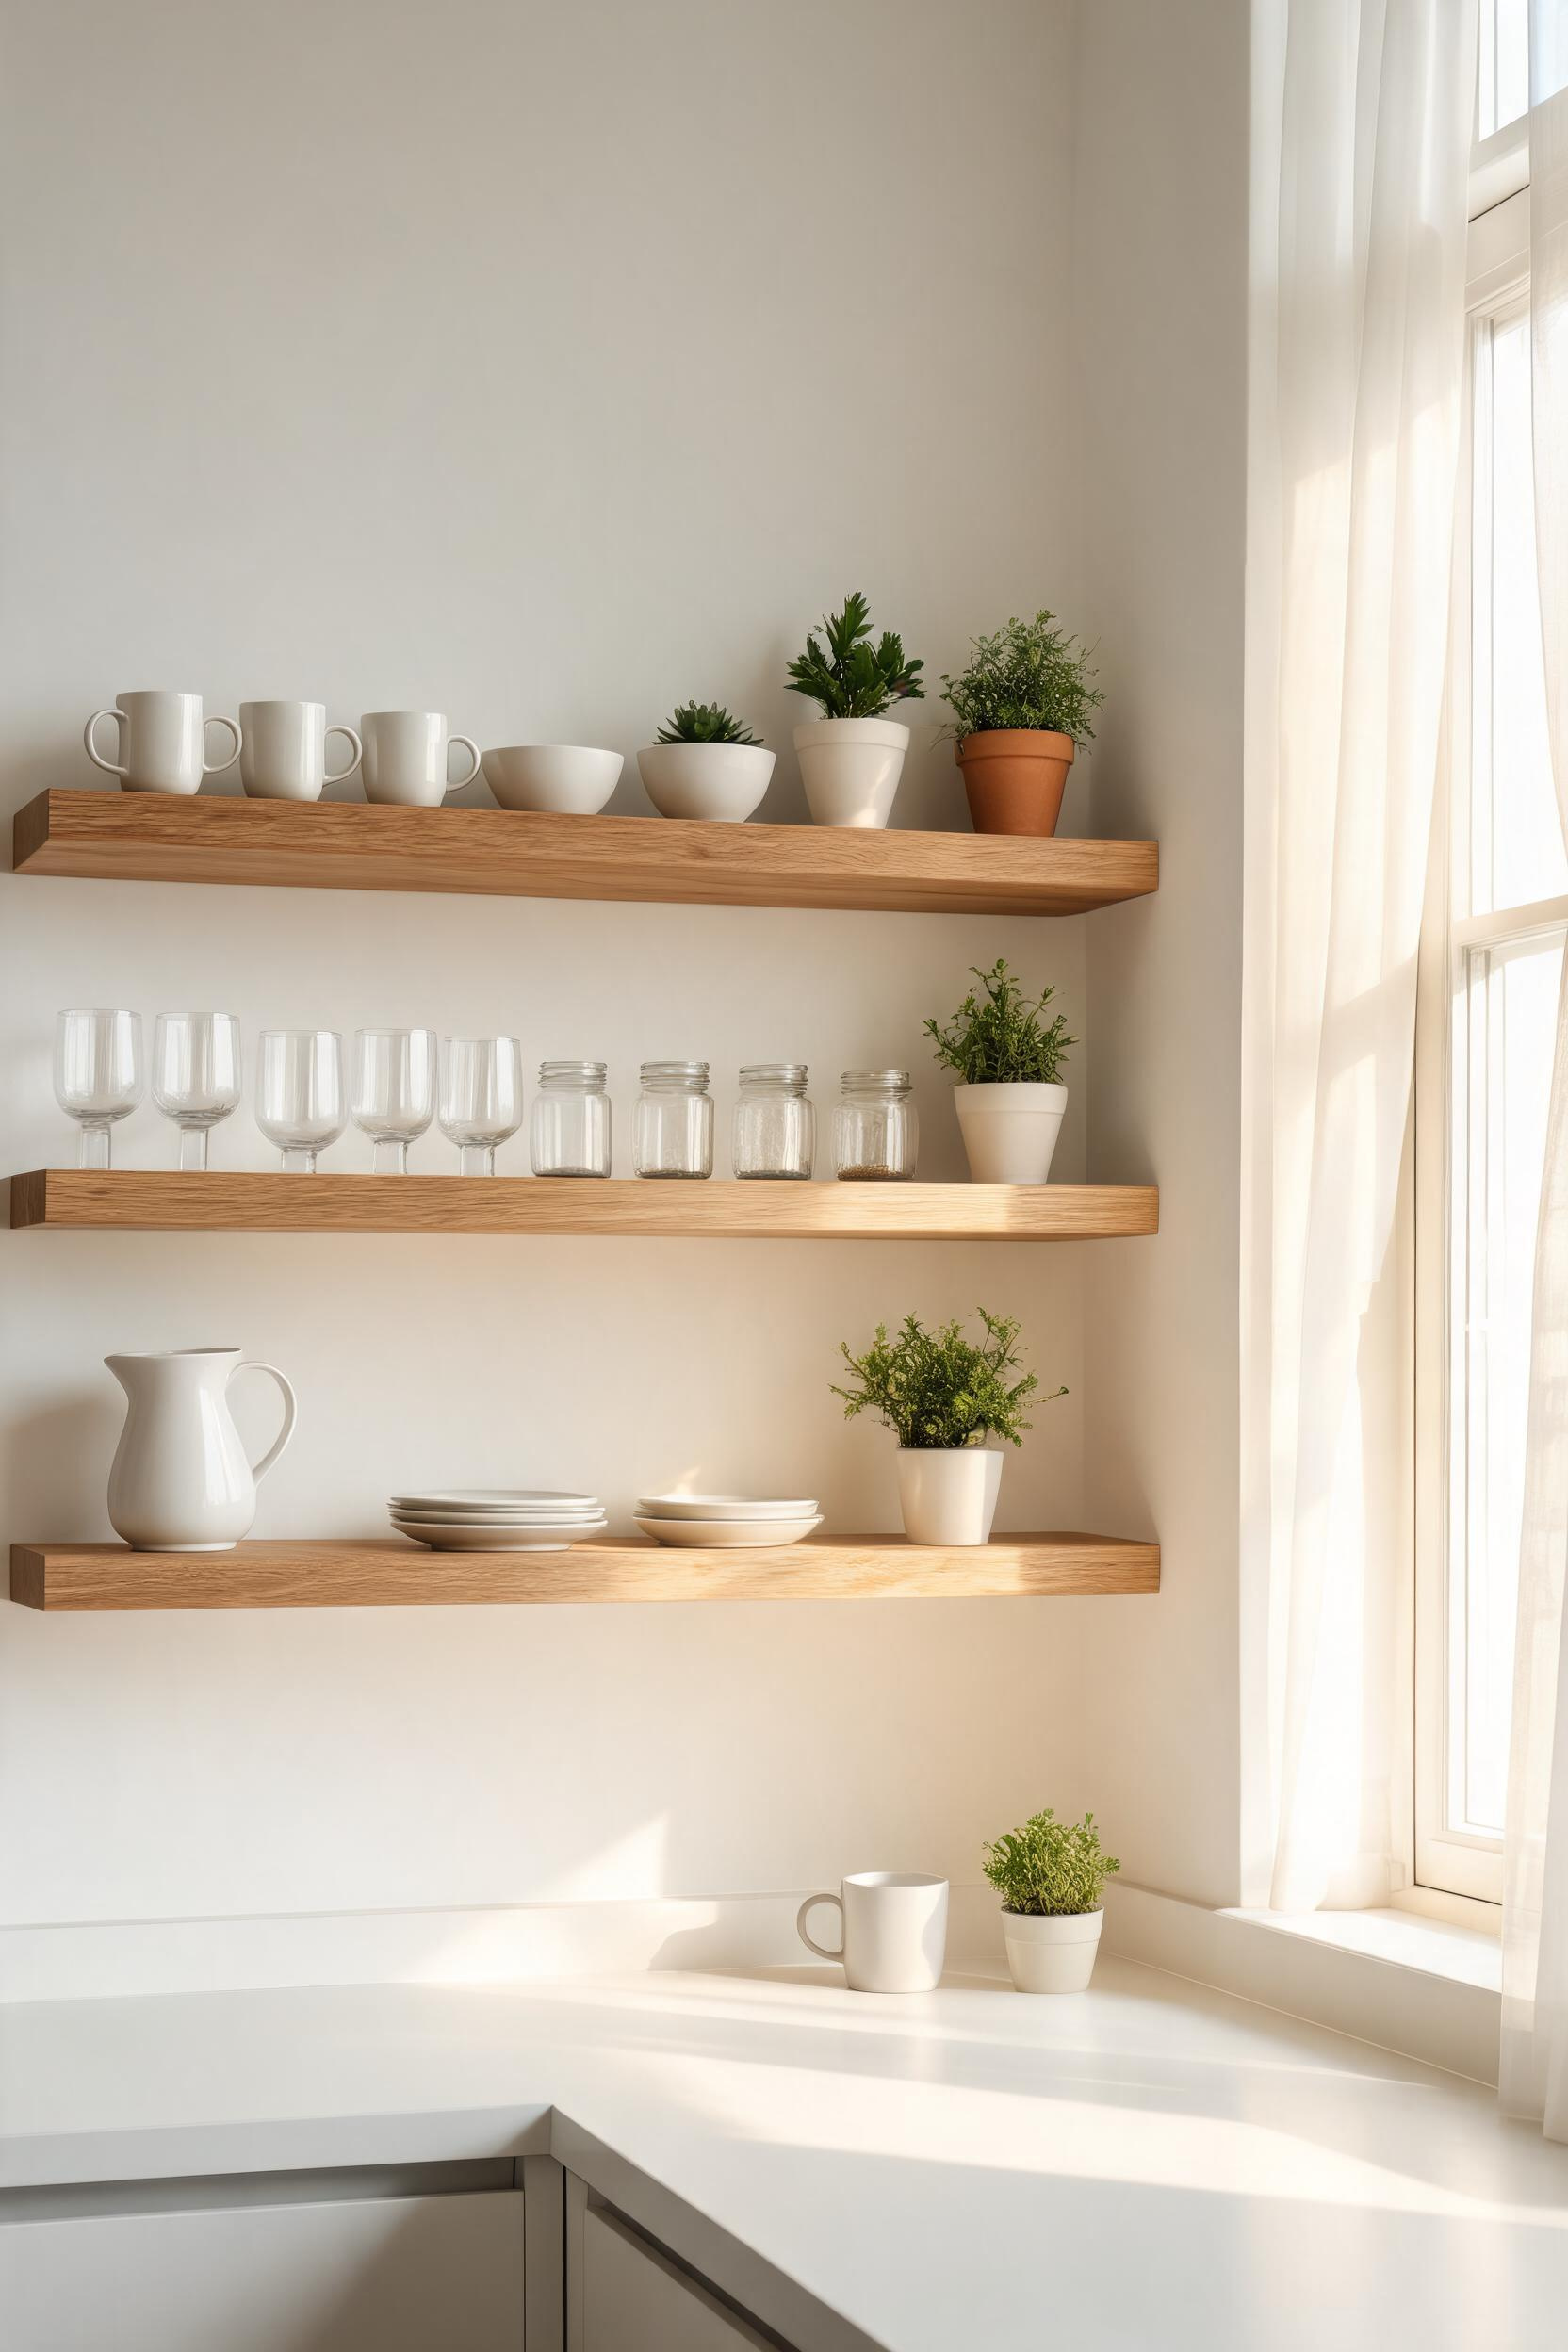
Why Open Shelving Works in Lofts and Urban Kitchens
In a loft kitchen, ceiling heights are often 10 to 14 feet. Extending upper cabinets to full height in that context can feel oppressive — it creates a wall of storage rather than a room. Open shelves at the standard upper-cabinet height (54–60 inches from the floor) break that vertical mass and let the wall breathe. They also suit the display-focused approach urban apartment dwellers often prefer: good knives on a magnetic rail, ceramics worth looking at, plants that tolerate low light.
The Bracket and Depth Specifications That Matter
For a modern kitchen remodel, floating shelves with concealed brackets read cleaner than exposed bracket styles. The Floating Shelf Co. and Shelf Master both make concealed-bracket systems rated for 60–80 lbs per shelf. Shelf depth matters more than most people realise: 10 inches is sufficient for plates, mugs, and spice jars; 12 inches accommodates larger bowls and small appliances. However, deeper than 12 inches and the shelf starts to block the counter below when you’re working. Thickness of 1.5 to 2 inches reads substantial; anything thinner looks provisional.
Styling Open Shelves So They Stay Functional
The problem with styled open shelves is that they photograph well and function badly. A shelf styled for Instagram isn’t storing anything useful. For a working kitchen: anchor with consistent-height items (stacked plates, matching mugs), leave one-third accessible for daily items, and edit every few months. Treat the shelf as both storage and display simultaneously — that balance is what makes open shelving worth keeping.
7. Under-Mount Sinks with Thick-Edge Countertops for a Refined Look
The sink is where the gap between a thoughtful remodel and a generic one is most visible. A drop-in sink in a thin laminate countertop is what most aging kitchens have. The alternative — an under-mount sink with a thick-edge slab — reads as premium regardless of the surrounding finishes.
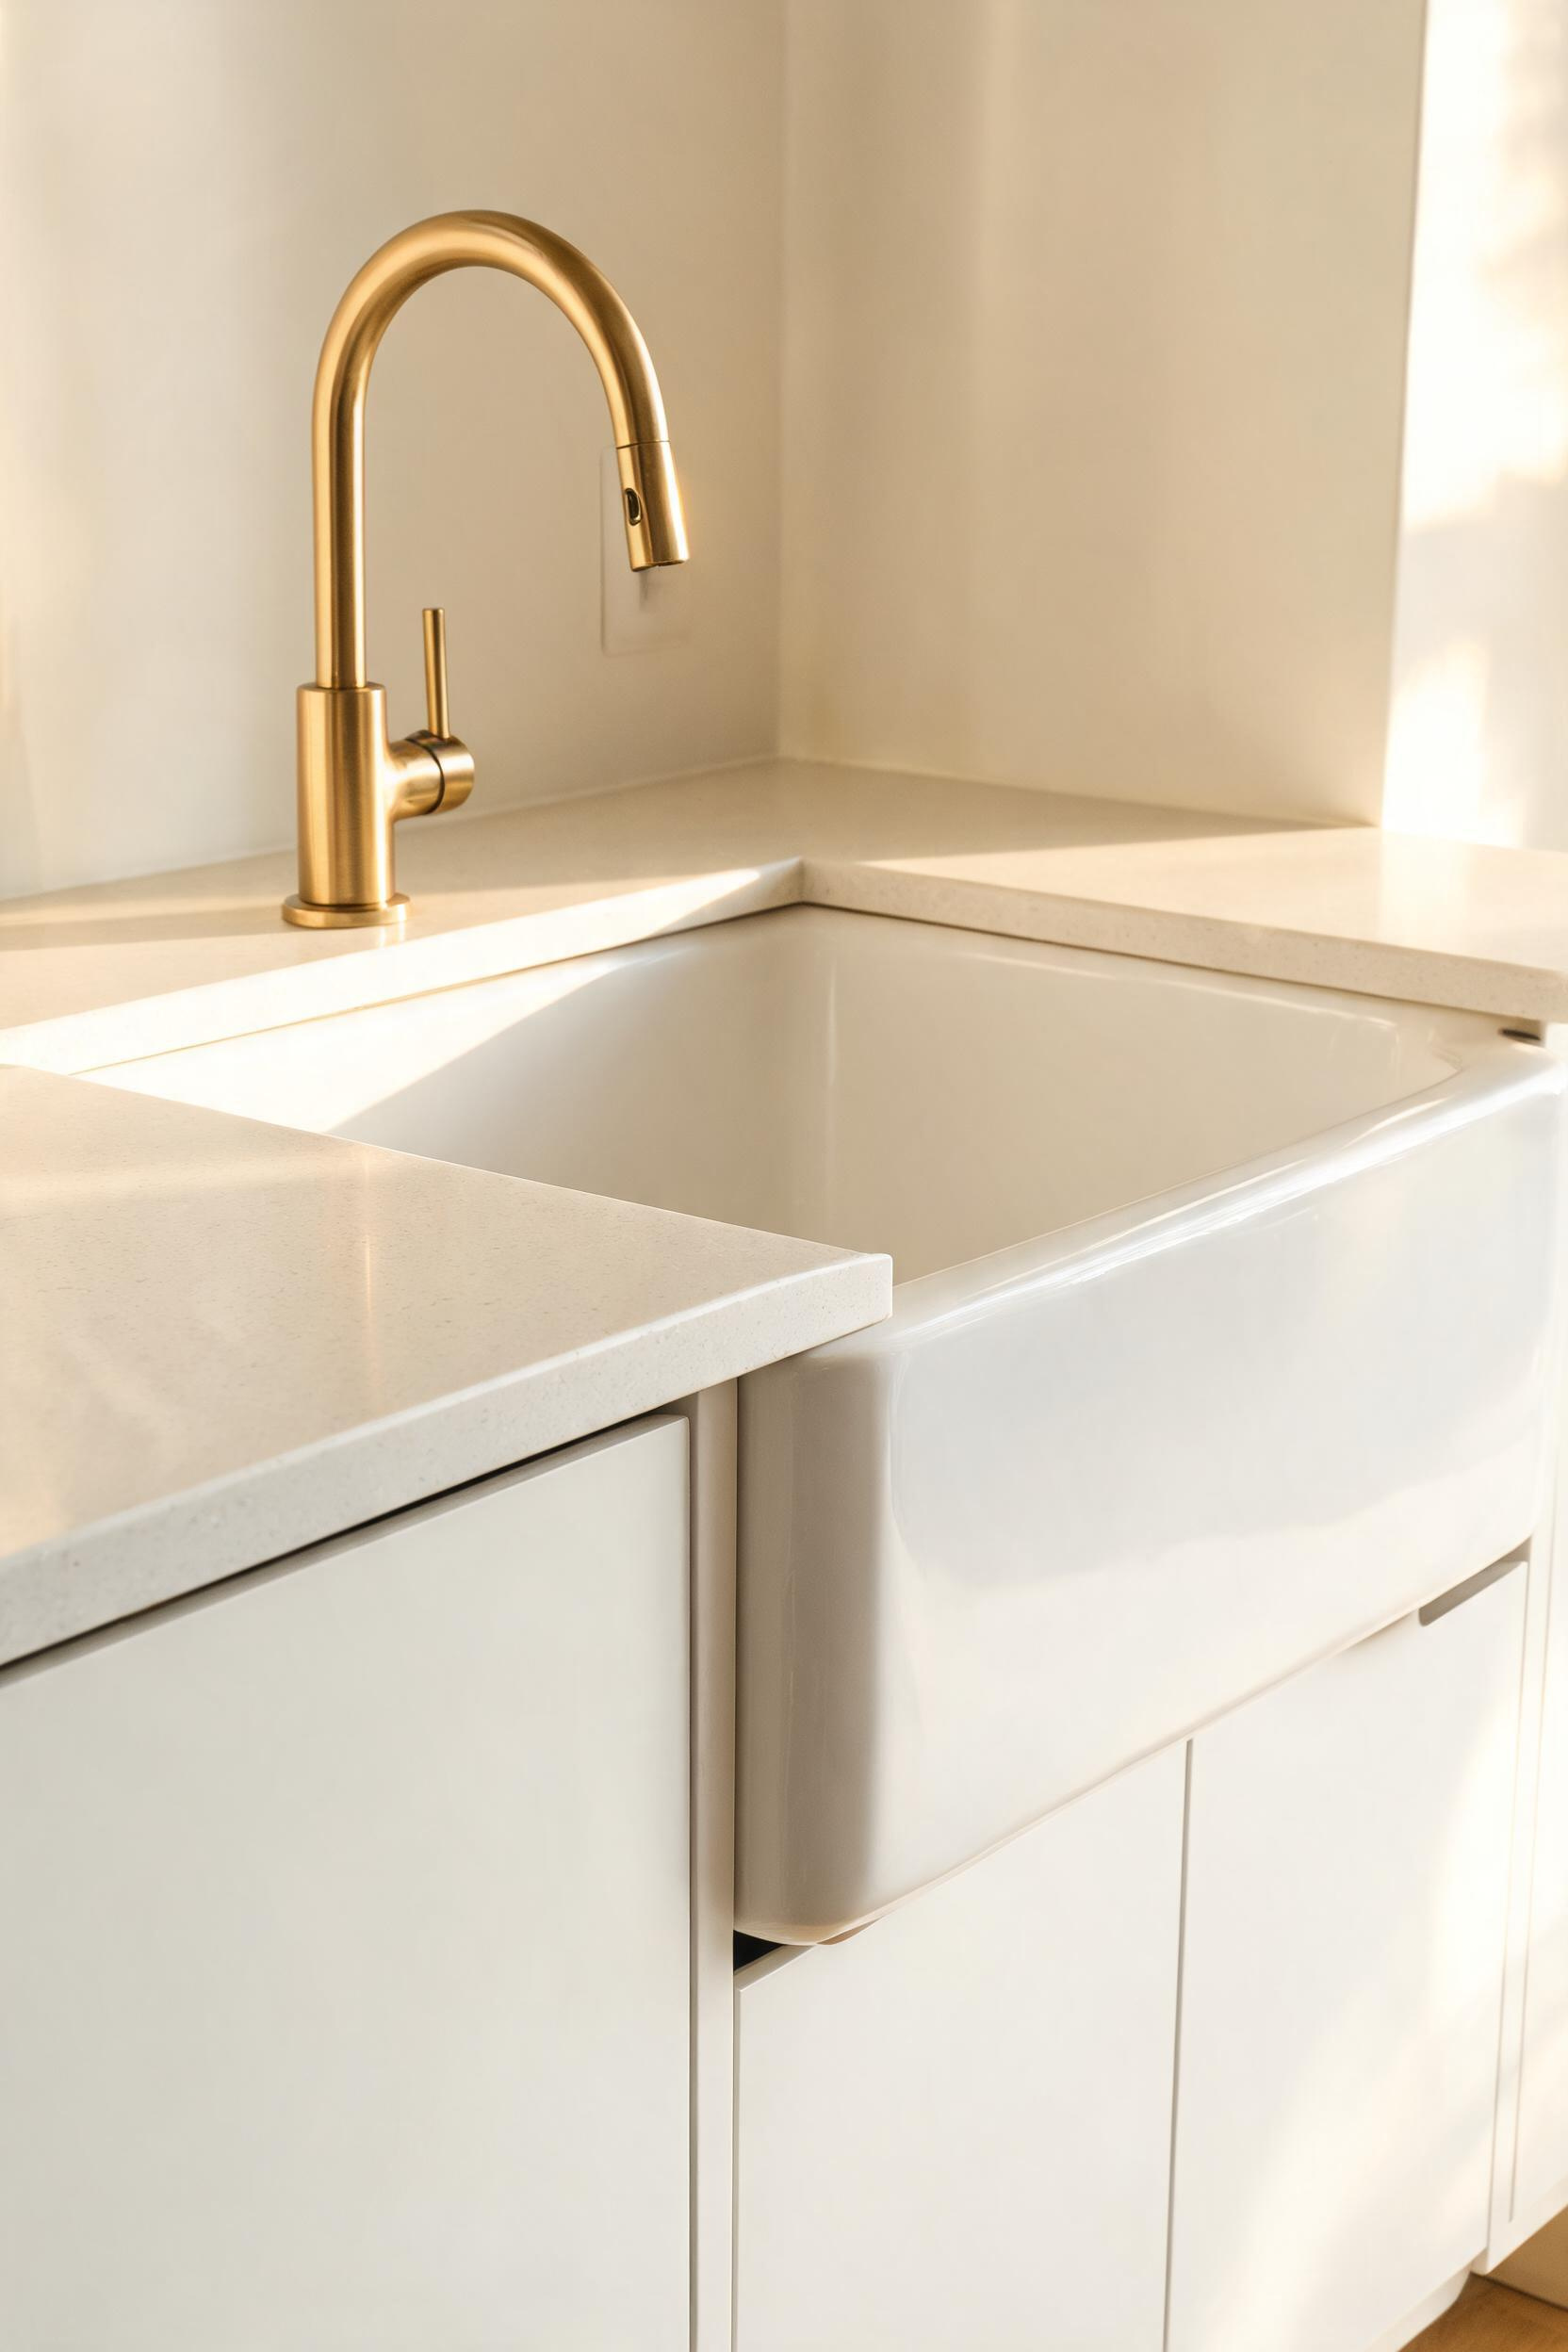
Why the Under-Mount/Thick-Edge Combination Reads as Premium
Drop-in sinks require a visible rim cut into the countertop. That rim collects debris, interrupts the countertop surface, and signals mass-market cabinetry. Under-mount sinks attach below the countertop, creating a clean, uninterrupted surface that’s also easier to wipe. Pair this with a 3 cm edge — rather than standard 2 cm — and the combination creates a sense of materiality that reads as genuinely considered. It’s also one of the more affordable upgrades in a full remodel.
Sink Materials for Modern Kitchens
Three materials dominate: stainless steel (16-gauge minimum — thinner dents and resonates), fireclay (heavy but virtually indestructible), and cast iron (the original premium, now mostly replaced by fireclay for weight). Kohler’s Whitehaven fireclay sink ($800–$1,200) is consistently the best value in its category. Rohl makes premium stainless and fireclay options in the $1,400–$2,200 range. Shaws Original (UK-made fireclay) is the connoisseur choice at $1,800–$2,800.
Sizing Ratios Relative to Cabinet Width
Leave at least 3 inches of countertop on either side of the sink when centred. For a 30-inch cabinet, a 24-inch sink is the maximum; for 33 inches, a 27-inch single bowl works well. Oversizing the sink leaves inadequate prep space — a common mistake. Mount the faucet in a pre-drilled hole at the back of the countertop rather than in the sink deck; it looks cleaner and keeps the sink bowl clear.
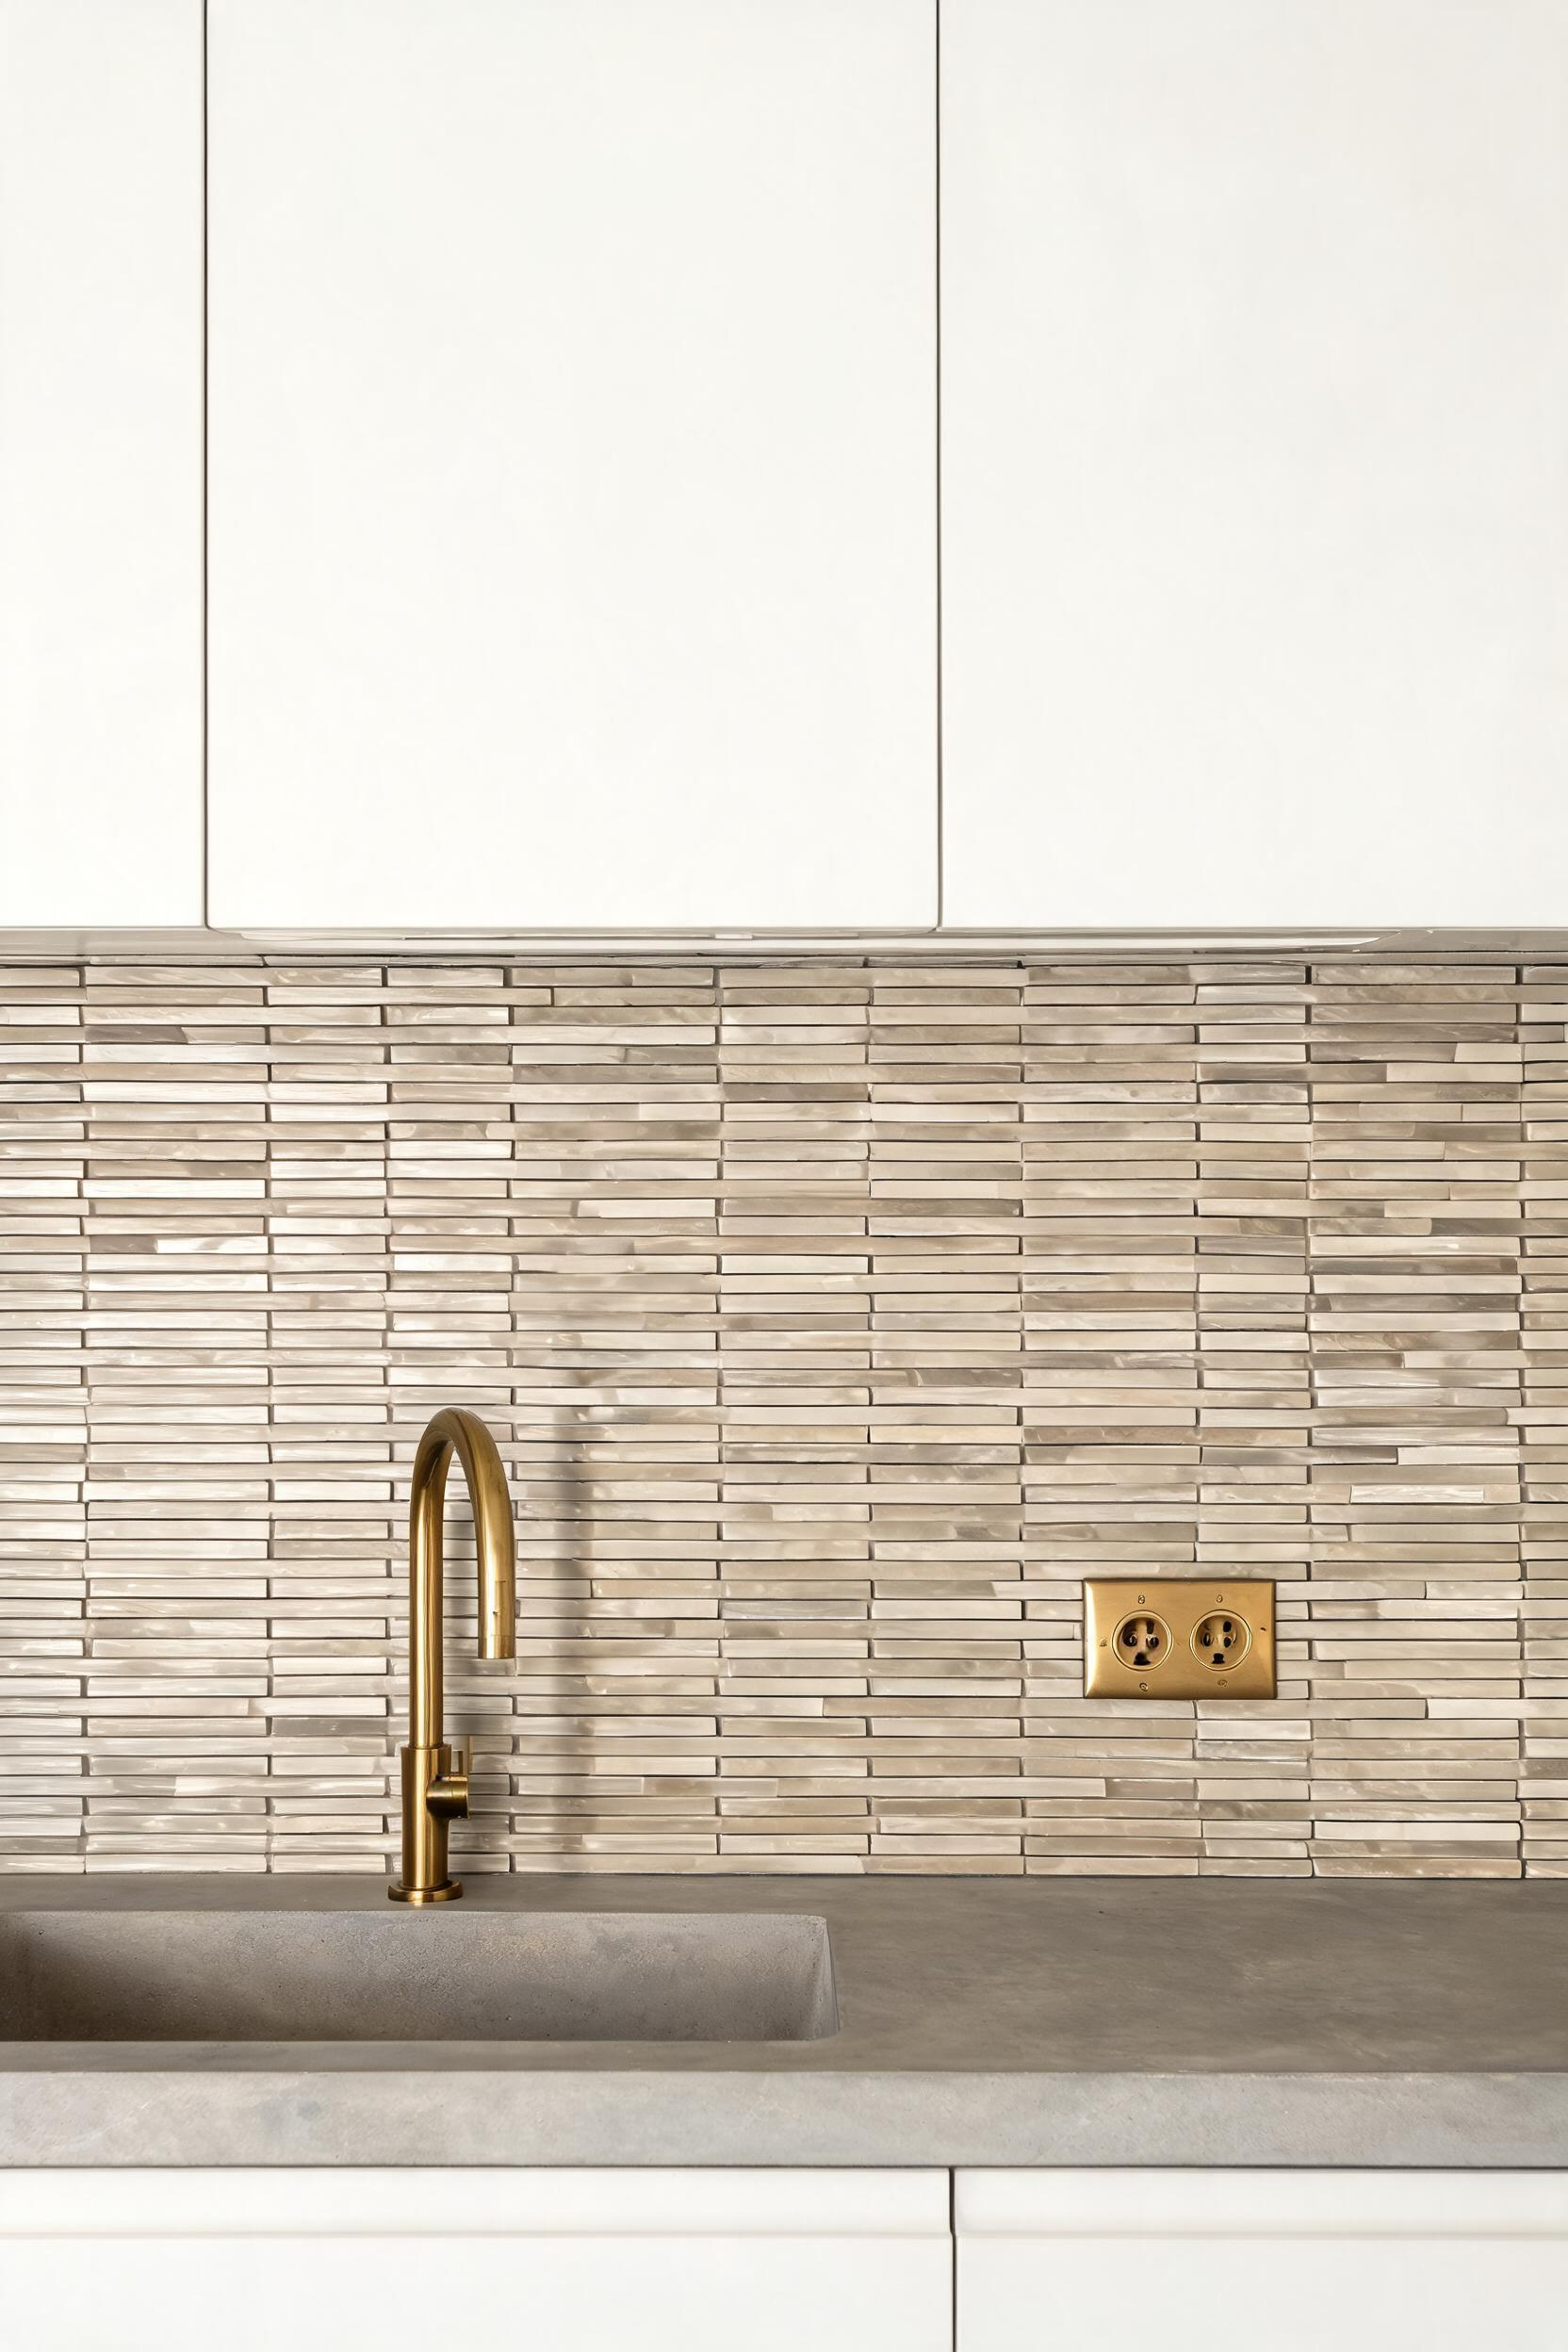
8. Linear Mosaic Backsplash Tiles for a Sharp, Graphic Backdrop
The backsplash is where most kitchen remodels either commit to a point of view or retreat into safe neutrality. Subway tile has become the safe neutral — so common that it no longer reads as a design choice. Linear mosaic tiles (long, narrow, rectangular tiles set in horizontal or stacked patterns) offer the clean graphic quality of subway tile with considerably more sophistication. They reward closer inspection: the more you look, the better they get.
Why Linear Patterns Work Harder Than Standard Subway Tile
Standard 3×6-inch subway tile set in a running bond pattern has become so ubiquitous in kitchen remodels that it’s effectively invisible. Linear mosaic tiles — typically 1×6, 1×4, or 2×8 inches — set in a stacked horizontal pattern create a much stronger graphic quality. Long horizontal lines read as directional — they make a kitchen feel wider. Also, the irregular handmade surface variation in hand-glazed linear tiles (Ann Sacks, Fireclay Tile, Cle Tile) adds depth that machine-made ceramics simply can’t match.
Colour and Grout Line Choices That Keep the Look Modern
For this kind of remodel, restraint in colour creates more impact than variety. A single tile in a warm off-white, greige, or sage — running floor to ceiling behind the range — reads as intentional and architectural. The grout colour is critical: match the grout to the tile (or go one shade lighter) to keep the pattern clean. Dark grout with light tile creates a graphic grid that can feel busy; it works in an industrial loft but can overpower a smaller kitchen. Price range for a modern kitchen remodel backsplash: $12–$45 per square foot for quality linear tile, installed.
Installation Orientation: Horizontal vs. Vertical vs. Herringbone
Horizontal stacked installation is the cleanest option for a modern kitchen — long lines, minimal visual noise. Vertical stacked tiles create a narrower, taller feel and suit kitchens with lower ceilings where you want to emphasise height. Herringbone adds the most dynamism but also the most visual complexity; it works behind a range as a feature panel rather than as a full backsplash. For more pattern ideas and how they interact with cabinet colour, the Kitchen Backsplash Design guide covers tile selection in useful detail.
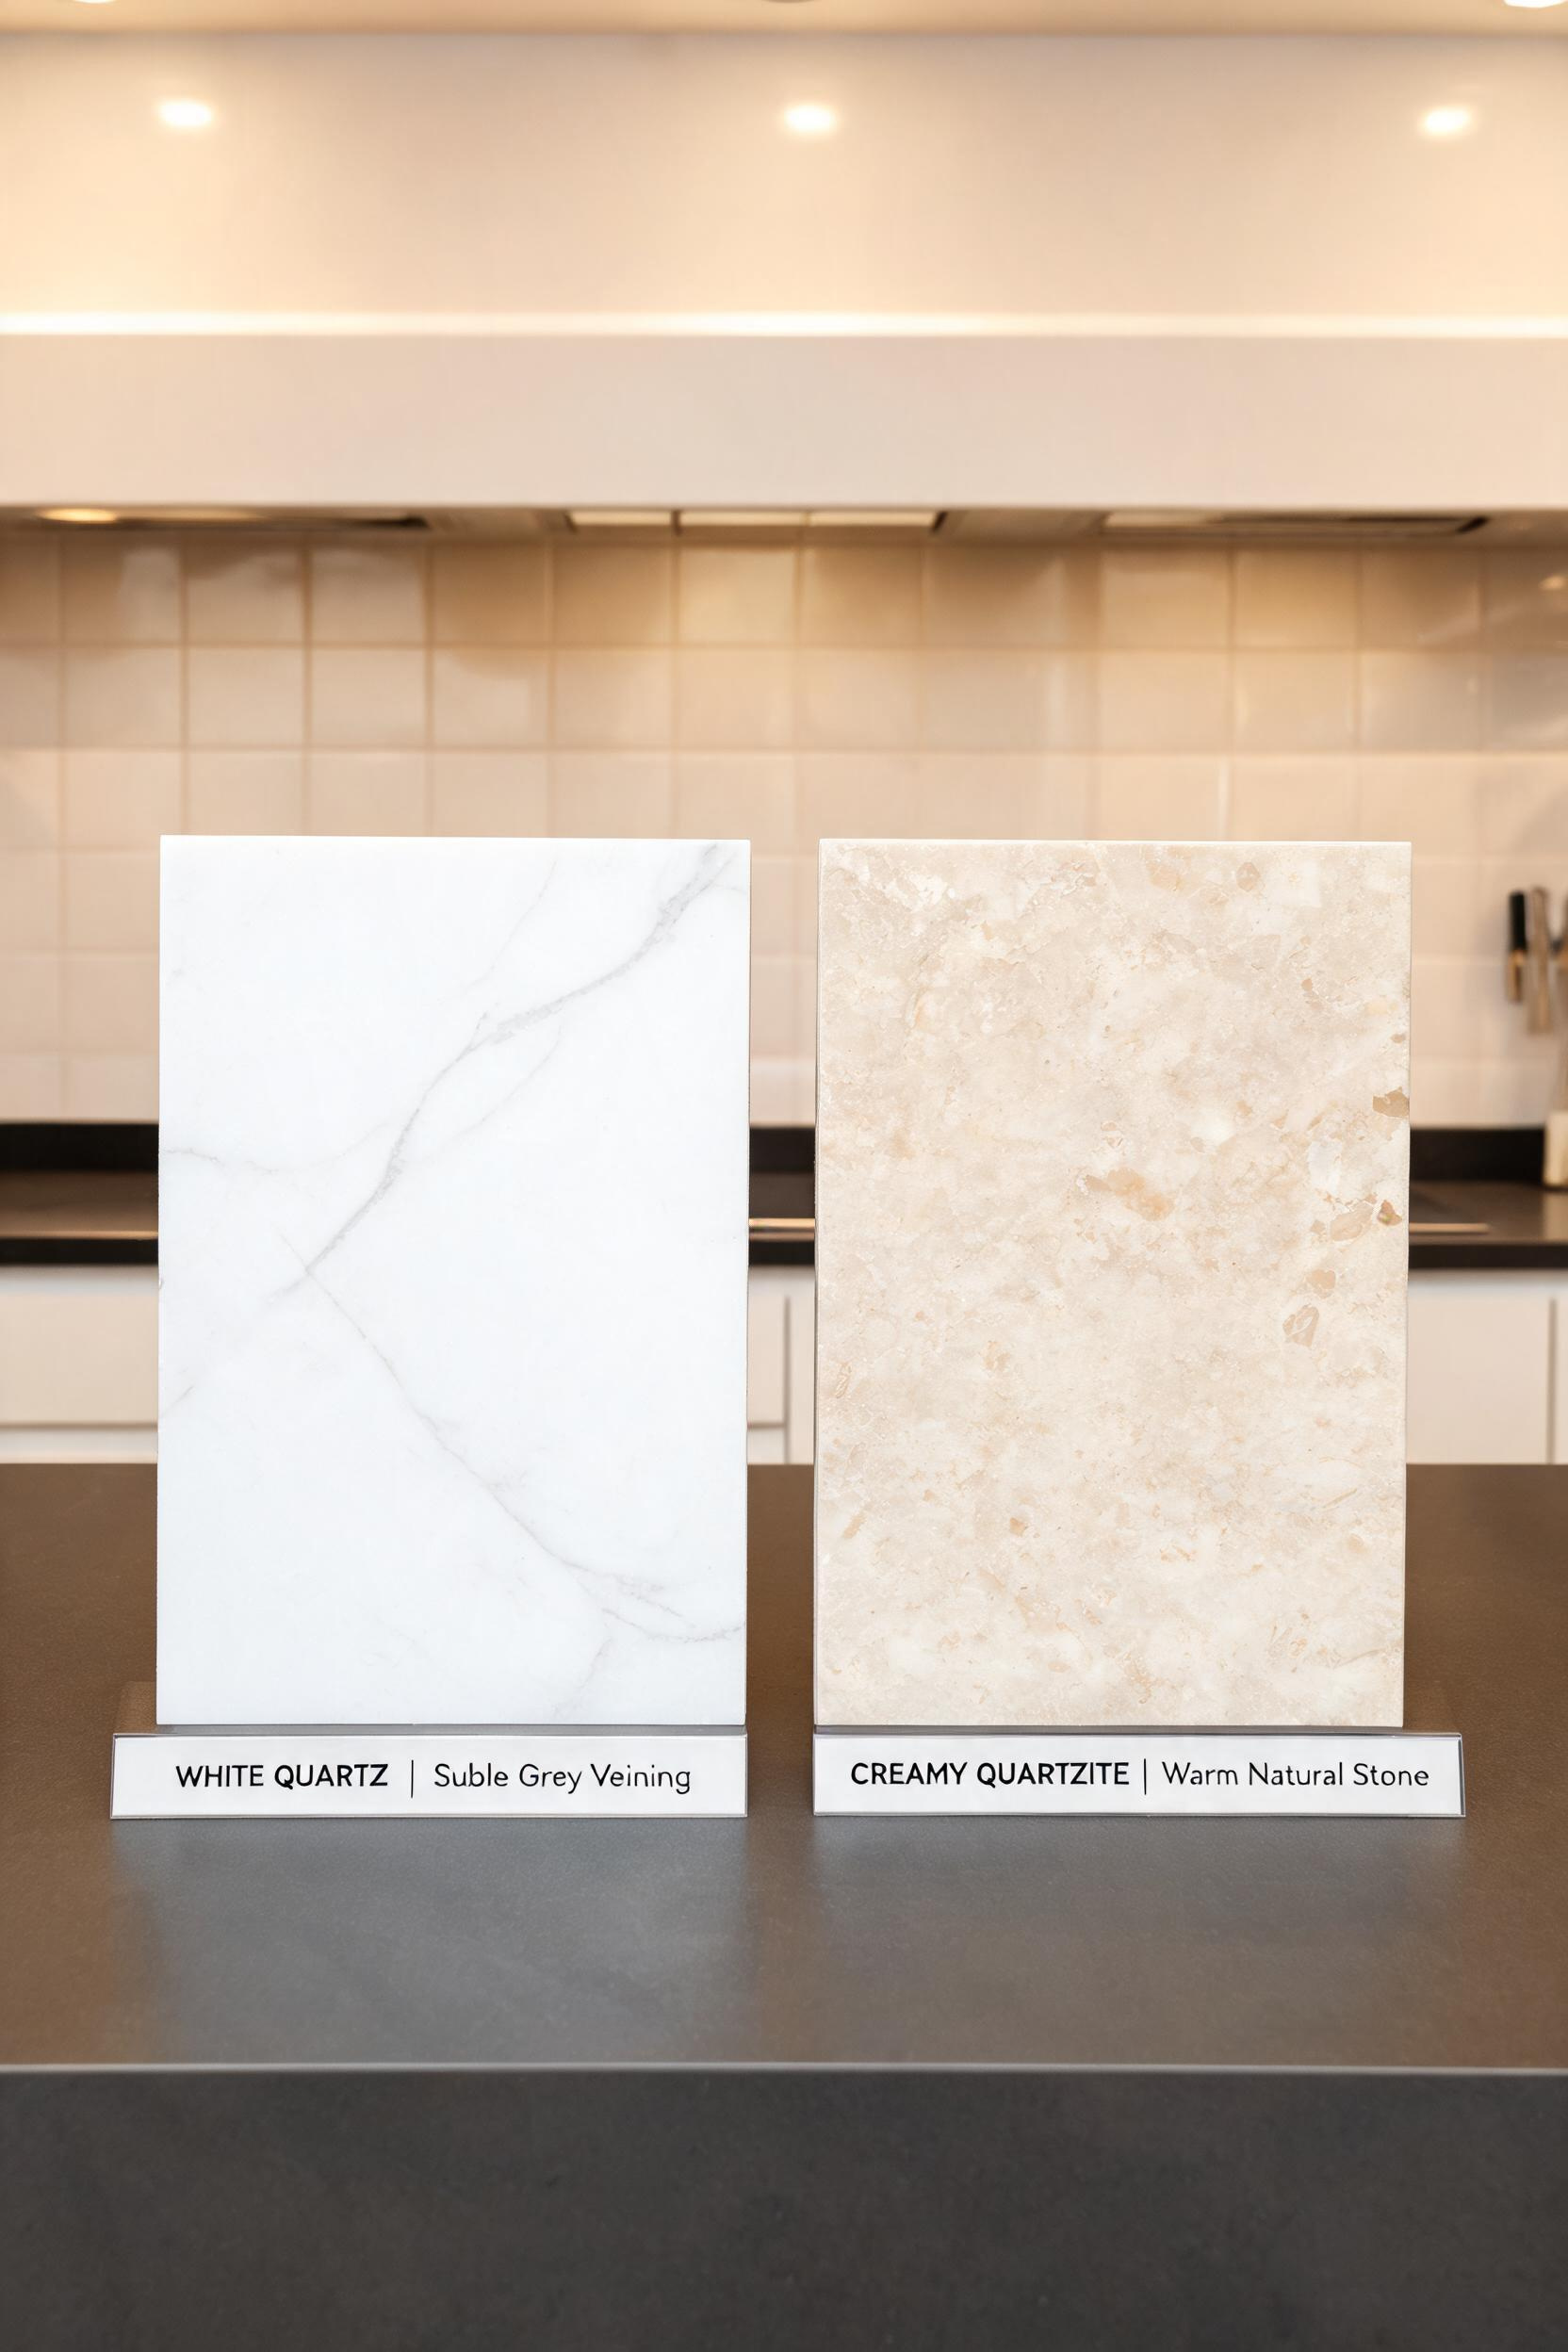
9. Quartz vs. Quartzite: Resolving the Modern Kitchen Renovation Debate
The quartz vs. quartzite question comes up in almost every kitchen renovation conversation I’m part of. The names are similar, the slabs look similar on a showroom floor, and the price overlap adds to the confusion. But the practical differences matter when choosing a surface that has to survive ten years of daily use.
The Practical Differences Most Renovation Guides Gloss Over
Quartz is an engineered product: roughly 93% ground quartz bound with polymer resin. It’s non-porous, needs no sealing, and resists staining. Quartzite is a natural metamorphic stone — compressed sandstone. It’s harder than granite and genuinely beautiful, but needs annual sealing and some varieties etch with acidic liquids. For a high-use kitchen where spills are frequent, quartz performs more consistently. For a kitchen where the material’s natural variation and depth matter more than maintenance convenience, quartzite is worth the trade-off.
Which Performs Better for Heavy Kitchen Use
In a working kitchen — daily cooking, wine spills, cutting boards on the counter — quartz wins on durability. Specific slabs: Caesarstone Calacatta Nuvo (~$75–$95/sq ft), Cambria Brittanicca (~$85–$110), MSI Taj Mahal quartzite (~$90–$130, most forgiving), and Sea Pearl quartzite (~$80–$120). If you’re drawn to quartzite, Taj Mahal is the one I’d choose — it’s denser than most and holds up better to acidic exposure. See how premium slab choices define whole room palettes in 20 Architectural Masterpieces Redefining the Modern Luxury Kitchen.
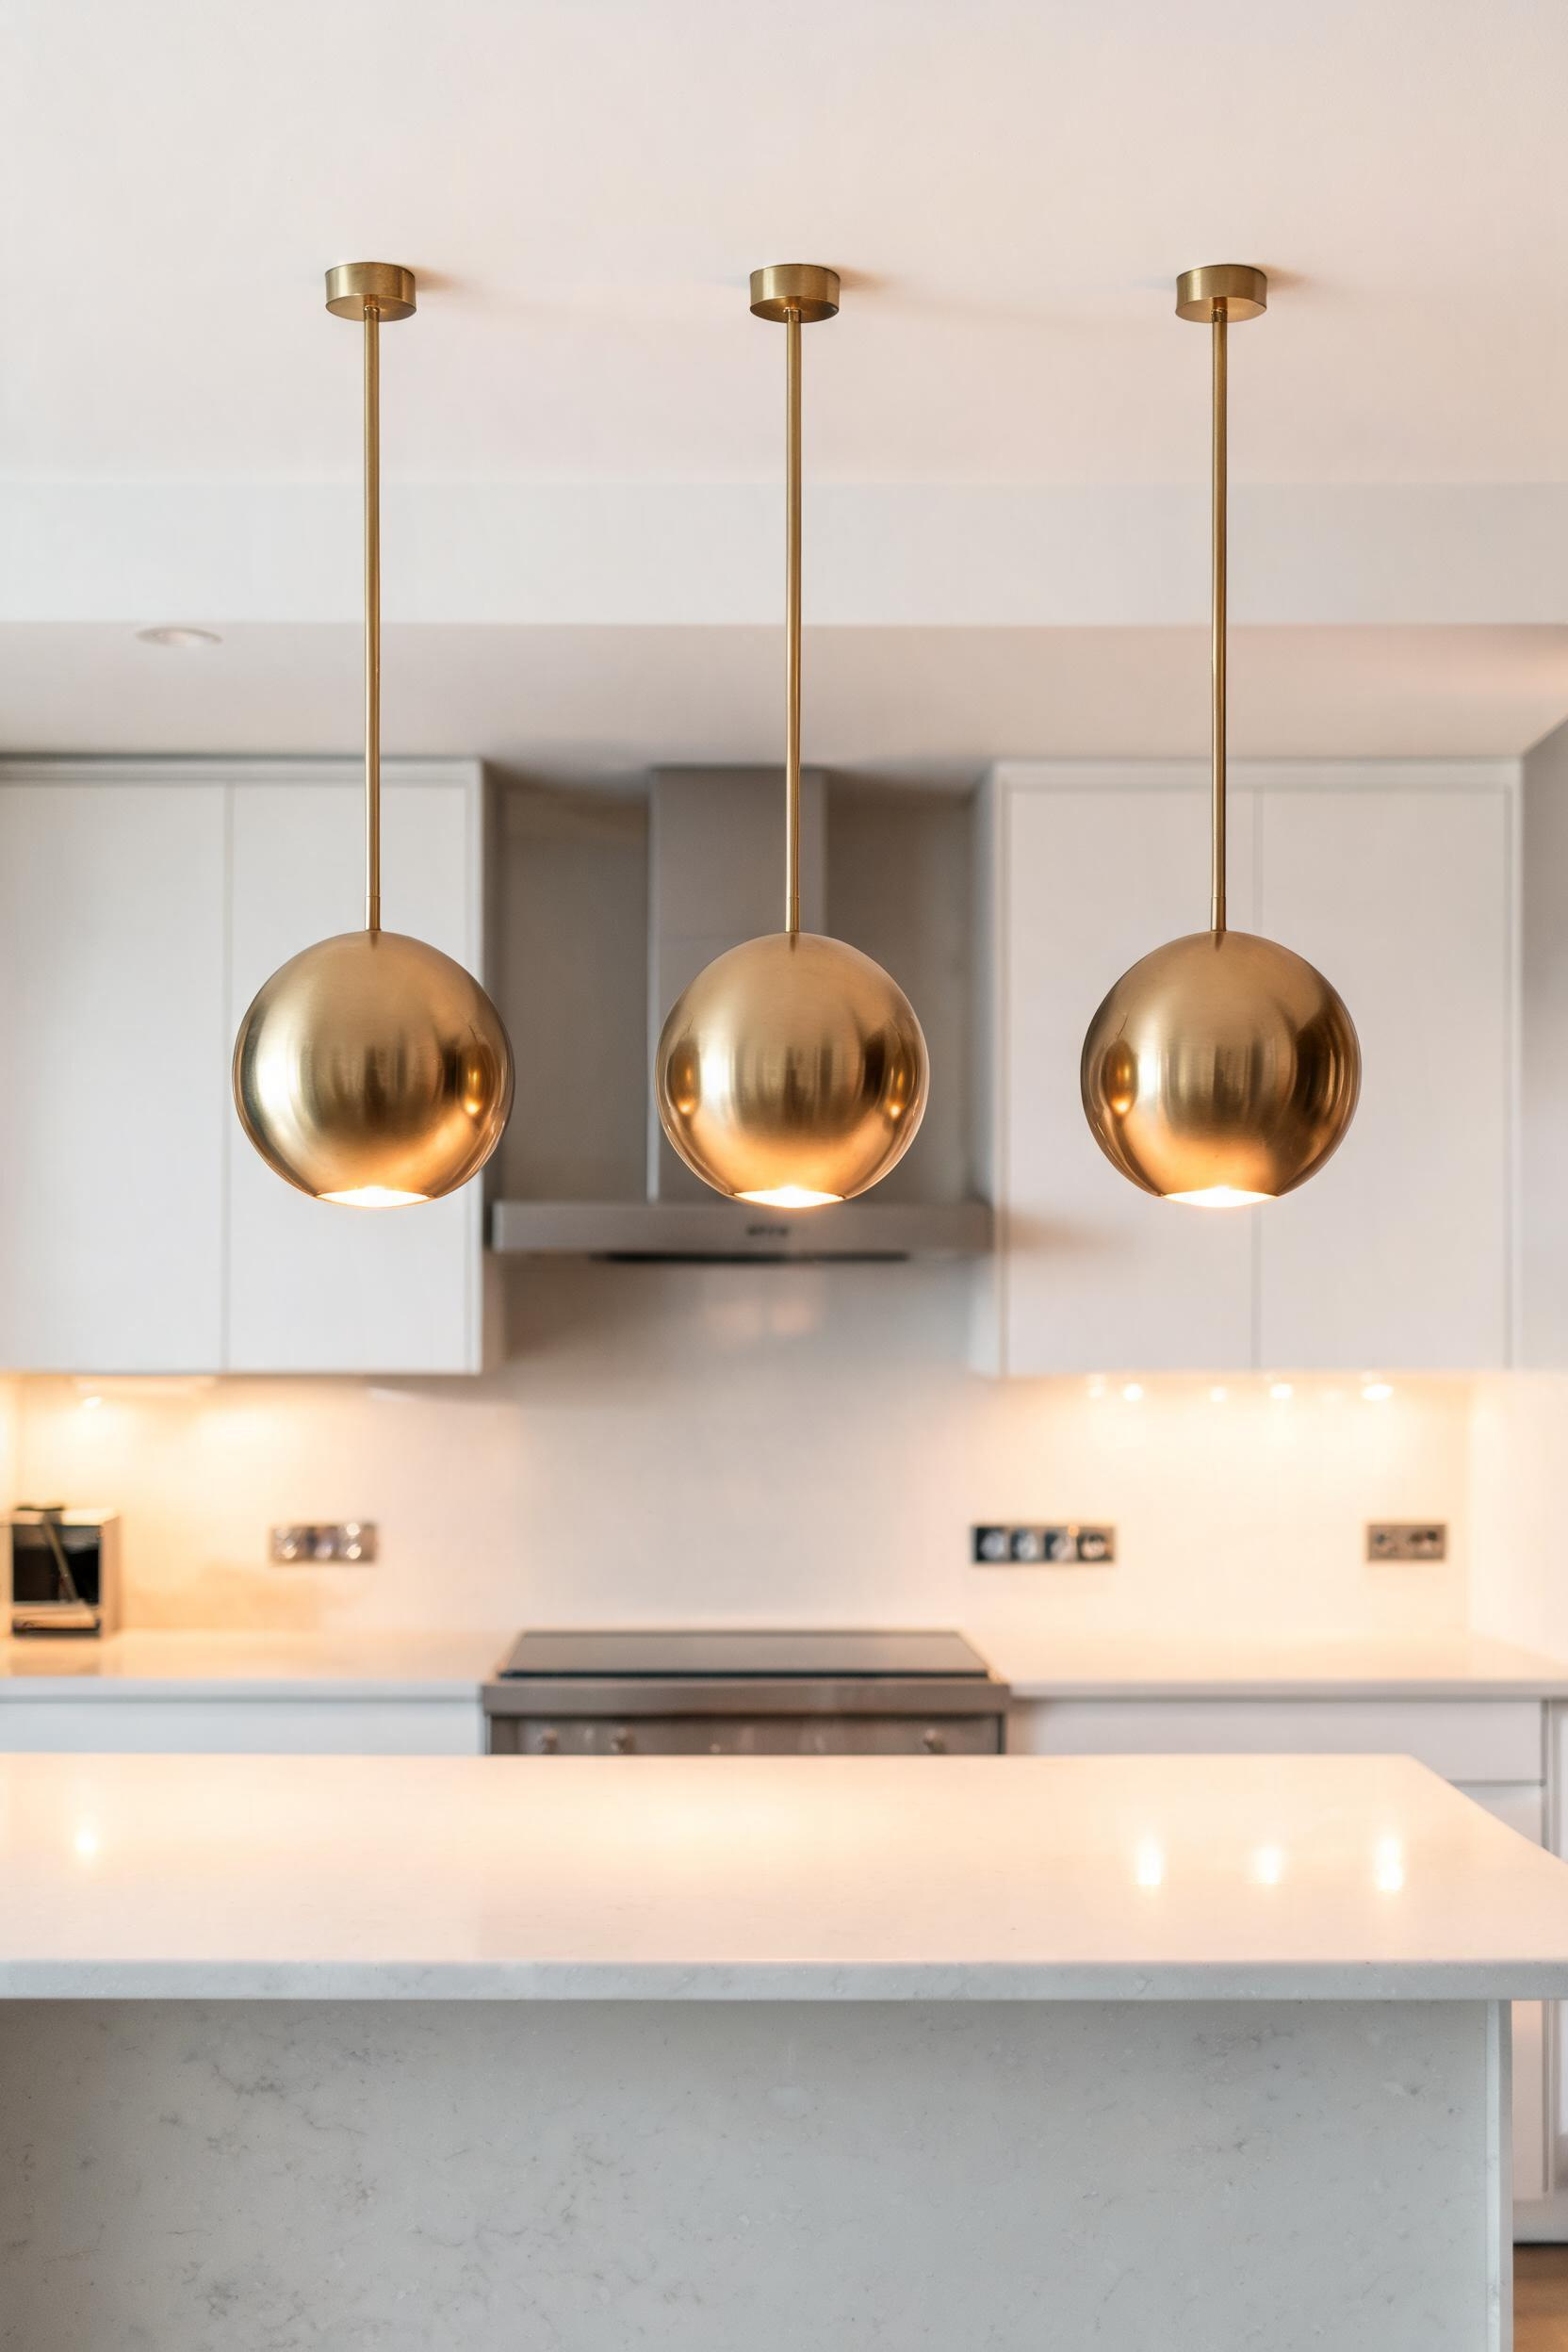
10. Pendant Lighting Over the Island: Getting the Scale Right
Wrong-scale pendant lighting is one of the most avoidable mistakes in a kitchen renovation. Two small pendants over a large island look provisional; one enormous pendant over a narrow island looks aggressive. Getting the scale right is a formula.
The Formula Architects Use for Pendant Height and Spacing
For a 9-foot ceiling, pendants should hang 30–36 inches above the countertop. Add 3 inches of additional drop per foot of ceiling height above 8 feet. Space pendants roughly one-third the island length apart — a 7-foot island gets pendants about 28 inches apart. For islands under 4 feet, one pendant centred is cleaner than two.
Fixture Types and Wiring Considerations
Globe pendants (Schoolhouse Electric, CB2) suit modern kitchens with their clean silhouette and wide light distribution. Cone shades suit industrial and loft kitchens — they direct light downward and create pools rather than ambient fill. Linear suspension fixtures (a single rod with multiple sockets) work on longer islands (7 feet+) and give the most even light coverage. If retrofitting pendants, confirm the junction box is rated for hanging fixtures — many standard boxes are not. Dimmer switches are strongly recommended — kitchen lighting requirements change from prep to dining to ambient.
11. Handleless Cabinet Doors That Define Contemporary Kitchen Remodels
Handleless cabinets are the clearest visual marker of a contemporary kitchen remodel. They also divide opinions more than almost any other design choice. Having lived with all three systems, here’s how each actually performs.
J-Pull vs. Push-to-Open vs. Recessed Groove
J-pull doors have an angled top edge that creates a grip recess — you open them by pulling on the lip. They’re the most reliable system for daily use and work on any door profile. Push-to-open (Blum TIP-ON mechanism, ~$15–$25 per door) requires no handle at all — you push the door, and a spring releases it. It works well on lower cabinets and drawers but can feel imprecise on larger upper cabinet doors. Recessed groove handles (a channel routed into the door face) are the most elegant option and suit flat-panel doors specifically. IKEA’s AXSTAD and KUNGSBACKA fronts both use a version of this approach at accessible prices.
Maintenance and Everyday Use Reality Check
Push-to-open mechanisms need adjustment after 12–18 months of heavy use — the spring tension softens. J-pull profiles accumulate grease in the recess over time and need regular cleaning. Recessed grooves are the easiest to maintain. Also consider who uses the kitchen — young children and people with limited hand strength often find push-to-open frustrating. A handleless look that creates daily friction isn’t worth the aesthetic gain. For cabinet door modernisation advice, the Beyond the Paintbrush: Modernize Kitchen Cabinets guide covers every approach in a modern kitchen remodel.
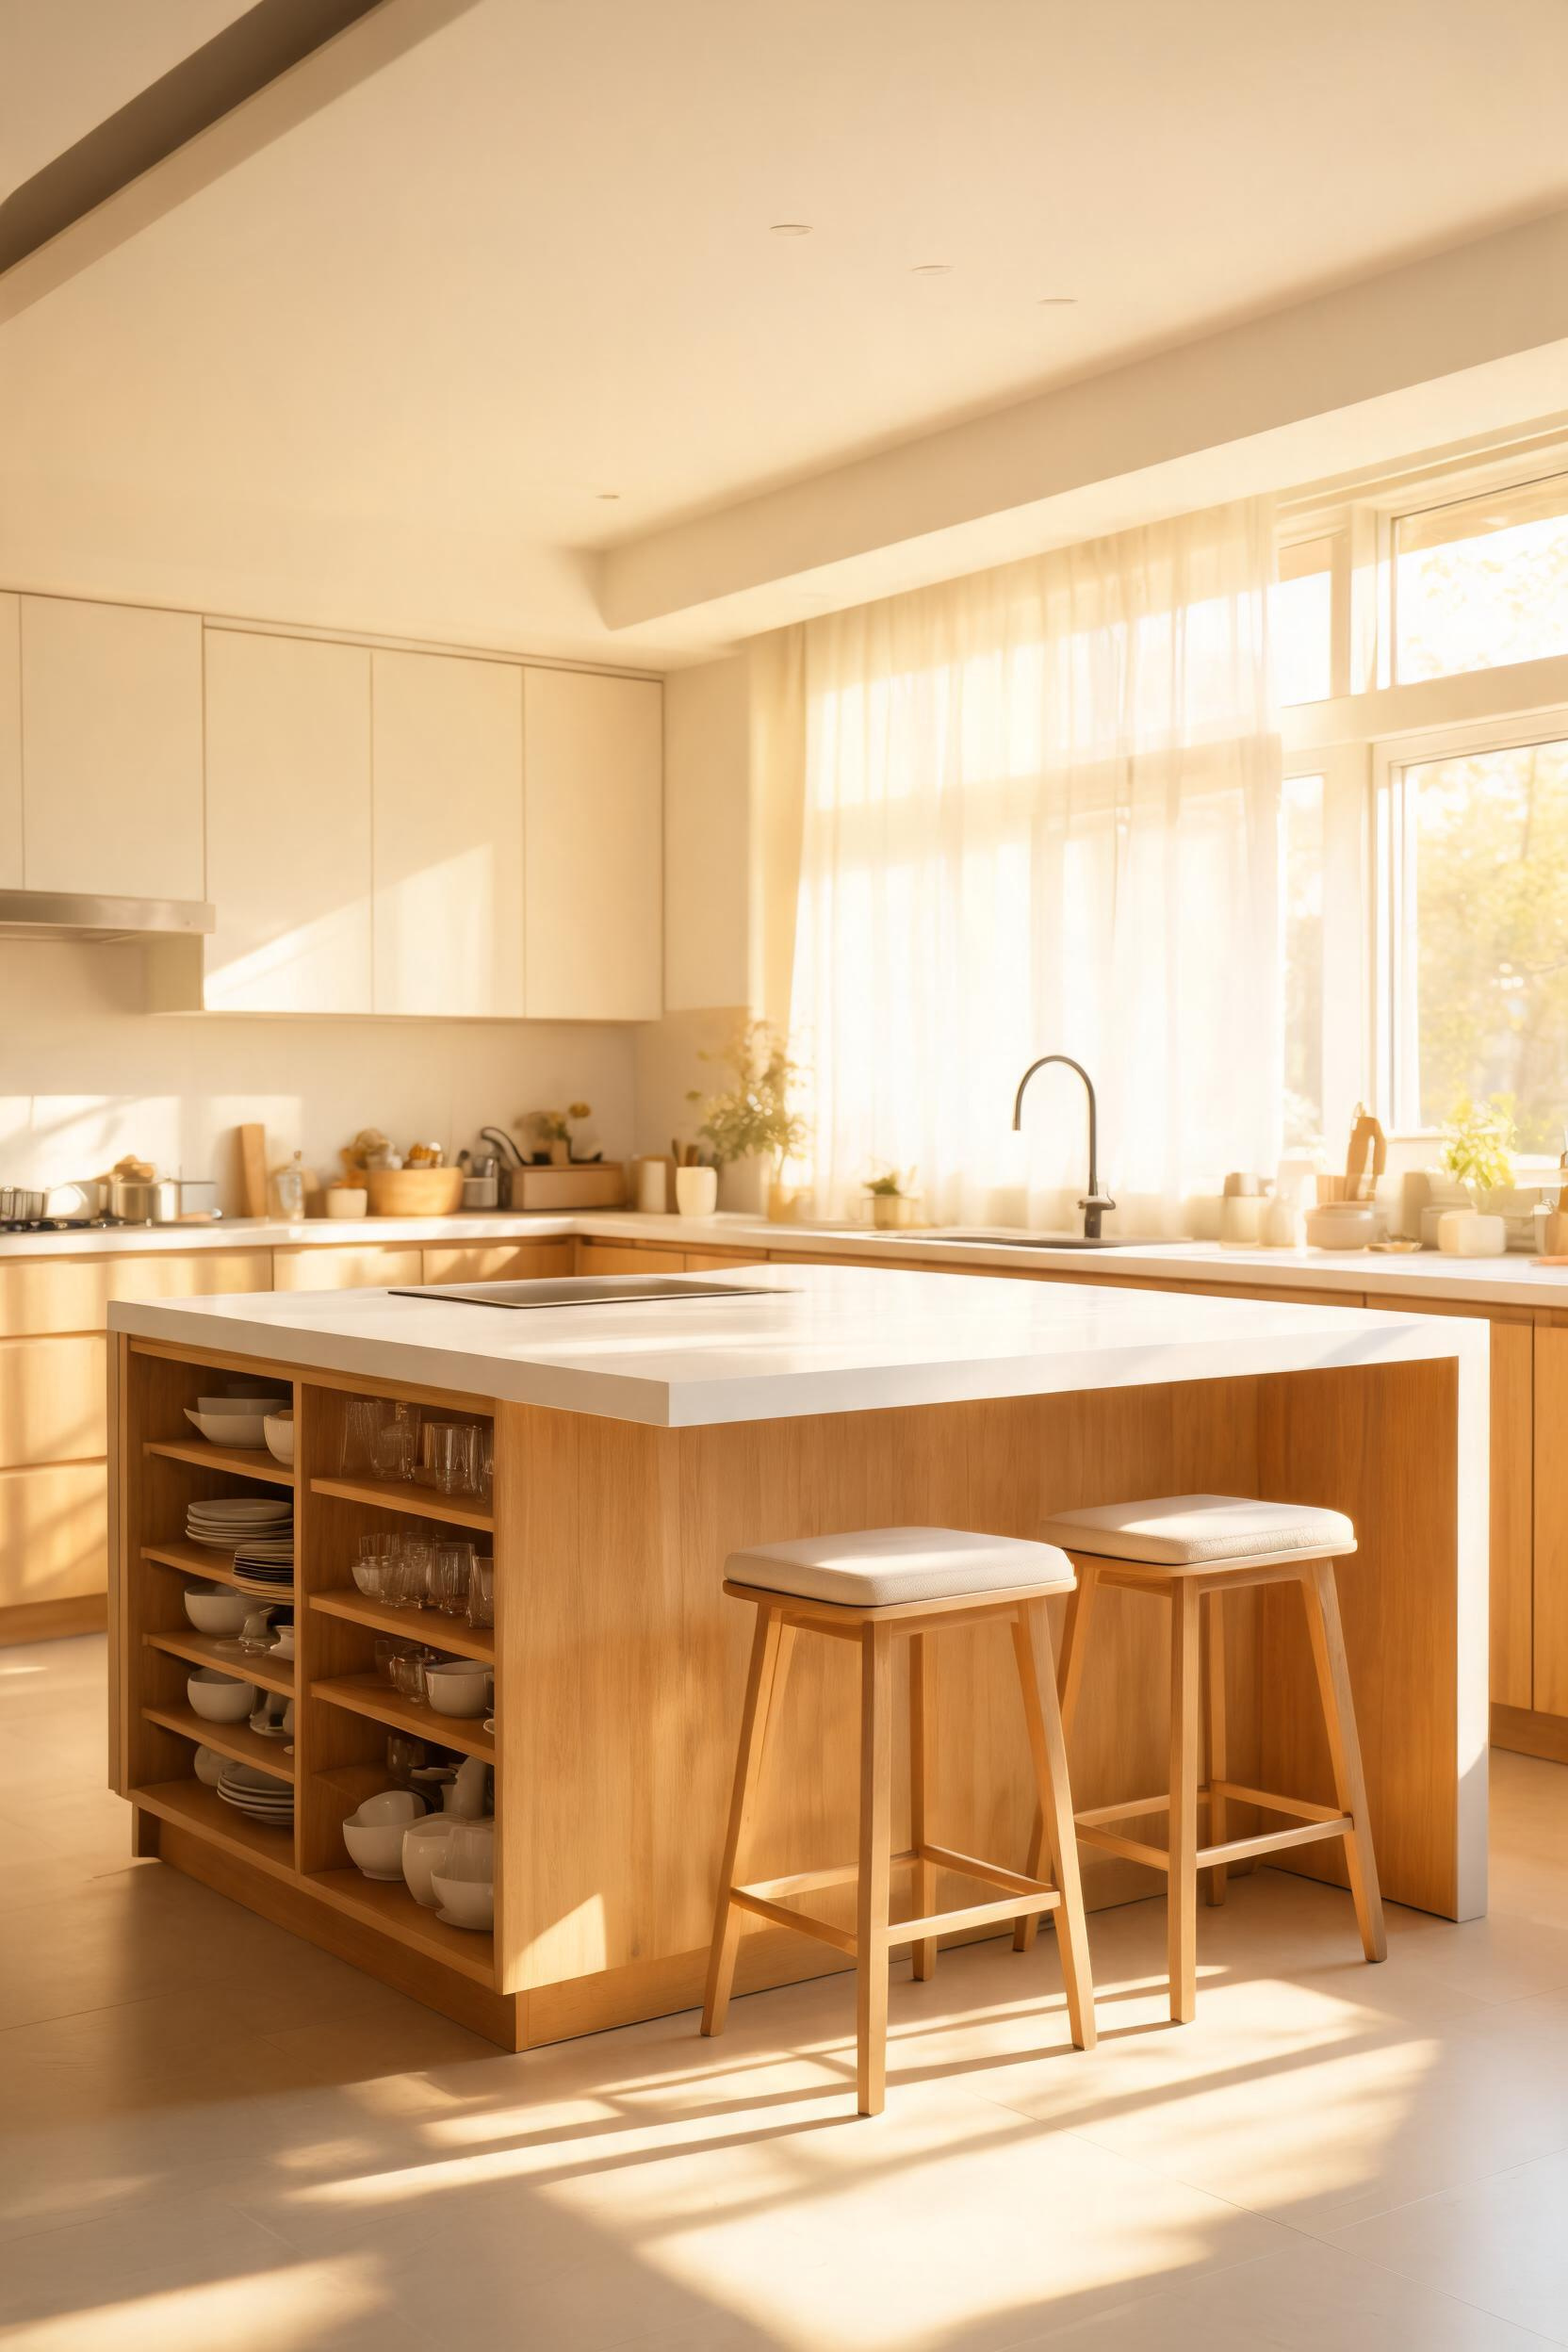
12. A Kitchen Island That Earns Its Square Footage
A kitchen island is the most expensive per-square-foot element in most kitchens and the most frequently oversized. People add one because they have floor space, then find it blocks traffic and delivers less prep surface than expected. A well-planned island earns every inch — a poorly planned one makes a good kitchen worse.
Sizing Rules: Clearance, Seating, and Proportions
Minimum clearance is 42 inches on the working side, 36 inches on the traffic side — increase to 48 inches for two-cook households. Each seating position needs 24 inches of width and 12–15 inches of overhang for knee clearance. The practical minimum for a useful island is 4 feet long by 2 feet deep. For a single-cook kitchen with seating for three, 6 feet by 2.5 feet is the sweet spot. The Optimize Kitchen Island Cabinets guide covers storage integration in depth.
When to Use a Contrasting Material on the Island
A contrasting material on the island — different from the perimeter countertop — creates definition and makes the island read as furniture rather than cabinetry. Butcher block is the most popular contrast material when quartz covers the perimeter; it introduces warmth that balances a cool palette. The rule I use: if the island is the primary prep surface, use the same material as the perimeter for practical consistency. If it’s primarily for seating and display, a contrasting material adds more than it complicates.
13. Under-Cabinet Lighting: The Modern Kitchen Upgrade Most Renovators Miss
Most remodels get overhead lighting right and ignore task lighting entirely. Under-cabinet lighting is the single most underutilised modern kitchen upgrade in residential remodels — and it’s also one of the cheapest, relative to its impact. A well-lit counter transforms cooking from a squinting exercise into an actual pleasure.
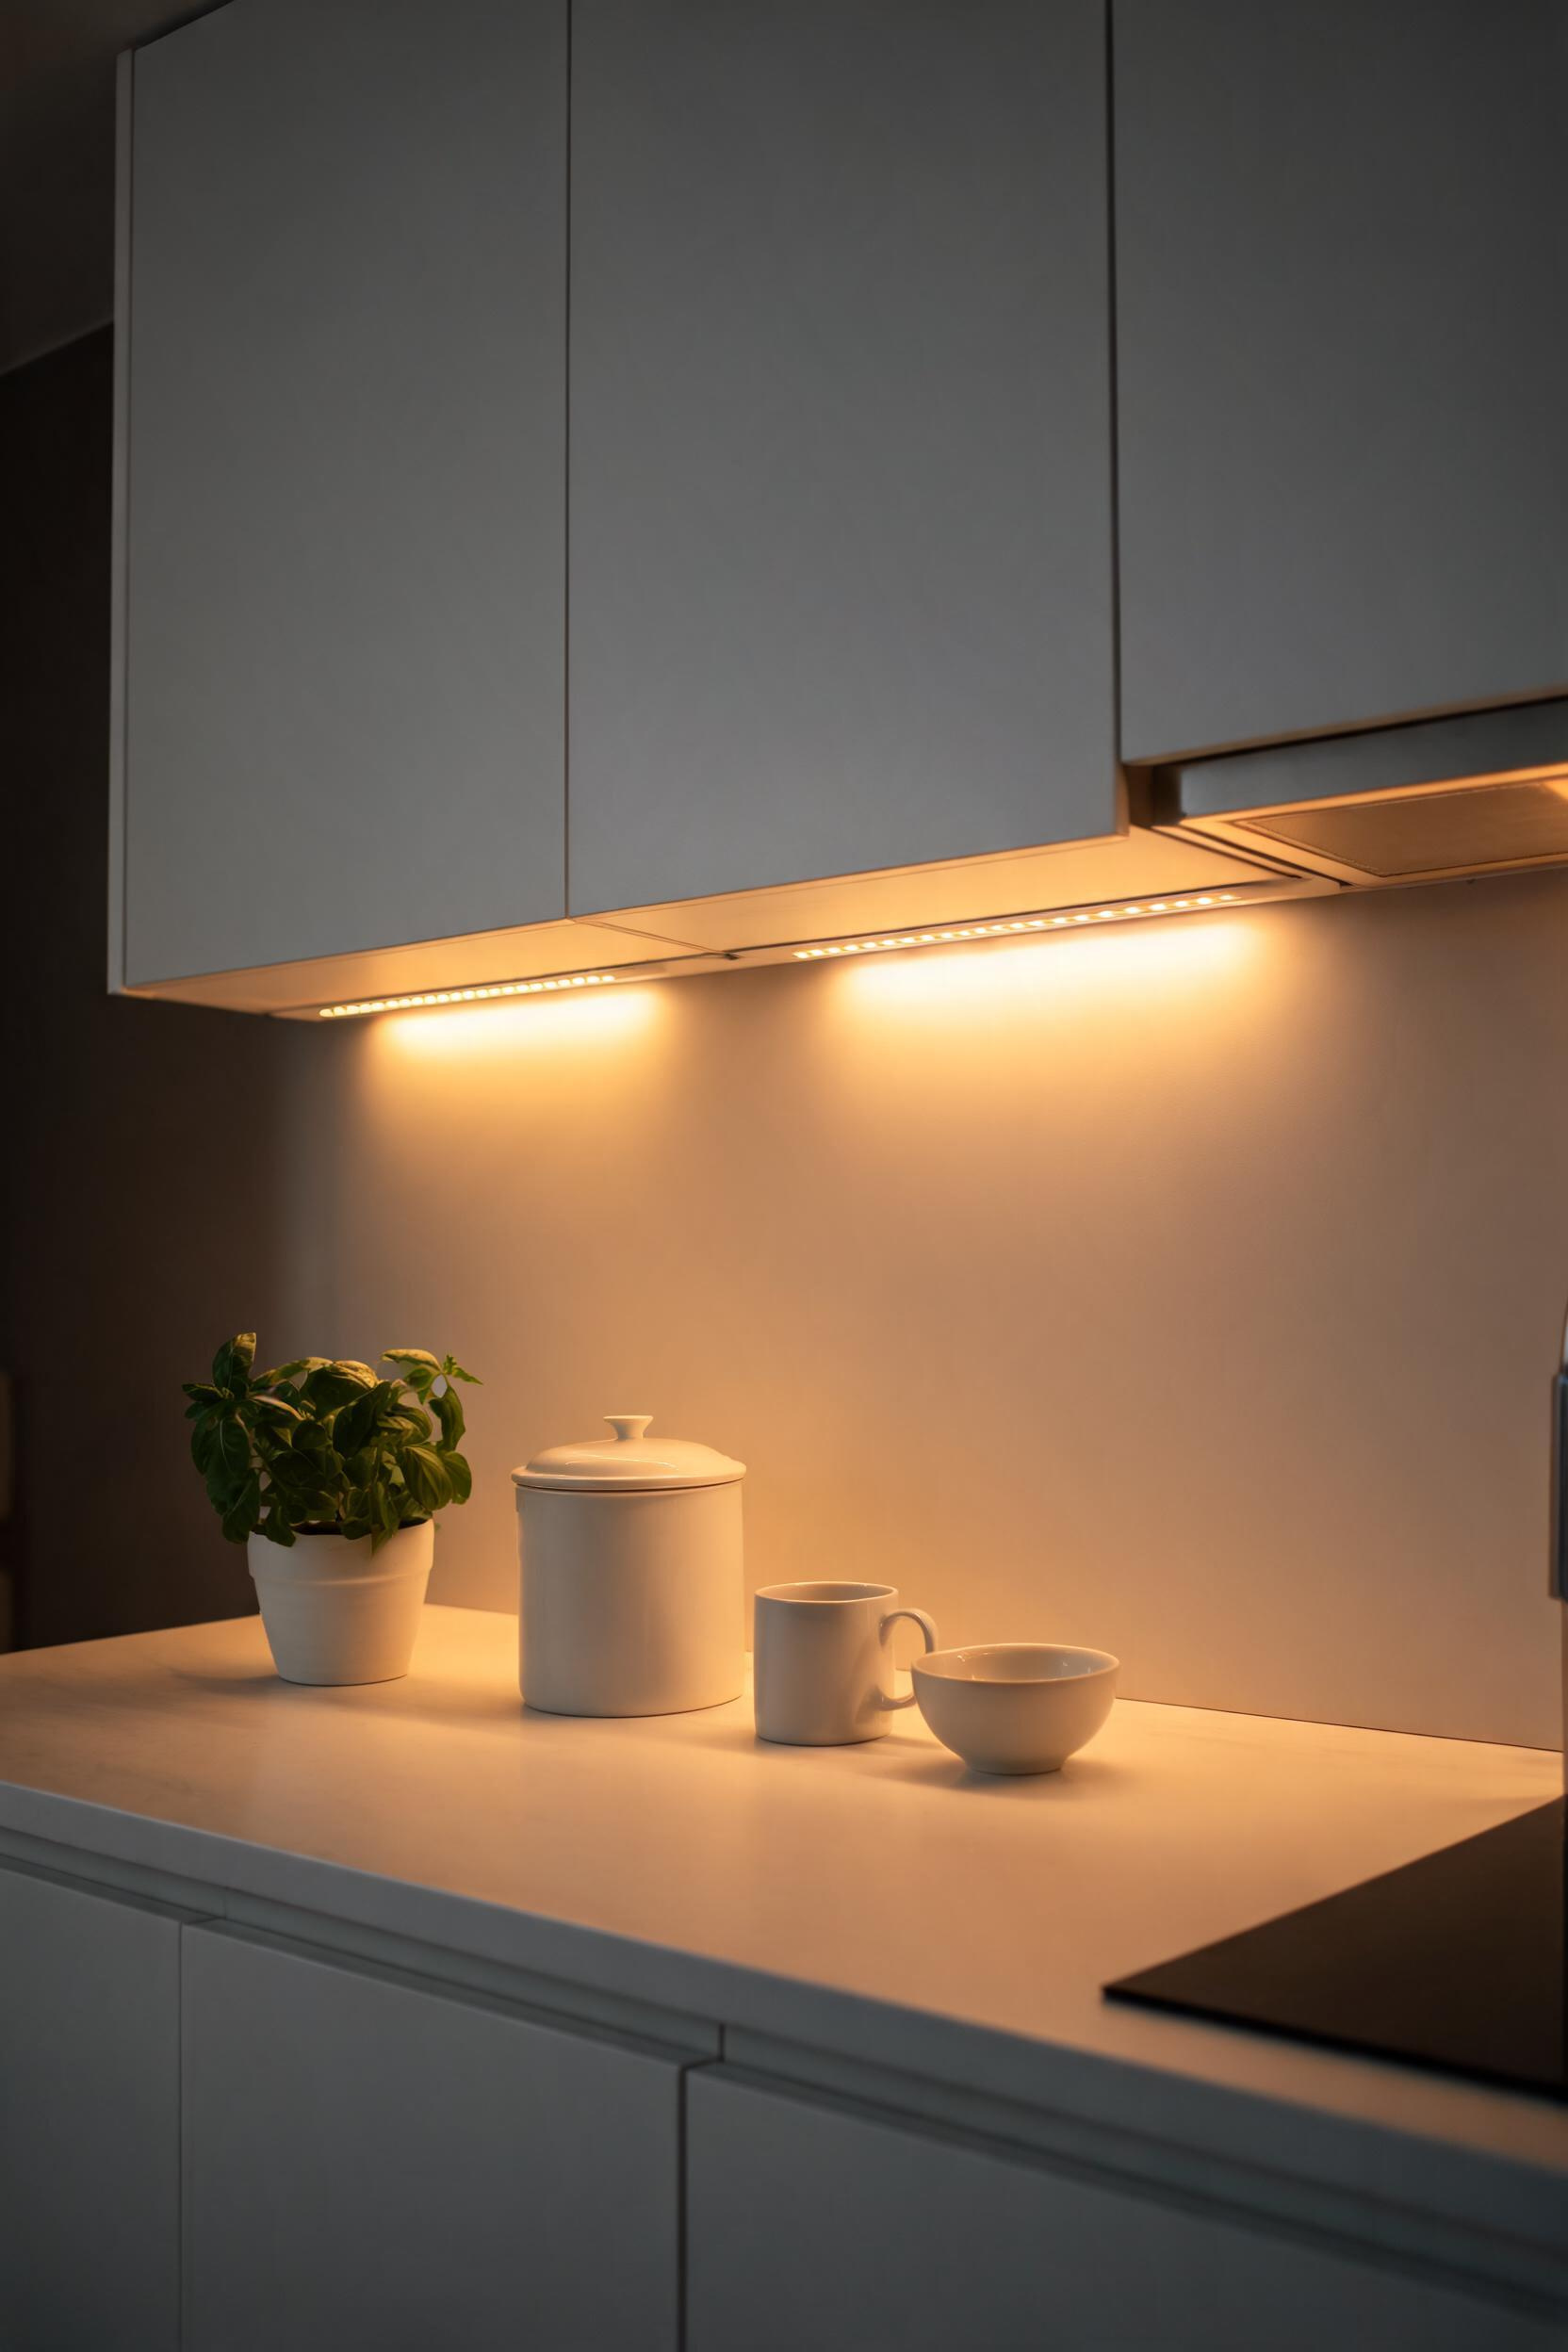
Why Task Lighting Matters More Than Ambient
The overhead fixtures in most kitchens — a combination of recessed downlights and a pendant or chandelier — are designed to light the room, not the work surface. When you stand at the counter to chop, your body creates a shadow directly where you’re working. Under-cabinet fixtures eliminate this. Warm white LEDs (2700K–3000K) at the front edge of each upper cabinet run provide enough illumination to work comfortably without looking clinical.
LED Strip vs. Puck Lights vs. Linear Fixtures
LED strip lights are the most flexible — thin, self-adhesive, and cut to any length. Kichler’s Design Pro LED strip runs $2–$4 per inch. Puck lights suit kitchens where the under-cabinet zone is visible from the main room; the fixture itself becomes a small design detail. Linear fixtures (WAC, Legrand Adorne) distribute the most even light across the full counter length. Expect $200–$450 per run for wired-in installation; plug-in strips work as a retrofit if rewiring isn’t possible.
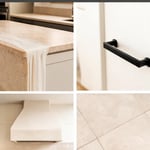
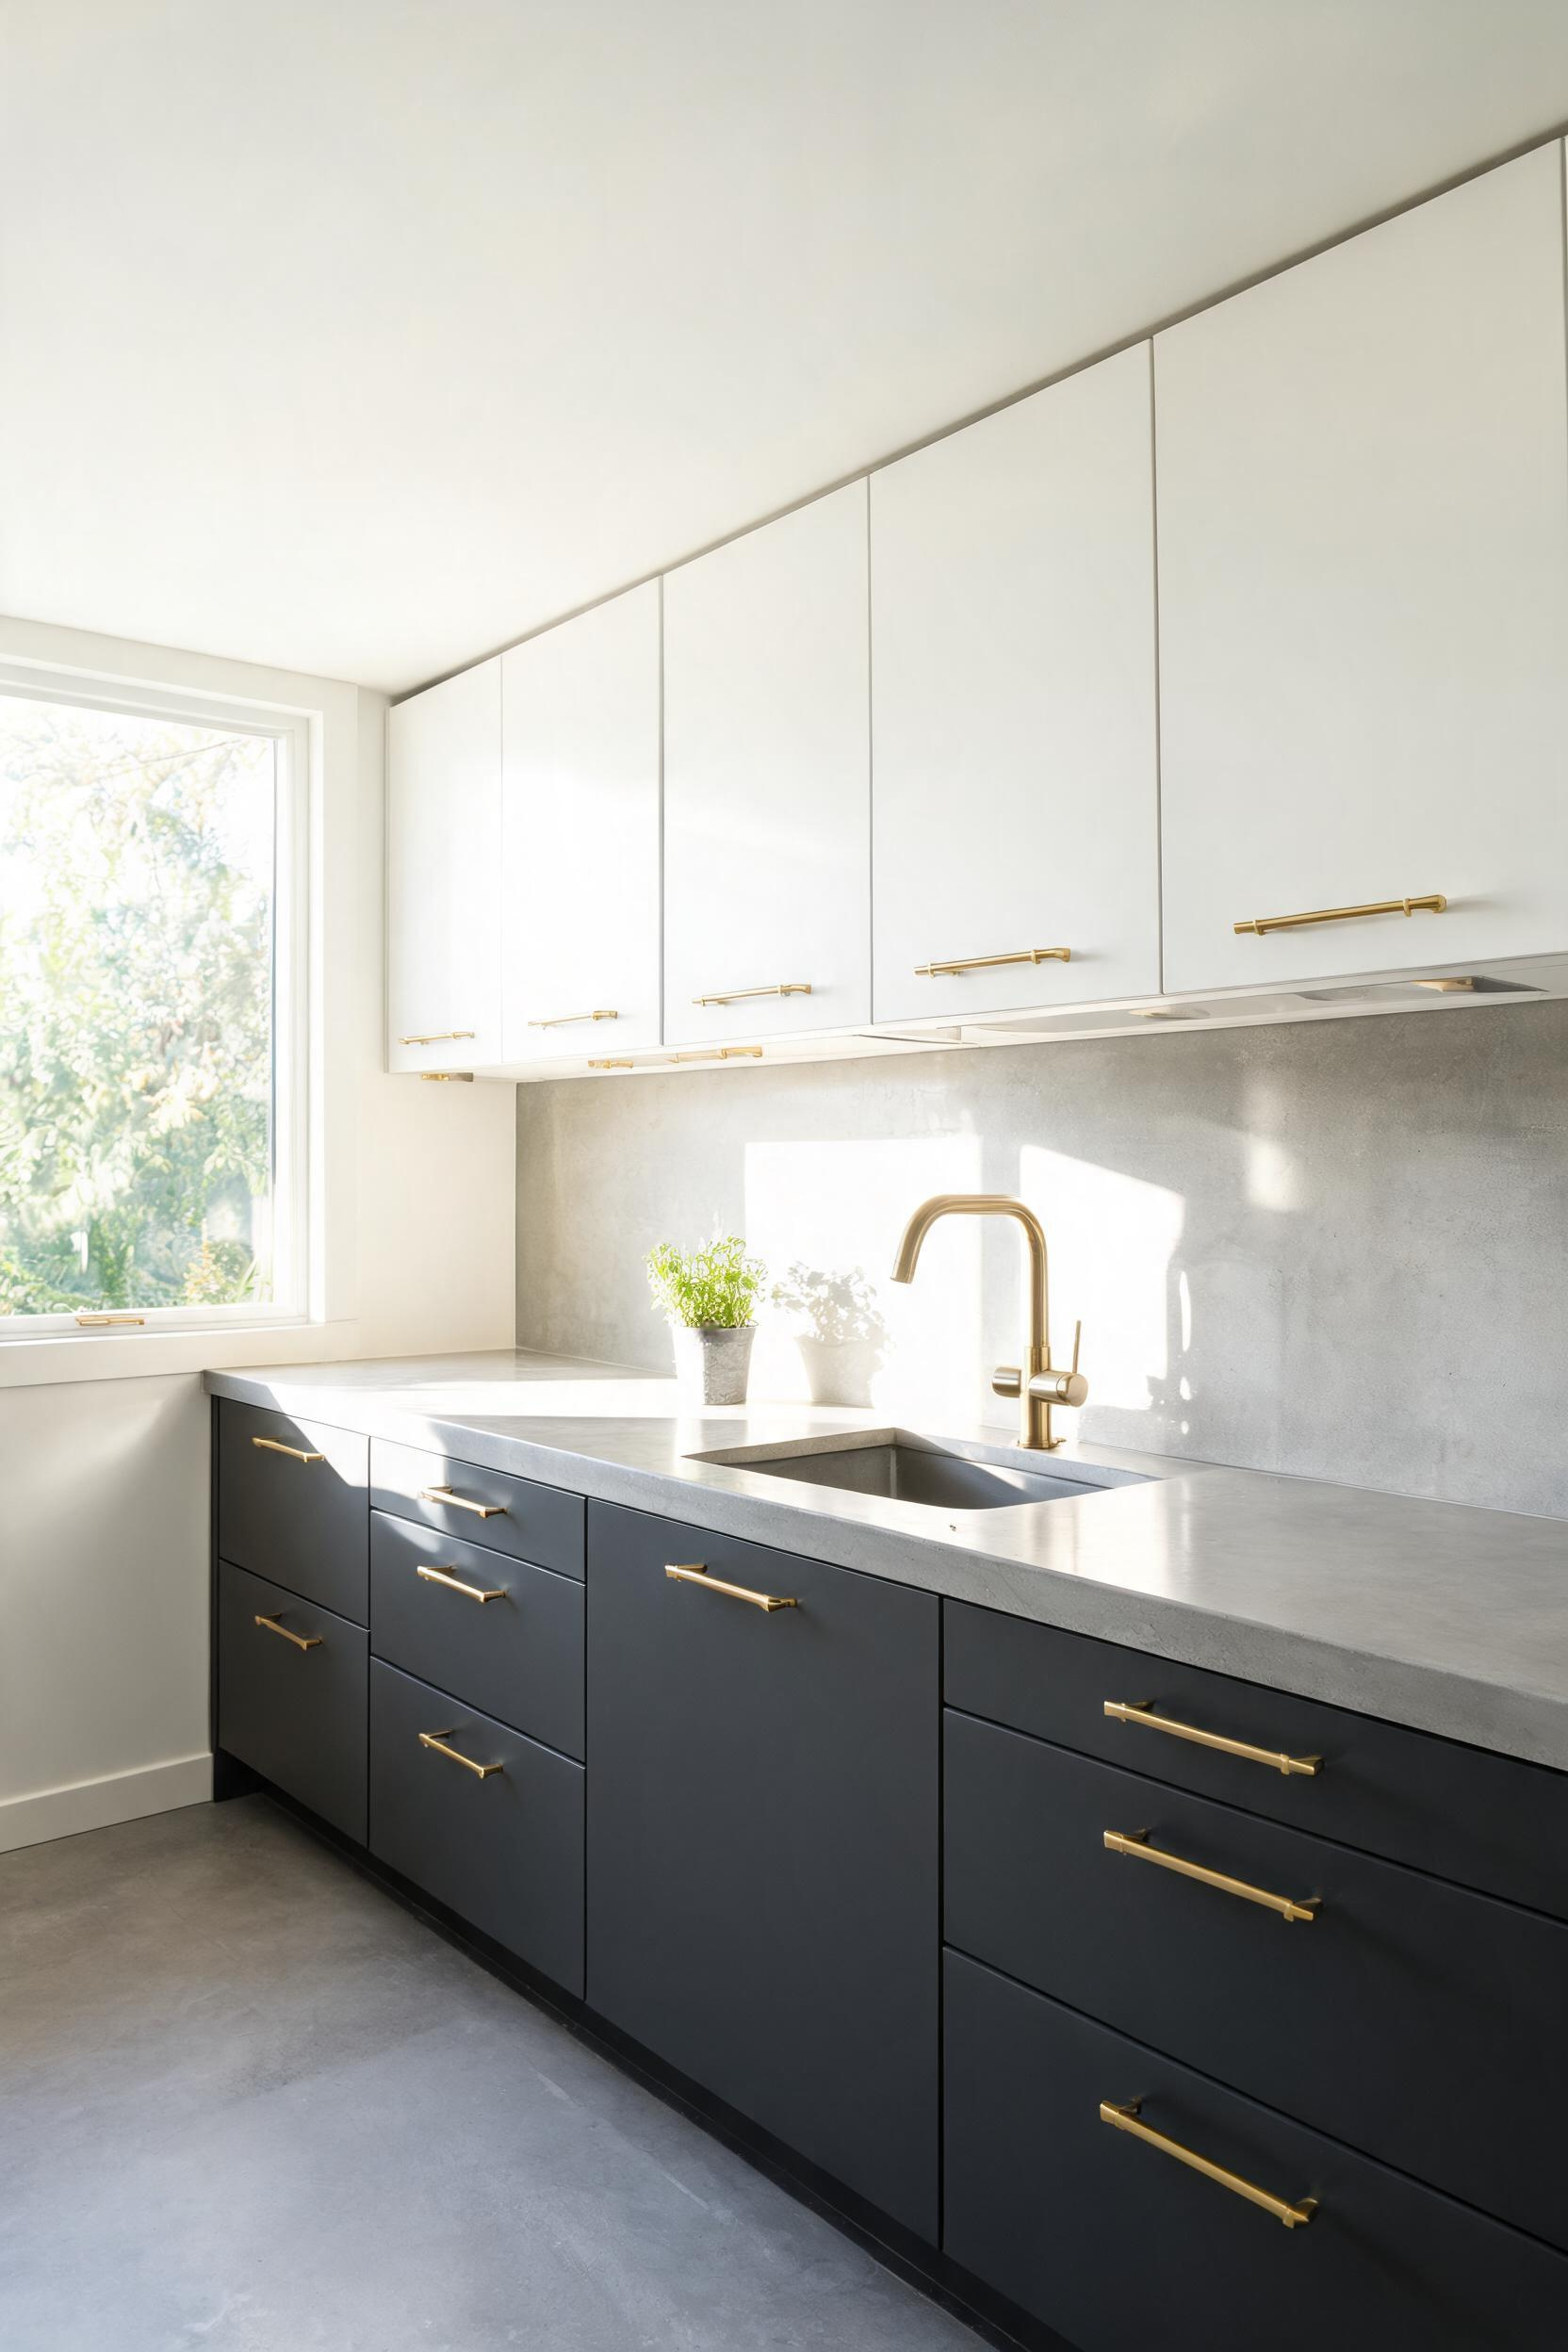
14. Matte Black Hardware as the Punctuation of a Modern Kitchen
Hardware is the detail that ties a kitchen together or doesn’t. Replacing hardware across 30 doors and drawers costs $600–$1,800 and takes a single afternoon — the fastest ROI in any remodel. For the visual impact per dollar spent, nothing else comes close.
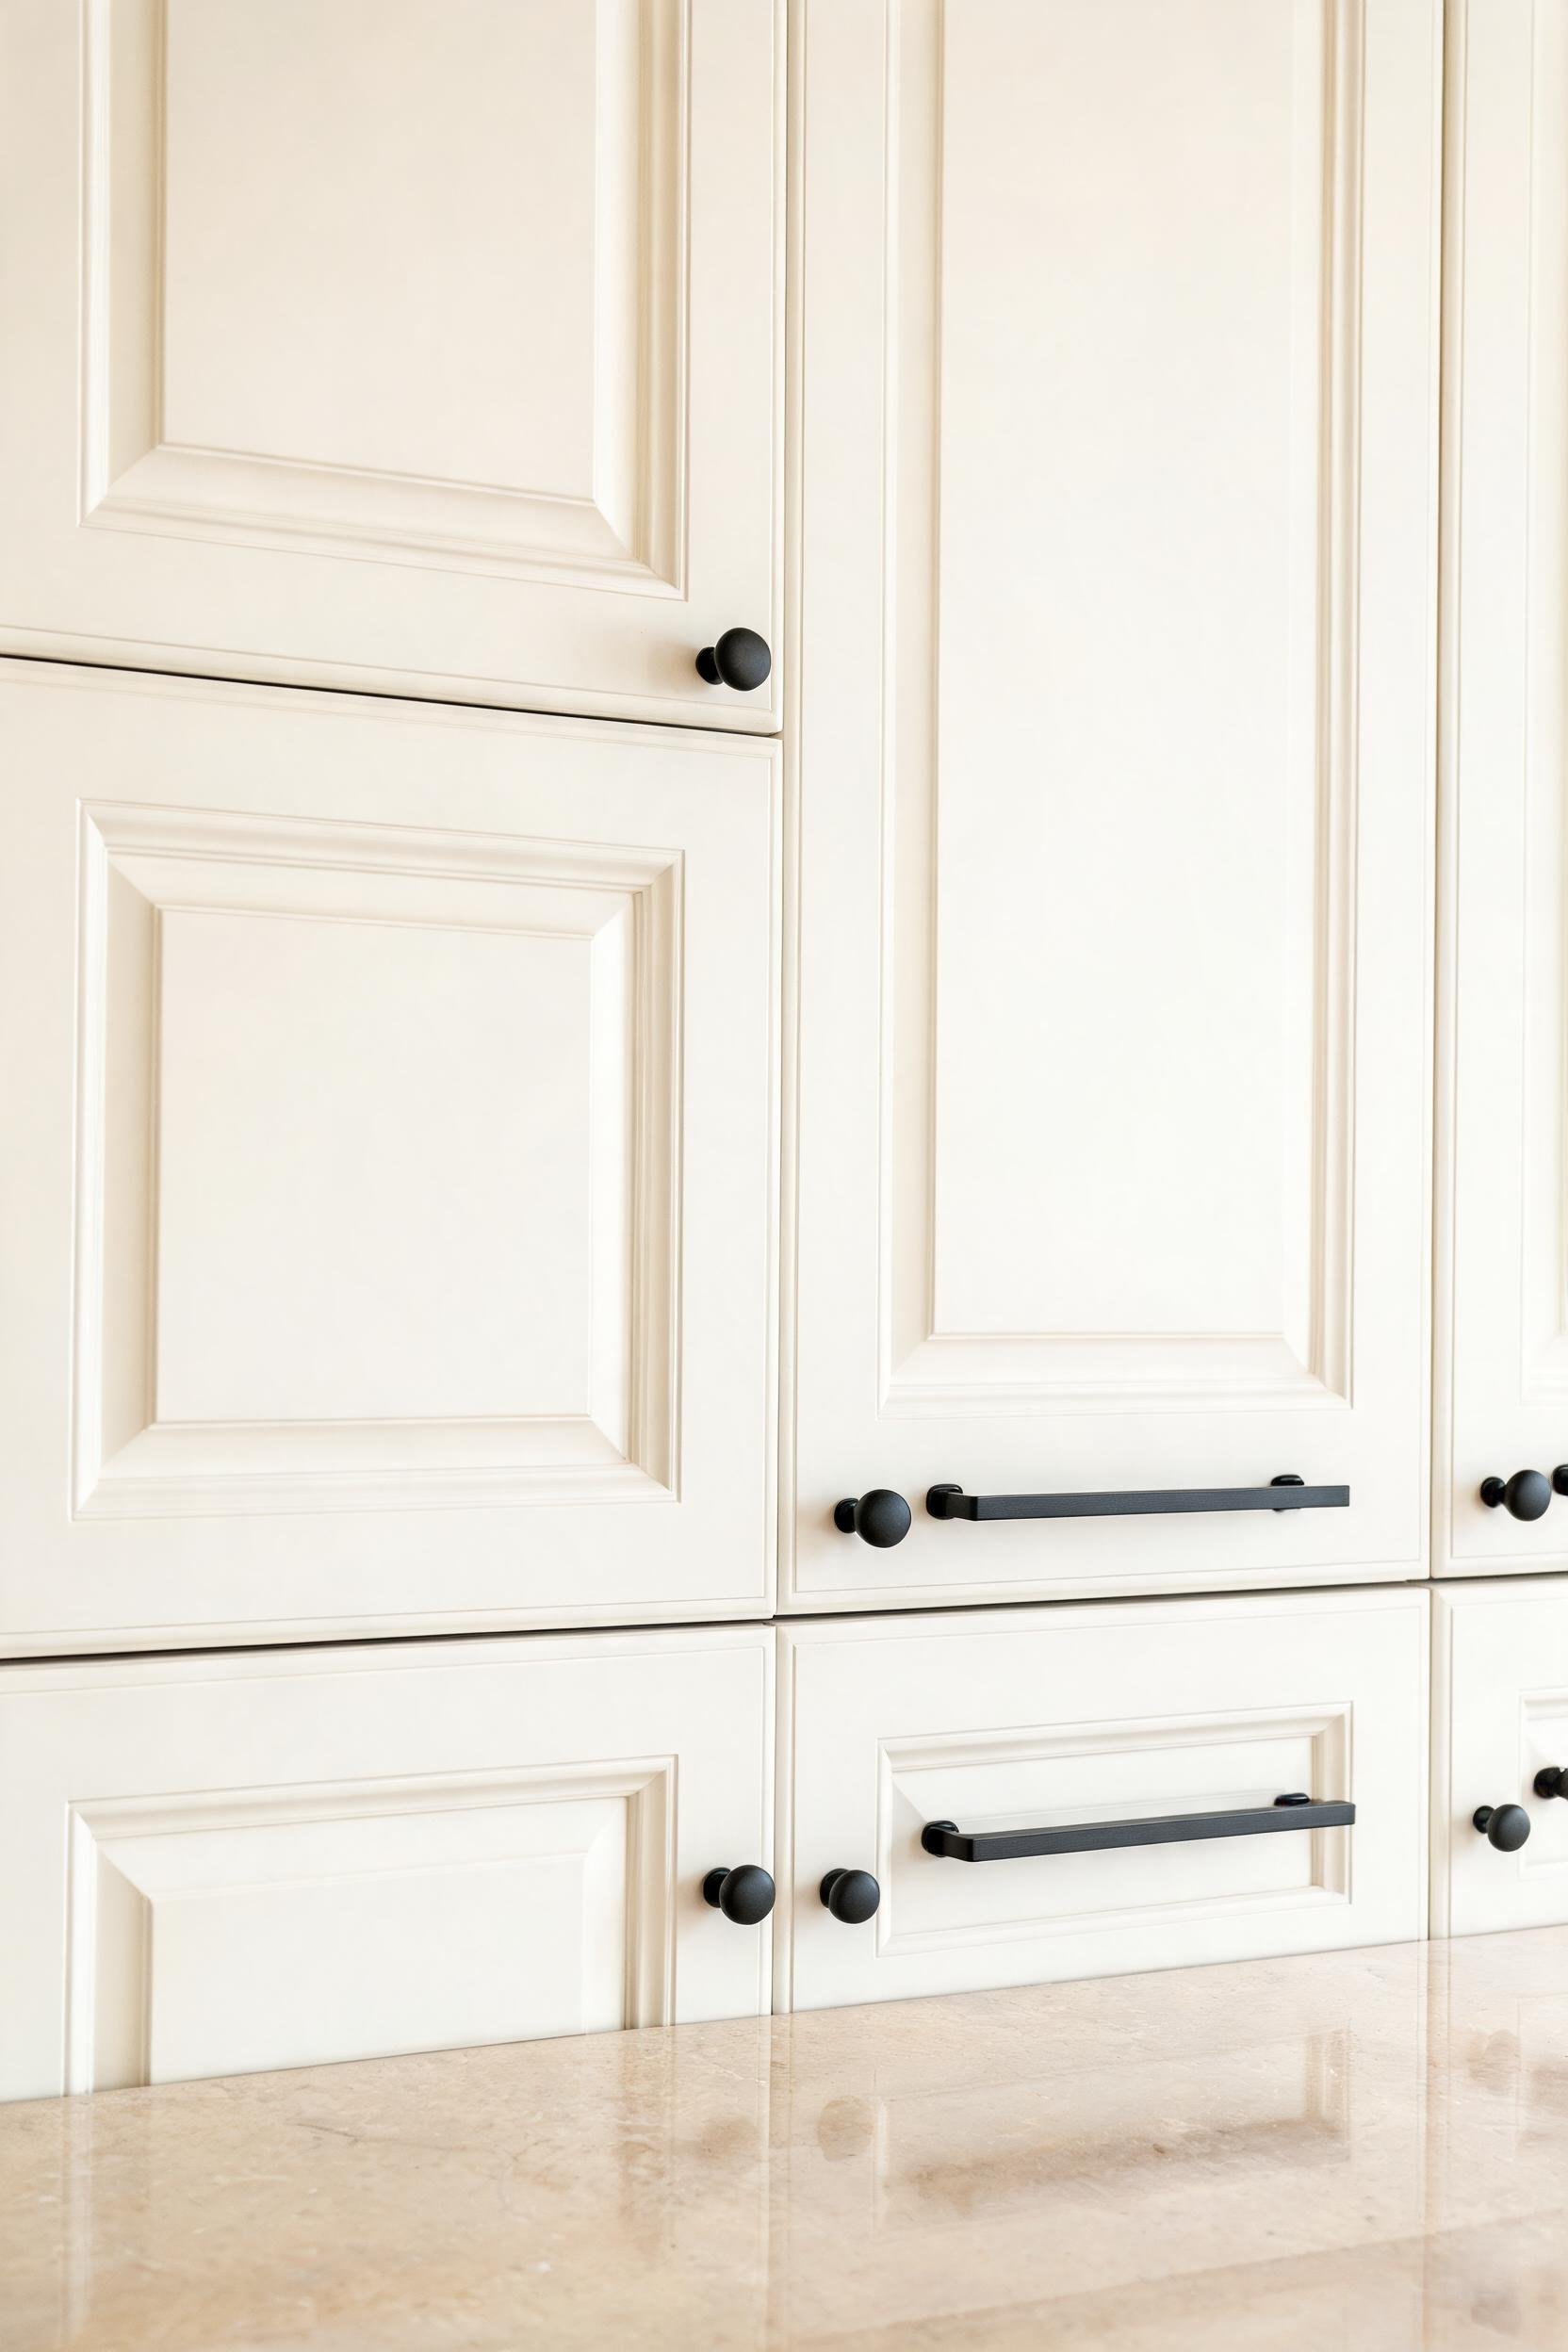
Why Hardware Is the Fastest ROI Change
In a modern kitchen remodel, hardware is often budgeted last — yet in a neutral white or greige kitchen it’s the only element with a strong graphic quality. Matte black pulls create a visual rhythm across cabinet faces that reads as deliberate. Because replacement requires nothing beyond a screwdriver, the entire cost is materials — no labour markup. The price range that holds up to daily kitchen use (water, food, cleaning products): $8–$30 per piece.
Which Finishes Hold Up: Coated, PVD, or Solid Brass
Standard matte black hardware is coated — a lacquer or powder coat over a zinc alloy base. It looks great initially but chips in high-touch areas after 3–5 years. PVD (physical vapour deposition) finishes are considerably more durable: the finish is molecularly bonded to the metal rather than applied over it. Rejuvenation and Emtek both offer PVD matte black options at $15–$35 per piece. Mixing metals — matte black hardware with a brushed brass faucet, for instance — works well if you limit it to two metals per room.
15. Large-Format Floor Tiles for a Seamless Modern Kitchen Makeover
Floor tile is one of the most visually powerful elements in a kitchen — and one of the most commonly undersized. Standard 12×12 tiles create a busy grid that makes kitchens feel smaller and more dated. Large-format tiles fix this, and their visual logic is straightforward.
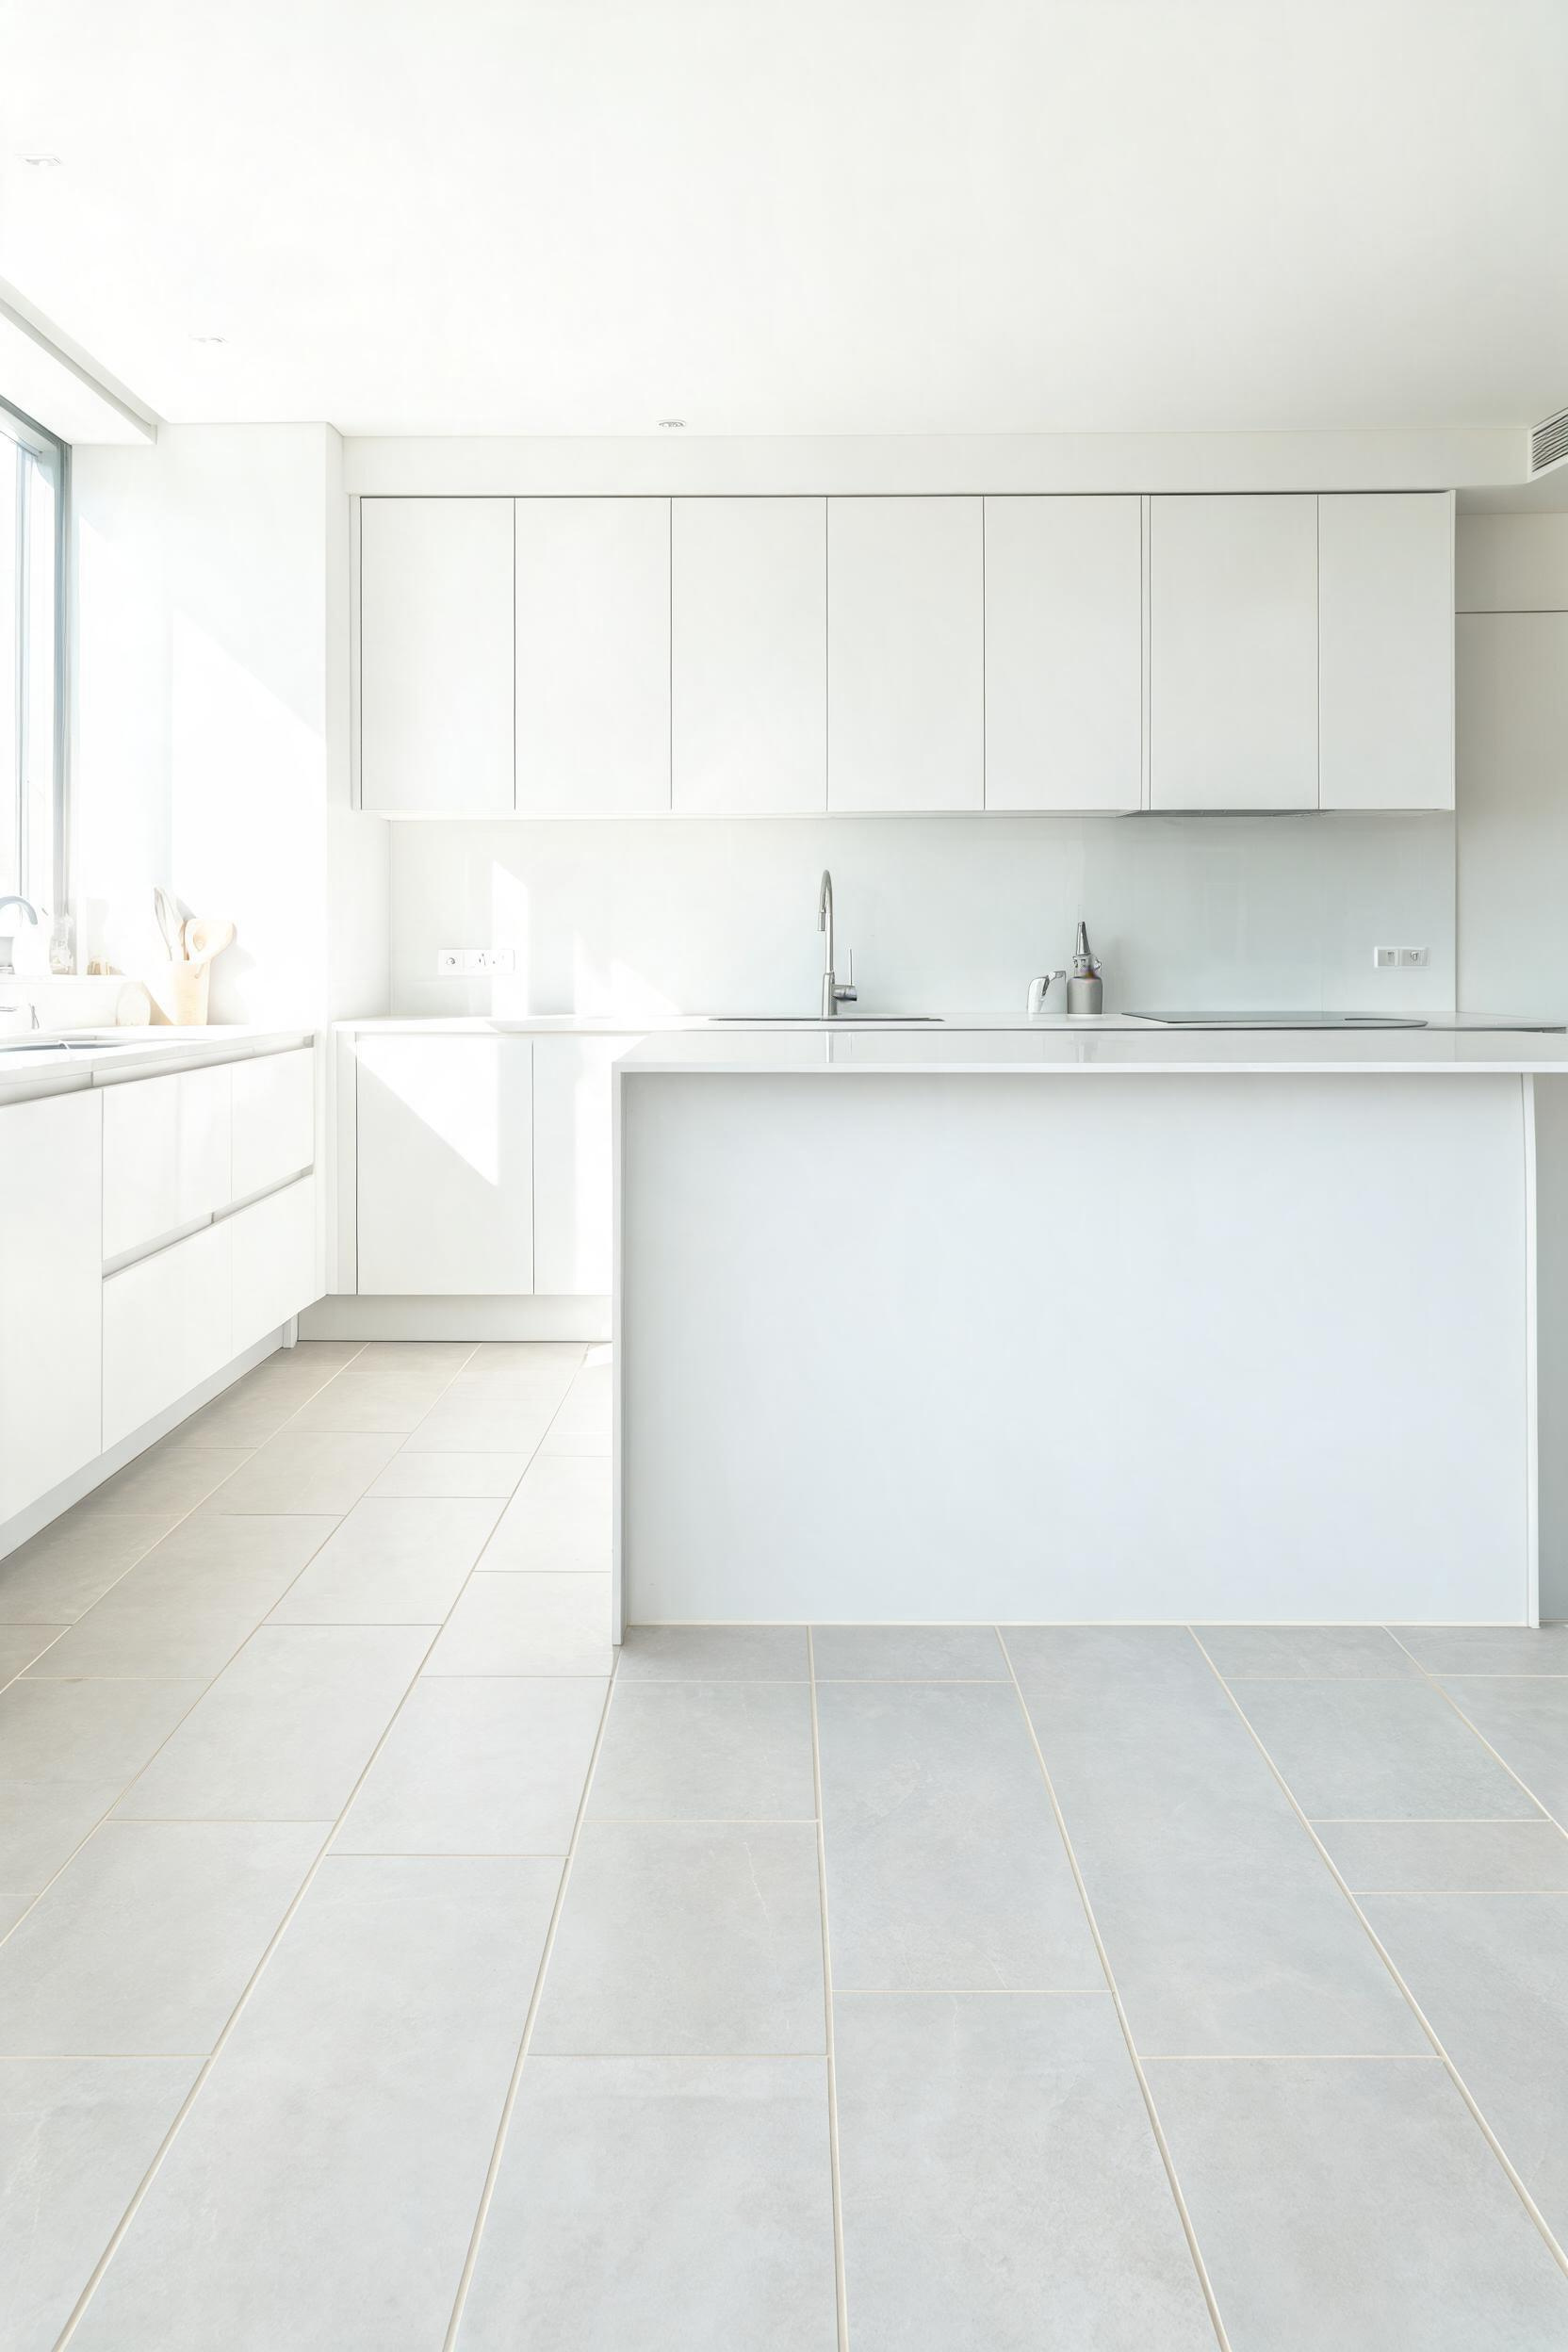
Why Large-Format Tiles Make Small Kitchens Read Bigger
Grout lines create visual interruptions — fewer means a more continuous surface, which reads as larger. A 24×48-inch tile in a 12×12-foot kitchen creates far fewer interruptions than a 12×12 grid. The effect is similar to how long-plank hardwood floors make a room feel longer. For a kitchen remodel, 24×48 or 36×36 tiles in warm grey or off-white are the most versatile choice.
Porcelain vs. Ceramic for Kitchen Floors
Porcelain is denser and less porous than ceramic — better suited for kitchens. Specify a PEI rating of 3 or 4 for kitchen floors (lower ratings are wall-only). Brands: Porcelanosa ($8–$20 per sq ft), Daltile ($4–$10), Emser ($3–$8). Large-format tiles need a perfectly flat substrate and a leveling clip system during installation, which adds $1–$2 per sq ft to the installation cost.
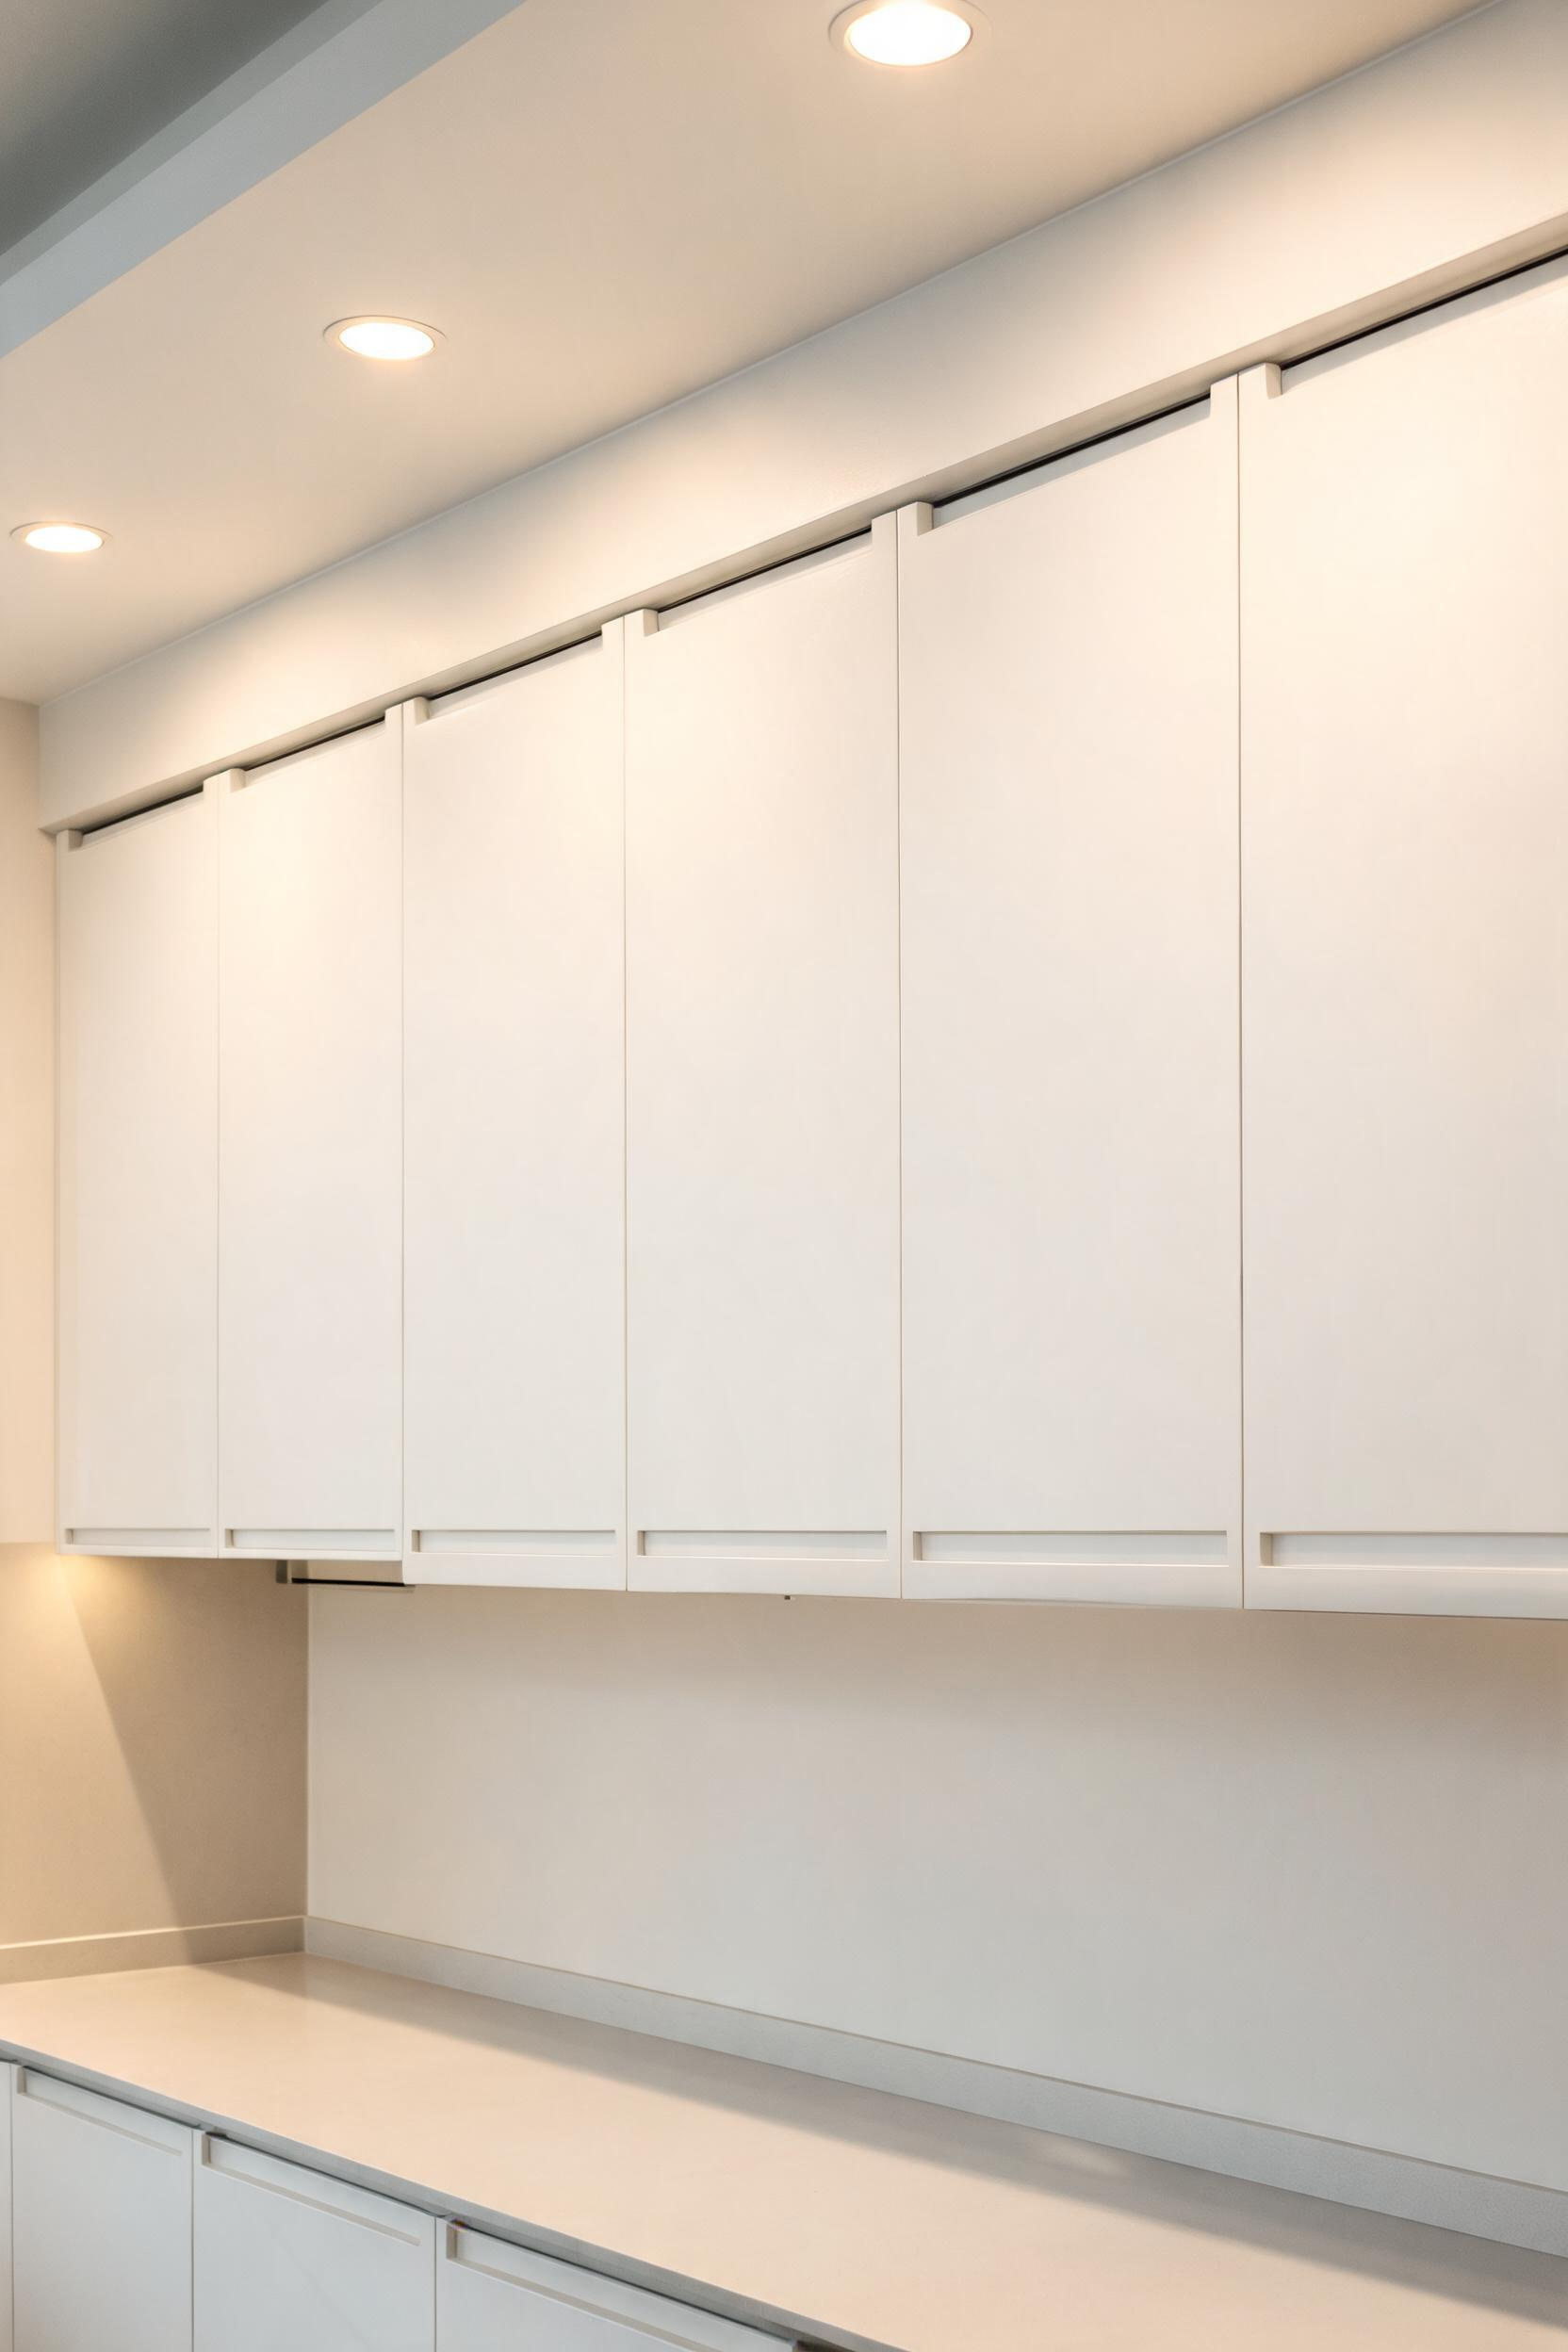
16. Floor-to-Ceiling Cabinetry for a Modern Kitchen Remodel That Maximises Storage
The gap between the top of upper kitchen cabinets and the ceiling is one of the most wasted spaces in residential design. In most pre-2010 kitchens, that 12–18-inch gap collects dust and makes the room look unfinished. Extending cabinetry to full ceiling height closes the gap, gives the kitchen a custom, built-in quality, and adds meaningful storage in a room where storage is almost always insufficient.
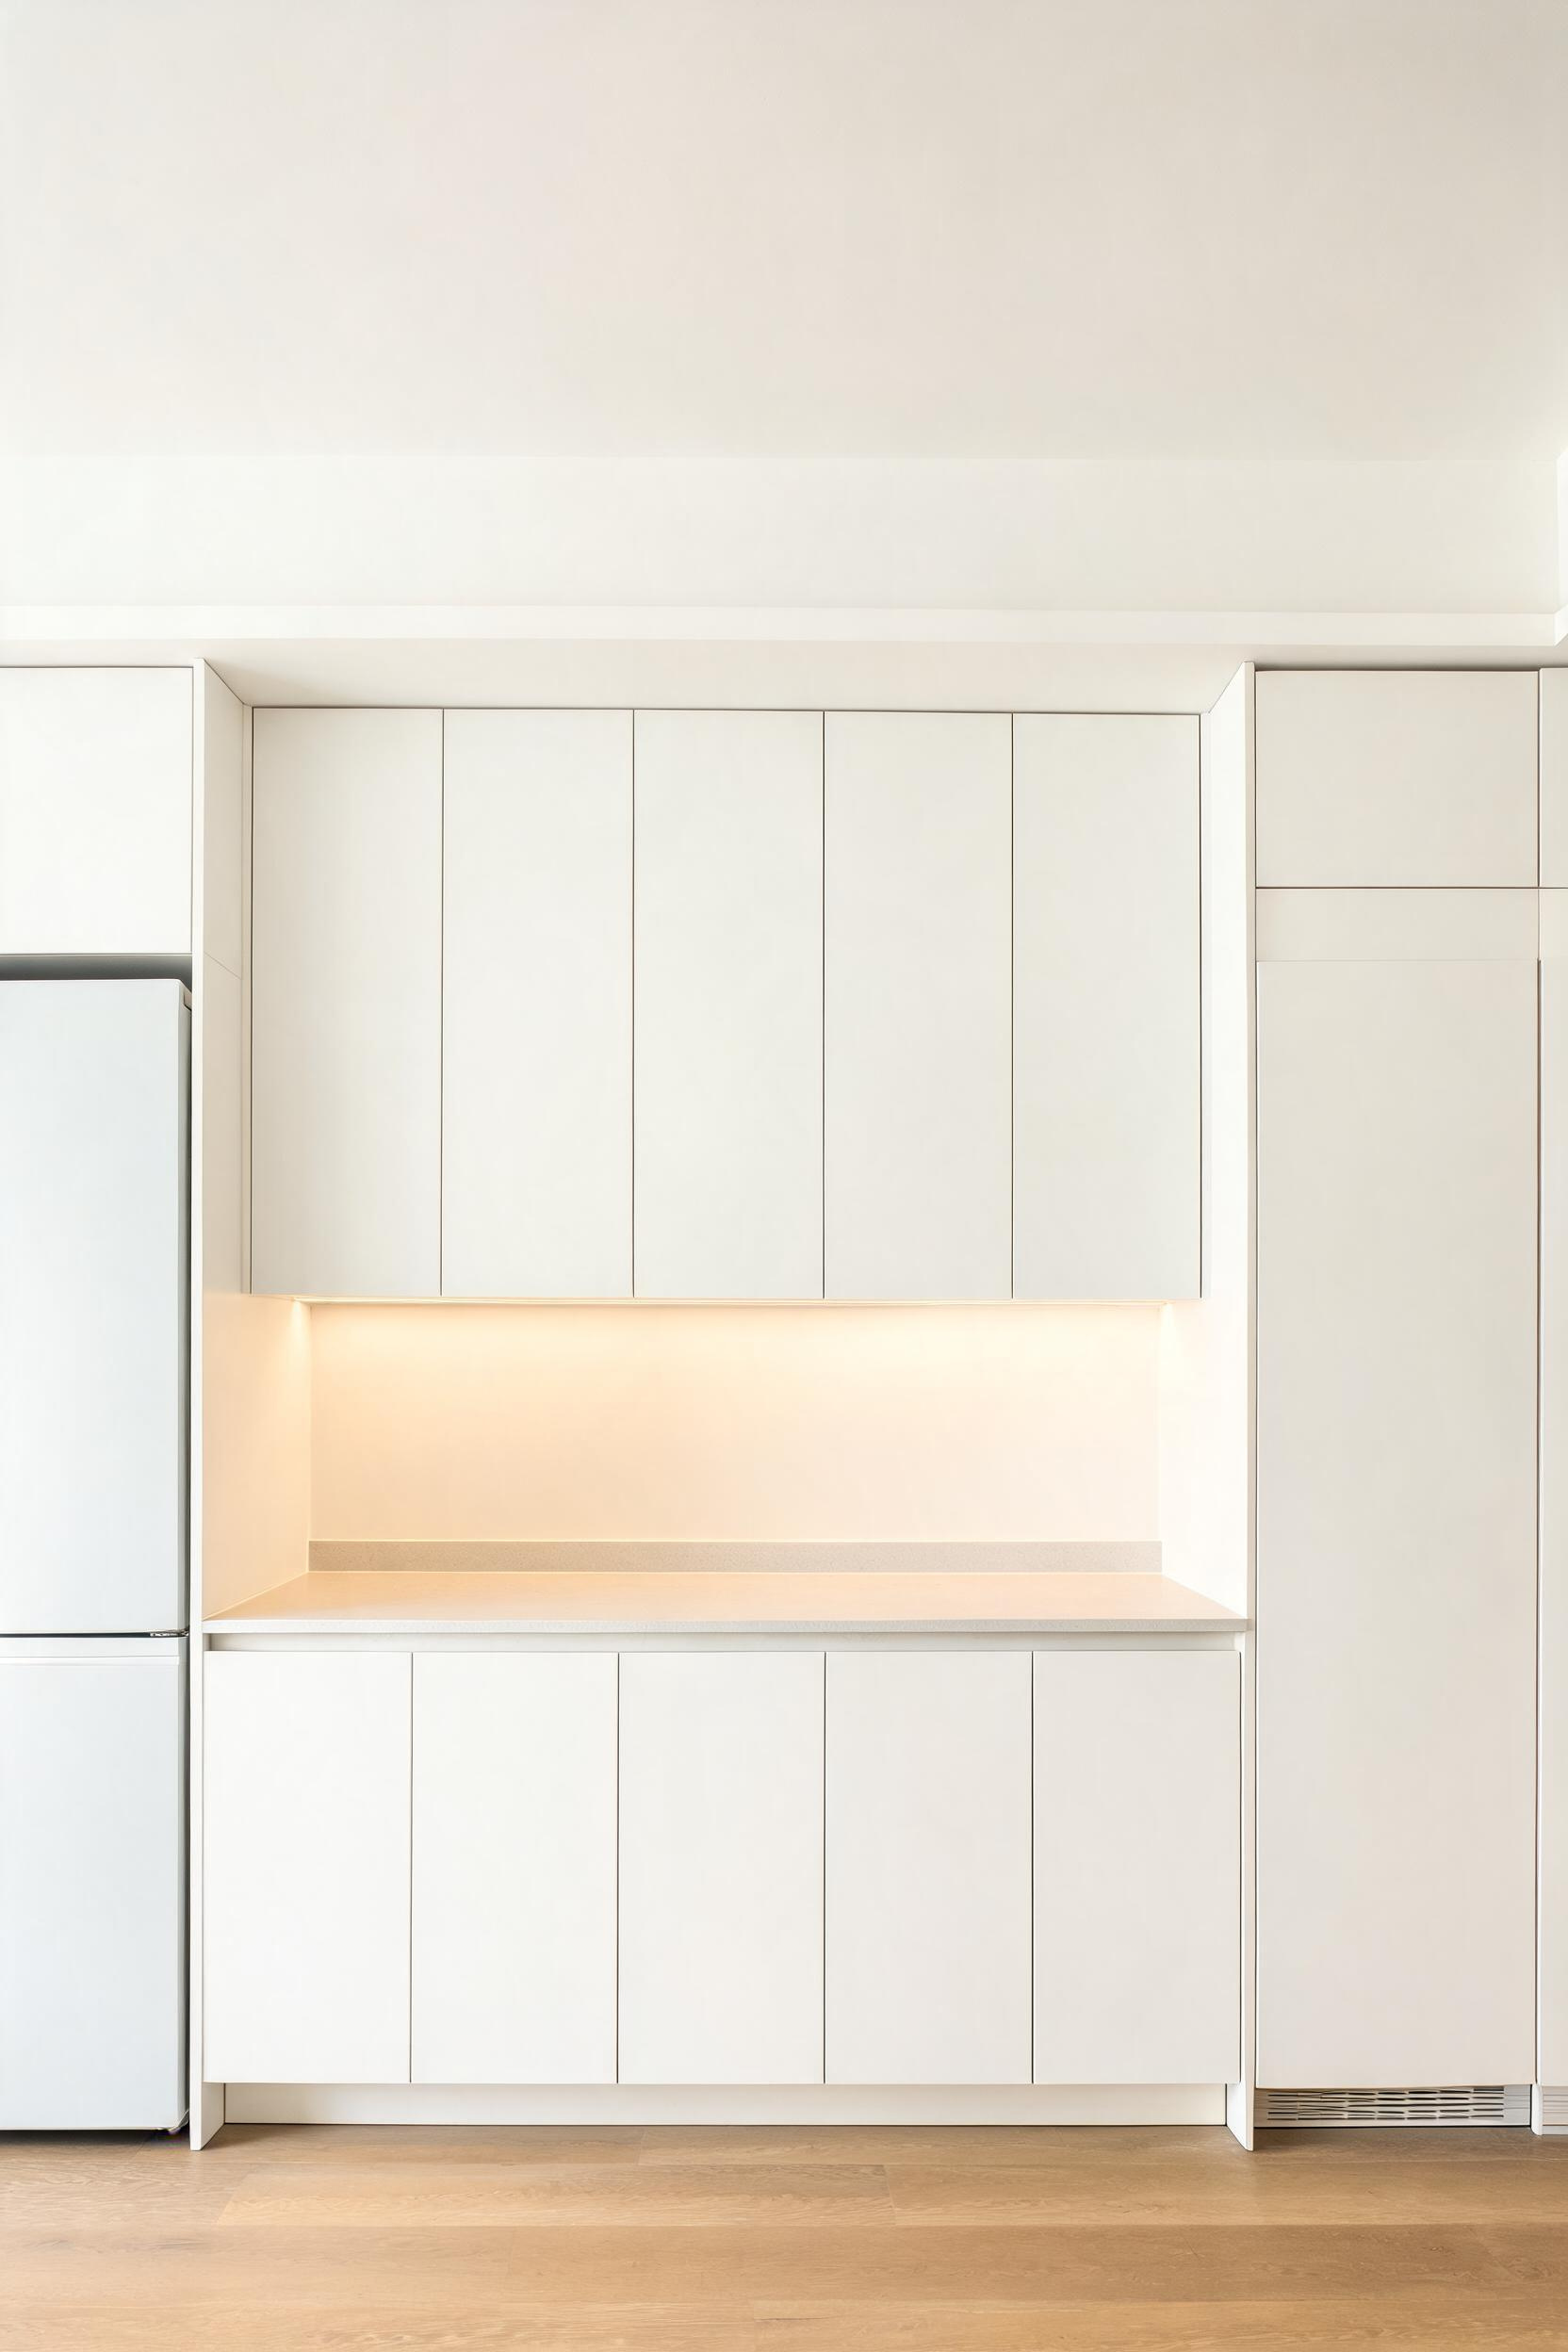
The Visual Effect of Eliminating the Gap Above Upper Cabinets
A standard upper cabinet that stops 12 inches below the ceiling creates a visual awkwardness — the room looks unfinished, like someone forgot to complete it. Extending cabinets to the ceiling creates a continuous vertical surface that makes the kitchen read as intentional and custom. In a modern kitchen remodel, this detail is particularly effective in rooms with 9-foot or taller ceilings, where the extension adds a genuine sense of height.
Practical Storage in the Upper Zone
Anything above 7 feet is accessible only with a step stool — which makes it appropriate for specific items. Seasonal serveware, bulk dry goods, and appliances used a few times a year belong up there. Everyday items stay below 6 feet. IKEA’s SEKTION offers 30-inch upper cabinets that stack to ceiling height at a practical price point; Fabuwood or CliqStudios offer semi-custom options at $200–$500 per cabinet.
Structural and Installation Considerations
Full-height cabinets must be secured to wall studs, not drywall — confirm stud locations before ordering. If ceiling height varies across the run, you’ll need scribe moulding at the top for a clean contact line. Budget 15–20% more for installation versus standard uppers. If you’re working with an all-white palette, the white kitchen ideas guide has useful notes on finish combinations that read well at full ceiling height.
Planning Your Modern Kitchen Remodel: Where to Actually Start
Most renovation planning starts in the wrong place. People choose finishes first, then discover mid-project they’ve ignored the structural decisions that drive everything else. The sequencing advice I give consistently: decide on your cabinet configuration first, because everything else — appliances, countertops, backsplash, lighting — is installed in relation to the cabinets.
How to Prioritise These 16 Changes by Budget and Impact
If you’re working with a limited budget and want maximum visual return, start with hardware replacement (item 14), under-cabinet lighting (item 13), and a statement range hood (item 3). These three changes cost roughly $1,500–$4,000 combined and transform the room without touching the structure. For a mid-range modern kitchen remodel ($15,000–$35,000), add new cabinet doors or a full refinish in a two-tone scheme (item 1), a backsplash upgrade (item 8), and new floor tile (item 15). For a comprehensive renovation, the integrated appliances (item 4) and floor-to-ceiling cabinetry (item 16) belong in the plan from the start.
The Sequencing Mistake That Adds Cost to Every Remodel
The expensive mistake is installing countertops before finalising the plumbing and appliance layout. A countertop fabricated around an original sink position becomes a problem if you later decide to move the sink or add a prep sink. Similarly, ordering pendant lights before confirming the island dimensions means you might end up with pendants that don’t centre properly over the finished island. The sequence that saves money: cabinets → appliances → countertops → backsplash → flooring → lighting → hardware. Each step confirms the dimensions for the next. A modern kitchen remodel planned in this order rarely needs expensive corrections. One done in the wrong order almost always does.