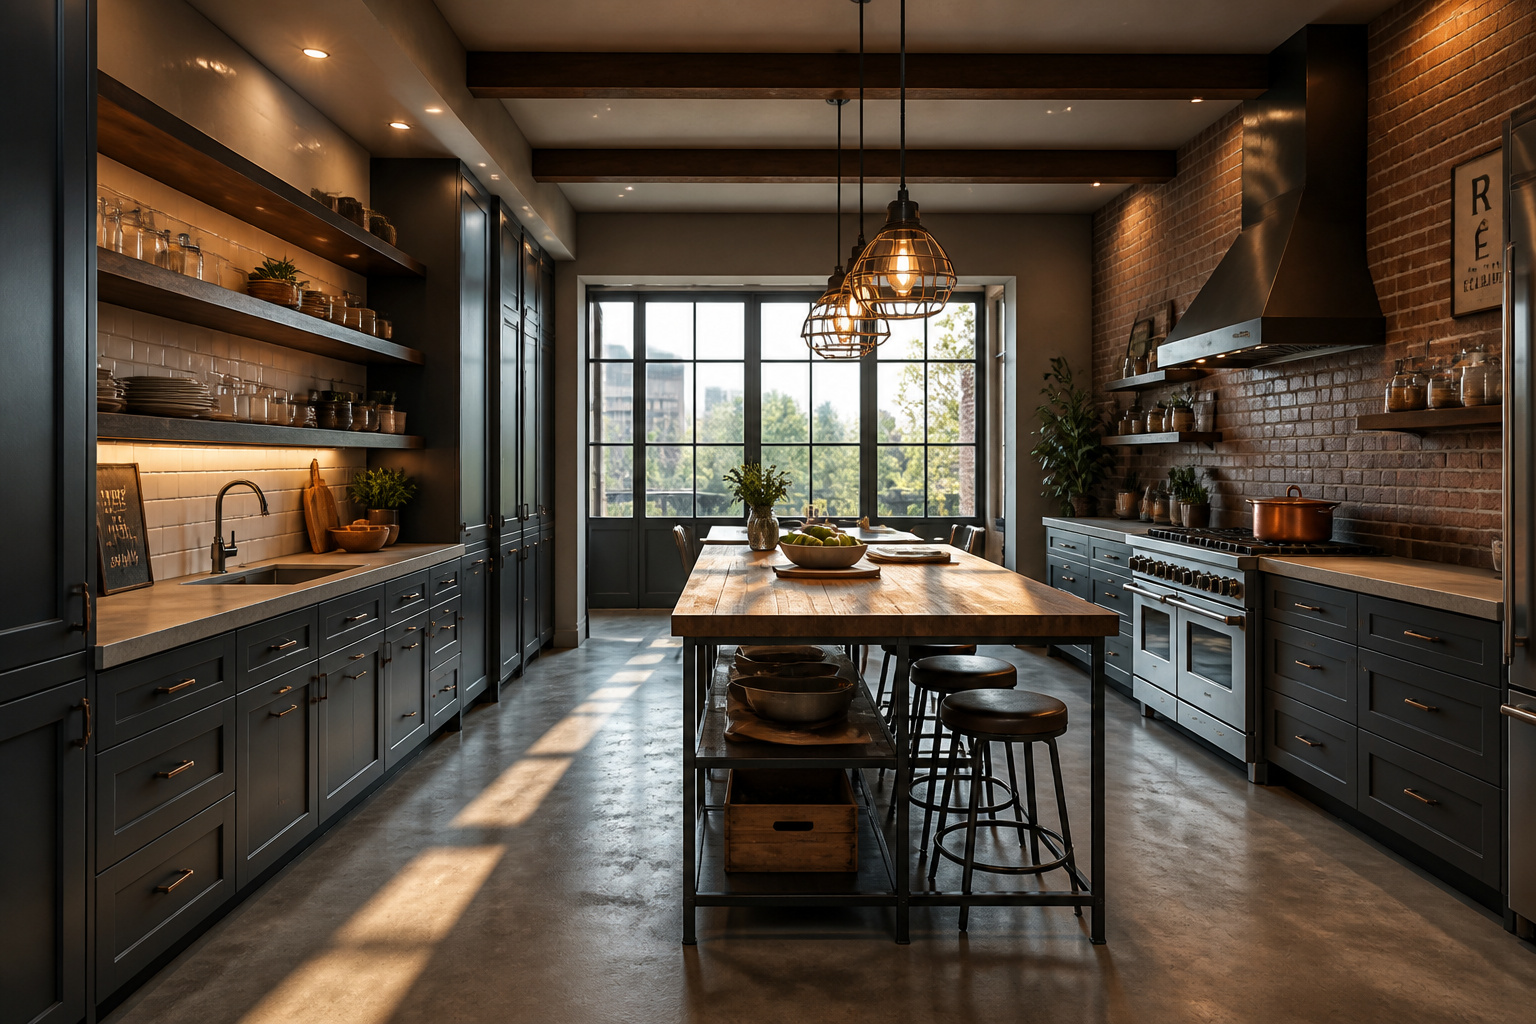
The most common mistake in industrial kitchen design isn’t choosing the wrong materials. It’s choosing too many of the same kind. Walk through a warehouse conversion that went wrong and you feel it before you can name it. Everything hard, everything cold. Light bounces off metal with nowhere warm to land. The kitchen reads like a set rather than a room someone actually cooks in.
After 14 years converting factories, lofts, and commercial buildings into homes, I’ve found one consistent truth. The best industrial kitchens work because they resist their own aesthetic. Raw steel and poured concrete are there. But so is salvaged wood, warm filament light, and butcher block thick enough to actually use. These 18 ideas cover the full range. From structural decisions like flooring and ductwork to the small hardware choices that, combined, make the difference between a kitchen that feels designed and one that merely has a theme.
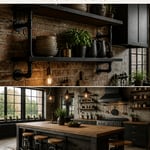
1. Exposed Steel Frames Paired With Concrete Countertops
Steel-frame cabinet doors alongside concrete countertops launched industrial kitchen design in residential spaces. It holds up because both materials are honest about what they are.
Why the Materials Work Together
Steel and concrete share an industrial lineage — both were engineering materials before they were design ones. Visually, concrete brings texture while steel contributes precise geometry, and the tension between them keeps the eye moving. Steel frames are lighter than solid wood cabinet doors while maintaining rigidity. With glass or mesh inserts, they give a display cabinet quality without the traditional cottage look.
For steel frame cabinetry, UK suppliers like Naked Kitchens start around £800 per door. In the US, Reform and Henrybuilt produce frames at varying price points. For concrete countertops, poured-in-place runs $80–$120 per sq ft installed; precast slabs are more affordable at $40–$75. Choose a satin or matte finish — polished concrete in a kitchen reads as trying too hard.
Maintenance and Longevity
Unsealed concrete stains immediately. A penetrating sealer (CHENG or Buddy Rhodes products) followed by a topcoat wax every six to twelve months keeps it performing well. Expect hairline cracks to develop over time. With industrial kitchen design as an aesthetic, this is part of the appeal rather than a defect.
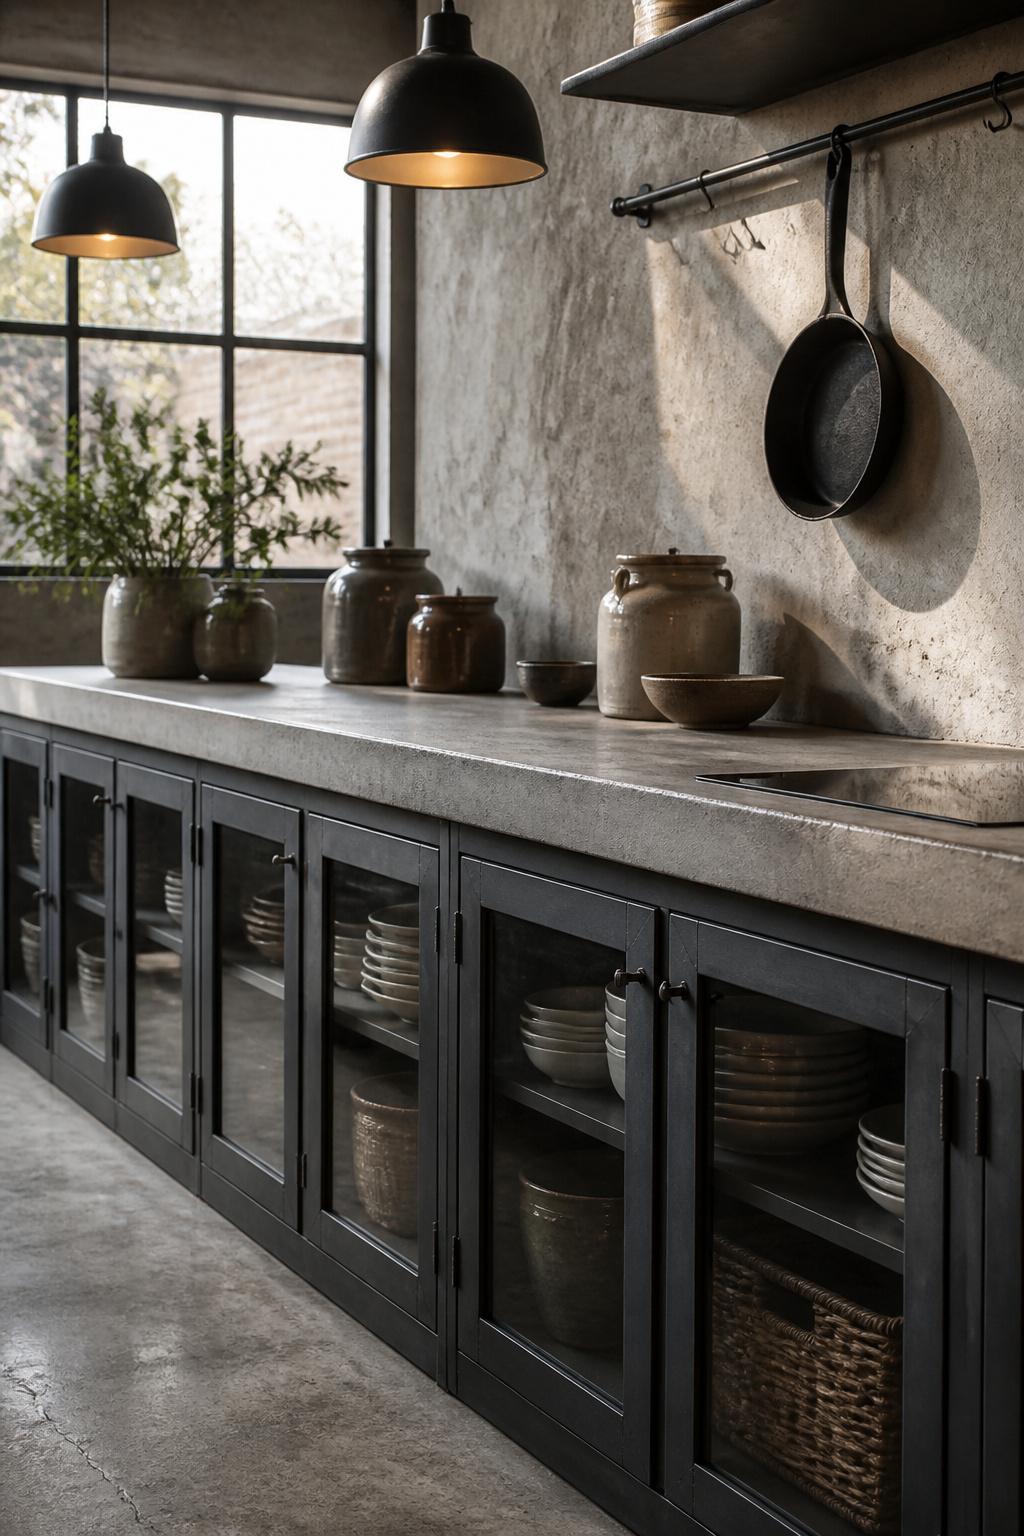
2. Pipe Bracket Open Shelving That Doubles as Design Sculpture
Open shelving in a kitchen is either clutter waiting to happen or the most interesting element in the room. Pipe bracket shelving tilts the odds toward the latter — when the pipes are sized correctly. It is one of the most reproduced elements of industrial kitchen design. It is also one of the most frequently done badly.
Scale and Installation
The pipe bracket shelf has become something of a cliché, mostly because people install them without thinking about proportions. Thin ¾-inch pipe looks insufficient against a 12-inch deep shelf. Use 1-inch or 1¼-inch diameter pipe and the bracket reads as engineered rather than improvised.
On brick or masonry, use a hammer drill and masonry anchors rated for twice the intended load. On drywall, locate studs — no toggle bolt reliably holds a loaded kitchen shelf long-term. A 36-inch shelf carrying typical kitchen items exerts approximately 30–50 lbs distributed load. Space flanges no more than 24 inches apart.
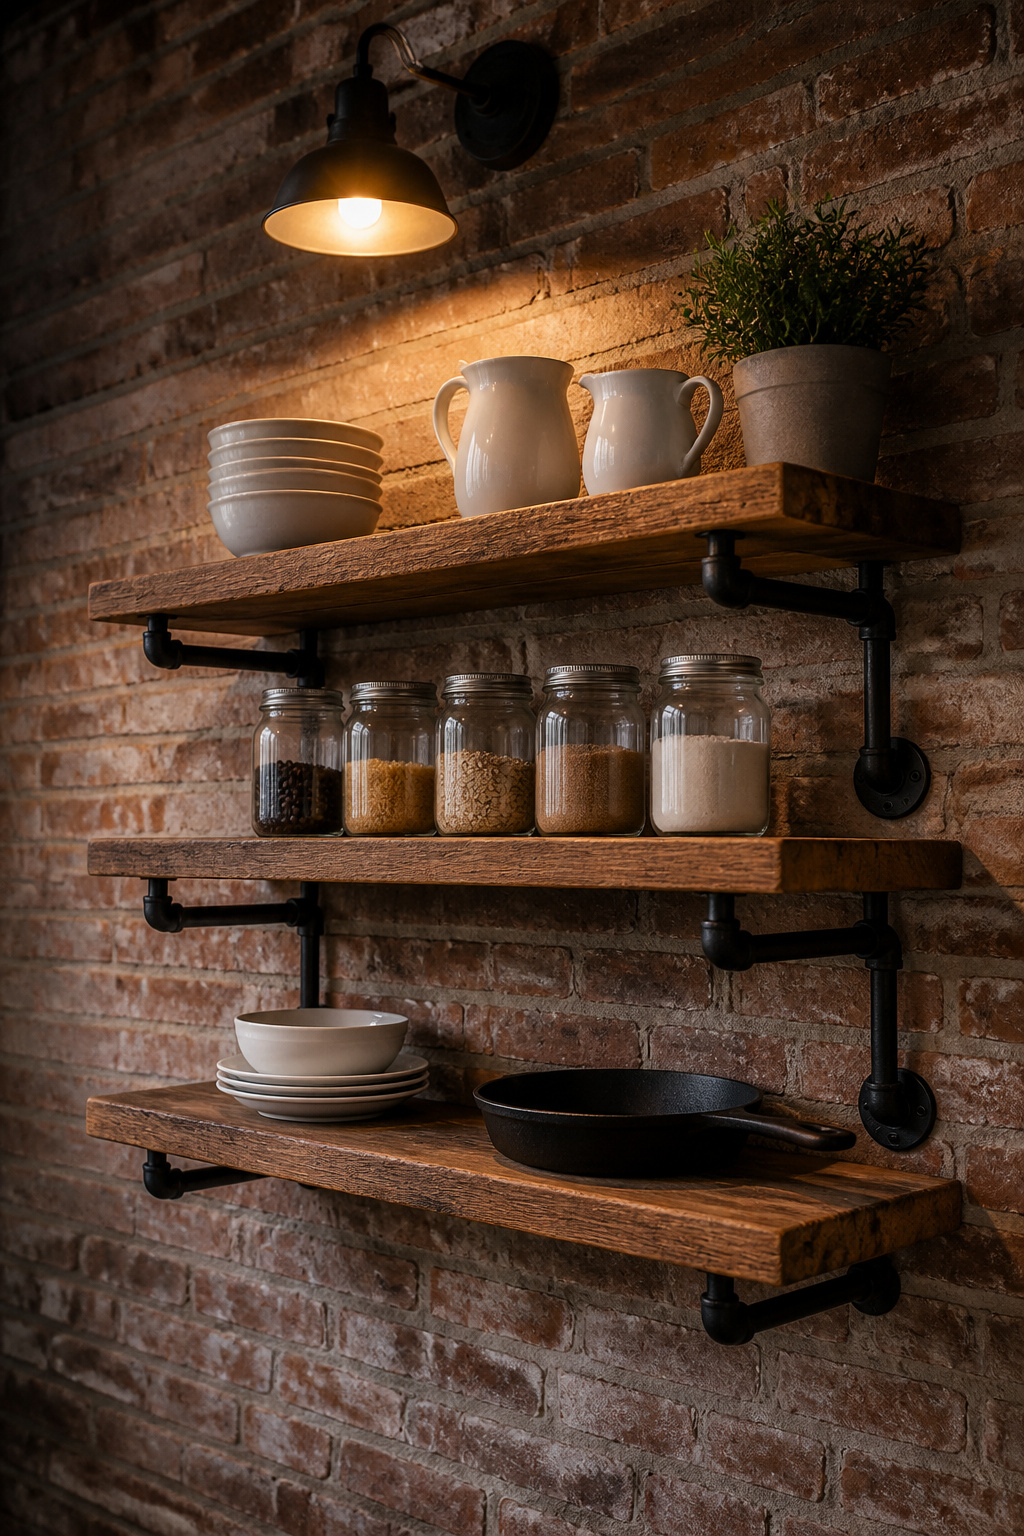
Styling the Shelves
One rule only: restraint. Group items by material. Leave one-third of each shelf empty. Place the tallest item at one end, creating a slope rather than a flat line. Rotate the arrangement every few months — open shelves work when they show intention, not accumulation.
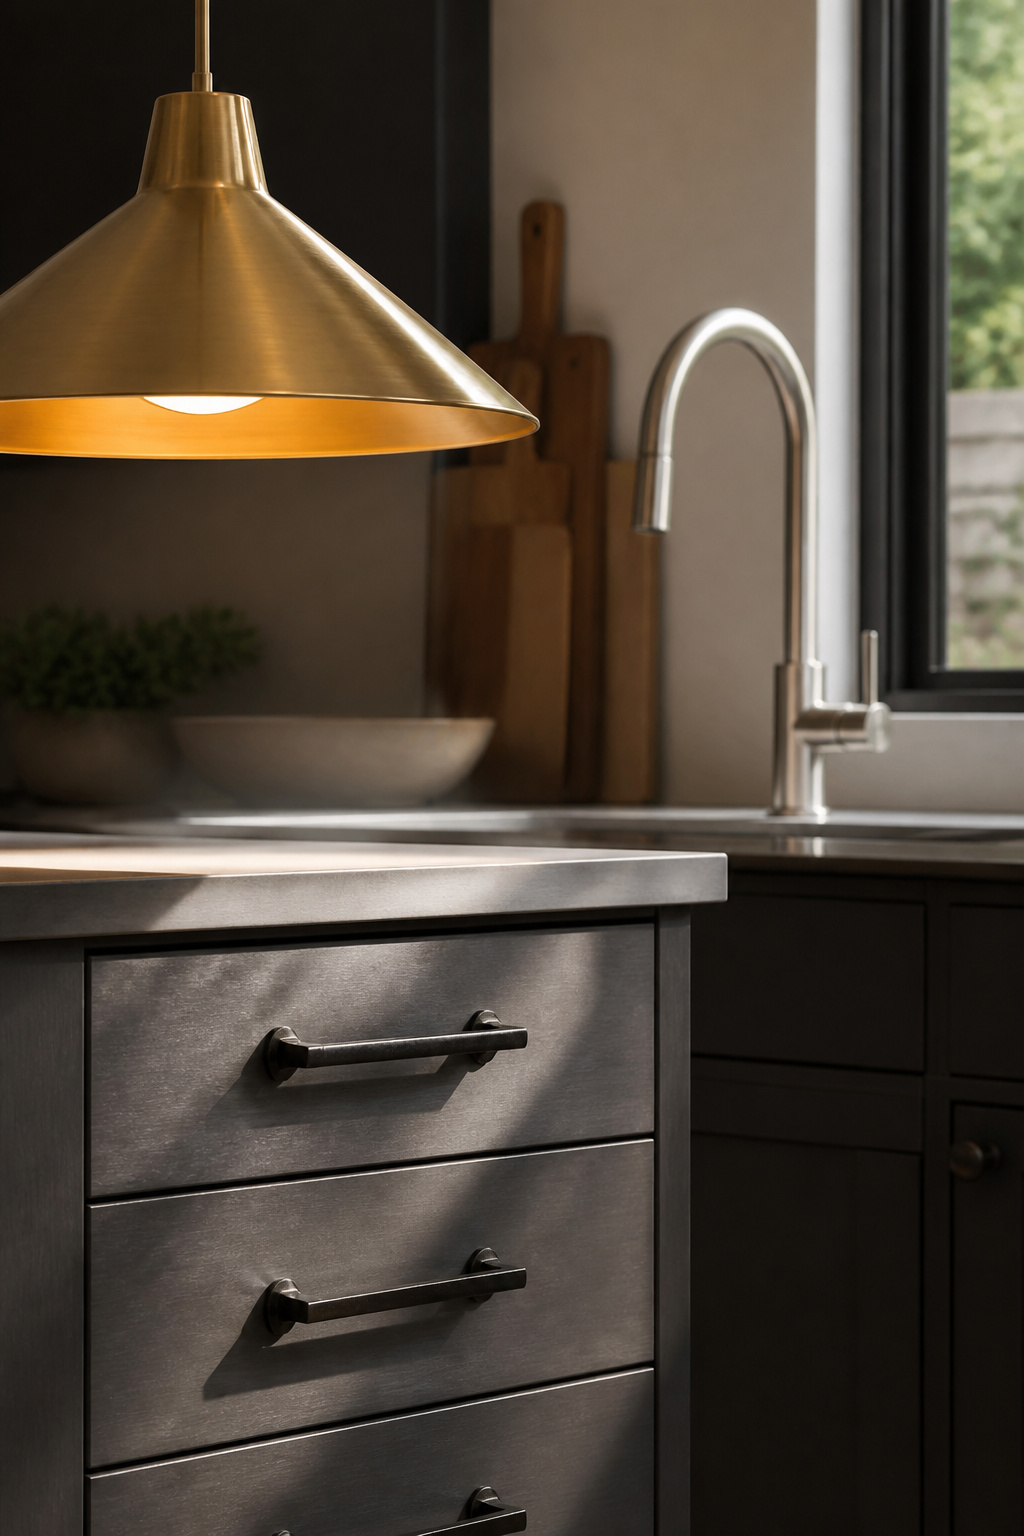
3. Urban Kitchen Design: Matte Black Hardware as a Unifying Language
If steel frames and concrete countertops are the architecture of the kitchen, hardware is the punctuation. Matte black applied consistently across cabinet pulls, faucets, drawer handles, and light switches threads a single visual note through everything.
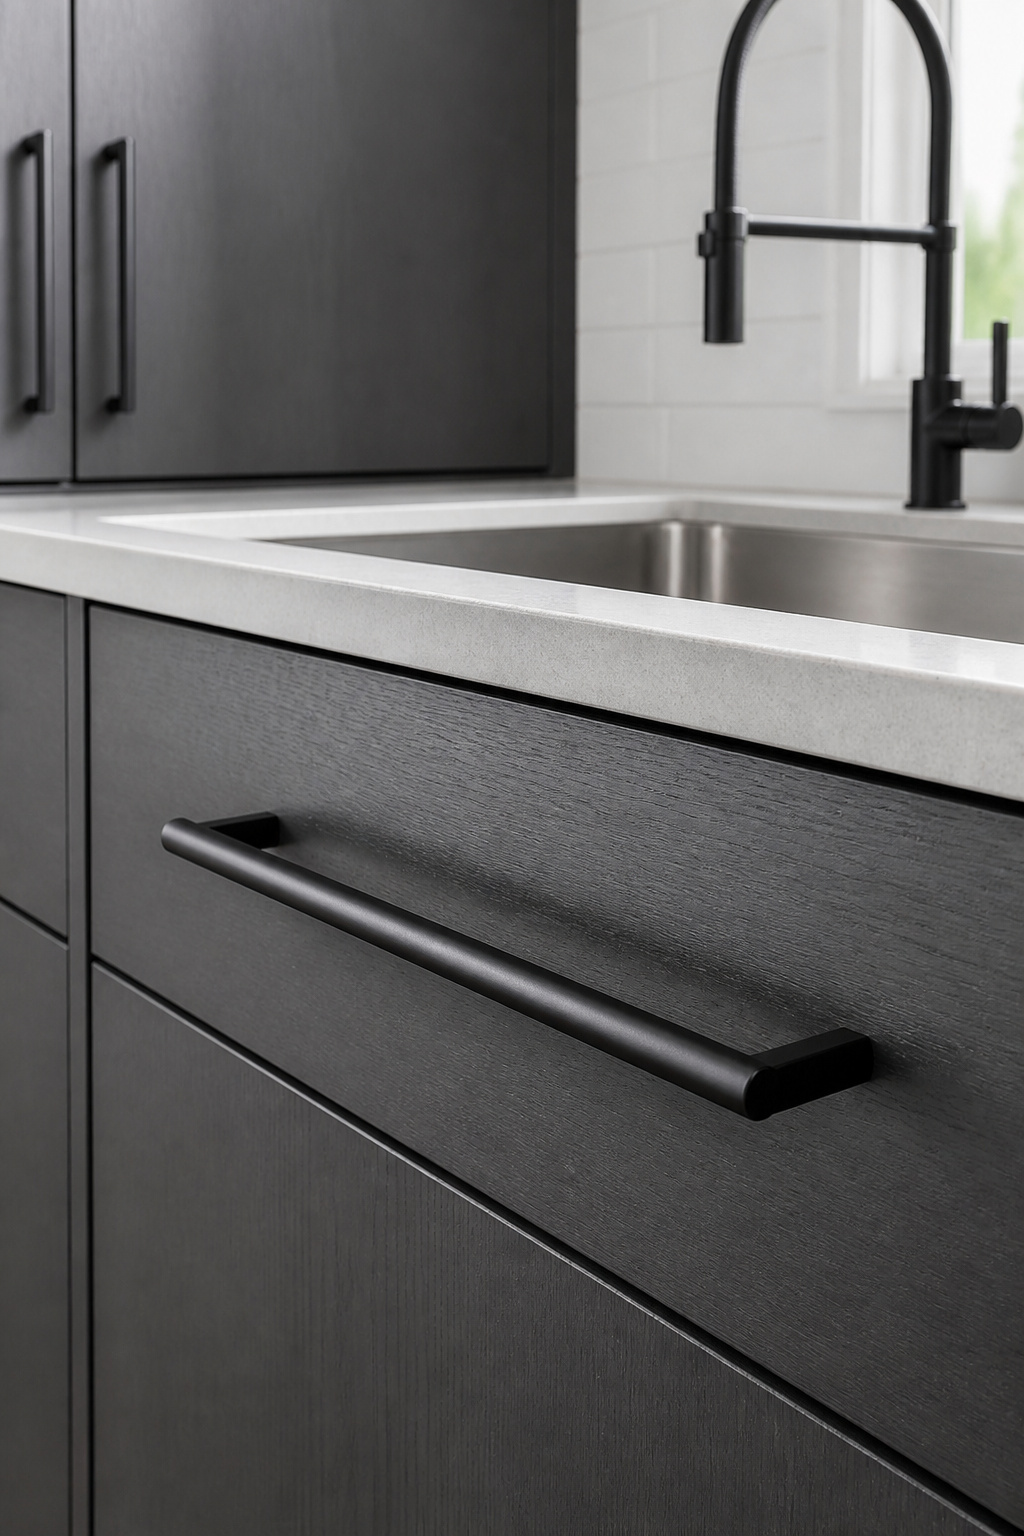
Why Matte Black Works Here
Matte black reads warmer than polished chrome or nickel because it diffuses light rather than reflecting it. It also shows fingerprints less readily than mirror finishes — a practical advantage in a working kitchen. In a scheme where surfaces are neutral — concrete, steel, brick — consistent hardware carries most of the visual character. When it reads consistently, the kitchen feels resolved.
Bar handles between 6 and 12 inches work best here. They mirror the geometry of steel frames and pipe shelving. Emtek, Top Knobs, and Rejuvenation carry strong matte black ranges. Extend the finish to the faucet (Moen Align or Kohler Purist), cabinet hinges, and switch plates where possible.
Where to Draw the Line
Keep appliances in stainless or integrated panel finishes, not matte black. A matte black refrigerator alongside dark cabinets and dark hardware tips from intentional to oppressive. Also avoid matte black countertops alongside matte black hardware — the surfaces blend and the detail disappears.
4. Polished Concrete Floors With Radiant Heating Below
Concrete floors belong in industrial kitchens. But they come with a deserved reputation for coldness — both thermally and underfoot. Radiant heating eliminates the first problem; the right finish addresses the second. Industrial kitchen design relies on concrete floors for both authenticity and durability.
The Floor as Foundation
Concrete floors are structurally durable and require no grout lines. Properly sealed, they outlast tile by decades and are more hygienic. Professionally polished and sealed, the cost runs $4–$10 per sq ft on existing concrete. For a new pour, budget $15–$25.
Hydronic (water-based) radiant underfloor heating is the most efficient system for large concrete floors. Concrete’s thermal mass retains heat well once brought up to temperature. Electric mat systems work as a retrofit when resurfacing is planned either way. Both require adequate slab thickness (4 inches minimum) and good insulation below.
Choosing the Right Finish
Avoid high-gloss polish in a kitchen — it reads decorative rather than industrial and shows scratches visibly. A satin sealer (Ashford Formula or Consolideck LS) gives a controlled sheen that picks up light without looking lacquered. Add a sacrificial floor wax every six months to protect against kitchen traffic.
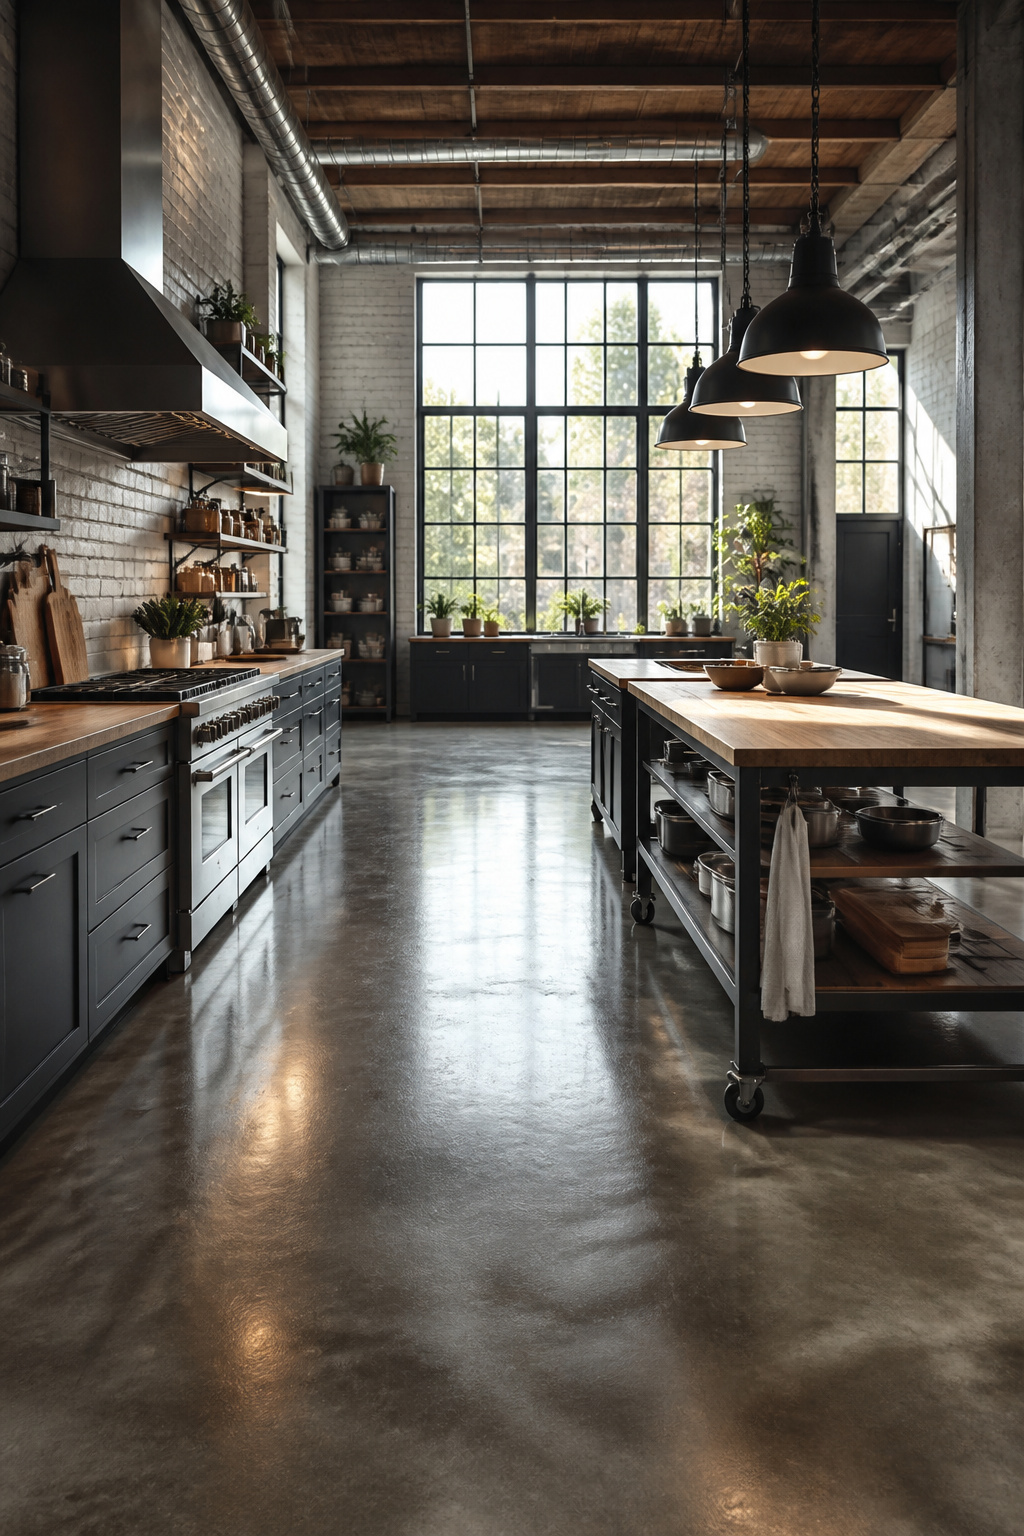
5. Industrial Kitchen Pendant Lighting Over the Island
Lighting has the most immediate visual impact of any decision in industrial kitchen design, and the island pendant cluster is the centrepiece. Get it right and the rest of the kitchen reads as intentional; undersize it and the whole space deflates.

Scale and Style Options
Industrial pendant lighting defines the island as a destination within an open-plan space. Also, it introduces warm, directed light into a room full of hard surfaces. Without it, industrial kitchens feel like they need daylight to be habitable. The dominant styles divide into three. Cage pendants (wire or steel frame over an exposed bulb — Rejuvenation, $80–$180 each) are the most recognisable form. Dome pendants in spun metal or enamel (Schoolhouse Electric, RLM barn styles) read as more refined. Oversized warehouse globe pendants in clear or smoked glass add scale without visual weight.
For a 48-inch island, use two pendants minimum; for 72 inches or longer, three in a row. Size each pendant 8–12 inches in diameter for the cluster to feel proportionate.
Also consider the architect’s guide to luxury kitchen lighting design for layered light systems. Pendants work best as part of a three-layer scheme, not as the only source.
Hanging Height
Hang island pendants 30–36 inches above the countertop. In high-ceilinged loft kitchens (9 feet or more), 36–40 inches keeps pendants from feeling oppressive. Space multiple pendants 24–30 inches apart centre-to-centre, and use an odd number — three reads more dynamically than two.
6. Professional-Grade Stainless Steel Appliances That Mean Business
Stainless appliances are embedded in kitchen design broadly. But there’s a real difference between the generic residential grade and the professional specification that belongs in a serious industrial kitchen design.
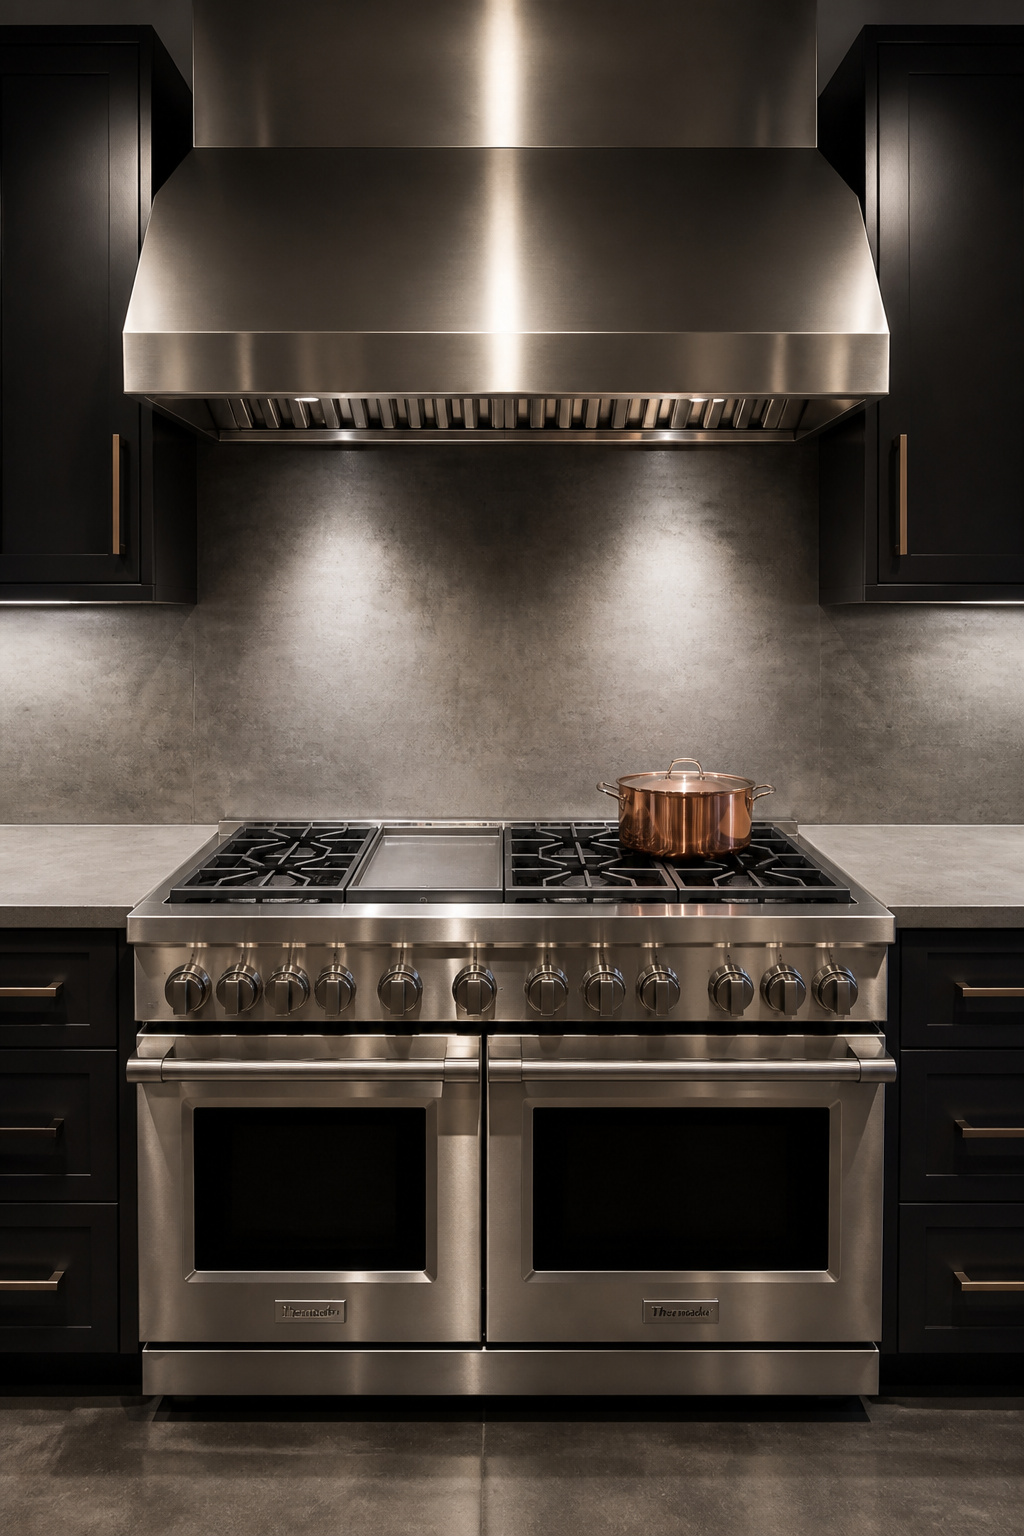
What “Professional-Grade” Actually Means
Most residential stainless uses 430-grade steel (thinner gauge, lower corrosion resistance). Professional-grade appliances — Wolf, Thermador, Bertazzoni — use 304-grade at heavier gauge. The doors don’t flex when you press them. That tactile quality matters in a kitchen where surfaces are supposed to feel solid and substantial.
At the top tier, Wolf’s 48-inch dual-fuel range (around $16,000) delivers genuine commercial credentials. Bertazzoni’s Professional series ($2,500–$5,000) offers Italian-made quality at mid-range prices. For budget-conscious buyers, the Cosmo Commercial-Style range (under $1,500) delivers the aesthetic at a fraction of the cost.
Integration Without the Restaurant Feel
The mistake is placing stainless appliances against stainless backsplash against stainless countertops with nothing to break the surface. In a restaurant, that uniformity serves hygiene. In a home kitchen, it reads cold and impersonal. Mix stainless appliances with concrete or wood countertops, dark cabinetry, and warm lighting. The stainless then reads as a professional tool within a designed space.
7. Industrial-Style Kitchen Backsplash: Beyond the Standard Subway Tile
Subway tile became the default for industrial kitchen backsplashes because it’s inexpensive and evokes early 20th-century urban buildings. In 2026, though, it’s also the most common backsplash across every design style, which undermines its industrial credentials.
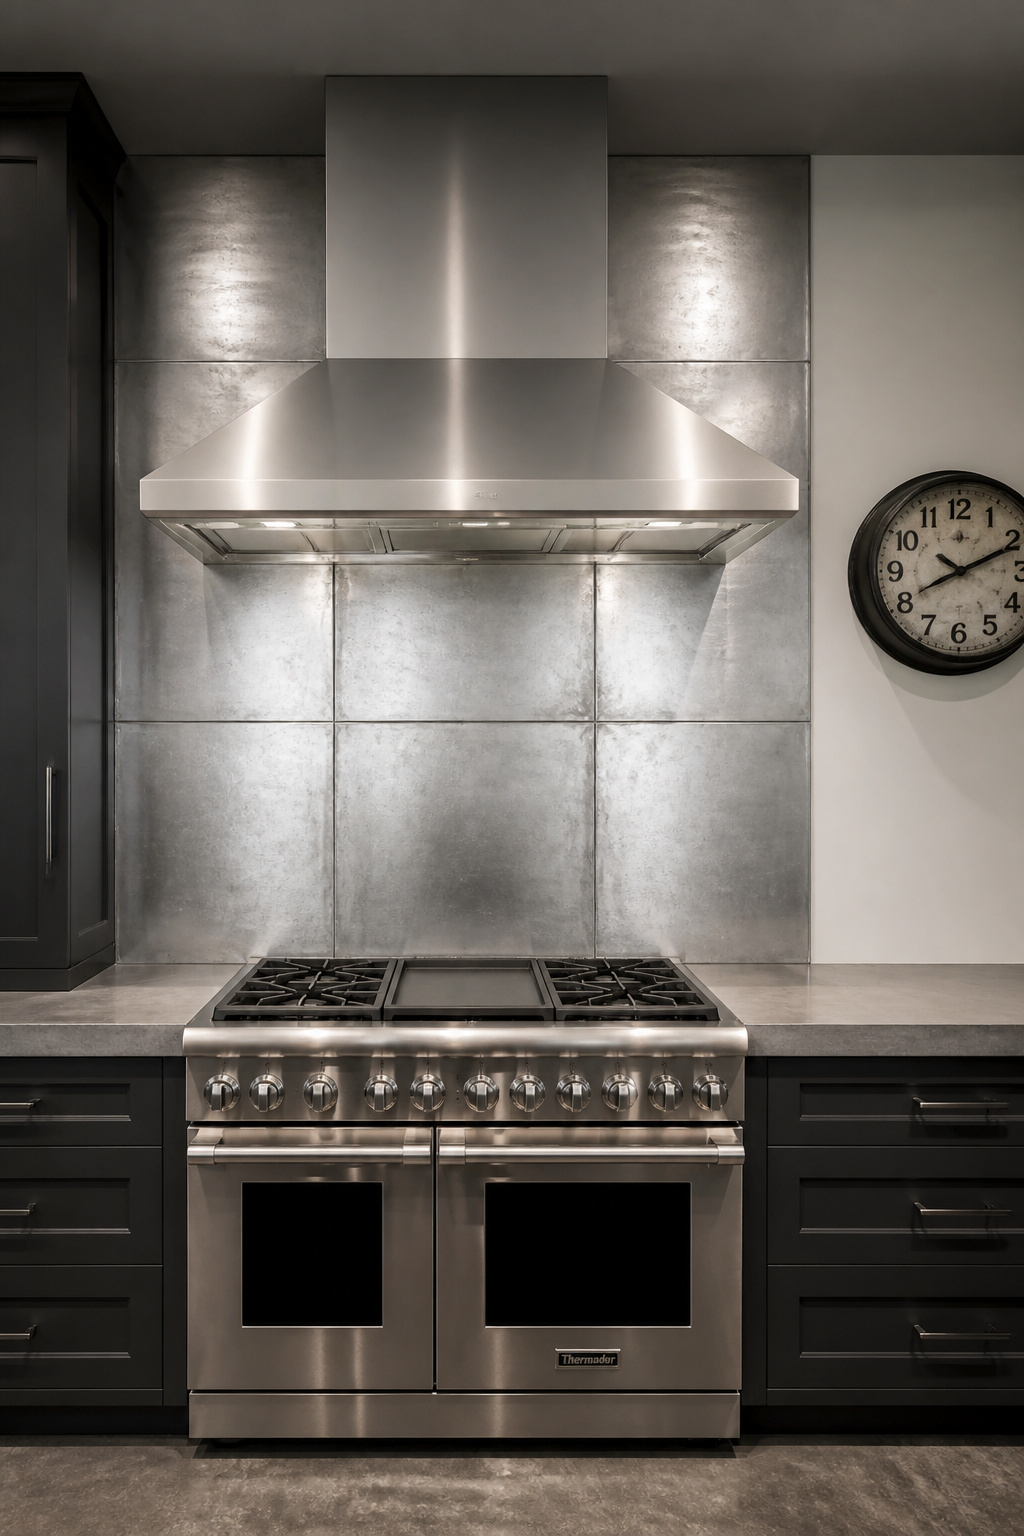
Stronger Alternatives
Sheet metal backsplashes are the most direct expression of an industrial kitchen. Stainless, copper, zinc, or blackened steel all work well, and each is practical behind a range. Metal handles heat, grease splatter wipes clean, and the material ages with character. Blackened steel sheets ($15–$25 per sq ft fabricated) develop a patina that deepens over time. Pressed tin ceiling tiles repurposed as a backsplash ($3–$8 per sq ft) add texture and historical reference simultaneously.
See the complete overview of kitchen backsplash ideas for sophisticated urban interiors for a broader material survey.
When Tile Is the Right Choice — and How to Make It Work
If you do choose tile, grout colour is more transformative than most people realise. Dark grey or charcoal grout on subway tile reads as urban and intentional rather than generic. Unsanded black grout on large-format concrete tiles creates a grid of dark lines. This echoes the structural geometry of steel-frame windows and ductwork, tying kitchen surfaces into a coherent visual language.
8. Exposed Brick Accent Wall Behind the Range
Of all the elements in an industrial kitchen, exposed brick is the most emotionally resonant. It connects the kitchen to a pre-industrial craft tradition. It is also the signature surface of the factories and warehouses that gave this design language its origin.
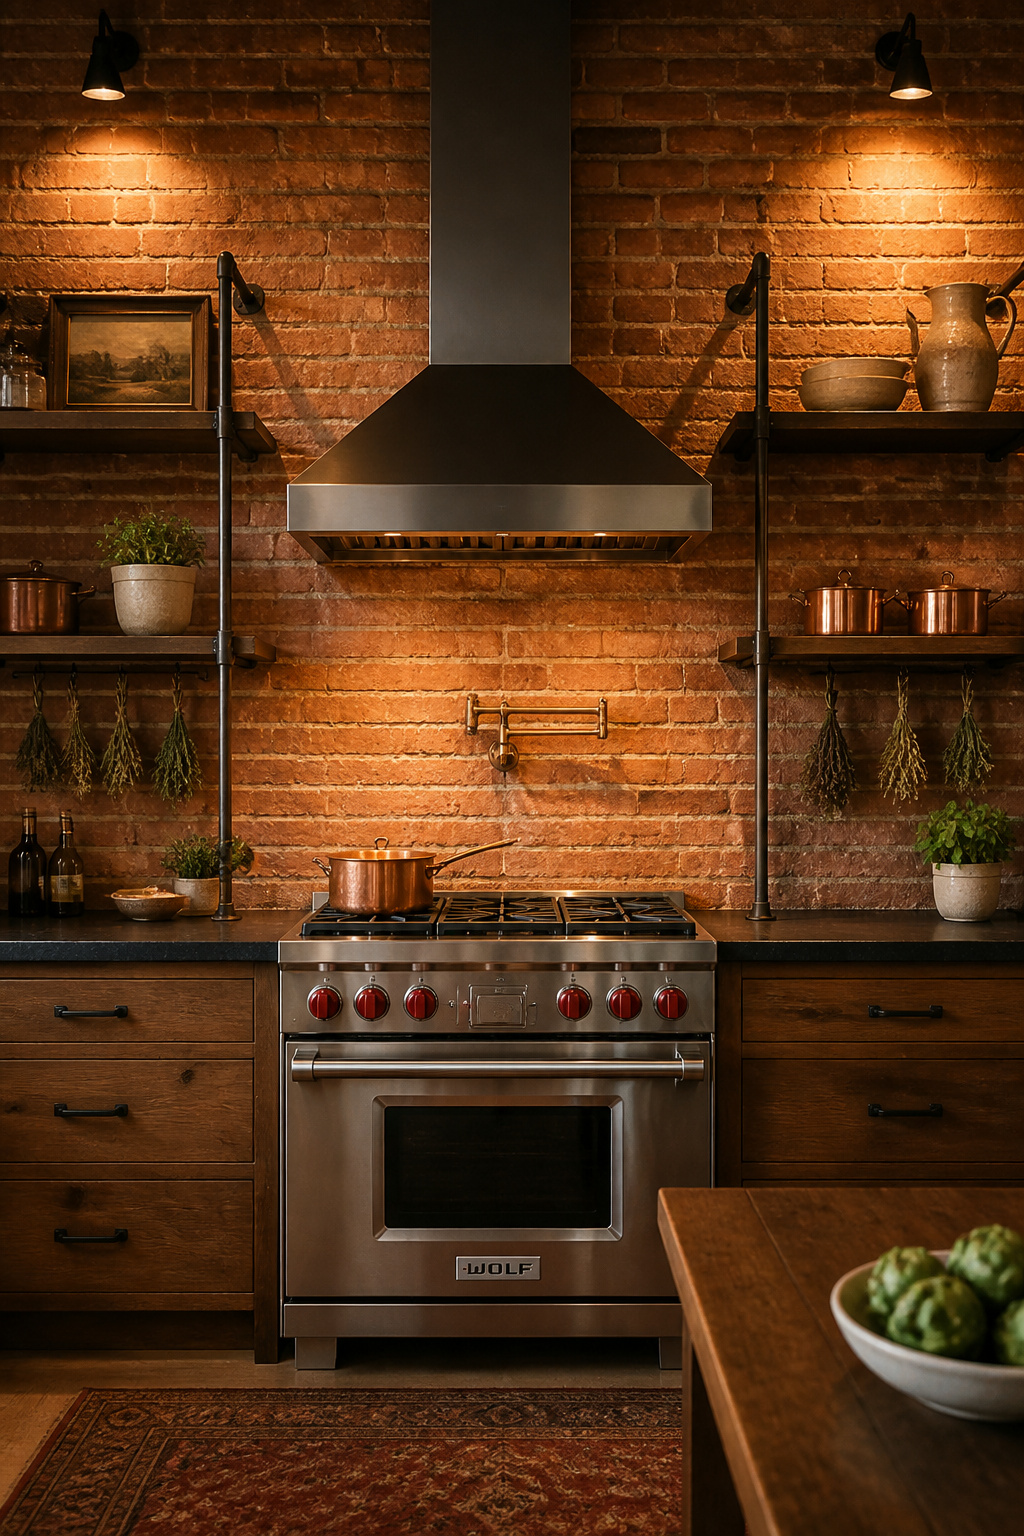
Impact and Practicality
The range wall is where design investment delivers the highest return. Covering it in brick adds texture, warmth, and depth that flat tile or paint cannot approach. The brick also absorbs rather than reflects light, which creates a visual anchor in an otherwise reflective kitchen. From a practical standpoint, brick behind a range is heat-tolerant. When sealed, it is also easier to clean than grout-heavy tile.
If genuine brick exists behind plaster or drywall in a conversion, exposing it is always preferable to veneer. Budget $500–$1,500 for professional repointing and cleaning of a standard range wall. For new construction or concrete block walls, thin brick veneer panels (¾ inch thick) run $8–$15 per sq ft installed. They look convincing when pointed properly.
Sealing for a Kitchen Environment
Kitchen brick needs a penetrating sealer to resist grease absorption. Unsealed brick behind a range darkens with grease that cannot be removed. Miracle 511 Impregnator or equivalent silane-based sealers work well. Reapply every three to five years.
9. Industrial Kitchen Island With Butcher Block and Steel Base
The kitchen island in a well-planned space is the room’s social centre. It is the place where people lean, eat, and talk while someone cooks. A steel-fabricated base with a thick butcher block top captures the contradiction that makes industrial design in a home work. Functional hardness alongside organic warmth.
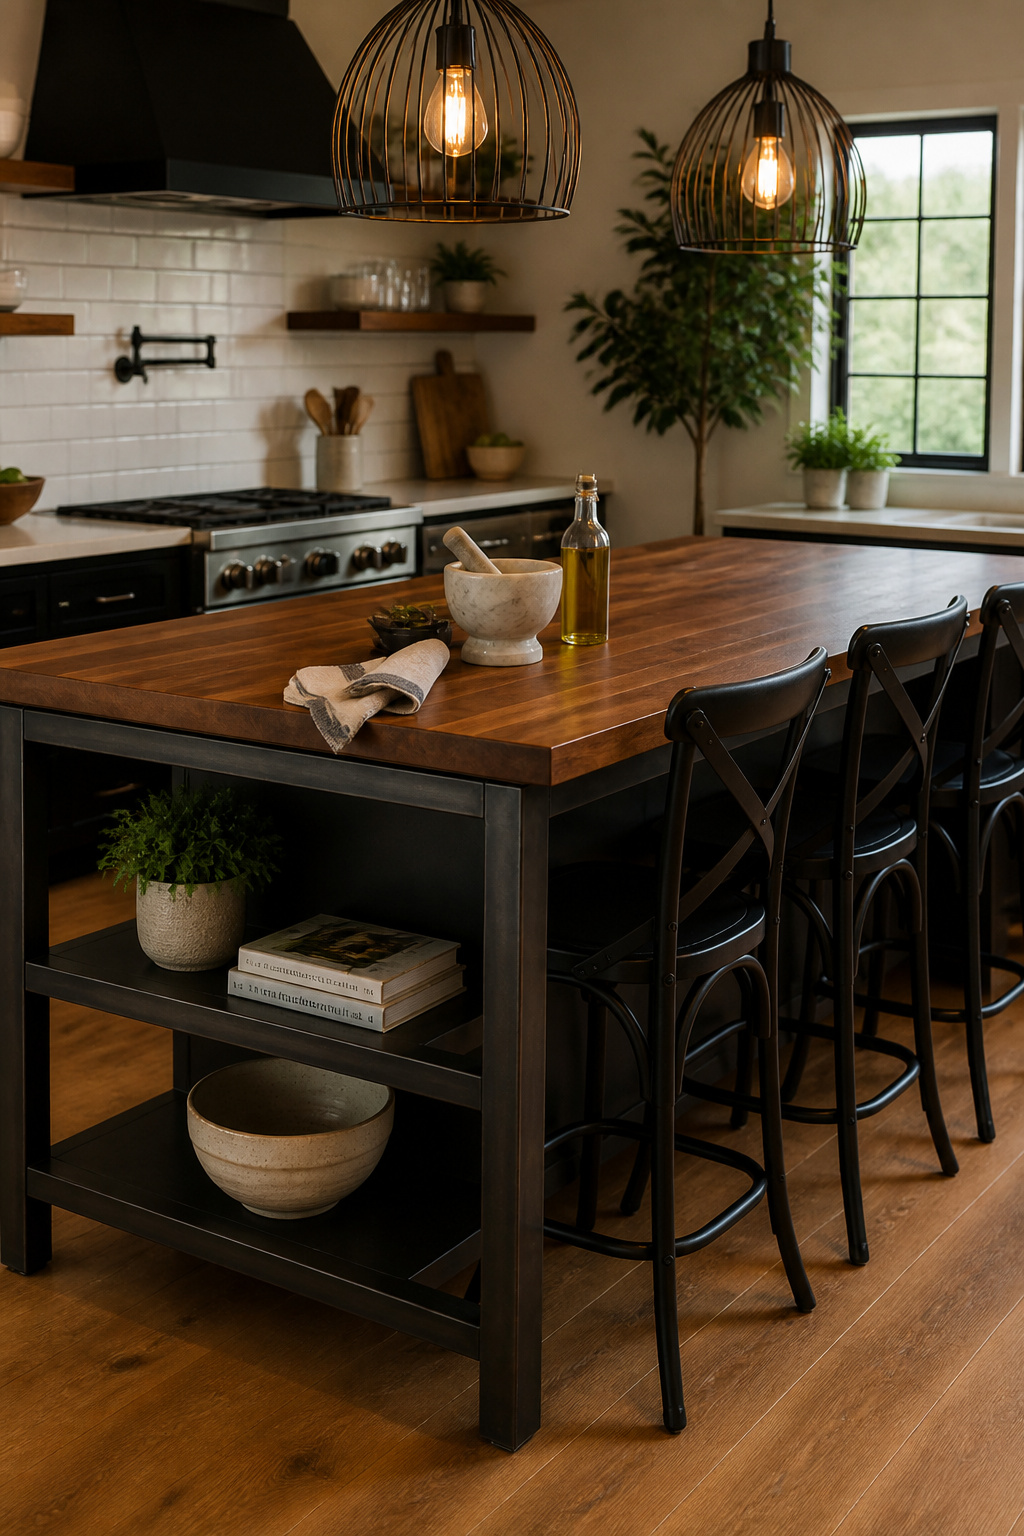
Why the Contrast Works
Steel and concrete speak in straight lines and manufactured precision. Wood speaks in organic warmth and natural irregularity. Edge-grain butcher block with its visible stave joints and grain variation is the best example. Placing them in direct contact creates visual tension that reads as intentional rather than accidental. For storage integration strategies that complement a steel-base island, see our guide to kitchen island cabinets.
Specifying the Base and Caring for the Top
A fully welded steel island base costs $1,500–$4,000 from a custom fabricator for a standard 48 × 24-inch base. Powder-coat finish options include flat black, charcoal, dark bronze, and — an interesting warmer choice — deep forest green or navy. Bolt-together steel frame kits ($300–$800) offer a more accessible entry point with the tradeoff of visible fasteners.
Butcher block requires monthly mineral oil treatment for the first six months, then quarterly maintenance. Sand out knife scratches with 220-grit sandpaper followed by re-oiling. With proper care, a quality butcher block top lasts twenty years and develops the kind of worn surface that no manufactured material replicates.
10. Edison Bulb Under-Cabinet Task Lighting for Warm Industrial Glow
The shadows that gather under open shelving and upper cabinets are one of the most common complaints about industrial kitchens, and they’re entirely avoidable. Under-cabinet lighting solves the practical problem while introducing warm, directed light that softens the harder surfaces around it. In industrial kitchen design, this combination of task function and atmospheric warmth is more valuable than it might seem.
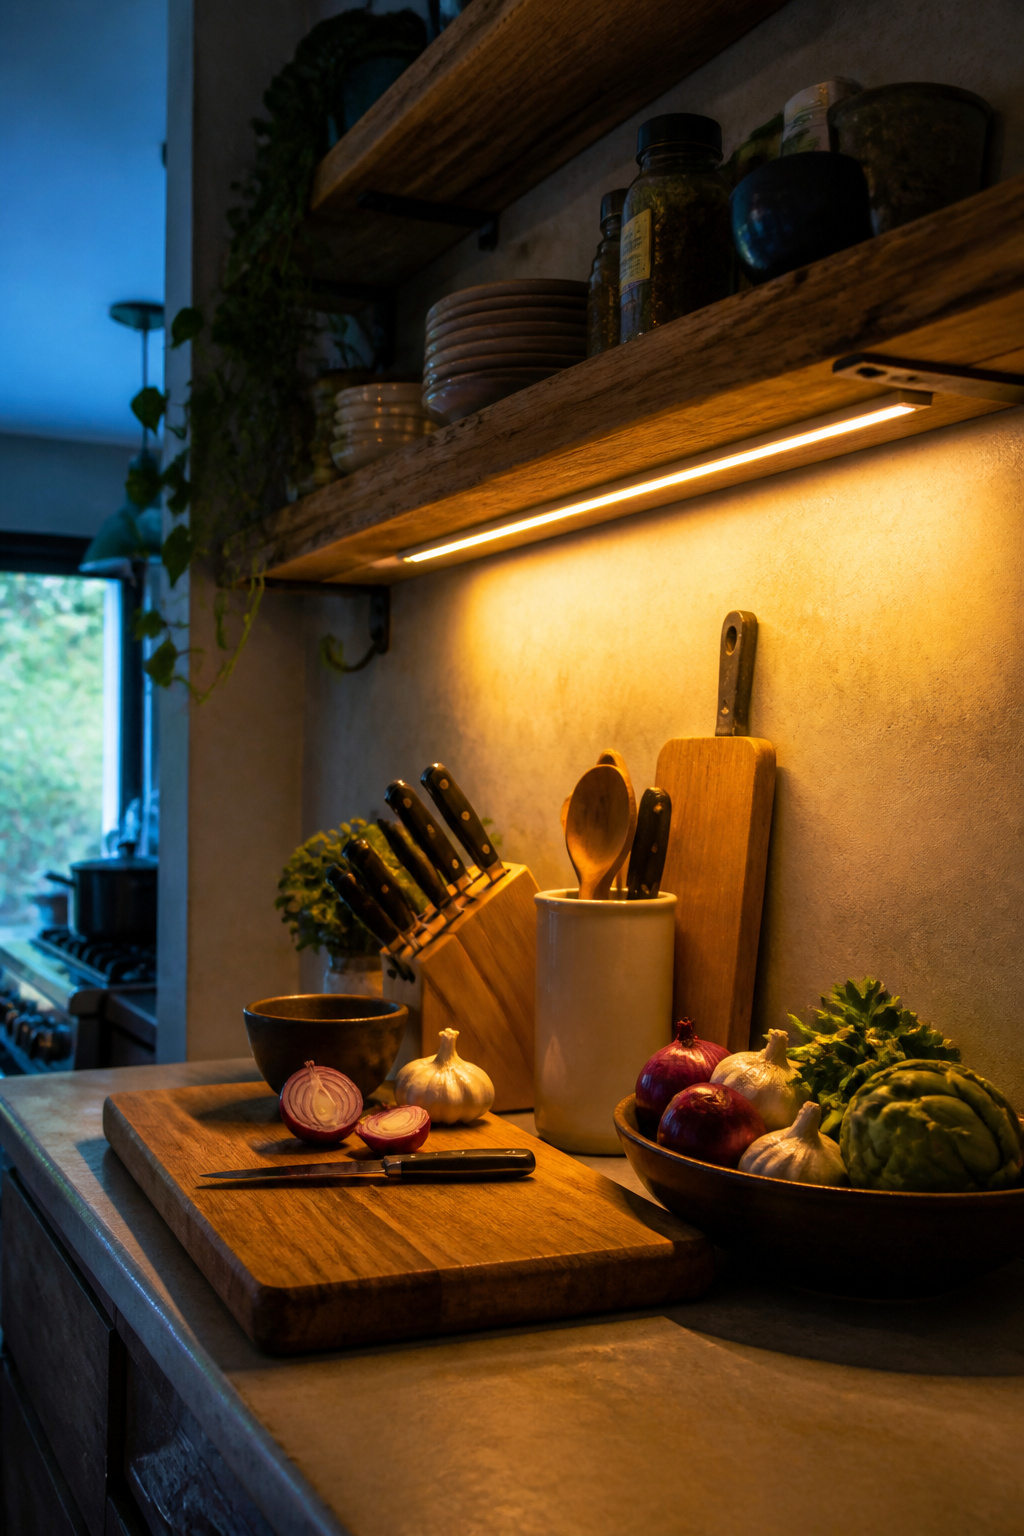
Choosing the Right Bulb and Concealing the Wiring
Traditional Edison bulbs produce significant heat in an enclosed under-cabinet position. LED filament alternatives (LIFX, Philips WiZ, or Feit Electric) reproduce the same warm amber appearance at 2200–2700K colour temperature while running cool and consuming 80% less energy. For an industrial kitchen, the 2200K end — the warmest, most amber — creates the best contrast against cooler surfaces.
For a clean installation, run wiring through the cabinet interior rather than along the exterior face. Recessed puck lights or slim LED strip profiles in an aluminium channel give a professional finish. If surface-mounting is unavoidable, route cables in ½-inch steel conduit — it looks deliberate and fits the overall vocabulary of the kitchen.
11. Urban Kitchen Design: Visible Ductwork as an Architectural Feature
In a conventional kitchen, ductwork gets hidden behind bulkheads and drop ceilings. In an industrial kitchen, you bring it forward. Exposed ductwork is authentic to the spaces that inspired the aesthetic. When routed intentionally, it signals architectural confidence rather than an unfinished job.
Making Ductwork Look Intentional
The difference between exposed ductwork that reads as designed and ductwork that reads as neglected is entirely in the routing and finish. Work with your HVAC designer to route ventilation in parallel with structural beams at a consistent height — a run that follows the beam line disappears into the architecture. Round ductwork (spiral pipe) has a cleaner aesthetic than rectangular ductwork for residential use. For finish, powder-coating in flat black, dark charcoal, or a deep forest green coordinates the ducts with other metal elements in the kitchen.
12. Steel-Casement Factory Windows That Flood the Space With Light
Steel-casement windows are to the industrial kitchen what exposed brick is to the loft bedroom. Nothing else adequately replicates the aesthetic they create. Their thin sight lines maximise glass area, and their materiality is completely direct. In any industrial kitchen design that takes authenticity seriously, these windows are worth the investment.
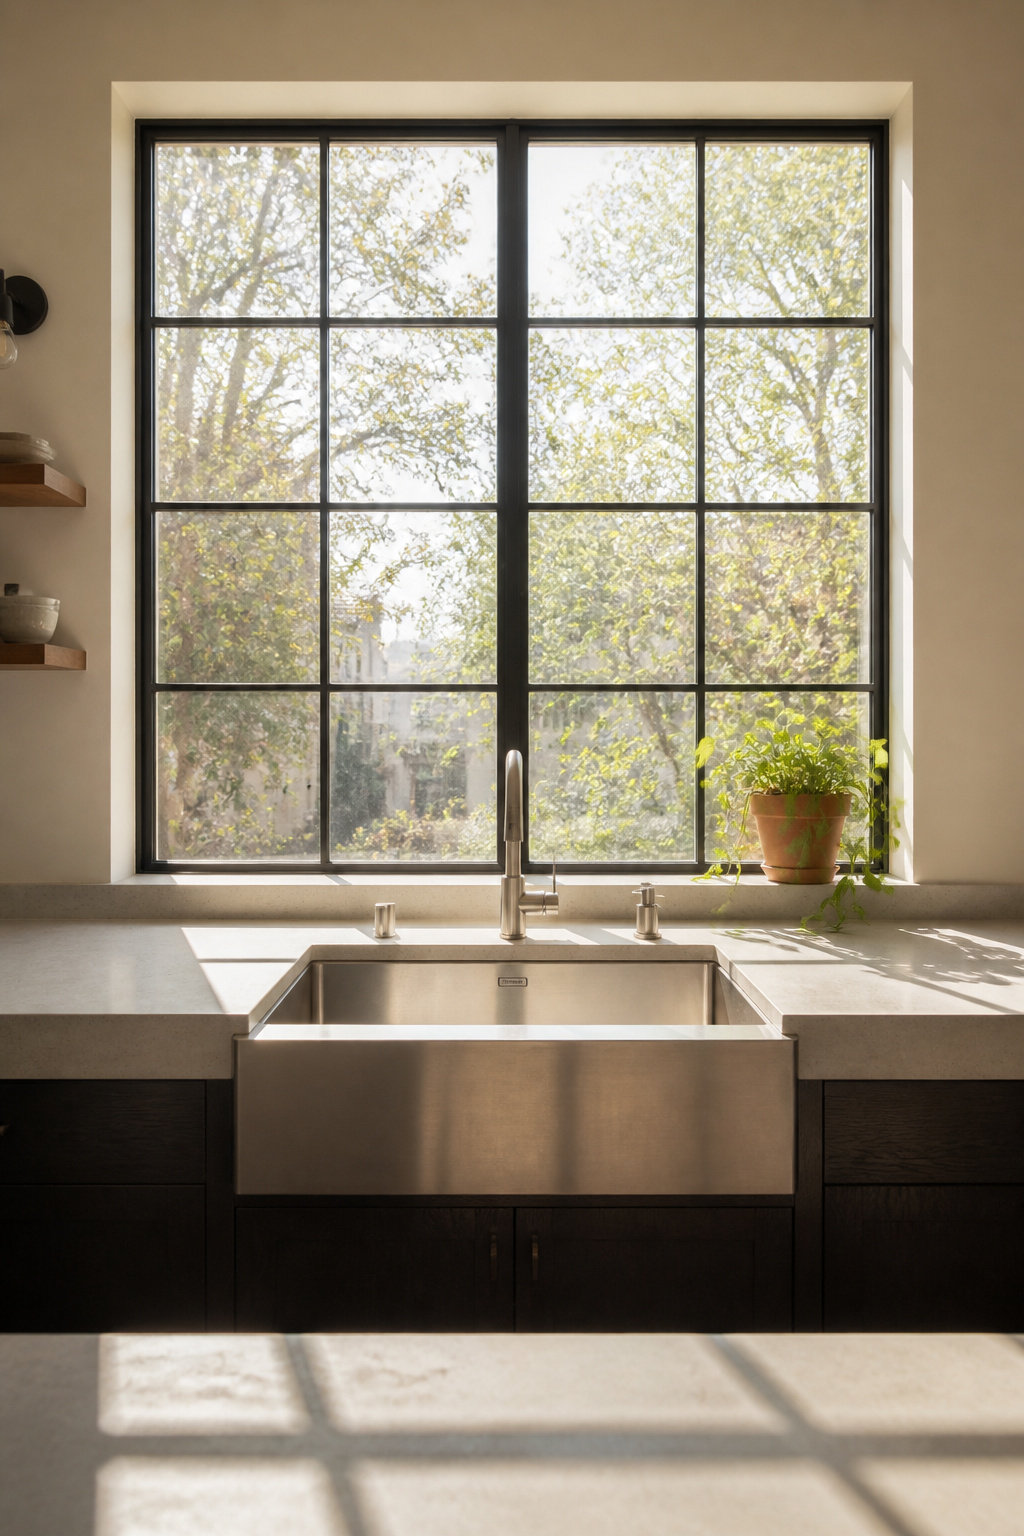
Heritage and Modern Options
Steel-casement windows were standard in commercial and industrial construction from the 1880s through the mid-20th century. Heritage versions by Hope’s Windows (US) and Crittall (UK) remain in production and are correct for period conversions, running $150–$350 per sq ft installed. Thermally broken modern versions from Brombal and Black Millwork offer contemporary energy performance at similar prices.
For most kitchen projects, the critical placement is above the sink — a large steel-casement window in this position is the most direct historical reference and the most practical. A minimum 36 × 48-inch window makes the architectural statement. If exterior window budget is a constraint, steel-casement interior windows between kitchen and dining room give the aesthetic at a fraction of the cost.
13. Industrial Kitchen Design: Dark Cabinets With Wire Mesh or Open Frames
Dark cabinet colours — charcoal, deep forest green, navy, matte black — are the natural choice for an industrial kitchen. They recede visually, allowing the kitchen’s raw material elements to advance. Wire mesh door inserts add texture and authenticity that solid or glass panels don’t provide.
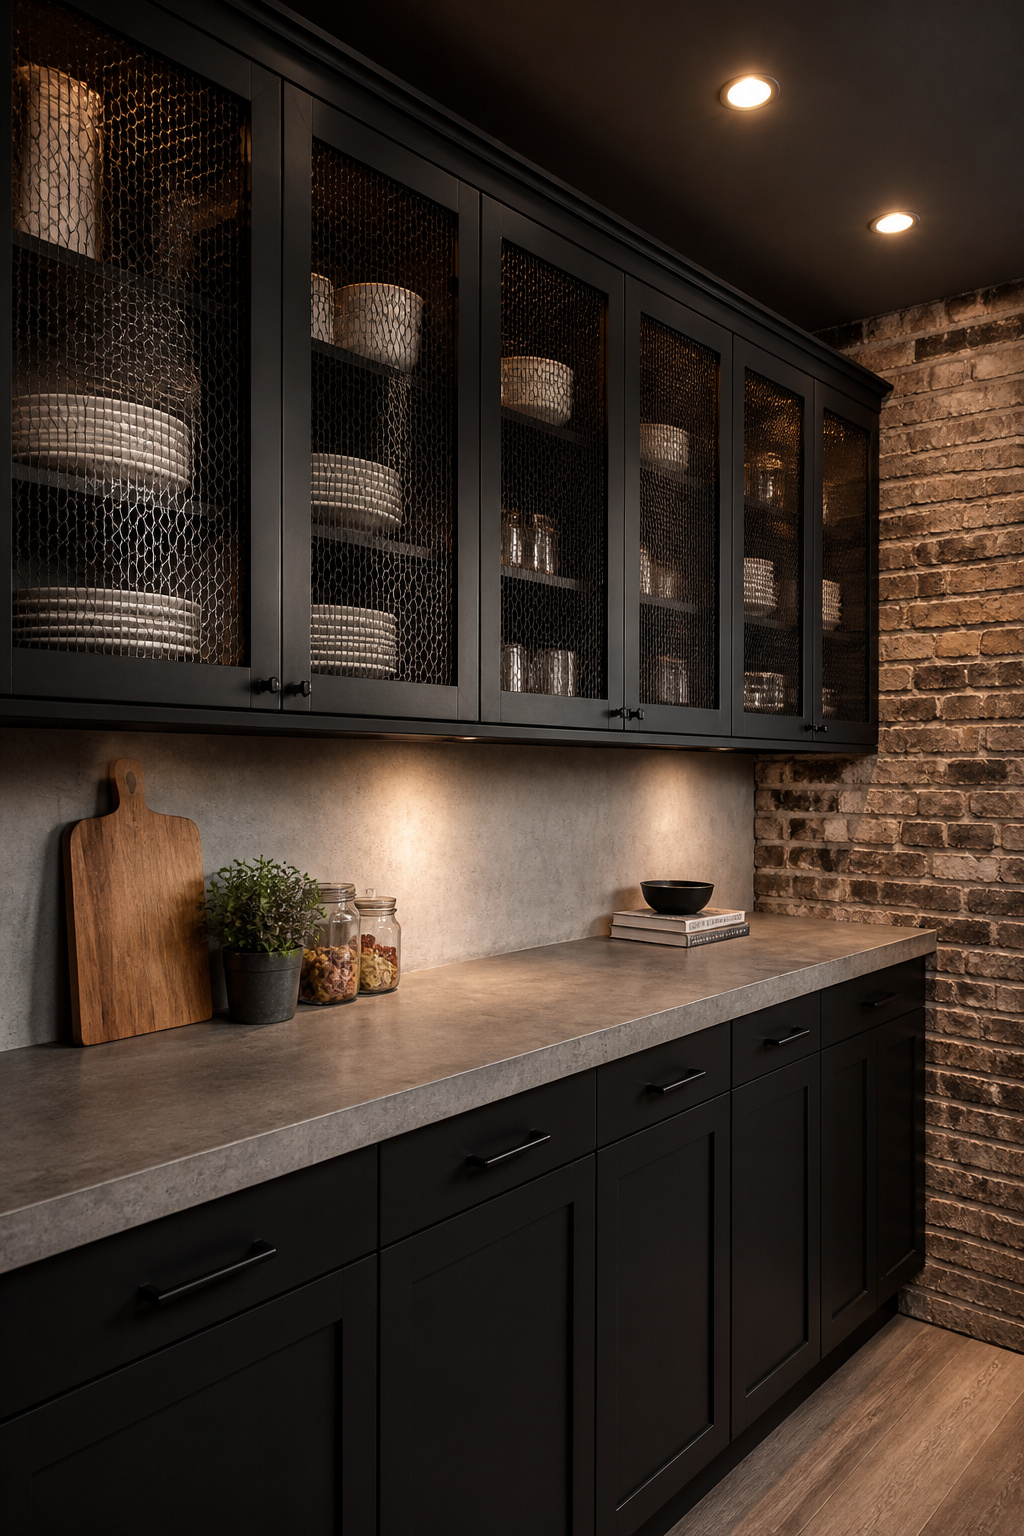
The Case for Dark Cabinets
Unlike white kitchens that rely on brightness for their effect, industrial kitchens work best when cabinets act as a structural backdrop. Farrow & Ball’s Off-Black or Down Pipe, Benjamin Moore’s Wrought Iron — these colours ground the kitchen and coordinate with matte black hardware without the visual churn that dark cabinets and light hardware create.
Wire mesh insert panels — 16-gauge expanded metal or woven mesh in a powder-coated black finish — add an industrial texture that flat doors lack. They also allow ventilation for stored items and a partial view of the cabinet interior that softens an otherwise heavy upper cabinet run. Retrofit inserts can replace the centre panel on existing cabinet doors, typically costing $50–$120 per door for fabrication and installation.
14. Salvaged Wood Floating Shelves as the Warmth Counterpoint
If there is one material in an industrial kitchen that prevents it from reading as cold and institutional, it’s salvaged or reclaimed wood. Exposed steel and concrete are beautiful — but without wood’s warmth in the mix, the kitchen never fully relaxes into a space you want to spend time in.
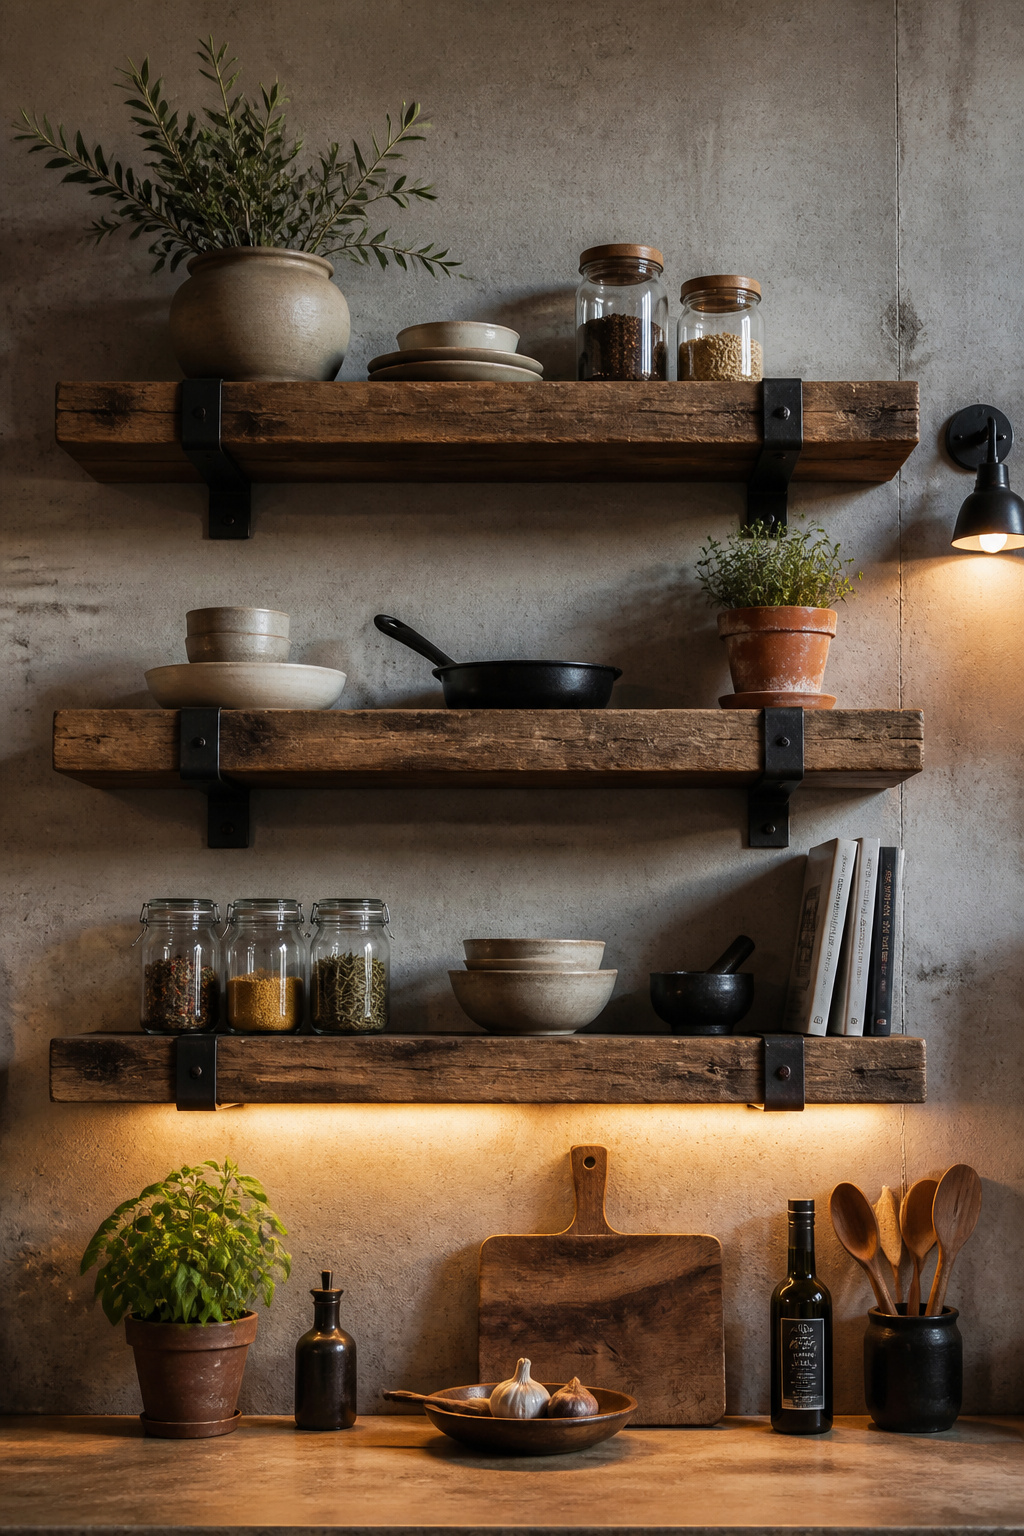
Why Salvaged Wood Works Here
Reclaimed wood brings genuine age, surface history, and colour variation. Manufactured materials cannot replicate any of these qualities. A thick slab of 80-year-old barn oak has nail holes, weathering, and grain patterns that no new timber approaches. This authenticity reads in the room as warmth and character — and it also connects to the salvage and repurposing ethic that informed early industrial design in the first place.
For kitchen shelves, choose reclaimed wood that has been kiln-dried after reclamation for dimensional stability. Finish with a hard-wax oil (Rubio Monocoat or Osmo) for water and oil resistance while preserving the wood’s natural appearance. For related advice on pairing wood surfaces with other kitchen materials, see our overview of kitchen countertop ideas.
15. Loft Kitchen Design: Bar-Height Island Seating for Urban Socializing
The kitchen island in a loft or open-plan urban home isn’t just a work surface — it’s the primary social gathering point of the space. Bar-height seating transforms the island into a place where people stay, rather than passing through.
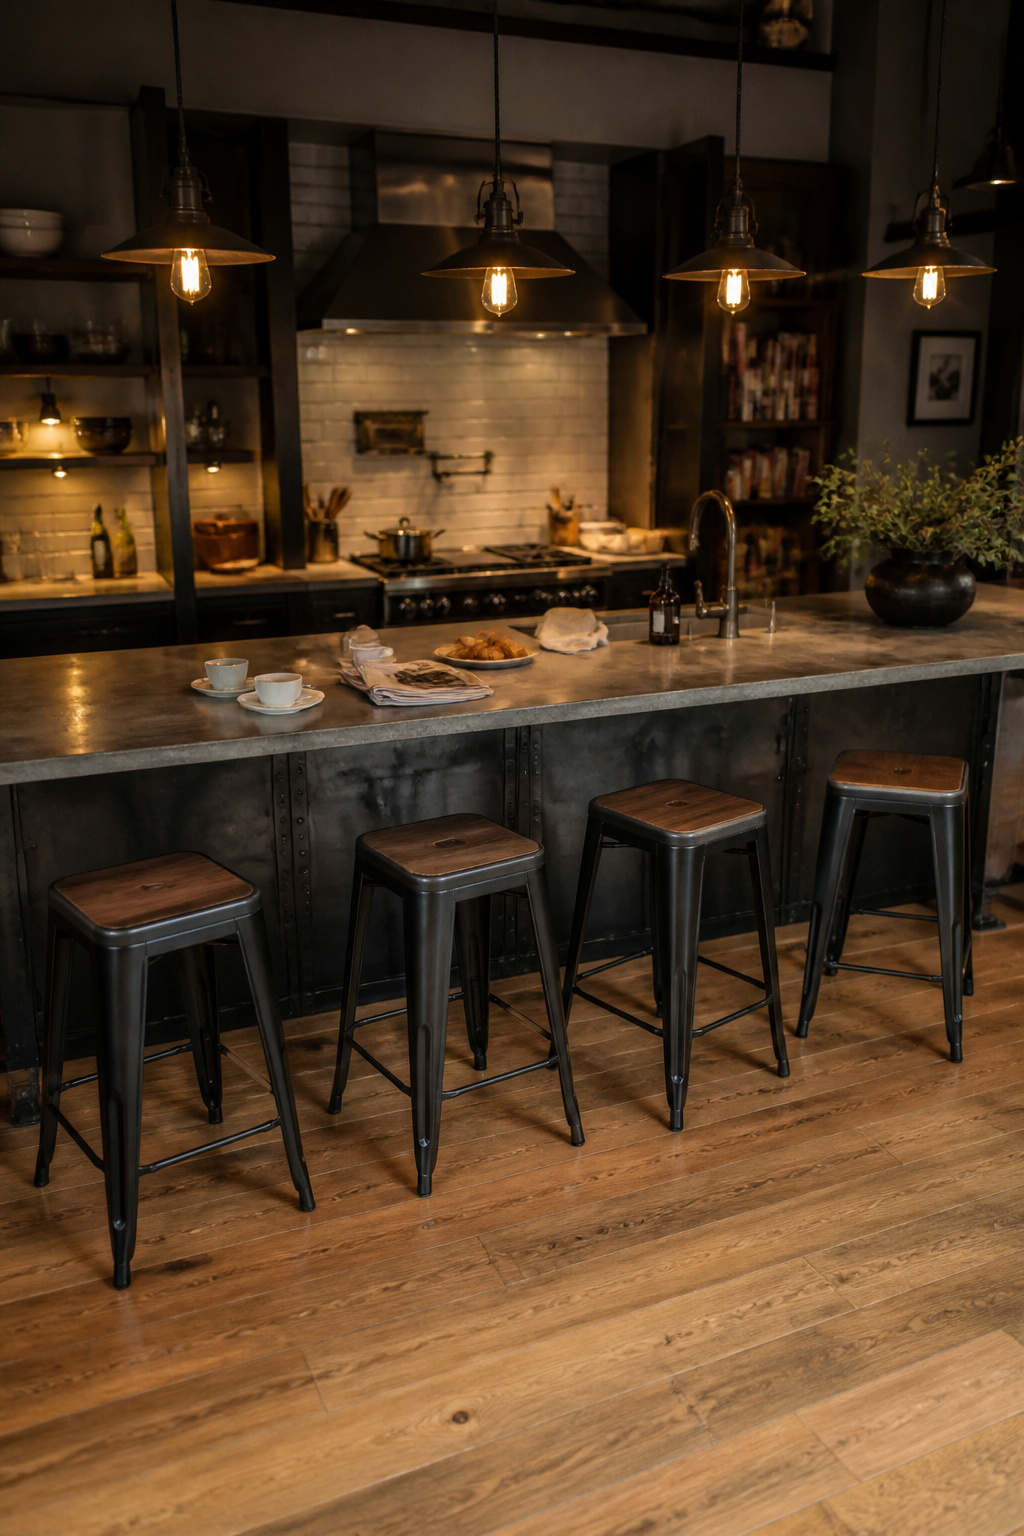
Why Bar Height Changes the Dynamic
Counter-height stools (24 inches for a 36-inch counter) seat guests below the cook. This creates a host-and-audience configuration. Bar-height stools (29–32 inches for a 42-inch counter) place guests at near-eye-level with someone standing at the island. The cook can hold a conversation rather than narrating from above.
The Tolix A-Stool (around $300 new, widely available secondhand for $60–$150) remains the defining industrial bar stool — its pressed steel construction and visible welds are authentic rather than decorative. Allow 17–20 inches of counter width per stool and 6 inches of knee clearance below the counter edge.
16. Utility Sinks and Commercial-Style Faucets With Industrial Presence
The kitchen sink is a working tool first and a design element second — but in an industrial kitchen there’s no reason it can’t be both. The right sink-and-faucet combination adds more visual authority than almost any other fitting choice.
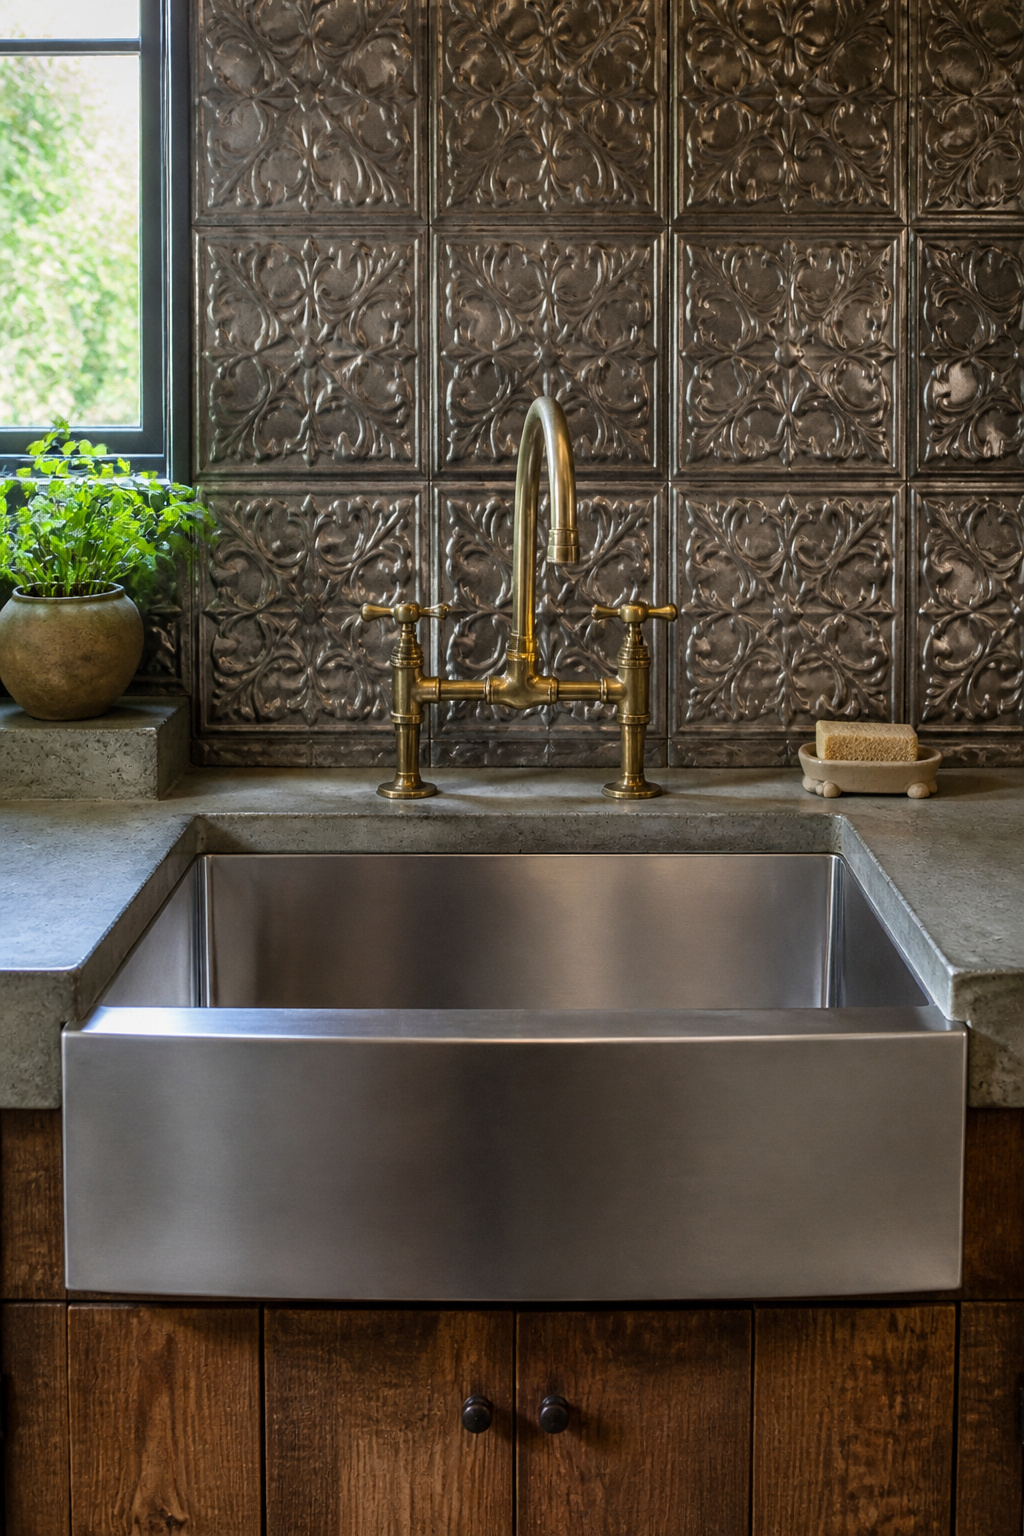
Sink Selection and Faucet Coordination
The apron-front (farmhouse) sink places the front face of the basin exposed rather than hidden behind cabinetry. Originally developed for working utility kitchens where large basins were needed for heavy-duty cleaning, this design carries exactly the right heritage for an industrial aesthetic. Deep single-bowl configurations (10 inches minimum) in 16-gauge or 18-gauge stainless are the most durable and appropriate.
Bridge faucets — where a horizontal bar bridges the hot and cold supply connections above the counter — are a Victorian and early industrial design form that reads correctly in this context. The Rohl Perrin & Rowe and Waterstone Annapolis bridge faucet lines are refined examples; Kingston Brass offers more accessible price points. For the broader sink wall material strategy, our kitchen backsplash design guide covers coordination approaches that apply directly.
17. Industrial Kitchen Style: Layering Mixed Metals Across Fixtures
The instinct in industrial kitchen design is to pick one metal and apply it uniformly — all matte black, all stainless, all aged brass. This produces a coherent result but often a flat one. Intentional metal mixing, using a rule of three, creates a layered richness that reads as more genuinely designed.
The Rule of Three and Which Combinations Work
Industrial spaces historically used whatever metal was available and functional. Cast iron, steel, brass, copper, and galvanised zinc all coexisted in the same factory environment. In a designed residential kitchen, mixing metals deliberately references that functional plurality while introducing warmth and tonal variation that single-metal schemes lack.
One dominant metal (the largest surface area — usually appliances or cabinet hardware), one secondary (light fixtures or faucet), and one accent (a pot rack or drawer hardware in a third finish). Matte black dominant + brushed brass secondary + brushed stainless accent works well with dark cabinets and concrete — the black grounds it, the brass warms it, the stainless keeps it kitchen-appropriate. Avoid mixing mirror-polished chrome with warm finishes; polished chrome reads as conspicuously modern rather than industrial.
18. Statement Range Hoods in Stainless, Patinated Brass, or Custom Metal
The range hood is the highest and most central element in the kitchen’s cooking zone. It’s also one of the most overlooked opportunities in an industrial kitchen. A specification-grade or custom hood turns a ventilation requirement into the crown of the room.
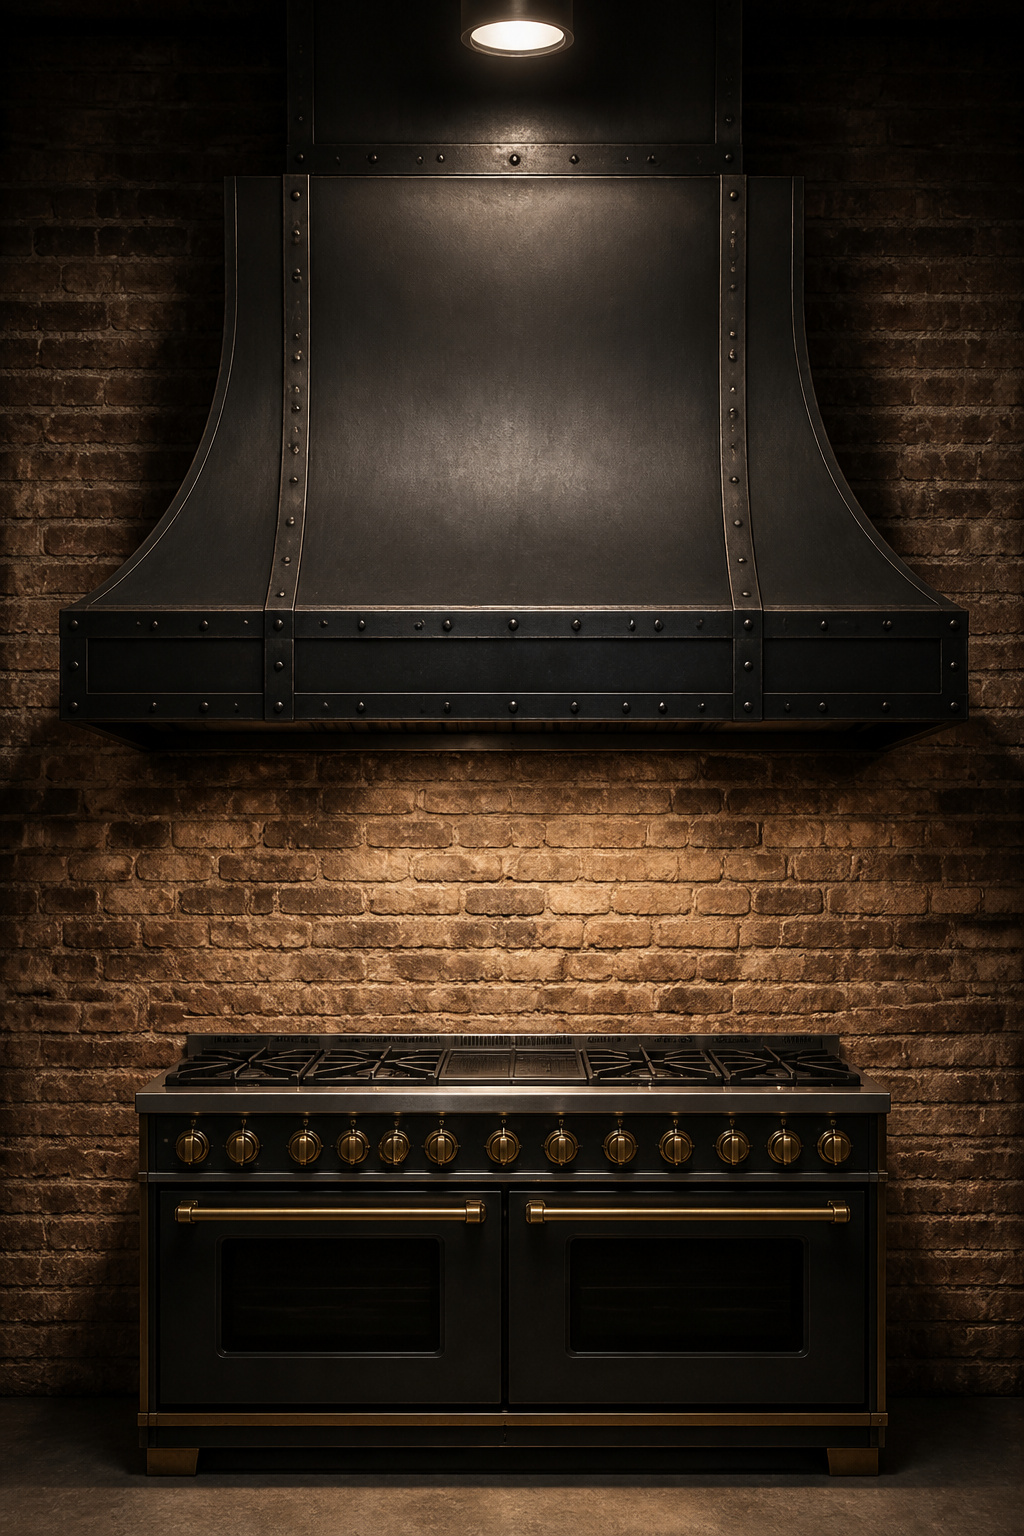
Custom vs. Production and Getting the Size Right
A custom fabricated hood in stainless, copper, patinated steel, or blackened metal typically costs $1,500–$6,000 depending on material and complexity. This is the right choice when the kitchen has been designed specifically around the cooking zone and proportions need to be exact. Production industrial-style hoods from Zephyr, Best, and Hauslane ($400–$2,000) deliver strong aesthetics without the custom lead time — Zephyr’s Modena series achieves the effect effectively for most renovation projects.
Size the hood to extend 3 inches beyond the range on each side — a 36-inch range needs a 42-inch hood minimum. CFM requirements depend on BTU output: gas ranges producing over 60,000 BTUs need at least 600 CFM; professional-grade ranges with 100,000-plus BTUs need 900–1,200 CFM. A hood that looks correct but is underspecified for ventilation will fill the kitchen with cooking fumes regardless of how good it looks.
Putting Your Industrial Kitchen Design Together: Where to Start
Most people approach a kitchen renovation by choosing surfaces first. They find a concrete countertop photo they love and build outward. In an industrial kitchen design, this usually leads to a collection of individually attractive elements that don’t fully cohere. Industrial kitchen design rewards patience with the sequencing process. The stronger approach is to structure decisions correctly.
Structure First, Then Surfaces, Then Hardware and Lighting
Decide on layout, island placement, and window specification first. Also settle whether ductwork or brick will be exposed before anything else. These decisions are difficult and expensive to reverse. Second, choose floor and wall surfaces — concrete flooring and brick walls establish the visual foundation for everything above them.
Then specify the major character elements: cabinet colour and door style, countertop material, appliances, and range hood. Only after these are locked in should you be choosing hardware, lighting, and styling. Hardware and lighting are the most forgiving decisions — they can be changed without major expense if the first choice proves wrong.
Where to Invest and Where to Save
Invest in materials you touch every day and see from across the room: the countertop, cabinet doors, range, and island. Also invest in structural elements you cannot change cheaply. The floor, exposed brick, and steel-casement windows all fall into this category.
Save on items that are easily replaced: bar stools, pendant light shades, open shelf styling, and smaller fittings. A well-executed industrial kitchen design is a long-term space — it should feel more itself in ten years than it does on day one. Start with the bones right and the rest follows.