
When I’m stripping back layers of paint on a vintage restoration project, I’m constantly reminded that “rustic” wasn’t originally a style choice—it was survival. The aesthetic we covet today is a deliberate callback to designs rooted in necessity, where materials like reclaimed wood and cast iron were selected strictly for durability and regional availability. True rustic design champions sustainability because it refuses to hide the structural “bones” of a space; it celebrates the rough-hewn textures that prove a home was built to last. To bring this honest, resourceful energy into a modern space, mastering rustic kitchen decor requires focusing on these three core principles:
- Define Your Cultural Root: “Rustic” isn’t monolithic. Before sourcing materials, decide if you are channeling the simplicity of a Shaker workshop or the heavy timbers of an Alpine lodge—sticking to one regional narrative prevents a chaotic, inauthentic mix.
- Follow the “Visible Hardware Rule”: Stop hiding the mechanics. Incorporate exposed iron hinges, large brackets, and visible joinery to signal historical integrity and structural strength.
- Blur the Utility/Luxury Line: Create tension by pairing high-tech, commercial-grade appliances with matte, aged surfaces. The contrast between a polished modern range and a scarred butcher block counter perfectly illustrates the journey from necessary function to modern luxury.
Material Honesty: The Foundation of Sustainable Rustic Kitchen Decor
Since the era of agrarian homesteading, the rustic kitchen decor has served as the hardworking heart of the home, evolving from a necessity of survival to a deliberate celebration of warmth and authenticity.
True rustic style isn’t about buying a reproduction farmhouse sign; it’s about honoring materials that have survived generations. In my restoration work, I’ve found that the most inviting kitchens embrace “material honesty”—choosing elements that get better with age rather than wearing out. When you select reclaimed wood flooring or soapstone counters, you are making a sustainable choice that mimics the resourcefulness of early homesteaders who built with what was durable and at hand. Don’t fear the scratch or the stain; instead, opt for unlacquered brass hardware and copper fixtures. Watching them develop a living patina over time adds a layer of authentic history that a factory finish simply cannot fake. This commitment naturally extends to utility, where functionality dictates design.
To transform your kitchen into a hardworking hearth, stop hiding your tools and start celebrating them. The original homestead kitchen was an engine of survival where efficiency dictated design, and you can recreate this authentic warmth by turning function into your primary decor. Here is how to curate a space that feels gathered rather than purchased:
* Expose the Utility: Install visible pot racks or open shelving to display cast iron skillets and stoneware crocks, turning bulk storage into textural art.
* Anchor with Light: Hang oversized, industrial pendants with warm Edison bulbs (2700K) over your island to mimic the magnetic, gathering-spot quality of an original cooking fire.
* Hunt for Heritage: Skip the big-box store island and repurpose a vintage drafting table or a workbench to infuse instant soul and visible craftsmanship into the center of the room.
The Sophisticated Rustic Interior: Celebrating Honest Construction
There is a profound beauty in a kitchen that isn’t afraid to show its life history, a concept I call “honest construction.” In my restoration work, I’ve found that the most soulful spaces reject the plastic perfection of heavy polyurethane sealants in favor of natural oils and waxes that allow reclaimed wood to breathe and deepen in color over time. We must be brave enough to choose living materials that improve with wear—opting for soapstone or honed marble countertops specifically because they will scar and etch. This isn’t damage; it’s a sustainable, evolving patina that tells the story of every meal cooked and shared, turning your kitchen into a future heirloom rather than a showroom.
To create a space that feels authentically rustic but functions like a modern culinary powerhouse, we need to stop hiding the mechanics of the room. True sophistication lies in exposing the “bones” of the architecture and celebrating the utility of the space. When curating your kitchen, prioritize structural transparency and robust functionality over concealment:
* Celebrate the Skeleton: Strip back drywall to reveal heavy timber beams, trusses, or original stone foundations; let the architecture serve as your primary decoration.
* Upgrade the Touchpoints: Replace hidden mechanisms with hand-wrought iron, brass, or blackened steel hardware. Exposed hinges and heavy latches offer a tactile reminder of quality craftsmanship.
* Bridge the Era Gap: Don’t sacrifice performance for a vintage look. Install pro-grade stainless steel ranges, but ground them visually by placing them beneath a textured, hammered copper or reclaimed wood ventilation hood.
Phase 1: The Architectural Shell (Restoring the Bones)
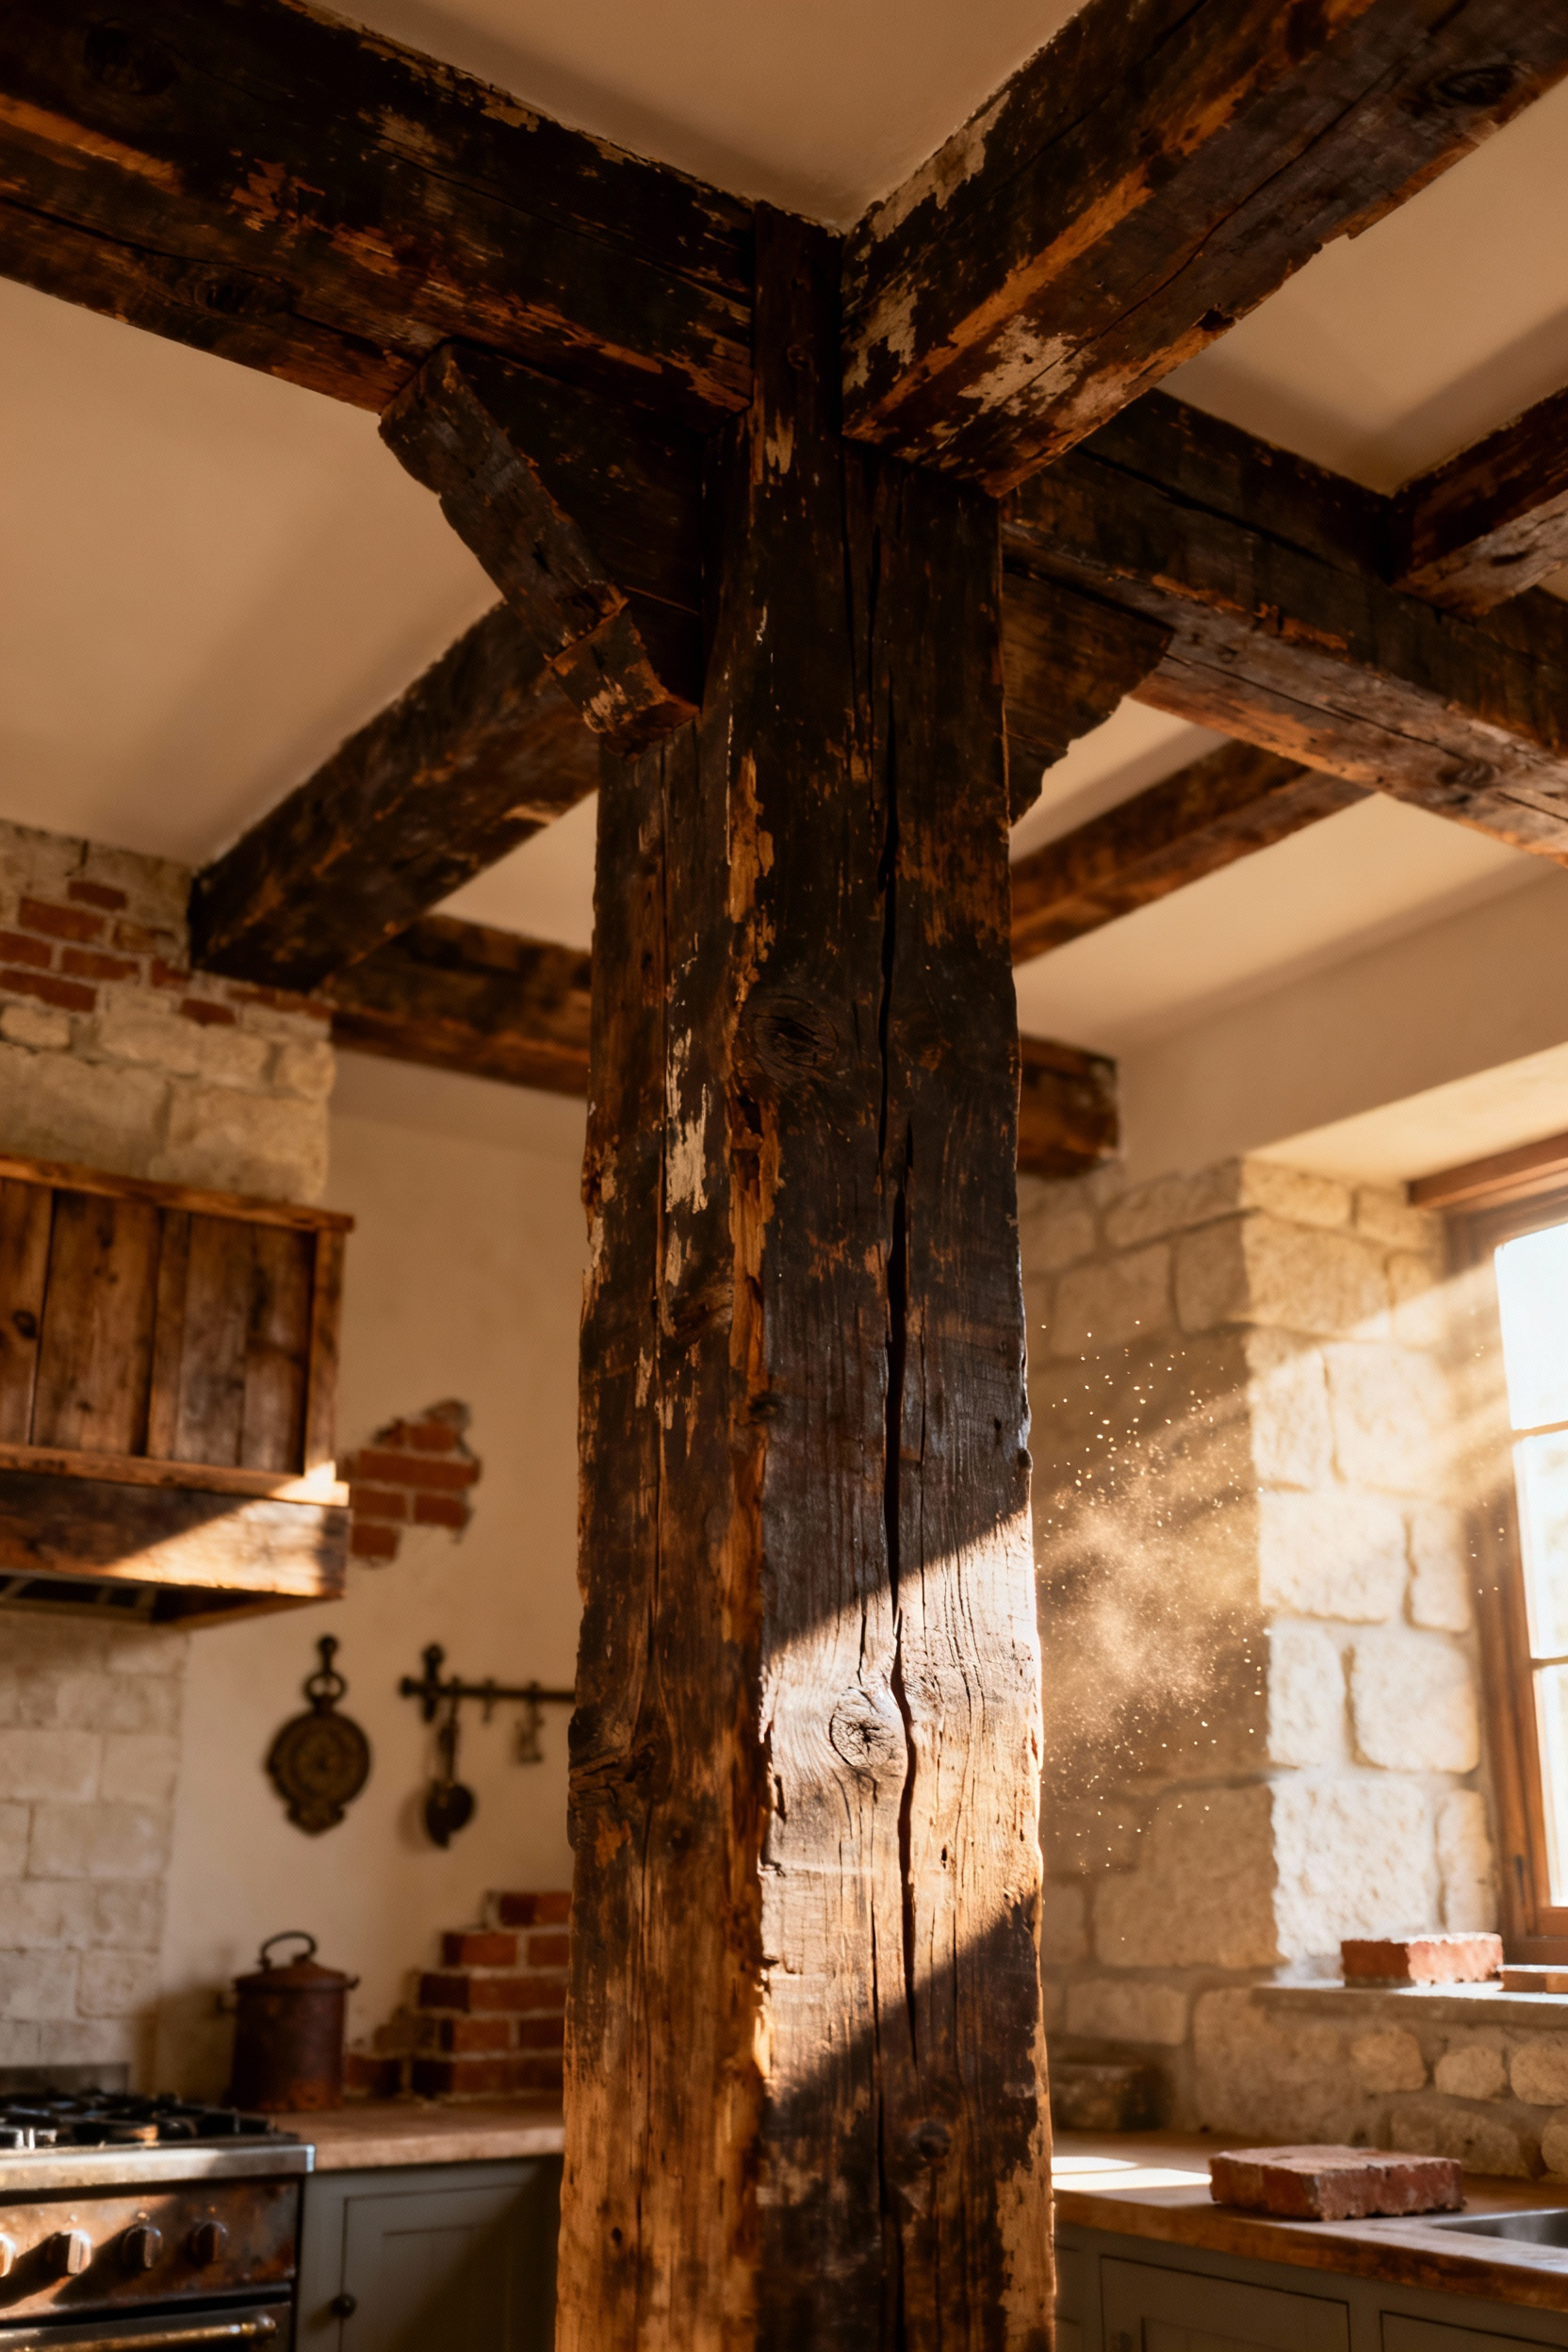
Think of this phase as an excavation for character; the soul of a rustic kitchen isn’t in the appliances, but in the scars and stories of the room itself. I remember tearing down a pristine 1990s dropped ceiling to reveal gorgeous, albeit battered, structural joists that instantly gave the space a sense of history. If your home doesn’t have those original architectural bones, you can ethically recreate them by sourcing reclaimed barn wood for non-structural box beams—just ensure they are sized robustly, as thin faux beams will betray the illusion.
To truly honor the “architectural shell,” you must banish the sterile feel of smooth drywall and standard trim in favor of tactile, substantial materials. Before a single cabinet is carried in, focus on these foundational non-negotiables:
- Anchor the Floor: Commit to 8-inch+ wide plank flooring (reclaimed oak is a sustainable favorite) or natural stone like slate. Crucially, install and seal this before cabinetry to ensure seamless coverage and authentic aging.
- Texturize the Walls: Create depth using lime wash, tongue-and-groove paneling, or rough plaster. If you are using stone veneer, install the base layer now to integrate it structurally.
- Weight the Openings: Swap standard trim for heavy, rough-sawn wood casings (at least 4–6 inches wide) and deep sills. I love adding black iron hardware or forged latches at this stage to give windows a sense of permanence and craftsmanship.
1. Exposing the History: Reclaimed Timber Beams and Rough-Hewn Posts
To me, a reclaimed beam isn’t just a structural element; it is a storyteller holding centuries of history. When hunting for timber, I urge you to embrace the “scars” of craftsmanship—look for deep adze marks, weathered grey patinas, or the hollow pockets of original mortise and tenon joinery. These imperfections provide the visual weight necessary to ground an open-concept kitchen, preventing the aesthetic from drifting into artificial “farmhouse chic.” By positioning a rough-hewn post or beam as a focal point—perhaps spanning above a sleek kitchen island—you aren’t just decorating; you are making a sustainable choice that keeps old-growth forests standing and preserves a piece of the past.

However, bringing the barn inside requires professional preparation to ensure your kitchen remains a sanctuary rather than a restoration nightmare. To balance raw history with modern hygiene and safety, stick to these non-negotiables:
- Demand Kiln-Dried Wood: Never install barn wood straight from the salvage yard. Professional kiln-drying is essential to stabilize the timber and eliminate dormant pests like powderpost beetles.
- Seal Without Shine: Protect the wood near cooking zones with a low-VOC matte sealant. This allows you to wipe down surfaces without altering the wood’s dusty, historic appearance.
- Master the Contrast: Embrace the “Soft Rustic Industrial” trend by pairing heavy, dark Oak or Douglas Fir beams with smooth, honed stone or minimalist hardware. This tension between the rough and the refined is what makes a vintage-inspired space feel timeless.
2. Earthen Foundations: Integrating Terracotta, Flagstone, or Brick Flooring
There is something profoundly grounding about standing on a floor that feels like it was pulled directly from the earth. I once stumbled upon a salvage yard offering reclaimed factory bricks, their tumbled, hand-molded edges whispering history—these are the textures that prevent a renovation from feeling sterile. When choosing your earthen foundation, focus on the dialogue between materials to create a sustainable, timeless look. If you are working with warm, reclaimed oak cabinetry, offset it with cool, pale gray-green flagstone to prevent the room from feeling monolithic. Conversely, use deep charcoal brick or terra cotta to provide a moody, high-contrast anchor for lighter woods.
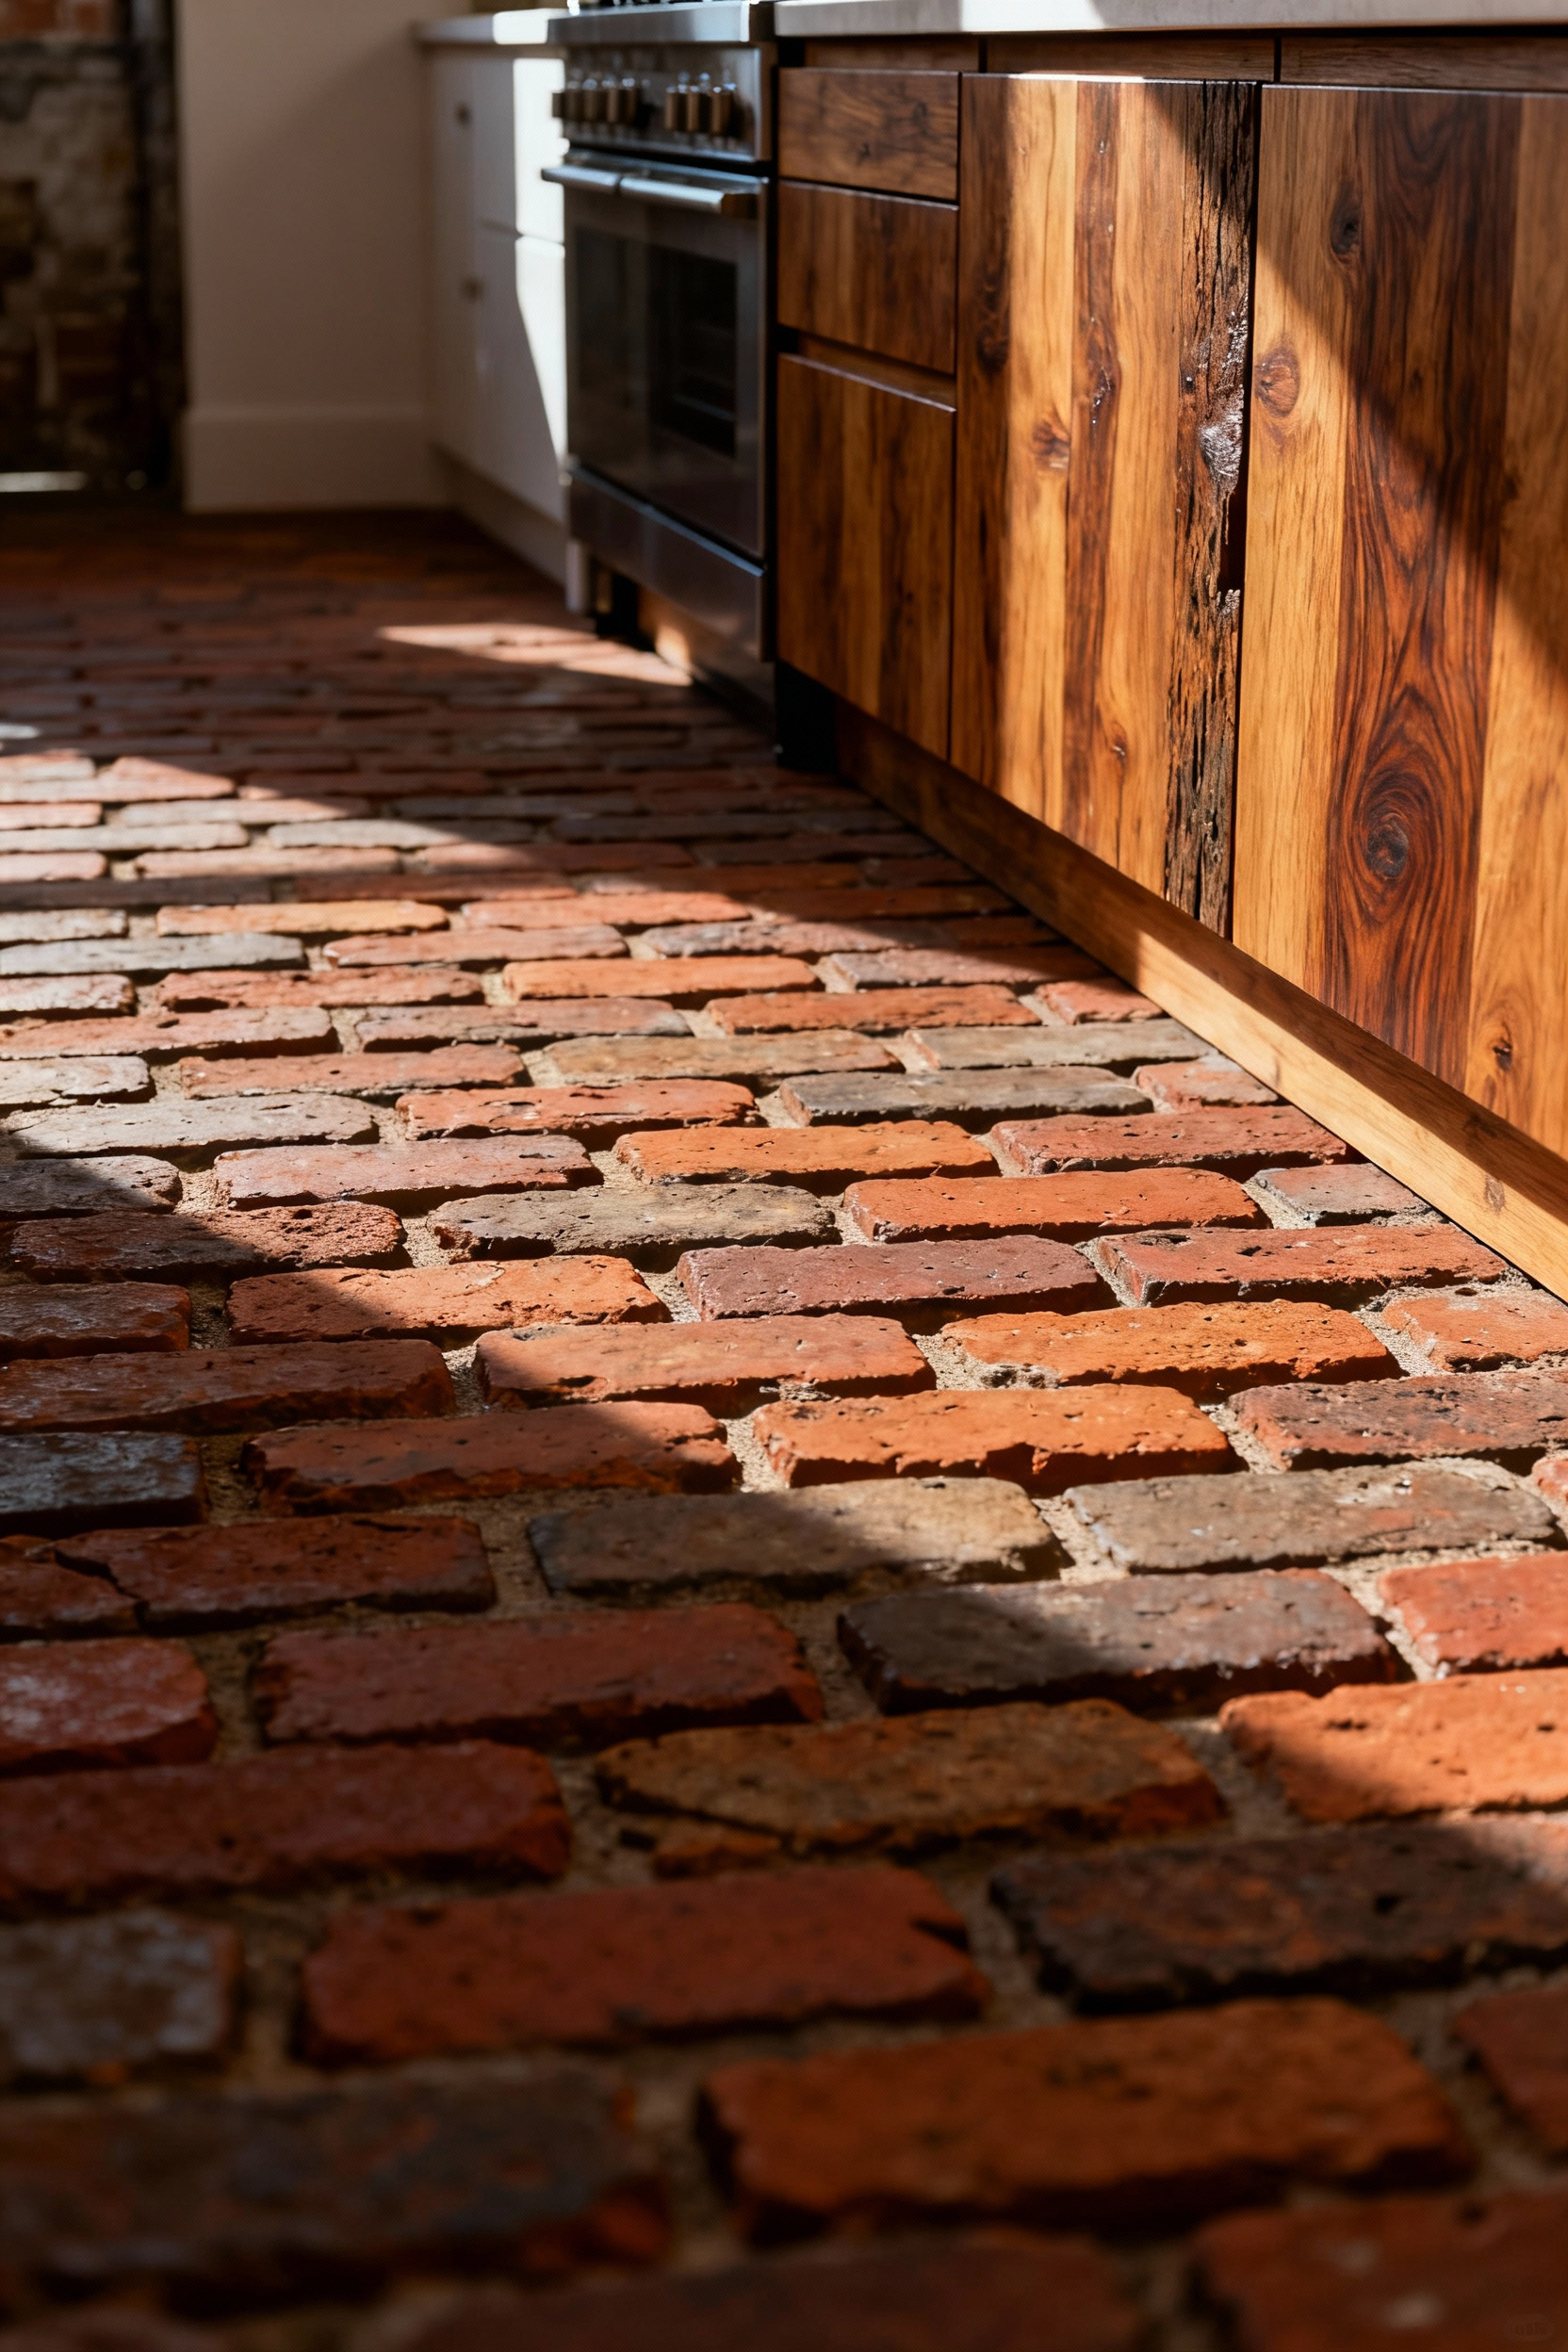
While the nostalgic appeal of natural stone is undeniable, living with earthen floors requires a blend of romance and modern practicality. These materials are naturally porous and cool to the touch, so ensuring longevity and comfort involves three non-negotiable steps:
* Prioritize Sealing: Authentic terracotta and brick are incredibly thirsty; you must use a professional penetrating sealant to guard against olive oil and wine spills, re-applying every 1–3 years.
* Smart Sizing: To reduce maintenance, opt for large-format limestone or slate with tightly packed, dark grout lines, which hides stains better than intricate, small-stone mosaics.
* Hidden Warmth: Don’t let the “cold stone” myth deter you—installing a radiant heating system beneath the flooring is a hidden luxury that makes historic materials livable in modern climates.
3. Textural Depth: Lime Wash Paints and Hand-Troweled Plaster Walls
There is a soulfulness to mineral-based finishes that flat latex simply cannot replicate. I once restored a mid-century modern credenza that felt completely lost against a sterile white wall, but as soon as I introduced the velvety, imperfect movement of lime wash, the warm wood tones immediately sang. To bring that sustainable, old-world depth into your kitchen, bypass glossy finishes in favor of matte Roman clay or lime plaster in putty or sage hues. Because these materials rely on shadow play and light absorption rather than heavy pigment for impact, strategic application is the secret to success:
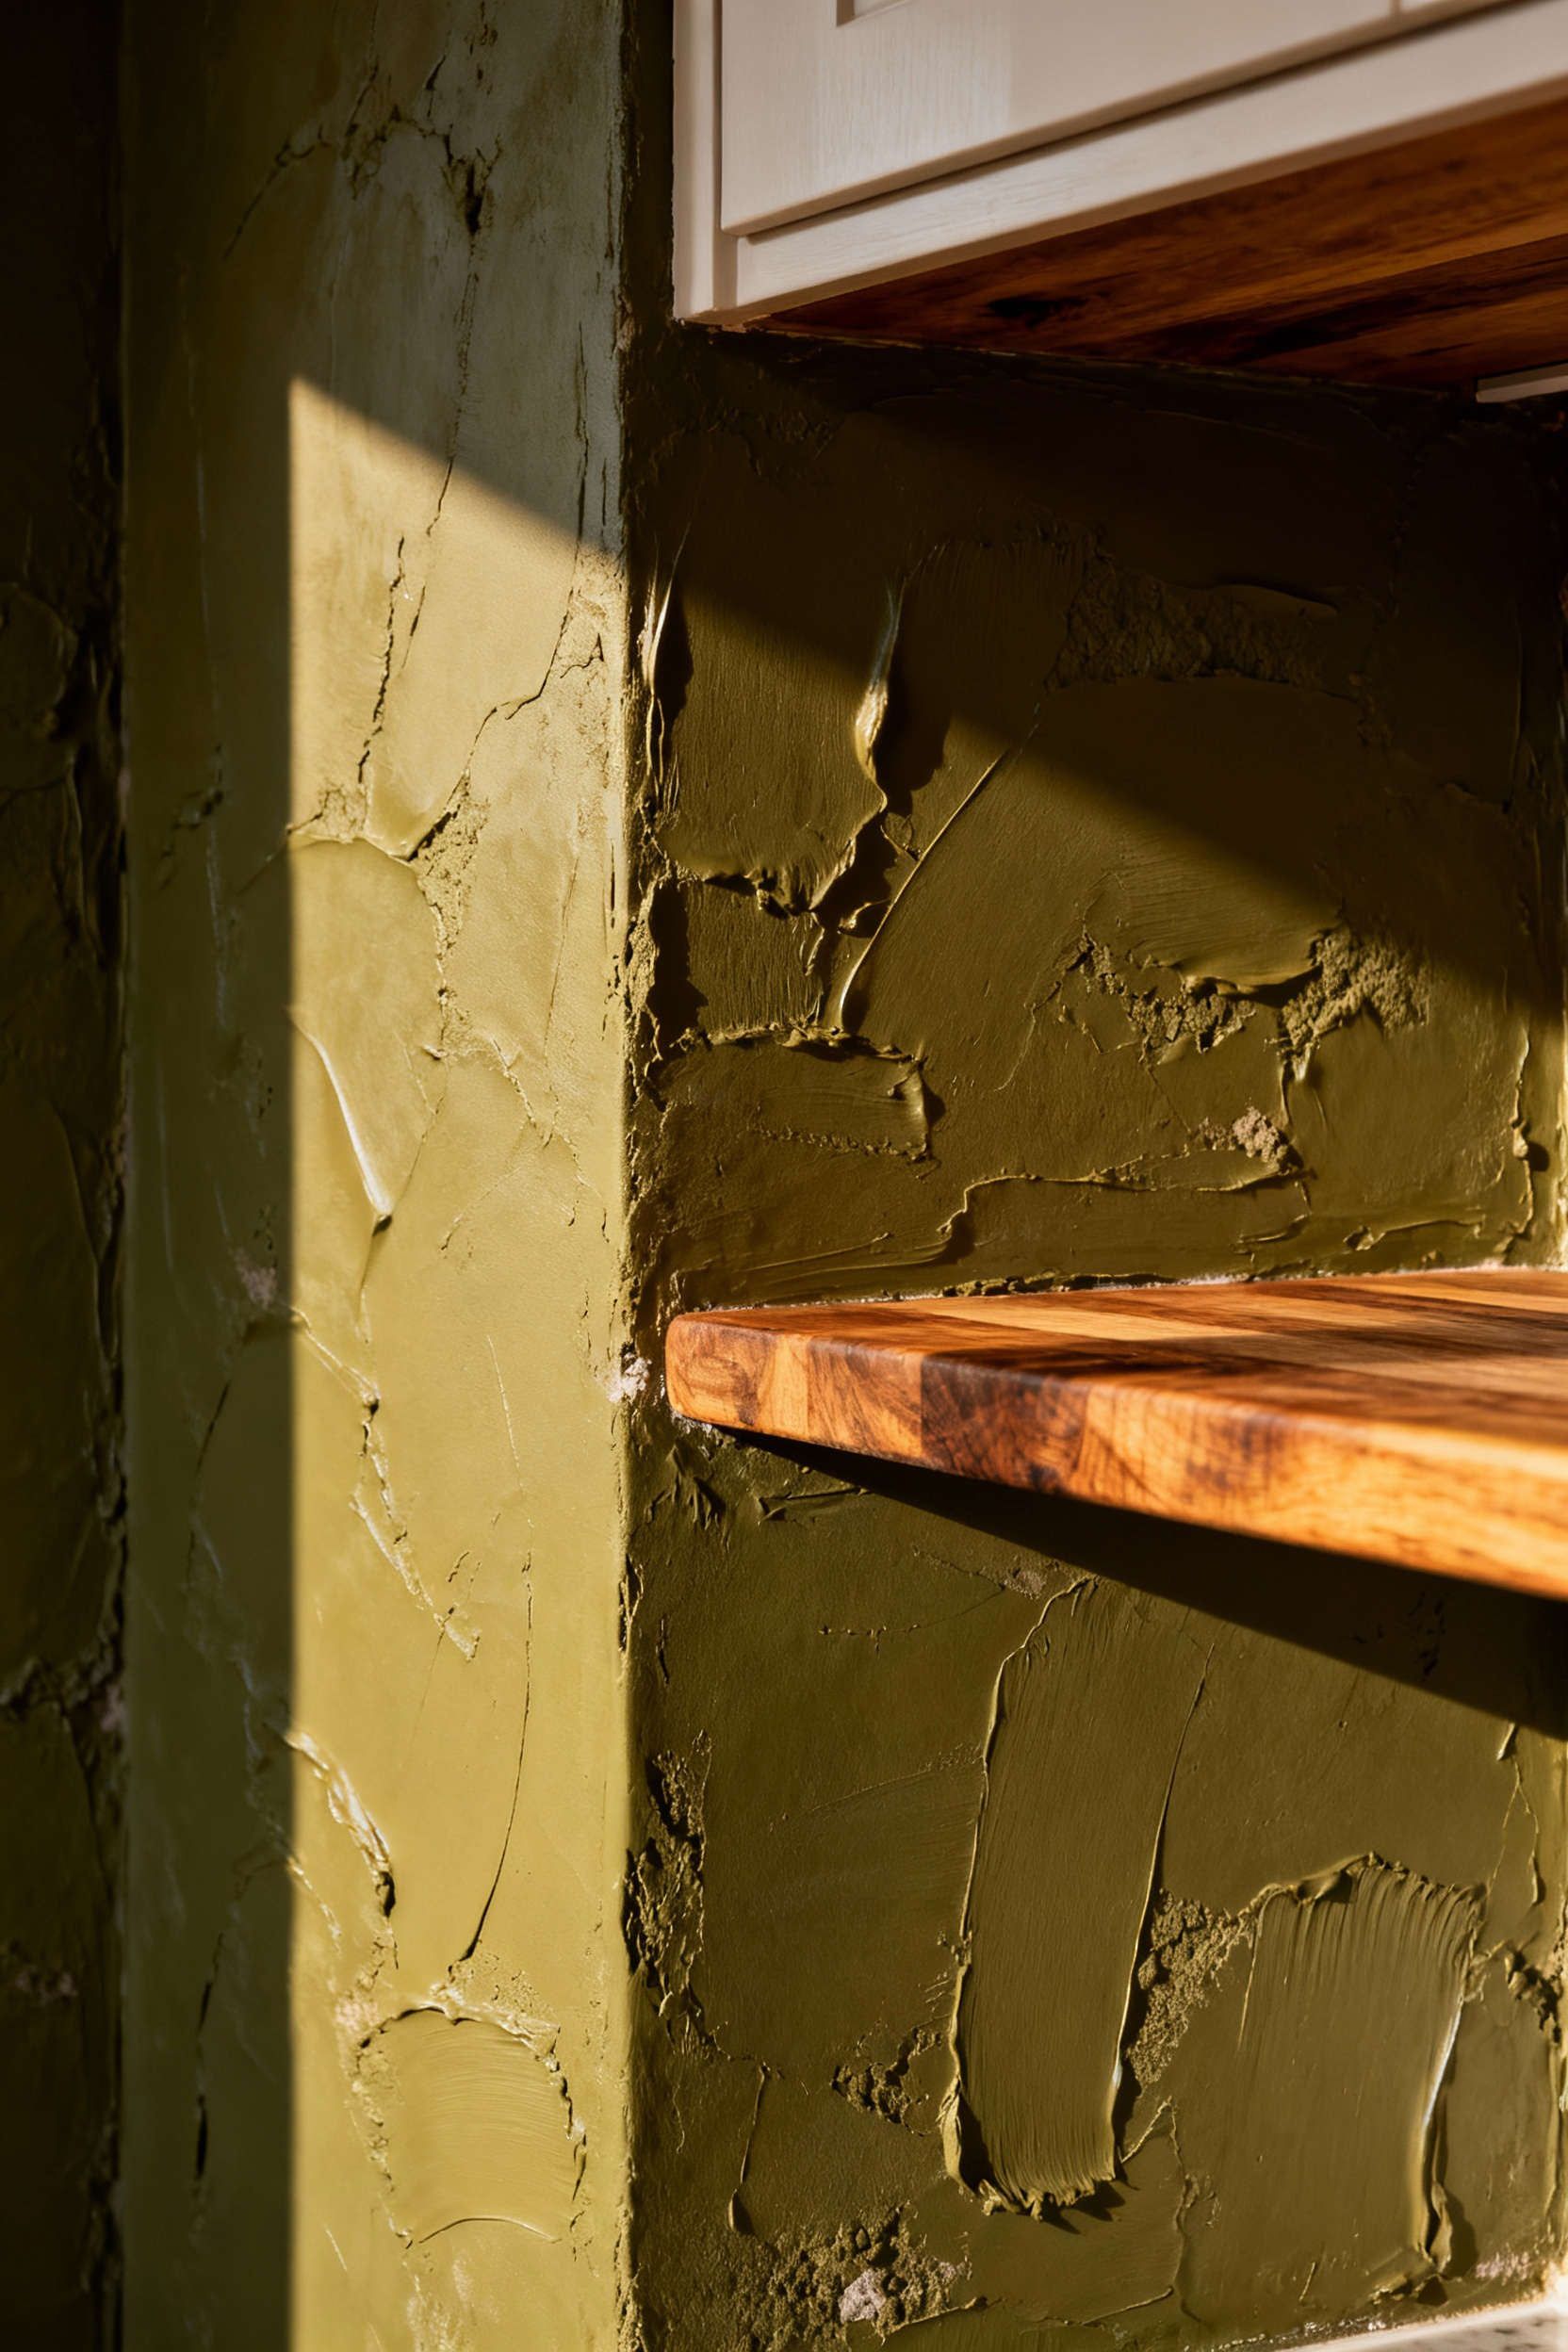
- Target High-Impact Zones: Apply the finish to specific architectural features—like a range hood surround or the interior of a pantry niche—to add historic weight without overwhelming the room.
- Ditch the Grout: Consider water-resistant Tadelakt for backsplashes; it creates a seamless, durable surface that eliminates grime-catching grout lines.
- Assess the Labor: Lime wash is a resourceful DIY project easily mastered with simple cross-hatch strokes, but achieving the heavy, intentional texture of troweled plaster usually requires a skilled artisan.
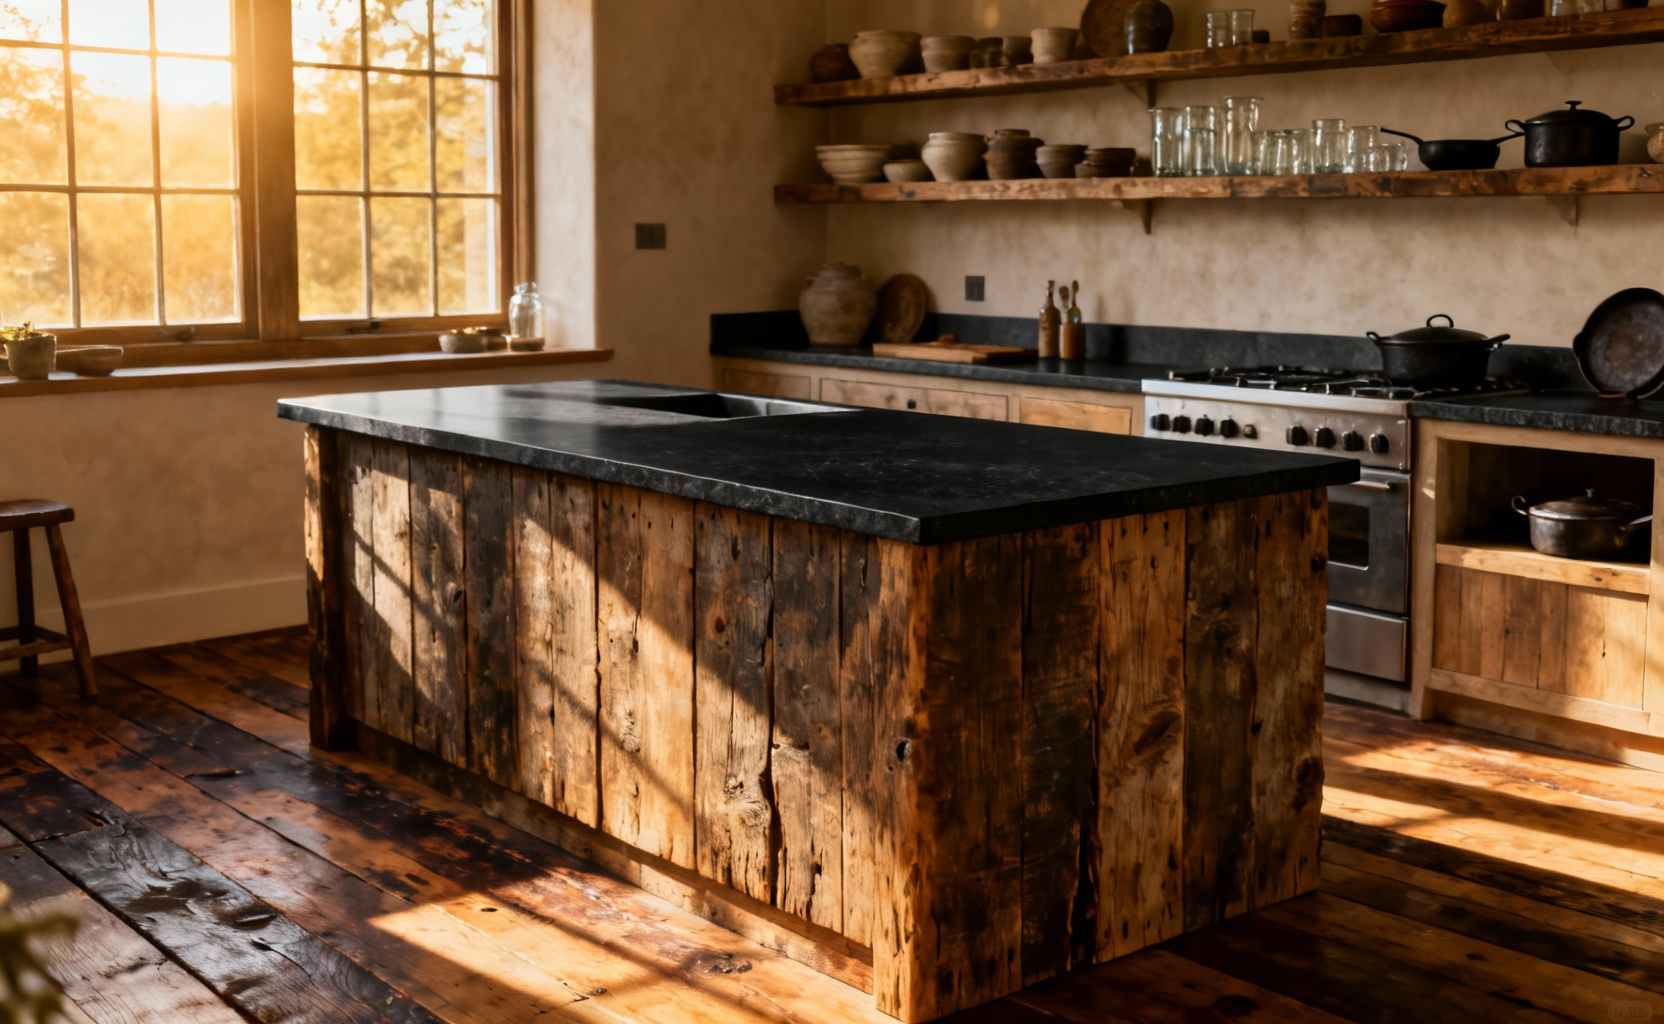
Phase 2: The Functional Core of Rustic Kitchen Decor (Furniture & Fixtures)
Building the functional core is where the real treasure hunting begins, transforming a standard room into a space with a pulse. For the island, we want heavy, salvaged timber that whispers history rather than factory perfection. I once dragged a battered oak workbench out of a collapsing barn; with a good sanding and a coat of food-safe oil, that reclaimed wood became a stunning, sustainable centerpiece that anchored the entire room. To achieve this grounded look, steer clear of seamless, wall-to-wall built-ins. Instead, integrate freestanding character pieces—like a glass-fronted farmhouse hutch or an antique dry sink—to break up the monotony and add a layer of collected heritage.
Once the heavy lifting is done, focus on the tactile details that define the room’s age. Shiny chrome feels too sterile here; you want hardware that feels time-worn and substantial under your hand. Swapping out modern handles for oil-rubbed bronze bin pulls or wrought-iron strap hinges is an instant, low-waste upgrade that adds grit to even newer cabinetry. Finish the look with utilitarian seating that prioritizes durability over plush comfort, ensuring every element serves a purpose:
- The Island: Hunt for repurposed butcher blocks or stone slabs on rough-hewn bases to create a heavy, permanent feel.
- The Hardware: Select matte black or bronze finishes to mimic hand-forged metal work.
- The Seating: Opt for sturdy wooden ladder-back stools or distressed metal seats; avoid swivel mechanisms or cushions to maintain the hardworking aesthetic.
4. The Unfitted Kitchen: Mixing Freestanding Hutches with Built-ins
There is a specific soulfulness to a kitchen that feels collected rather than constructed, a look achieved by rescuing forgotten furniture and giving it a second life amidst modern conveniences. I once hauled a battered pine dresser from a barn sale, and after a little restoration love, it brought more history to my space than a wall of brand-new cabinetry ever could. The secret to mastering this “unfitted” rustic aesthetic is establishing a clear material hierarchy. Let your freestanding treasures—like a reclaimed oak hutch or a patina-rich cupboard—carry the visual weight and drama. To prevent the room from feeling heavy or chaotic, reserve your built-ins for quieter roles, utilizing simple painted finishes or clean shiplap that allows the sustainable, vintage hero pieces to truly shine.
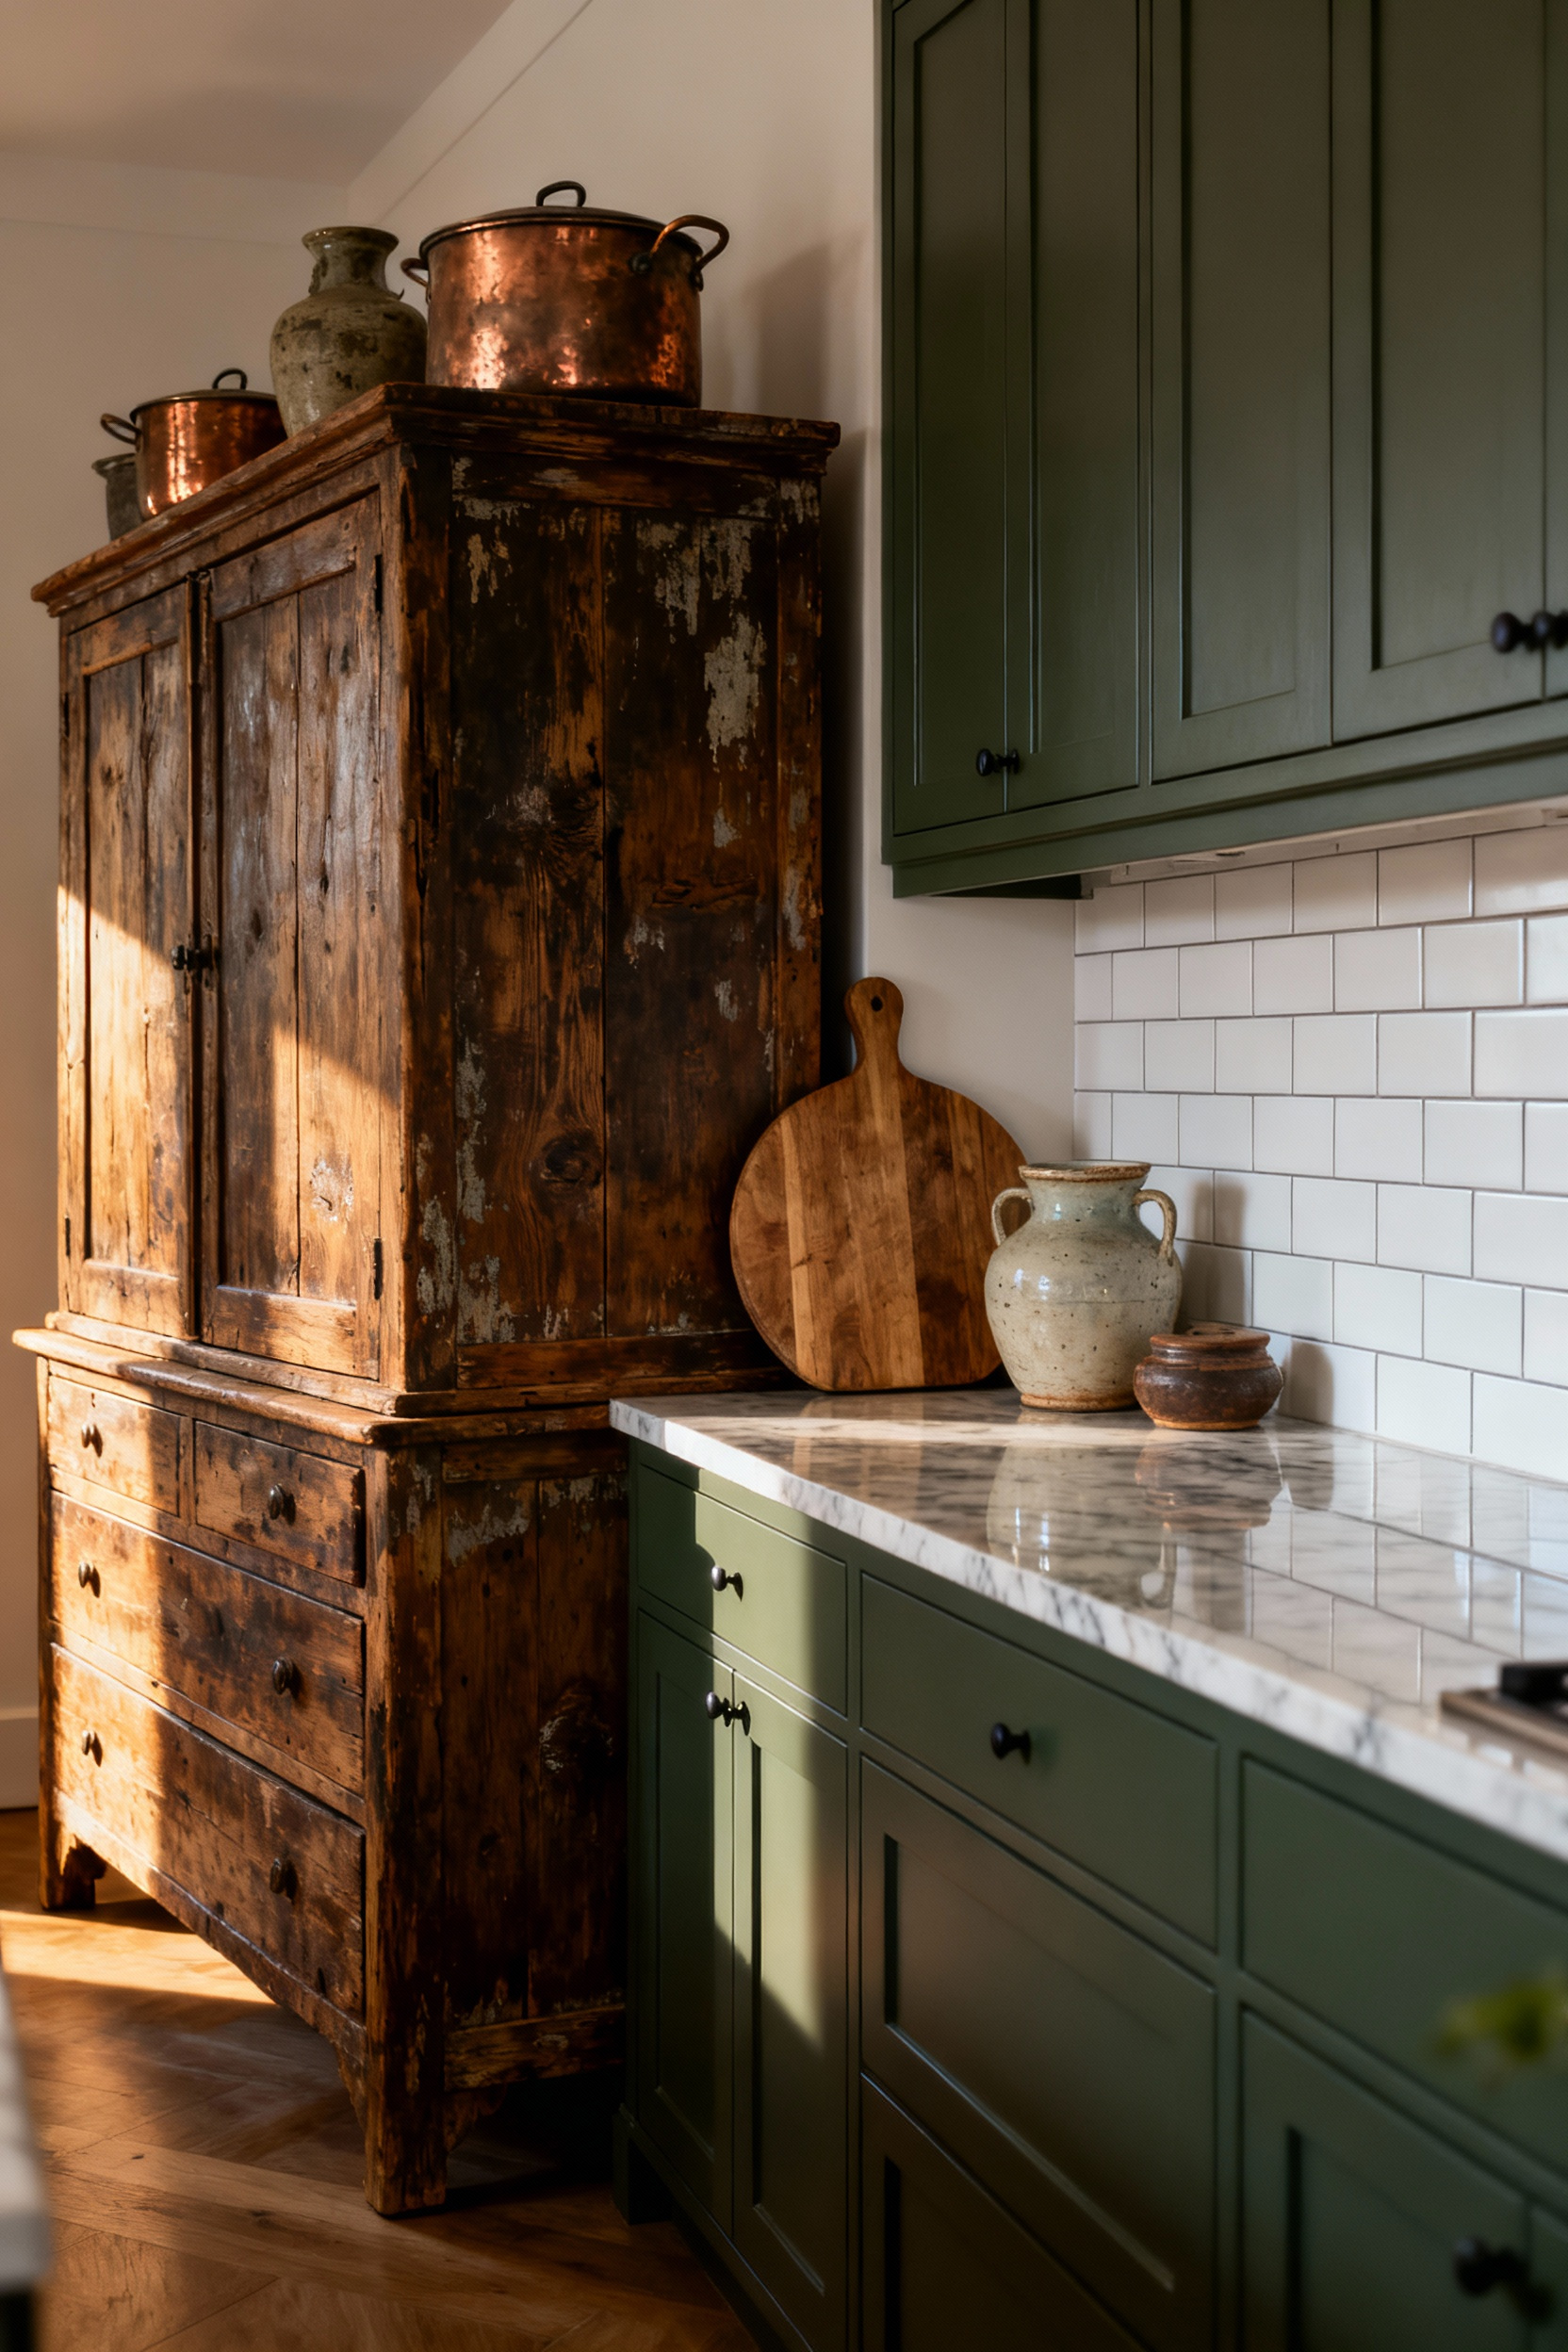
To ensure your eclectic mix feels intentional rather than accidental, focus on the connective tissue between the old and the new:
- The Hardware Link: Create immediate cohesion by installing the same matte black or iron pulls on both your antique hutch and your modern base cabinets.
- Strategic Placement: Position your furniture-style piece away from the main work triangle—perhaps near a window or dining nook—to serve as a focal point for displaying heirlooms.
- Tactile Contrast: Delineate zones by mixing countertop materials; use durable soapstone or butcher block on workhorse built-ins, but top your freestanding island or dry hutch with aged zinc or wood to reinforce that authentic, time-worn narrative.
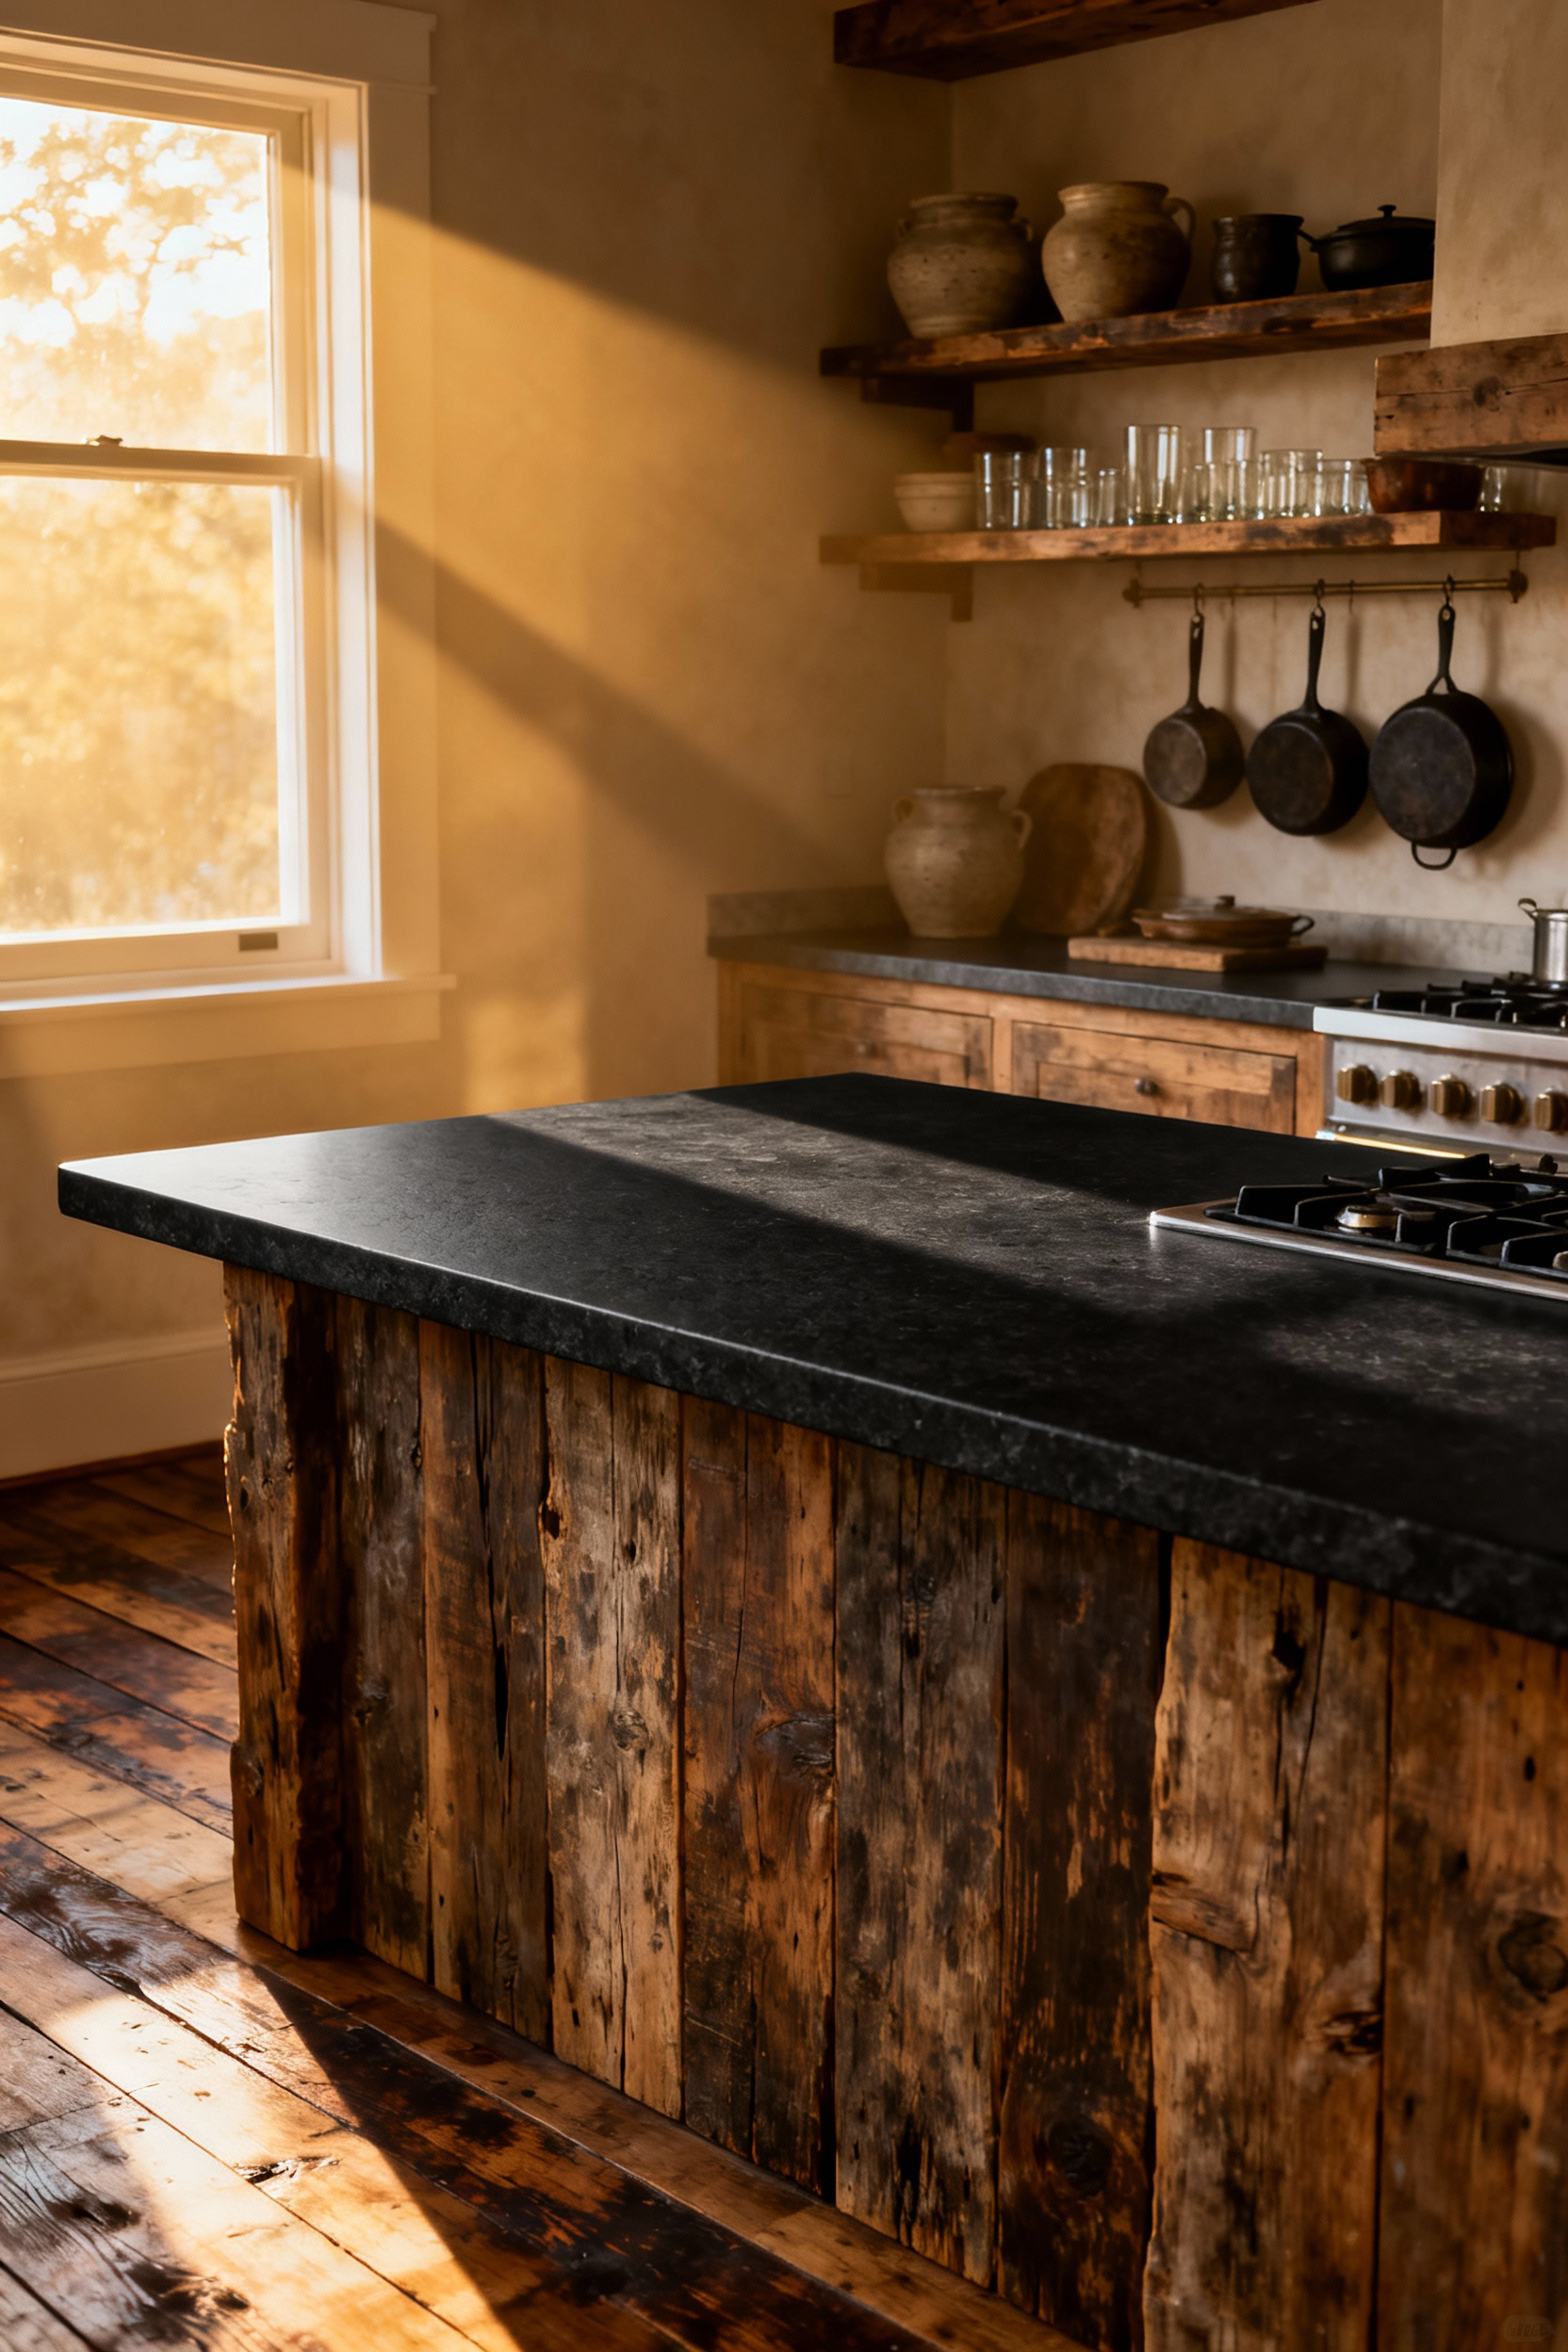
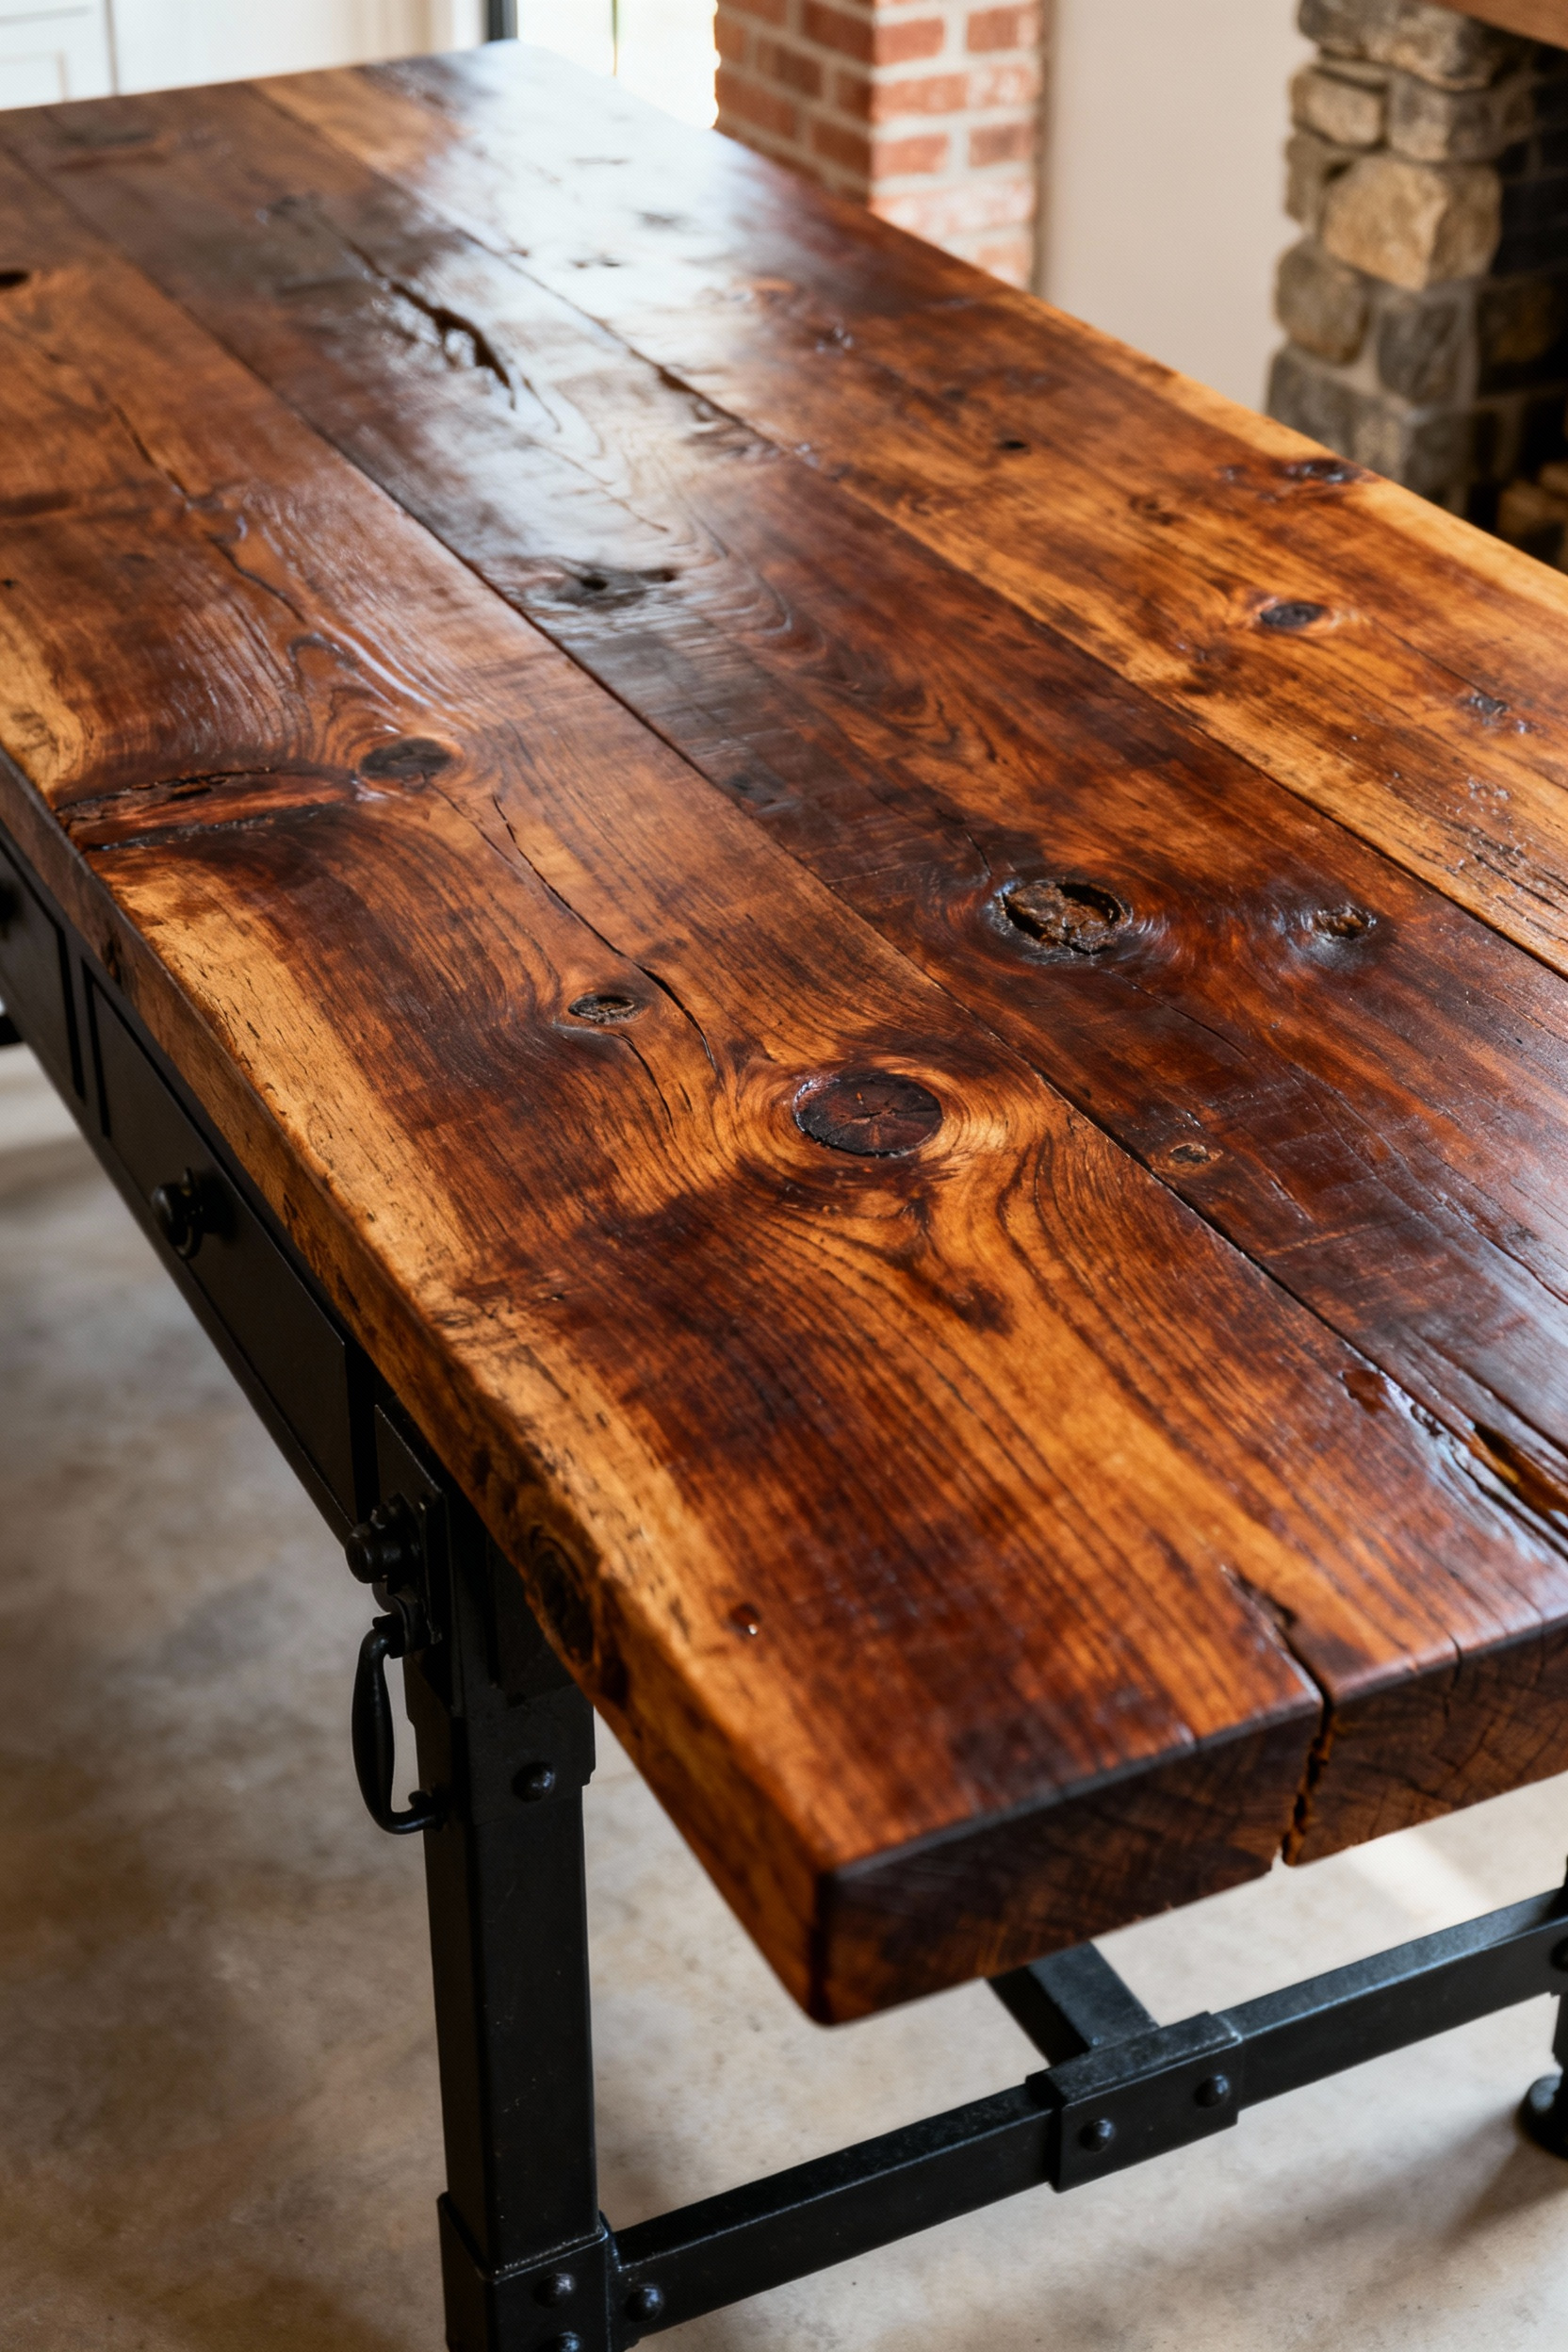
5. The Butcher Block Island: Sourcing Antique Worktables as Centerpieces
There is a specific thrill in dragging a dusty, industrial workbench out of a salvage yard and imagining it as the pulsing heart of a family kitchen. Instead of demanding new lumber, we are honoring the dense, old-growth wood of a baker’s table or factory bench that has already survived a century of labor. When sourcing your centerpiece, look past the grime at estate sales and architectural salvage yards; you want heavy bases and deep scars that tell a story—a “perfect” surface is a boring one. By repurposing these forgotten workhorses, we keep history out of the landfill and bring an unmatched, soulful durability into our homes.
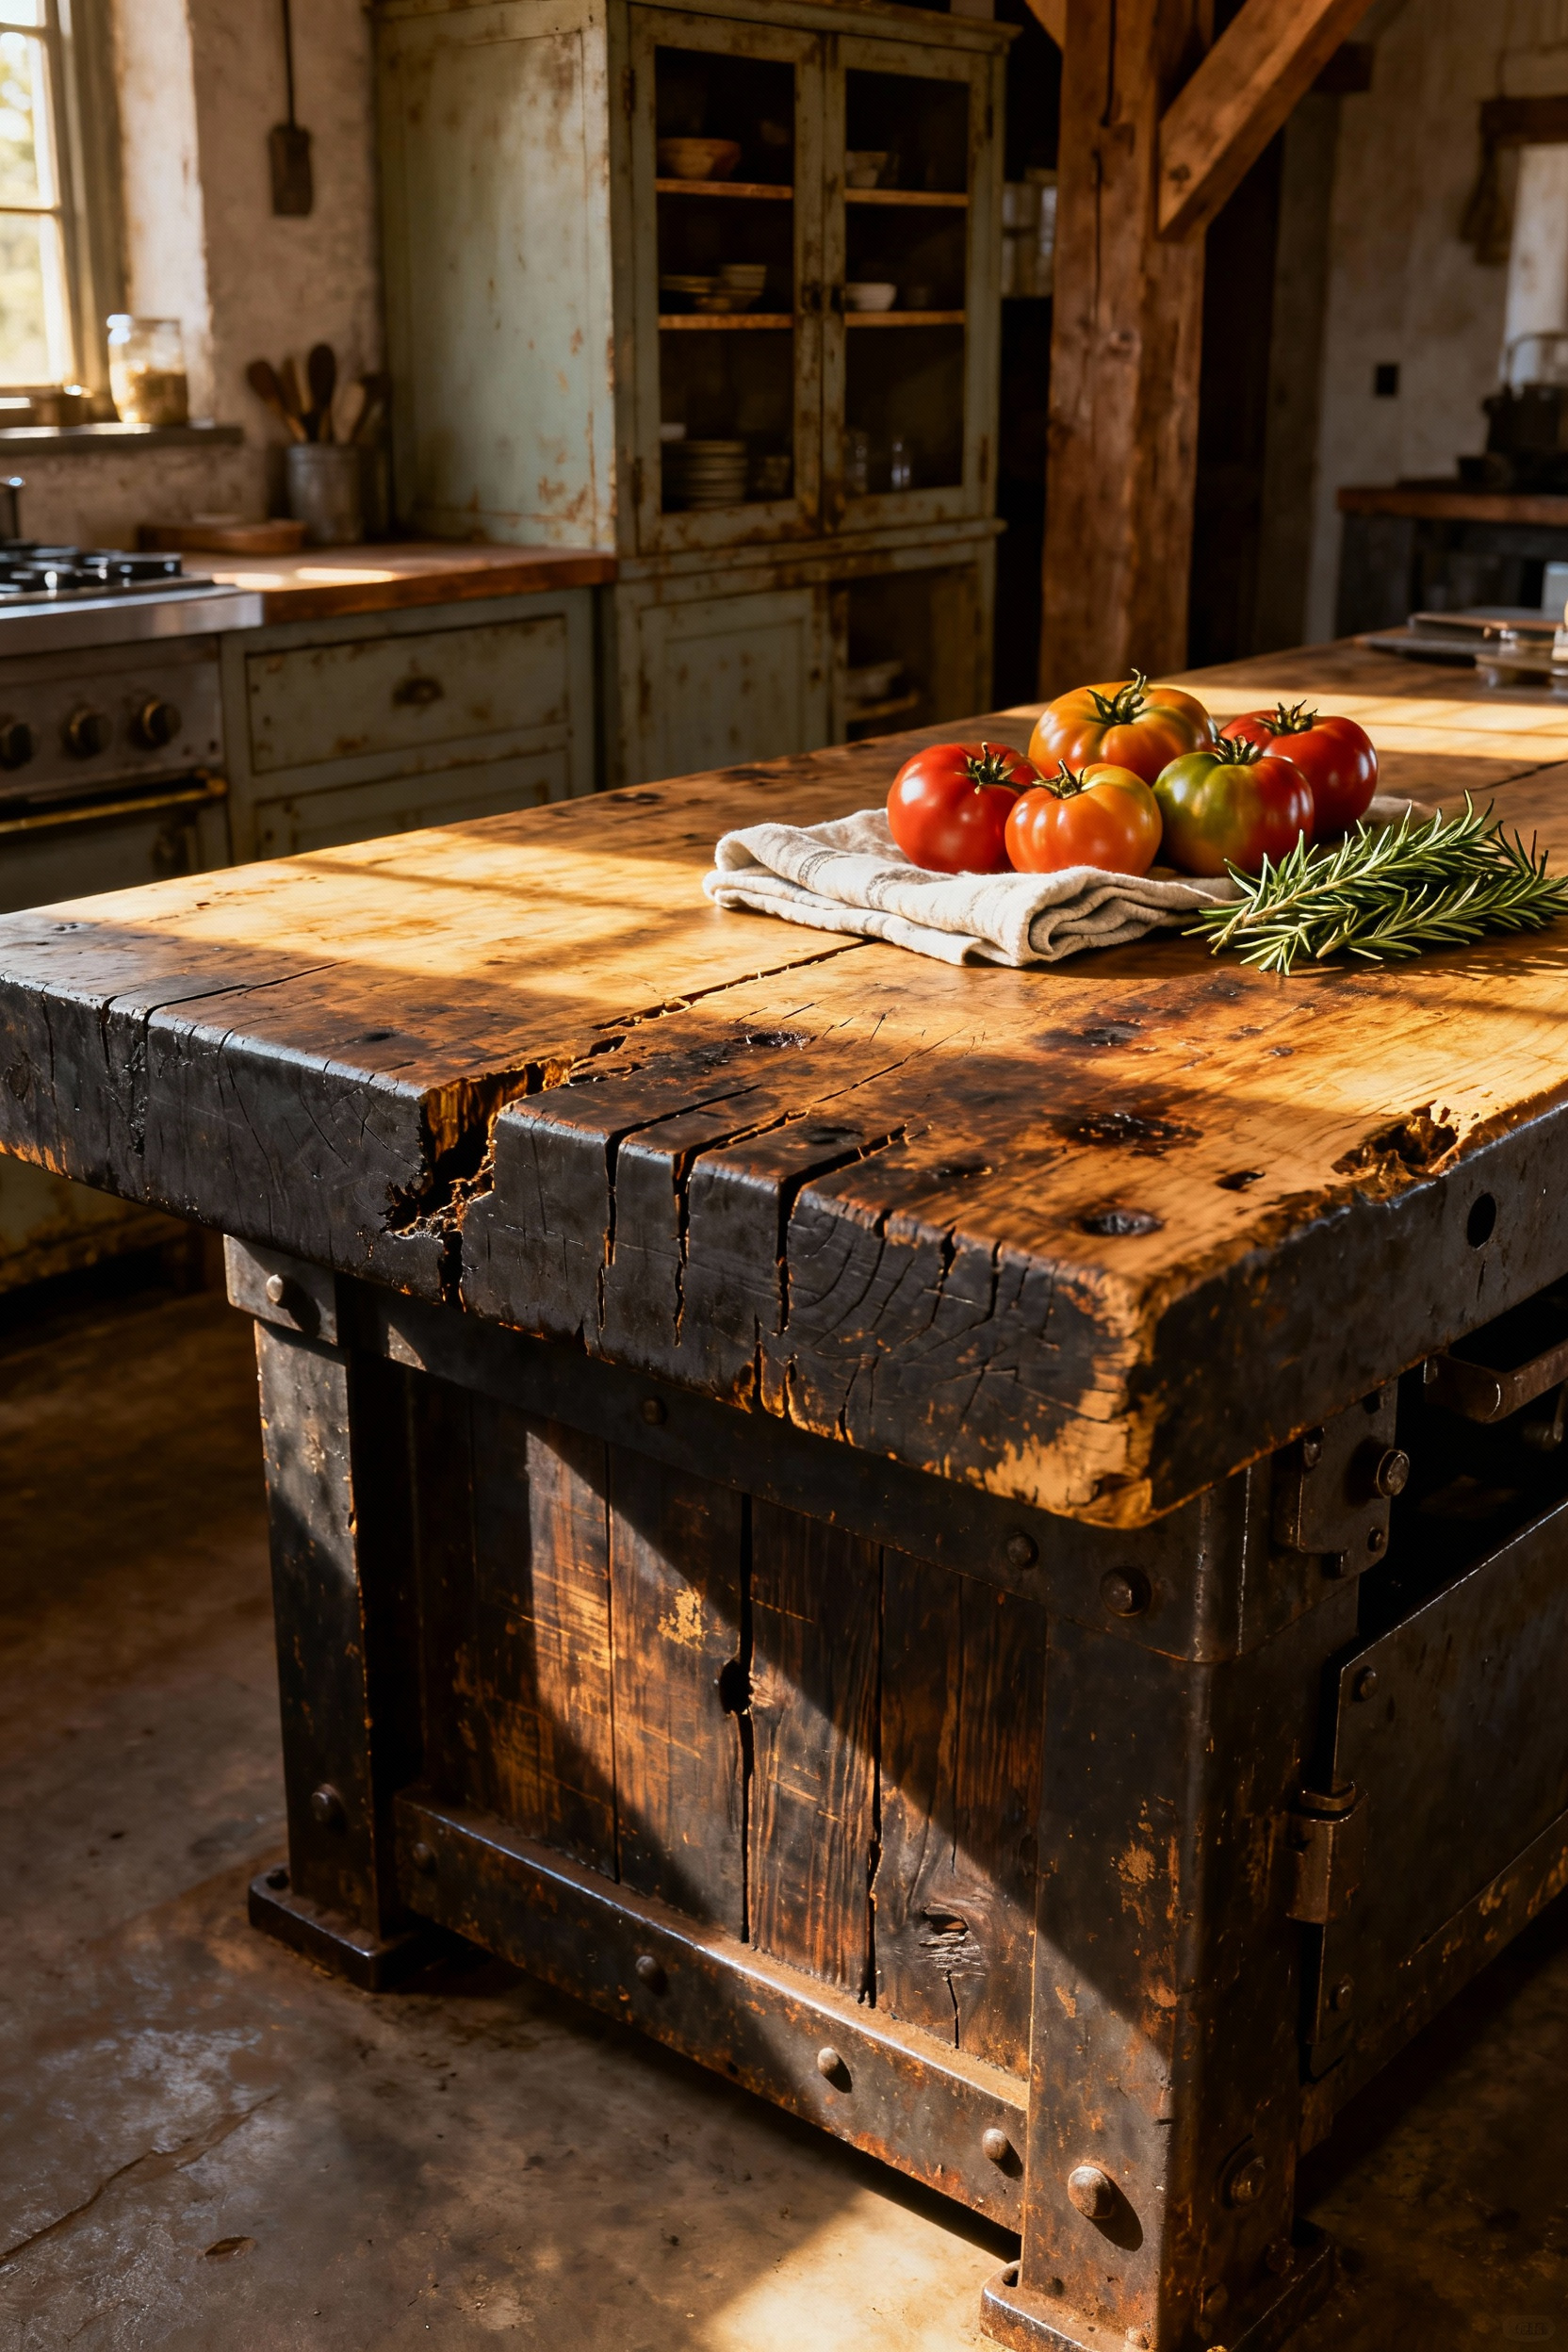
Don’t let the quirky dimensions of a vintage find scare you away; with a little elbow grease, these pieces transition beautifully into modern use. Most antique tables sit lower than standard 36-inch counters, but this offers a chance to add functional flair. To transform a relic into a daily driver:
* Elevate It: Add heavy-duty locking industrial casters or a custom wooden plinth to raise the surface to an ergonomic prep height.
* Preserve the Narrative: Deep clean the wood, but resist the urge to sand away the knife marks and dents—that patina is the table’s fingerprint.
* Feed the Wood: Apply generous coats of food-grade mineral oil or beeswax to sanitize and seal the surface, making that rich, aged grain sing without erasing its past.
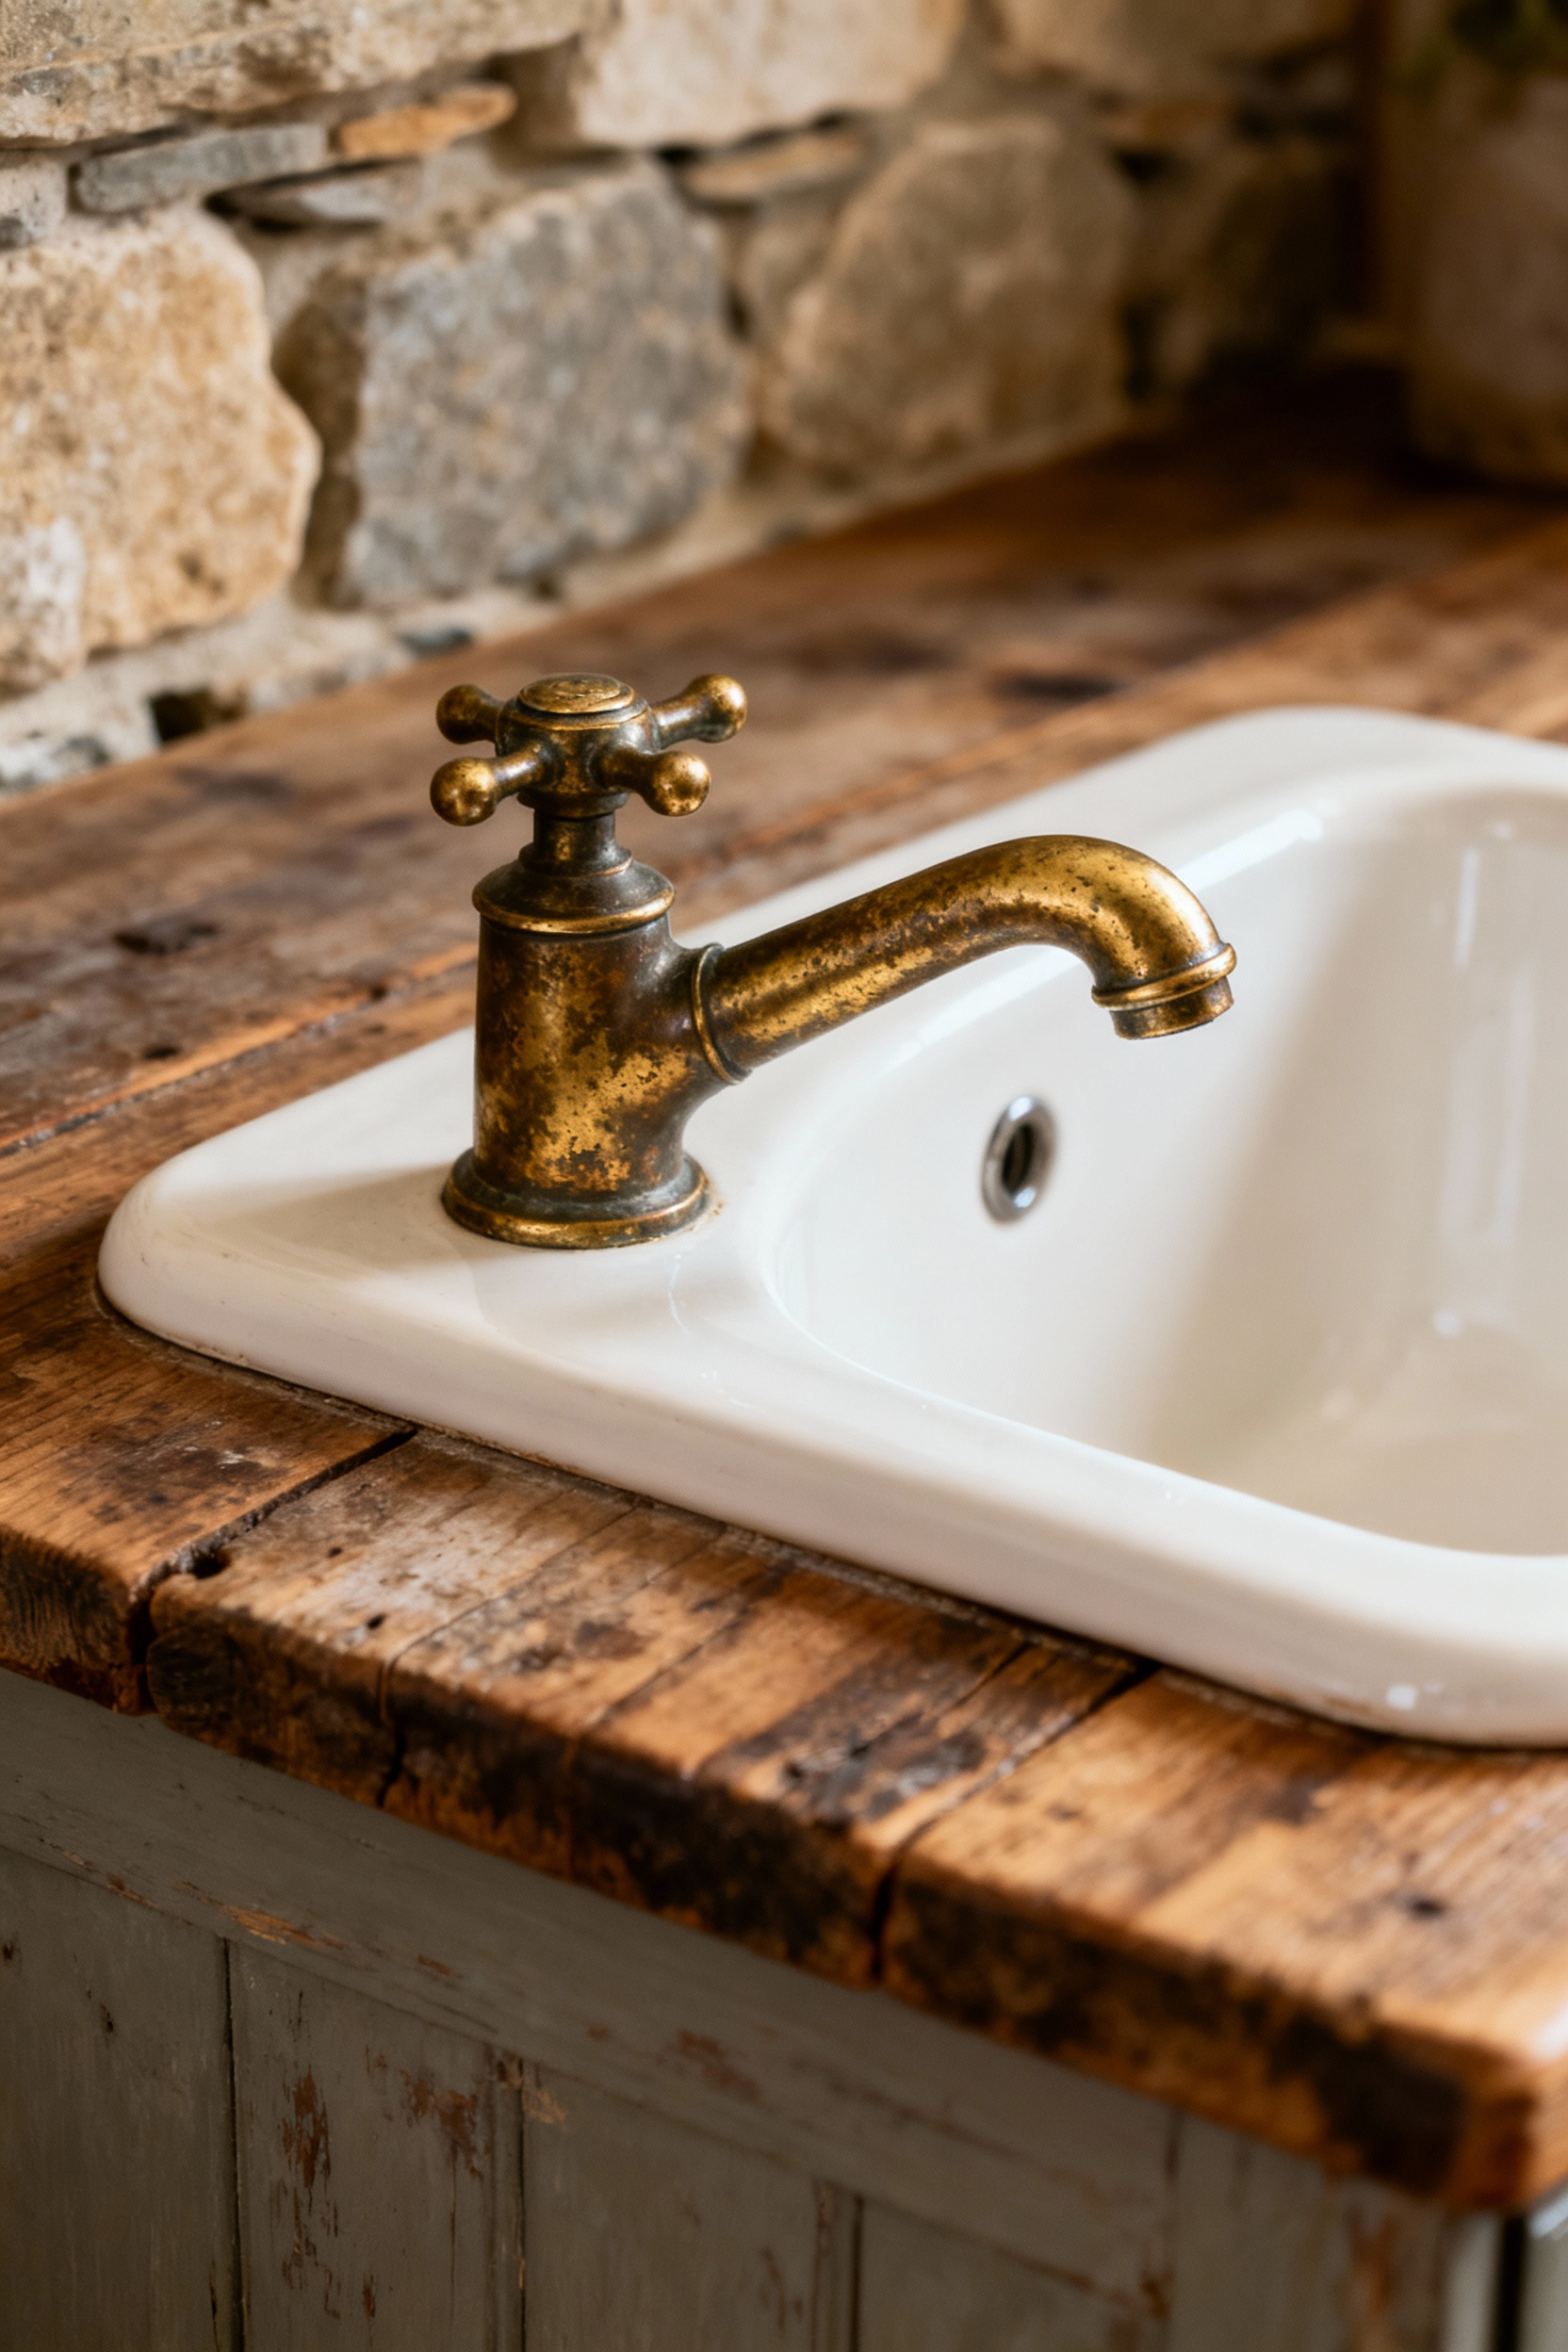
6. The Deep Basin: Apron-Front Sinks in Fireclay or Hammered Copper
There is something profoundly grounding about standing before a deep apron-front sink; it transforms a mundane chore into a tactile connection with the past. I often encourage clients to choose hammered copper for its “living finish”—over time, it develops a rich verdigris patina that tells the story of your kitchen, turning scratches and age into character rather than damage. Alternatively, traditional white fireclay offers a crisp, sustainable choice with incredible scratch resistance, though you must ensure your cabinetmaker builds a reinforced custom base to support its substantial weight.
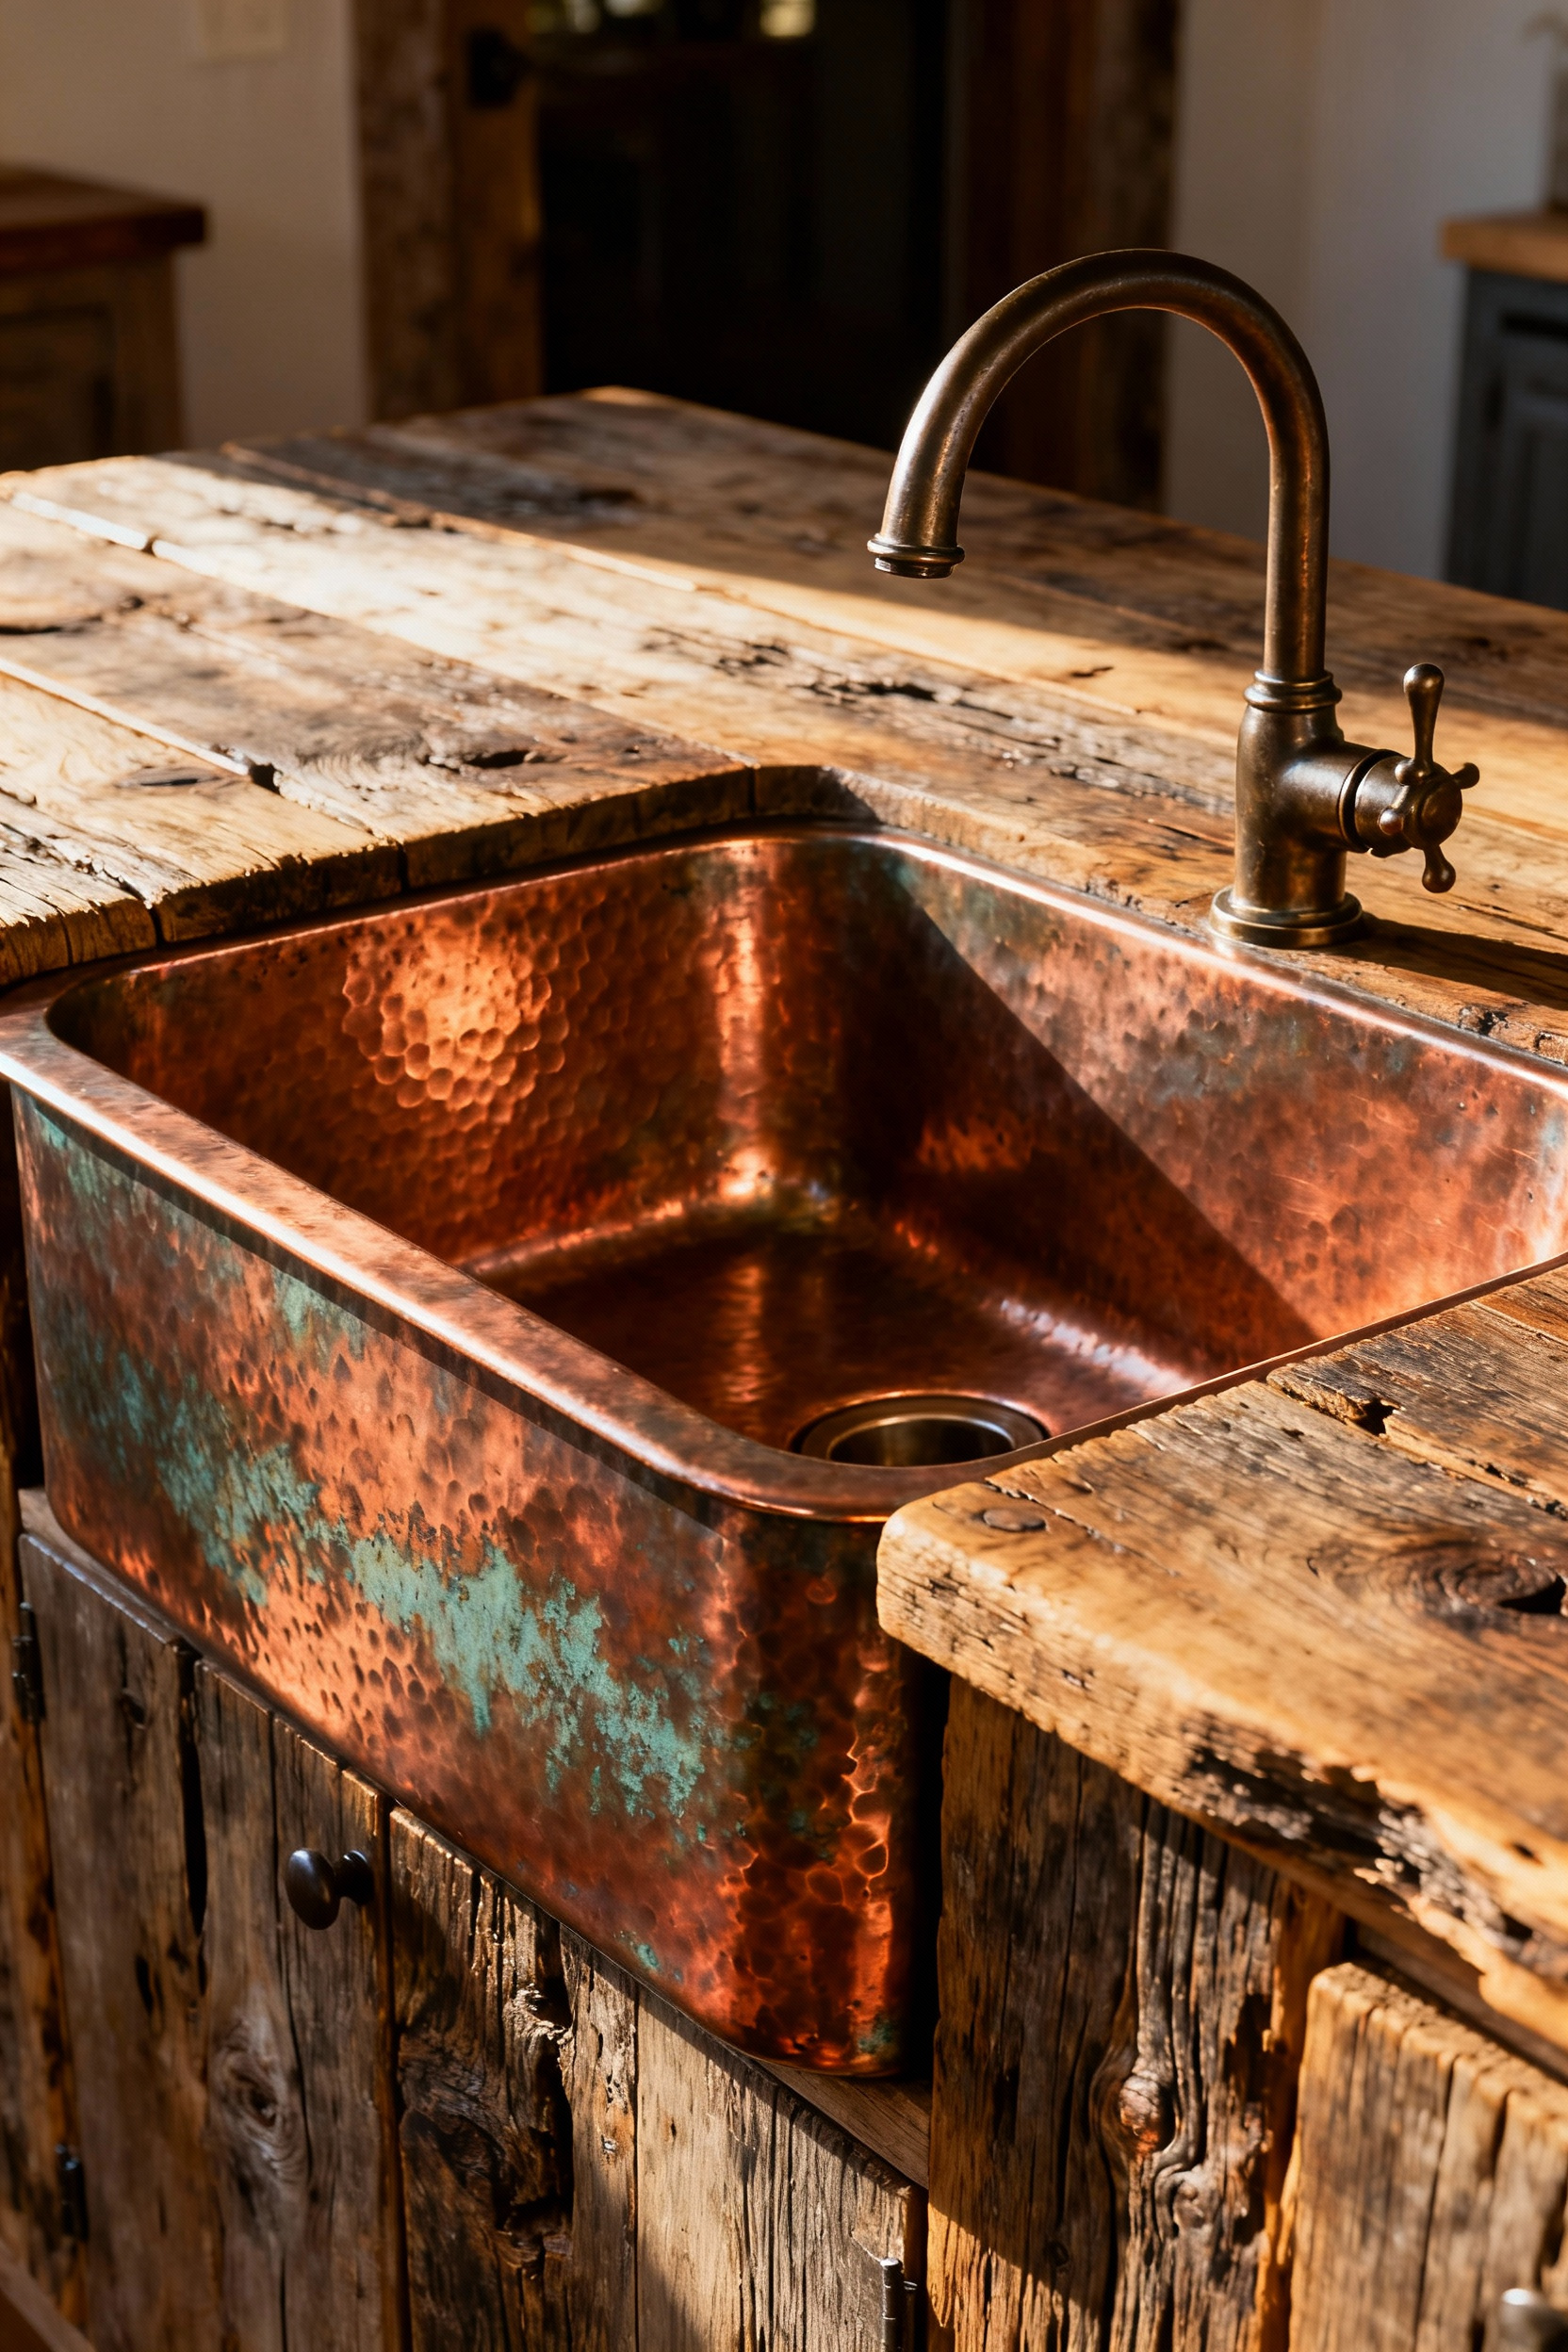
To ensure your sink works as hard as it looks, keep these restoration-minded tips in mind:
- Prioritize the Single Basin: Opt for a large, uninterrupted single basin. It captures the true utility of farmhouse living, allowing you to easily soak oversized vintage roasting pans and baking sheets without fighting a center divider.
- Scale Up Your Hardware: A heavy fireclay or copper front demands visual balance. Install a high-arc bridge faucet in antique brass or oil-rubbed bronze; standard sizes often look lost against these robust sinks and lack the clearance needed for deep-basin cleaning.
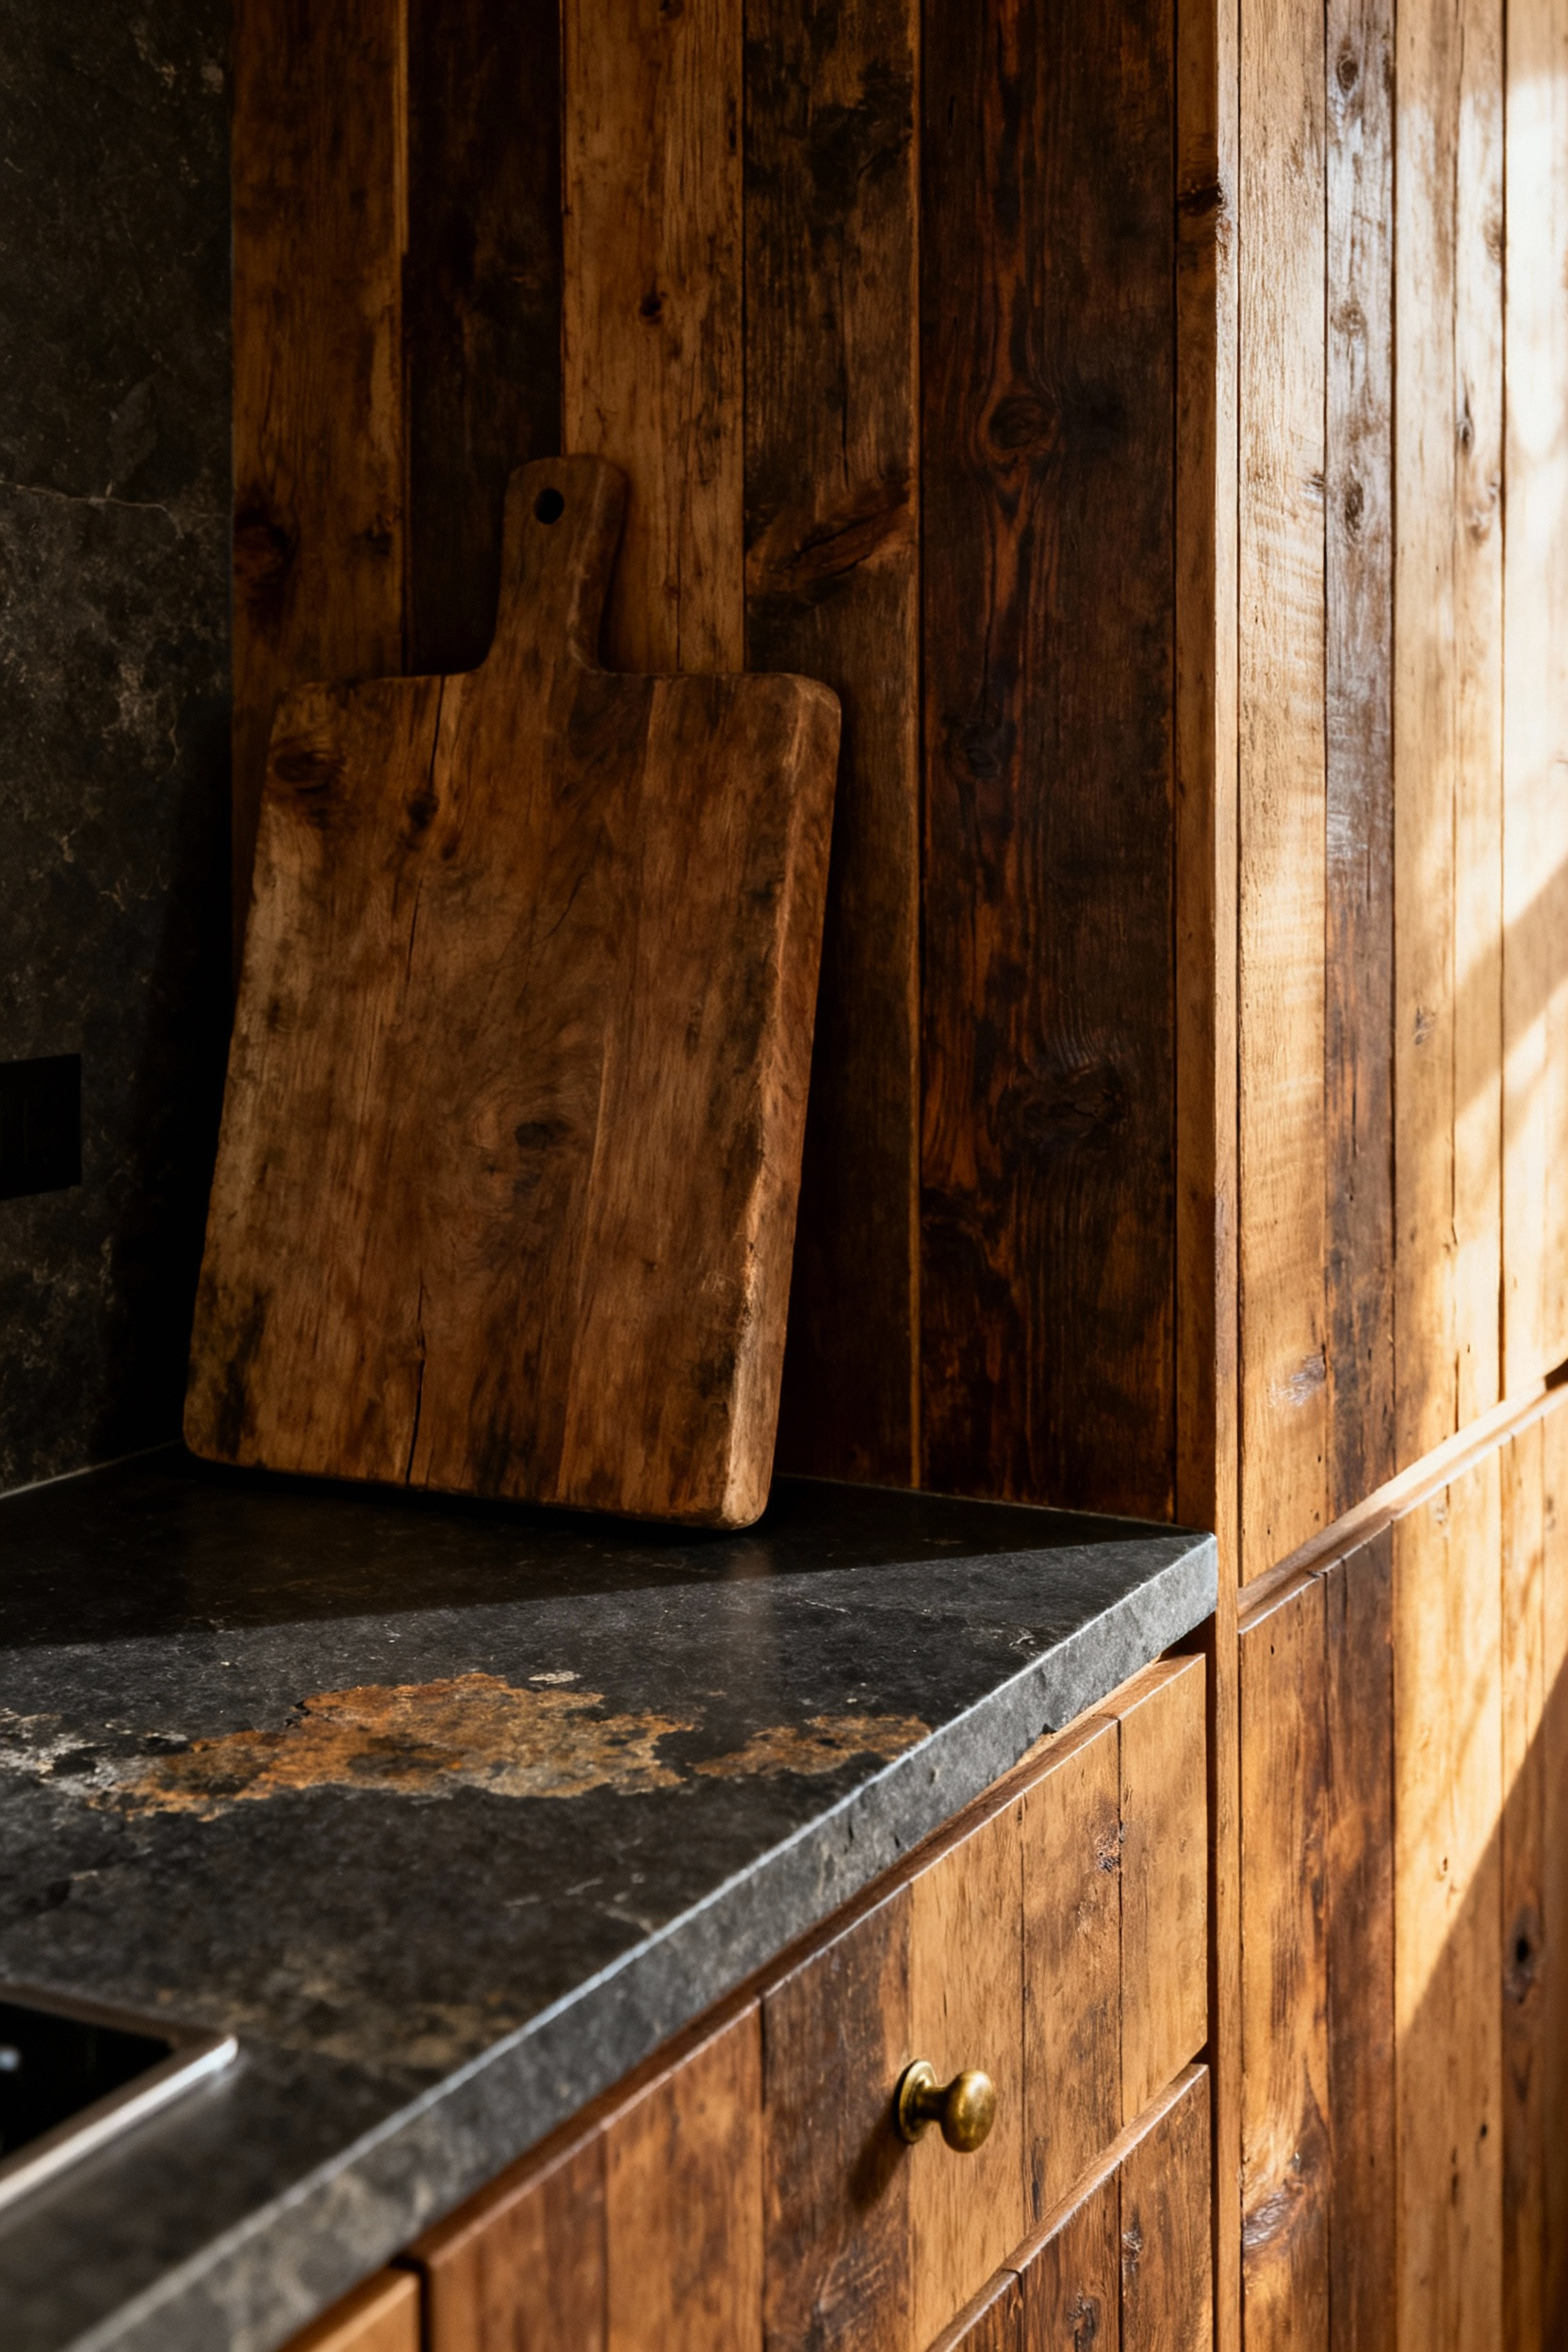
7. Honest Utility: Heavy-Duty Open Shelving for Everyday Wares
There is a profound sense of history in repurposed materials that new manufacturing simply cannot replicate, and nothing grounds a rustic kitchen quite like the weight of reclaimed timber. For true authenticity, skip the thin veneers and hunt for 2-to-3-inch dimensional lumber—perhaps salvaged barn wood or rough-sawn oak that tells a story of resilience. These shelves are workhorses, not just displays, so they demand support that matches their character. Secure them with industrial black matte plumbing pipes or hand-forged iron brackets to ensure they can bear the load of heavy stoneware while keeping sustainable, long-lasting materials out of the landfill.
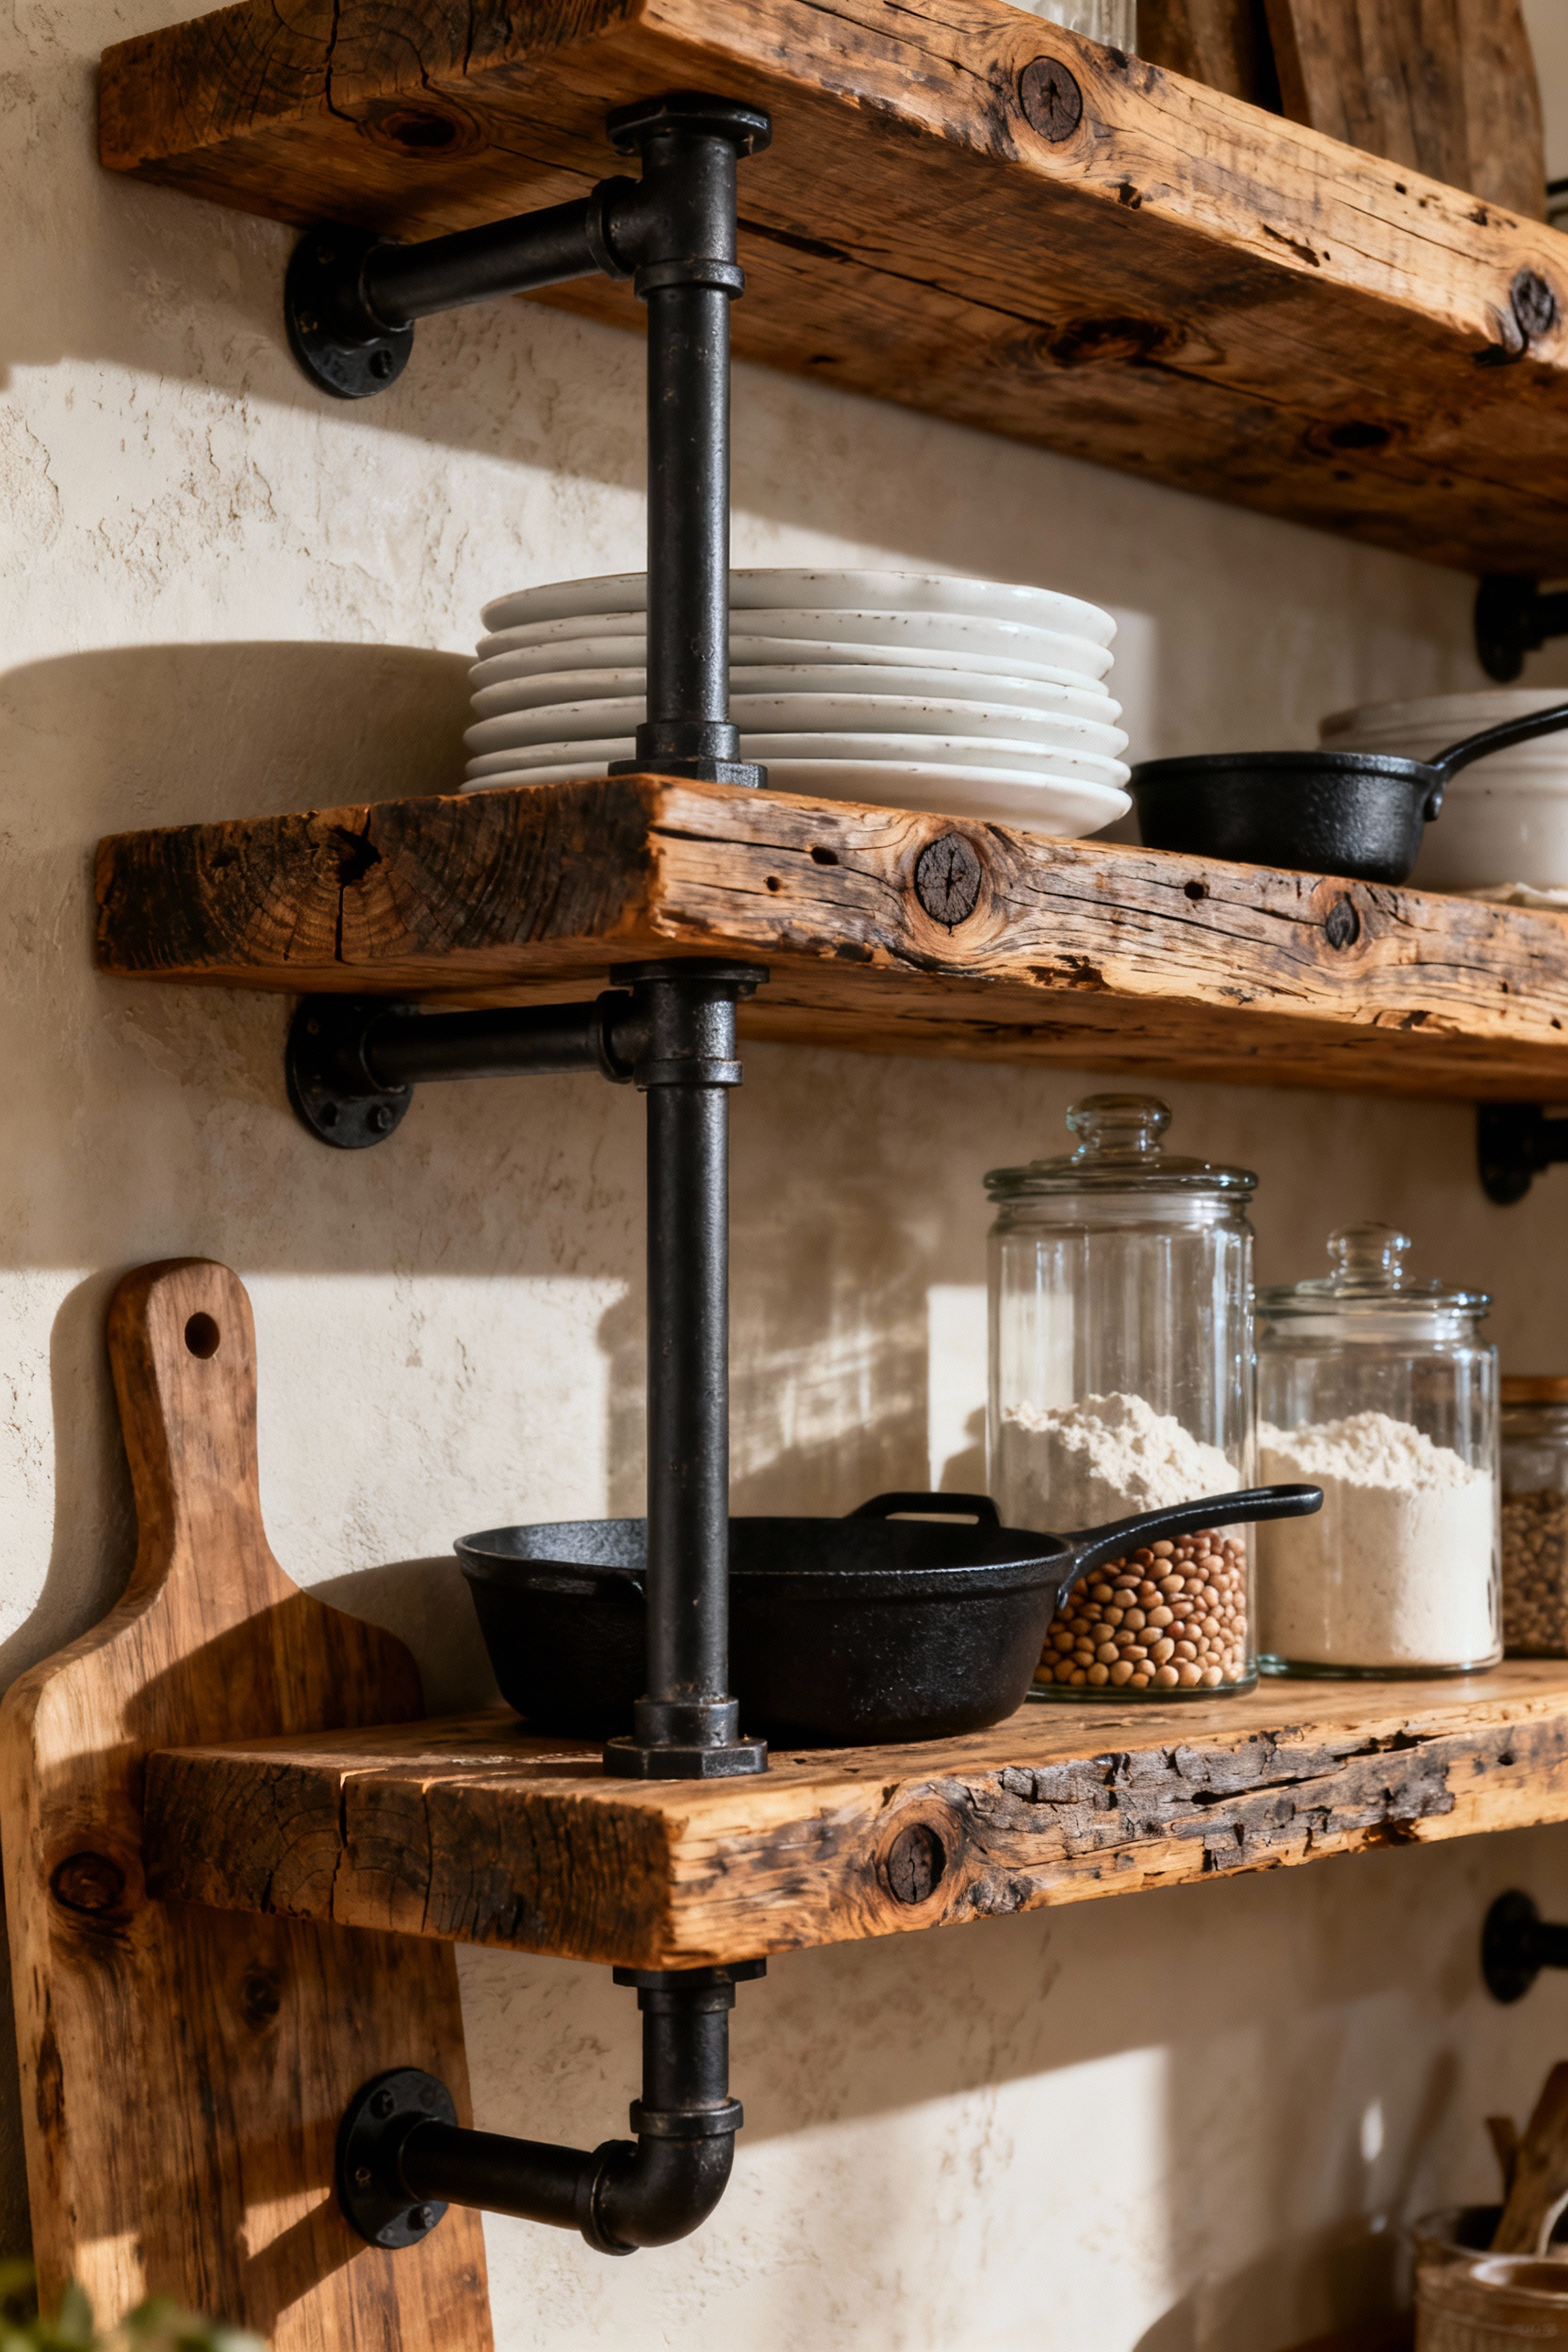
To maximize “honest utility,” consider replacing upper cabinets near your range or sink with these robust floating shelves. This keeps your most-used tools accessible, but remember that open storage requires a disciplined eye to prevent visual chaos. I recommend the following approach to balance function and form:
* Create Uniformity: Stack matching sets of cream stoneware or clear glass drinking vessels to maintain a clean, cohesive rhythm.
* Zone Your Wares: Place spices and prep bowls directly above the counter where you chop, and heavy platters near the oven.
* Showcase with Purpose: Reserve the highest shelf for those special flea market treasures—like a vintage copper kettle—that need protection but deserve to be seen.
Phase 3: The Patina of Time (Metals & Hardware)
True sustainability isn’t just about how a product is made, but how gracefully it ages, which is why I always steer clients toward “living finishes” like unlacquered brass and raw copper. Unlike static, lacquered chrome that eventually chips, these reactive metals deepen and evolve, recording the history of your home through oxidation; they gleam where your hands land daily and darken in the shadows. I once rescued a mid-century credenza with heavily tarnished pulls that the owners intended to trash; rather than replacing them, we simply embraced the oxidation, proving that a little wear adds a soul that factory-perfect hardware can never replicate.
To curate this sense of permanence without veering into disrepair, focus on the tactile weight and finish of your metals:
* Scale Up: Swap flimsy standard hardware for oversized, hand-forged iron or cast-iron bin pulls. The heavy industrial scale visually anchors the space and withstands decades of use.
* Mix Warm and Dark: Don’t fear blending metals. A hammered copper sink (a high-impact focal point for verdigris patina) pairs beautifully with dark oil-rubbed bronze cabinet latches, provided both share a non-synthetic, aged depth.
* Manage the Decay: Know the difference between patina and rot. While copper loves oxidation, iron requires a light wax coating to prevent corrosive rust while maintaining that coveted matte, time-worn texture.
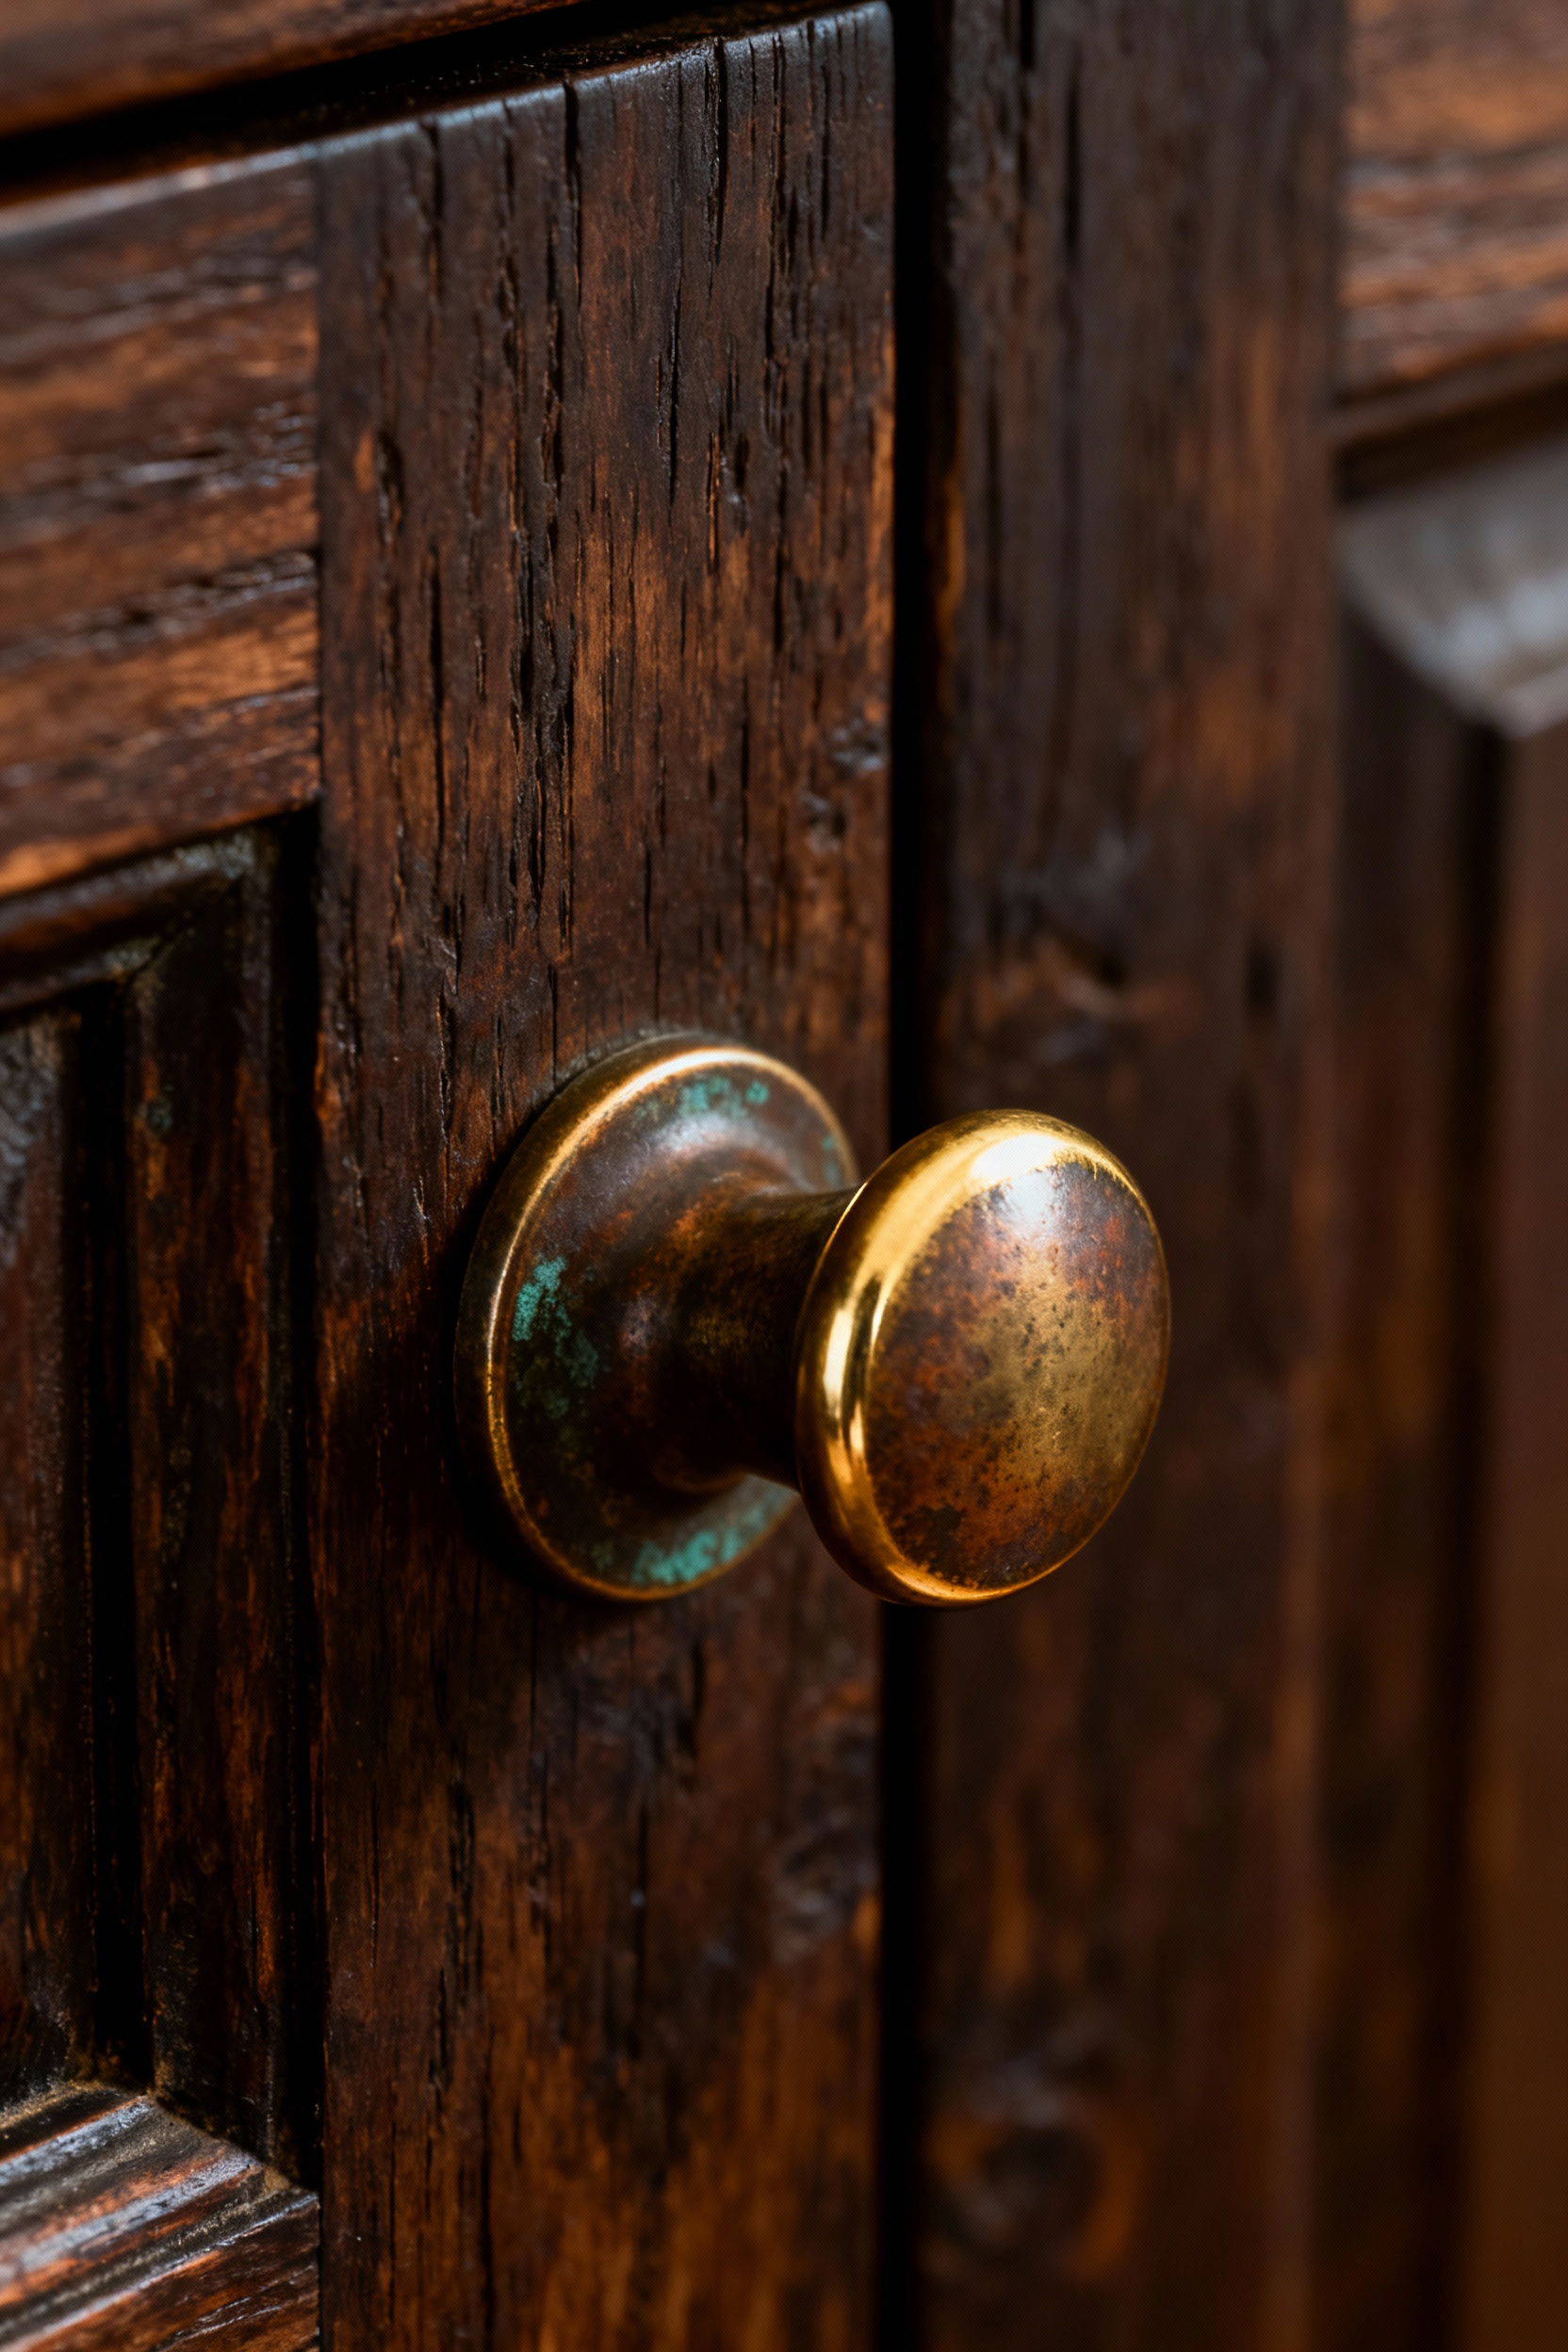
8. Living Finishes: Unlacquered Brass Faucets and Wrought Iron Latches
There is something magical about unearthing a brass faucet that has darkened into a rich, mottled gold; it’s a “living finish” that breathes history into a room. Instead of fighting the oxidation, I encourage you to embrace this patina as a primary design feature. It is the ultimate sustainable choice because it gets better with age, naturally grounding your kitchen with an authenticity that factory-sealed chrome just can’t mimic. To truly capture that collected, nostalgic vibe, contrast those warm, evolving brass tones with the grounding visual weight of matte black wrought iron.
When integrating these finishes, think like a curator balancing texture and history:
- Scale is Everything: Rustic design involves heavy textures like stone and reclaimed wood. Ensure your wrought iron latches are oversized and substantial enough to stand up to these elements without getting visually lost.
- Mix, Don’t Match: Avoid a flat, monochromatic look by pairing the reflective warmth of an unlacquered brass pot filler with dark, iron cabinet pulls.
- Put Down the Polish: The most critical maintenance tip is restraint. Clean these pieces with gentle soap and water only; harsh chemicals and abrasives will strip away the very story you are trying to create.
9. Culinary Heritage: Curating a Display of Vintage Copper Cookware
There is a profound sustainability in rescuing cookware that has outlived generations; these pieces carry a culinary soul that modern manufacturing simply cannot replicate. I once rescued a dented French stockpot destined for the scrap heap, and rather than polishing it to a mirror finish, I let its darkened oxidation stand in stark, beautiful contrast against my rough-hewn oak shelves. For an authentic rustic aesthetic, resist the urge to scour away this patina. That rich, varied tarnishing signals history and adds a necessary warmth that bridges the gap between cold metal and organic textures like distressed wood and stone.
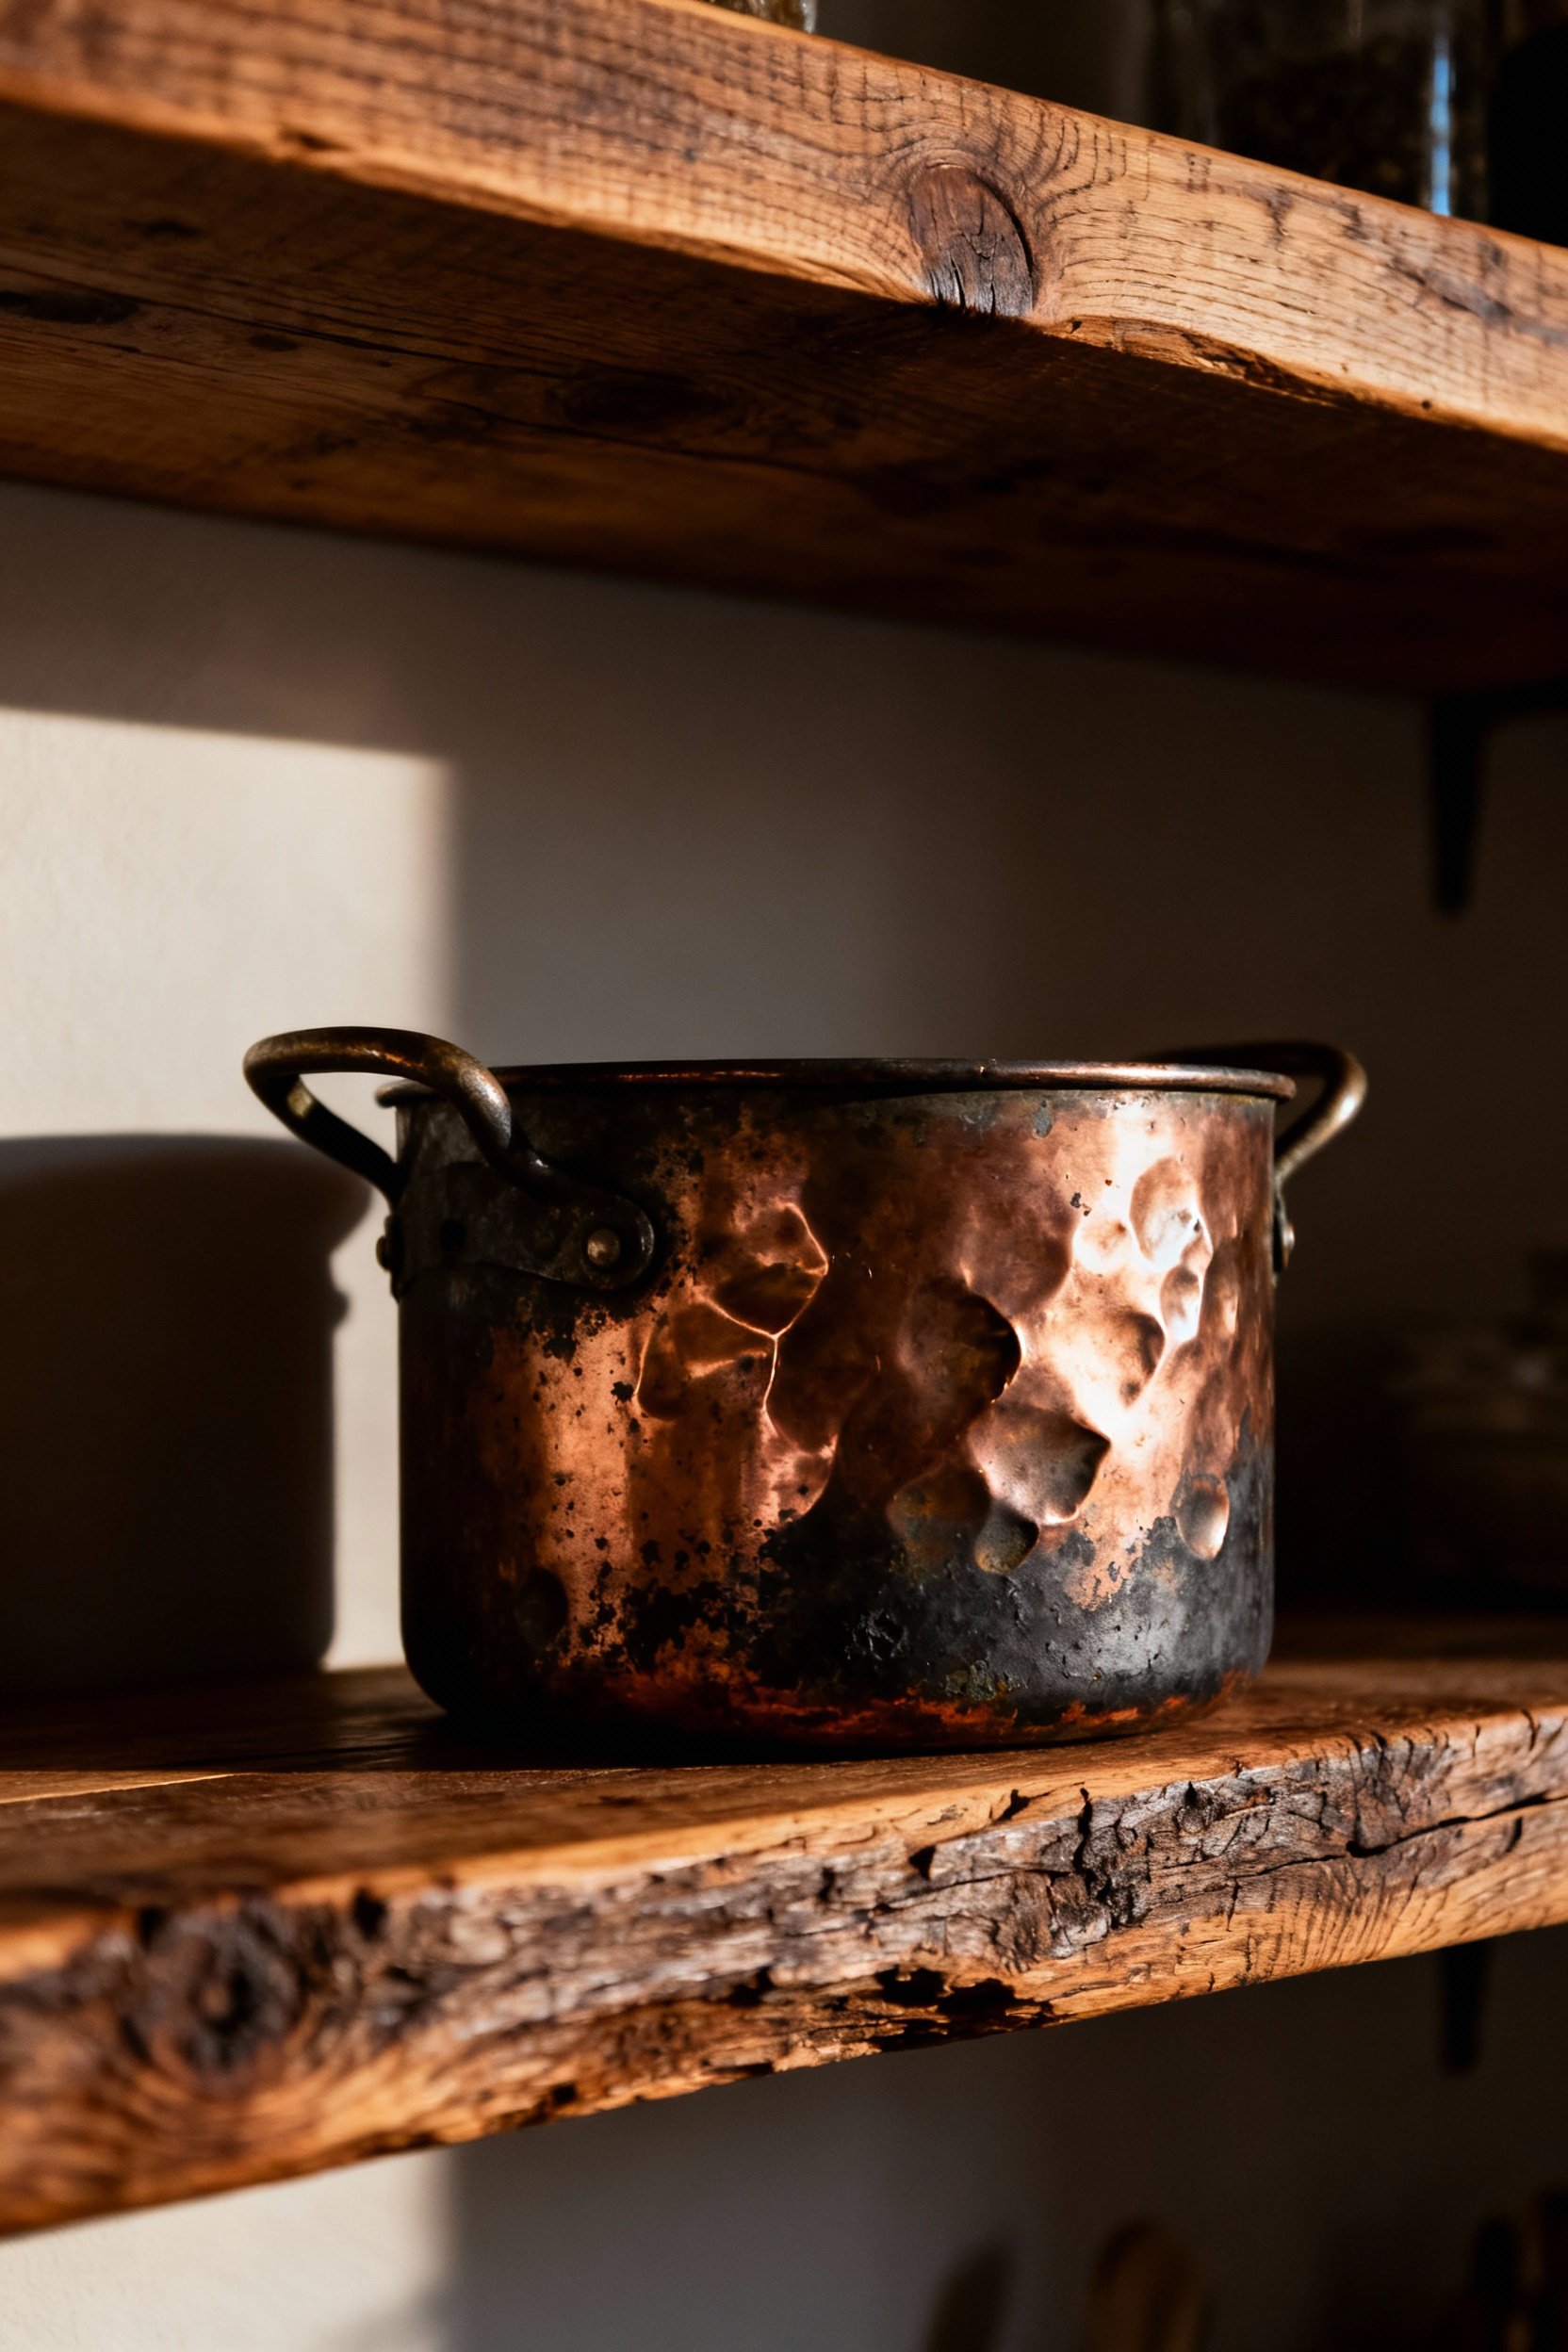
To transform your collection from simple storage into a curated heritage display, focus on verticality and visual weight. Utilizing heavy-duty wrought-iron pot racks or exposed beams not only frees up counter space but creates a focal point that celebrates the craftsmanship of the past.
* Curate by Scale: Avoid monotony by grouping items of varying sizes—hang a towering fish kettle next to delicate, hammered jelly molds to create intentional visual interest.
* Layer Textures: Prevent the copper from feeling too industrial by hanging matte black iron hooks or placing the display near neutral linen tea towels to ground the metallic shine.
* Group for Impact: Treat your cookware as art; a clustered arrangement often looks more “collected” and purposeful than spreading pieces thinly across a room.
10. Industrial Illumination: Restoring Salvaged Factory Pendants and Enamel Shades
There is a distinct thrill in unearthing a heavy-duty factory pendant and realizing its battered enamel shell—perhaps a deep green RLM standard or a chipped white dome—is the perfect counterpoint to a warm, rustic kitchen. Instead of striving for a high-gloss restoration, I encourage you to embrace wabi-sabi by preserving the authentic chips, distress, and faded manufacturer labels. Simply clean the surface and apply a clear matte sealant to arrest corrosion; this keeps the history alive while protecting your space. To amplify this resourceful aesthetic, consider the “collected” look: group two or three slightly different shapes or shades over your island. This variation makes the design feel organic and sustainable, rather than purchased from a catalog.
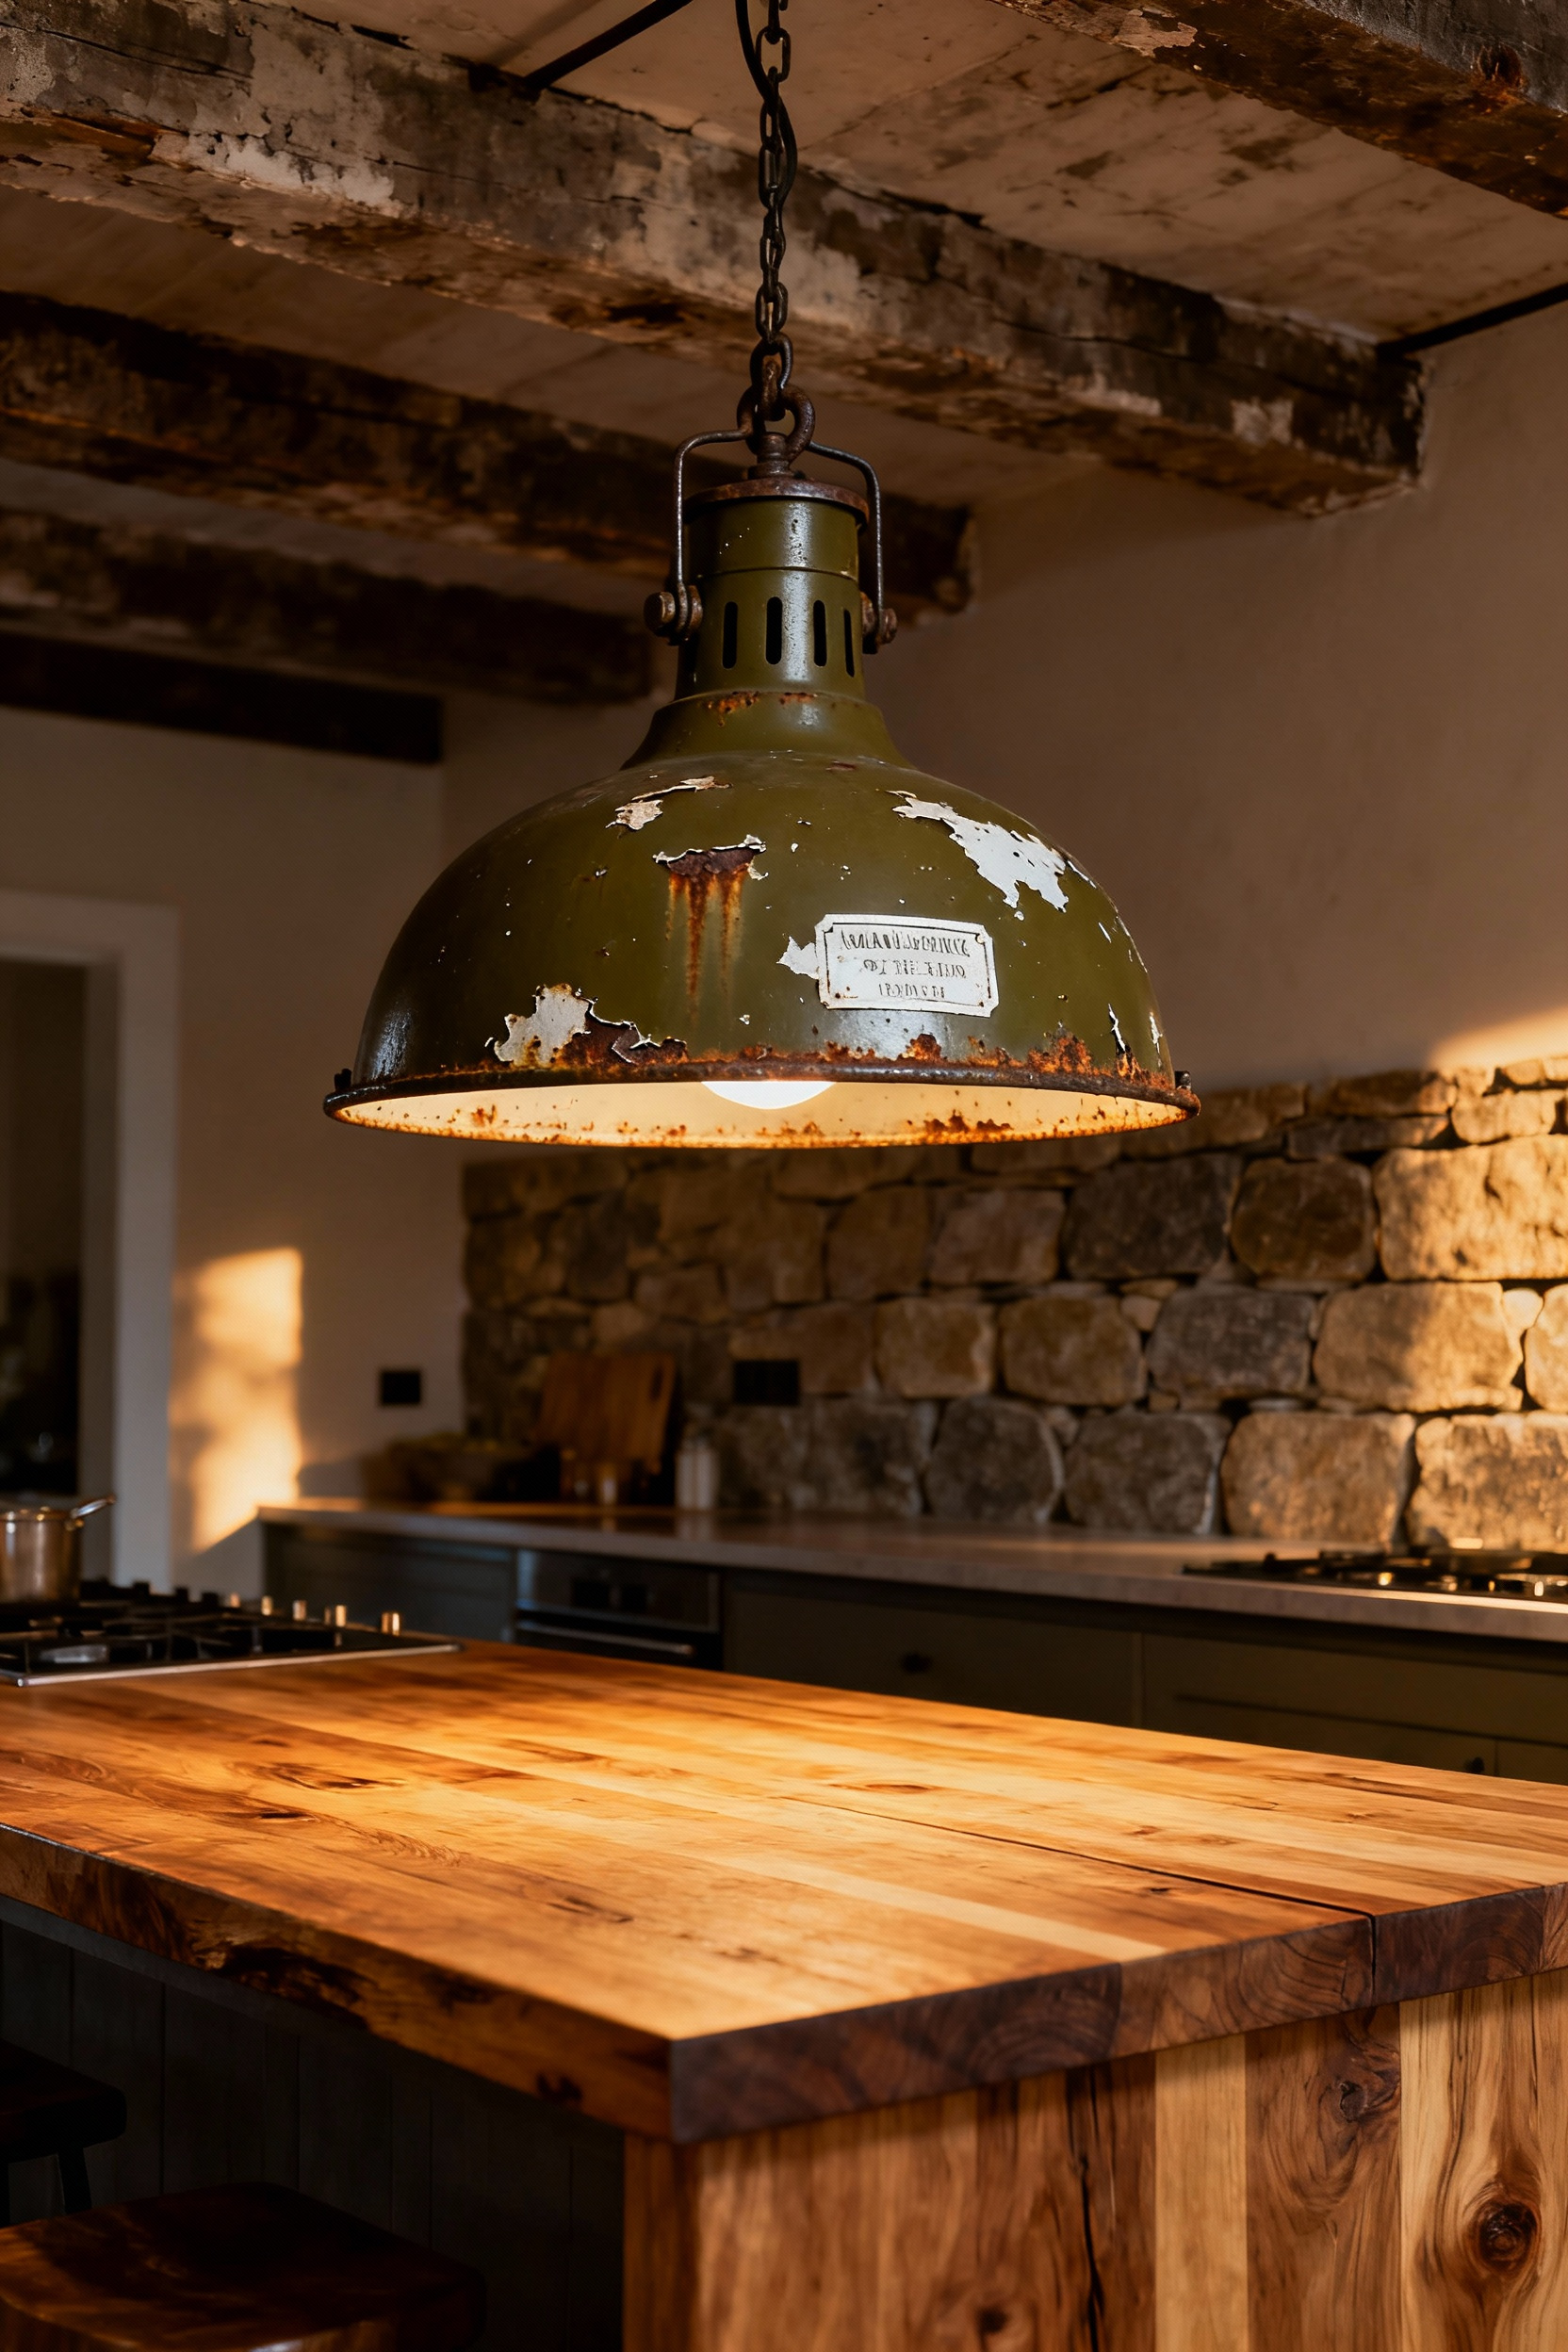
However, while the exterior should honor the past, the internal mechanics must be strictly modern. I never hang a vintage find without a complete safety overhaul. Strip the fixture down and install code-compliant sockets, but keep the nostalgic vibe by utilizing specific finishing touches:
* Fabric-wrapped wire: Choose black or jute-wrapped cords to mimic period-correct wiring while ensuring electrical safety.
* Warm filament LEDs: Industrial fixtures can be stark; counter this with 2200K–2700K “Edison style” bulbs. This amber glow softens the hard metal edges and provides the cozy atmosphere essential for a welcoming kitchen.
11. The Iron Pot Rack: Vertical Storage as Sculptural Element
There is a profound sense of history in the heavy, matte black finish of a hand-forged iron rack. I remember pulling a rusted, riveted rail from a barn sale and realizing it wasn’t just scrap metal—it was the anchor my kitchen needed. To achieve this sculptural effect, prioritize authenticity by choosing hardware with visible rivets and a rough-hewn texture, then mount it against a light backdrop like white subway tile or natural wood planking. This high-contrast placement transforms the rack from simple commercial storage into a striking silhouette, celebrating the durable tools that nourish us while keeping them out of landfills.
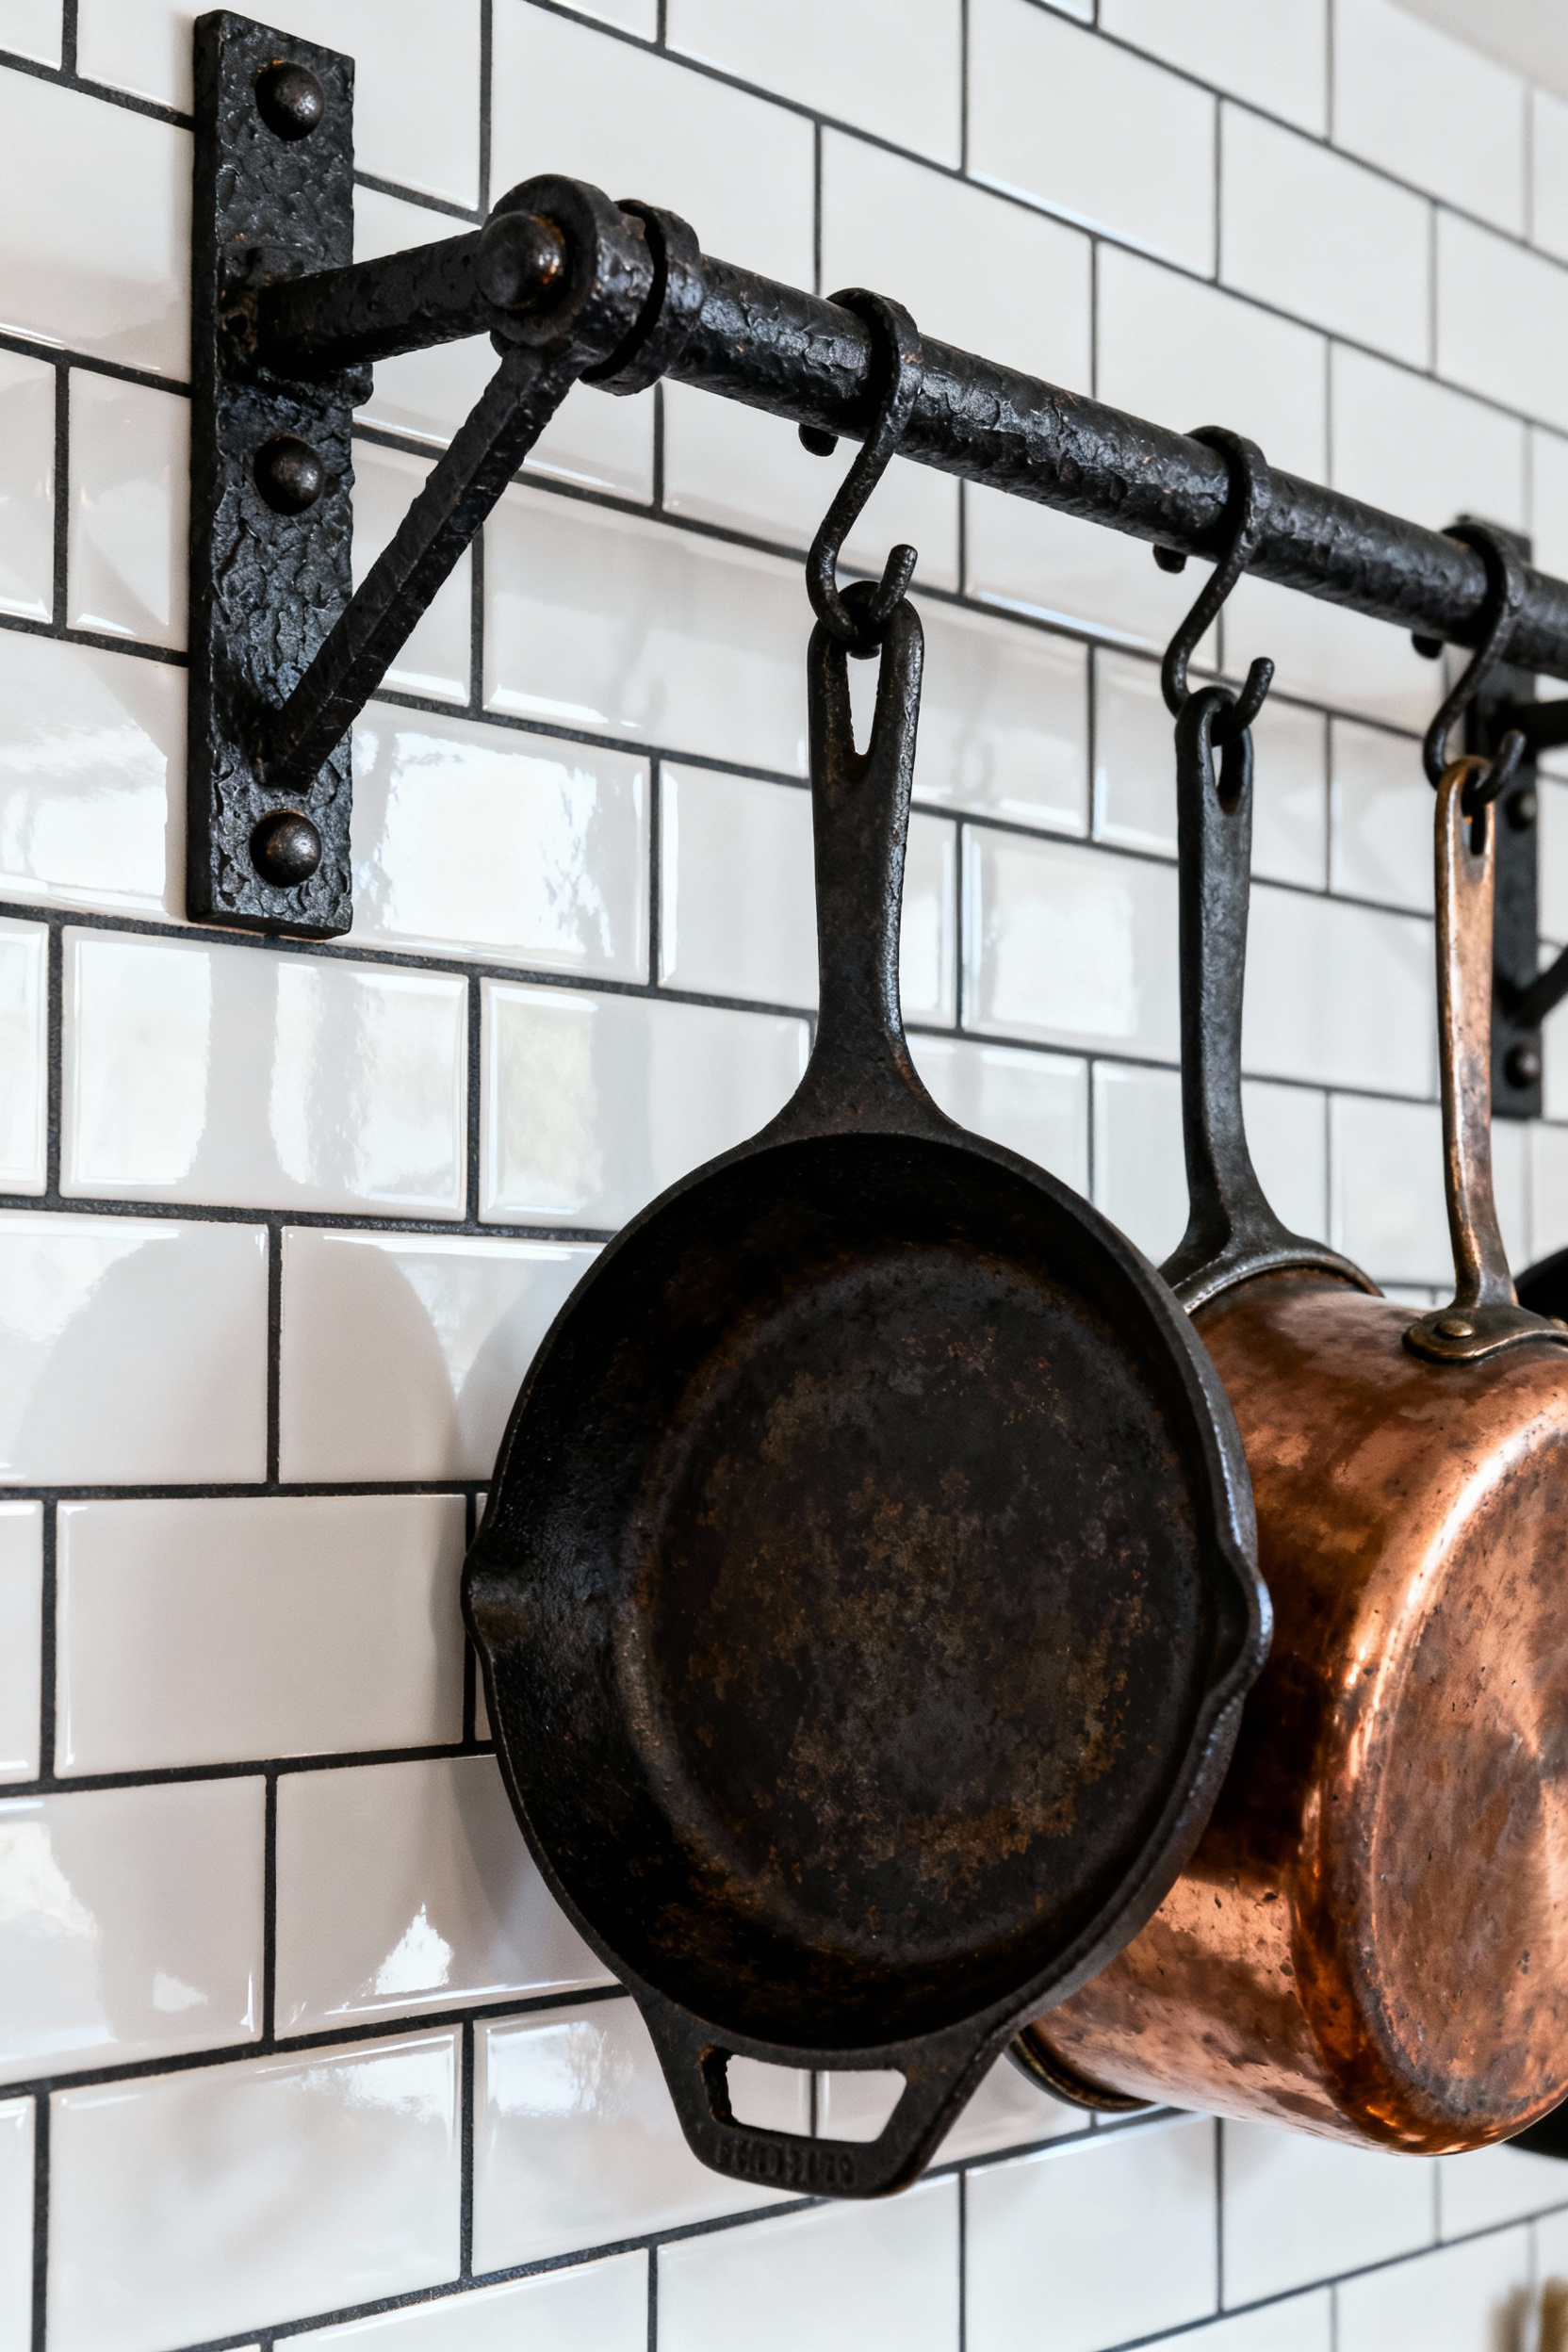
For a modern rustic aesthetic, skip the bulky ceiling grids in favor of sleek horizontal rails or vertical “ladder” systems mounted near your range. However, the true artistry lies in how you curate the display, treating your cookware as functional decor. To master the look:
* Mix Materials: Create dynamic visual texture by pairing the rugged darkness of cast iron with the warm, reflective glow of vintage copper saucepans.
* Create Flow: Arrange items by weight and size to ensure visual balance, preventing the rack from looking cluttered.
* Celebrate Imperfection: Embrace the patina of aged aluminum or well-seasoned steel; these sustainable choices tell the story of a kitchen well-loved.
Phase 4: Softening the Edges (Textiles & Organic Layers)
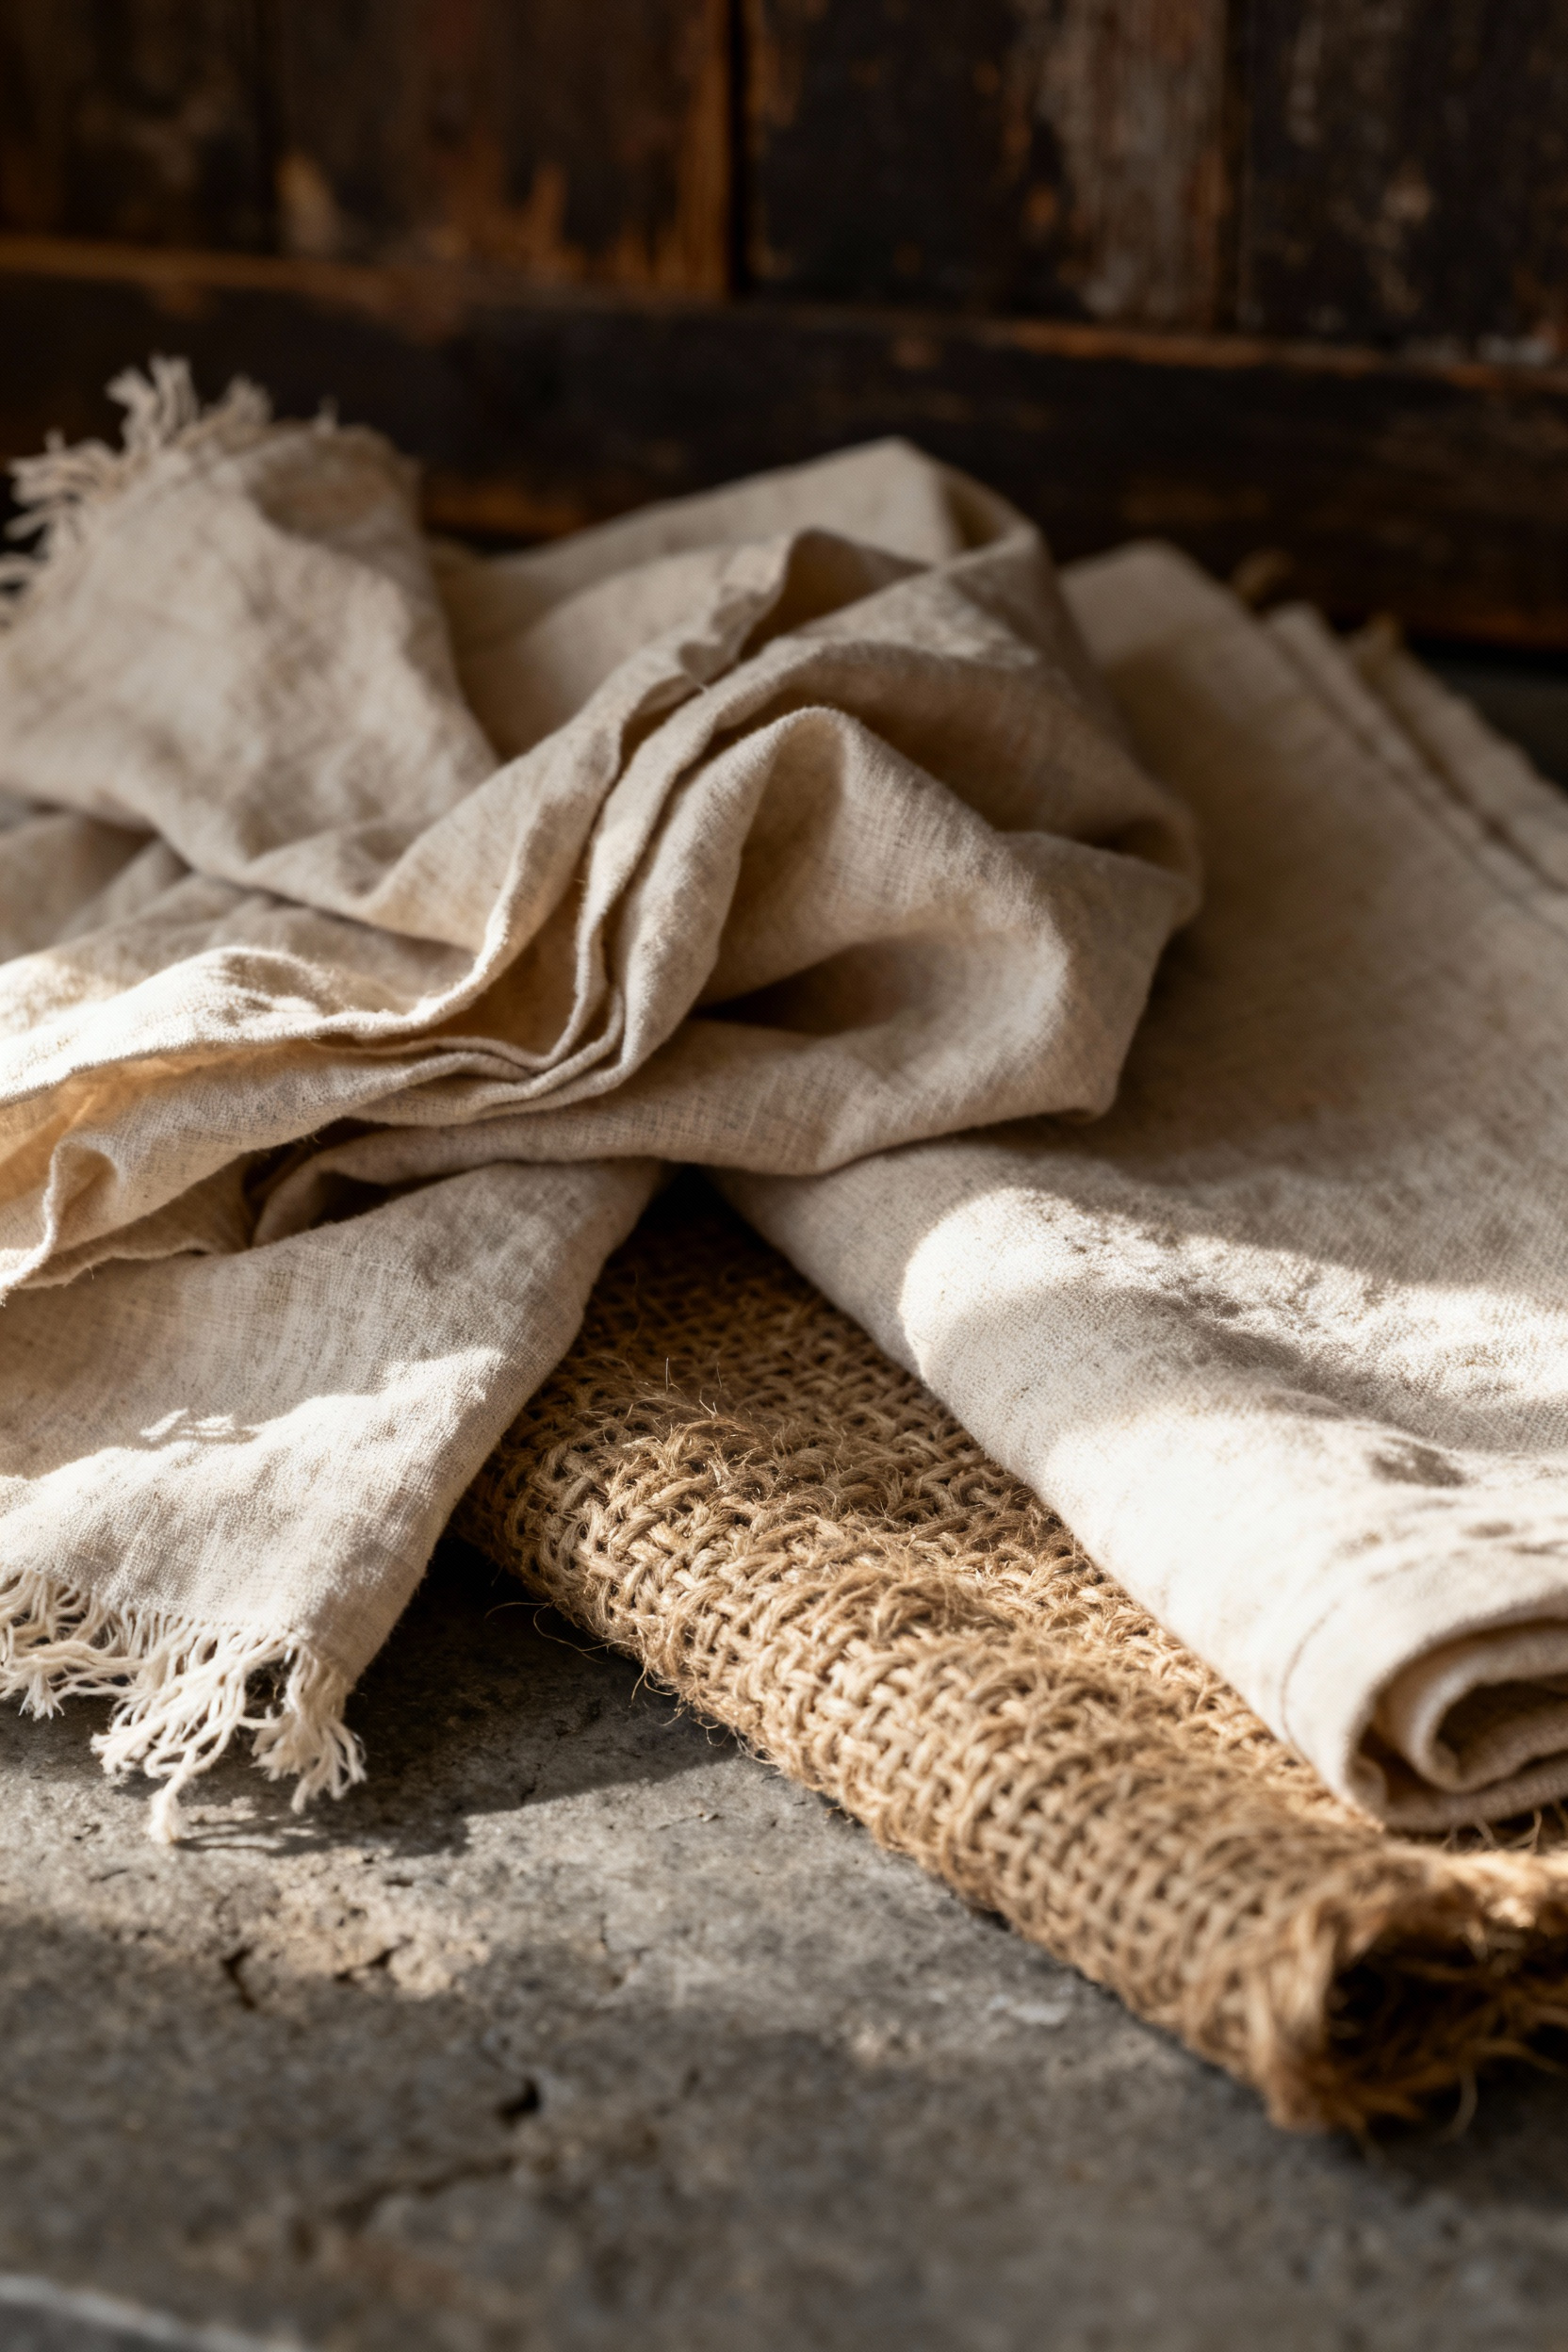
When I’m scavenging through estate sales, I’m often drawn to the heavy, time-softened linens that others overlook; there is a specific comfort in a frayed edge that a crisp, new hem just can’t replicate. To truly soften the heavy stone and timber of a rustic kitchen, you must swap out synthetic sleekness for materials that breathe and age gracefully. I always recommend replacing standard textiles with unbleached cotton, crushed linen, or hemp—fabrics that offer a relaxed, tactile resistance to the room’s harder lines. Even a vintage sheepskin draped over a stiff wooden barstool can instantly transform a utilitarian spot into an inviting nook.
Beyond just fabric, think of this phase as “rounding out” the room with organic, sustainable layers that break up angular cabinetry. I love using vintage woven rattan baskets for produce storage—it’s a functional, eco-friendly alternative to plastic that adds immediate warmth and history to your countertops. To achieve that cozy, lived-in aesthetic without cluttering the space, focus on these key textural shifts:
* Ground the Space: Place braided jute rugs in high-traffic zones to define areas and dampen sound against hard flooring.
* Embrace Wabi-Sabi: Choose window treatments and napkins with raw edges, visible stitching, or natural wrinkles rather than heavy, pleated structures.
* Soften the Geometry: Introduce trailing houseplants like ivy or ferns to visually disrupt straight architectural lines with living, organic curvature.
12. Tactile Comfort: Layering Vintage Grain Sack Linens and Wool Runners
There is a unique soul in textiles that have already lived a full life, and nothing grounds a rustic kitchen quite like the honest, hardworking texture of vintage grain sack linens. I love hunting for these heavy hemp or cotton pieces because they offer an incredible tactile counterpoint to the space; their coarse, durable weave stands up to endless washings, making them the ultimate sustainable choice for high-traffic areas. To truly elevate the sensory experience, pair that crisp, utilitarian fabric with the deep, forgiving pile of a dense wool runner. The magic lies in the juxtaposition—the slightly scratchy history of the sack against the soft warmth of the wool creates a layered depth that mass-produced textiles simply cannot replicate.
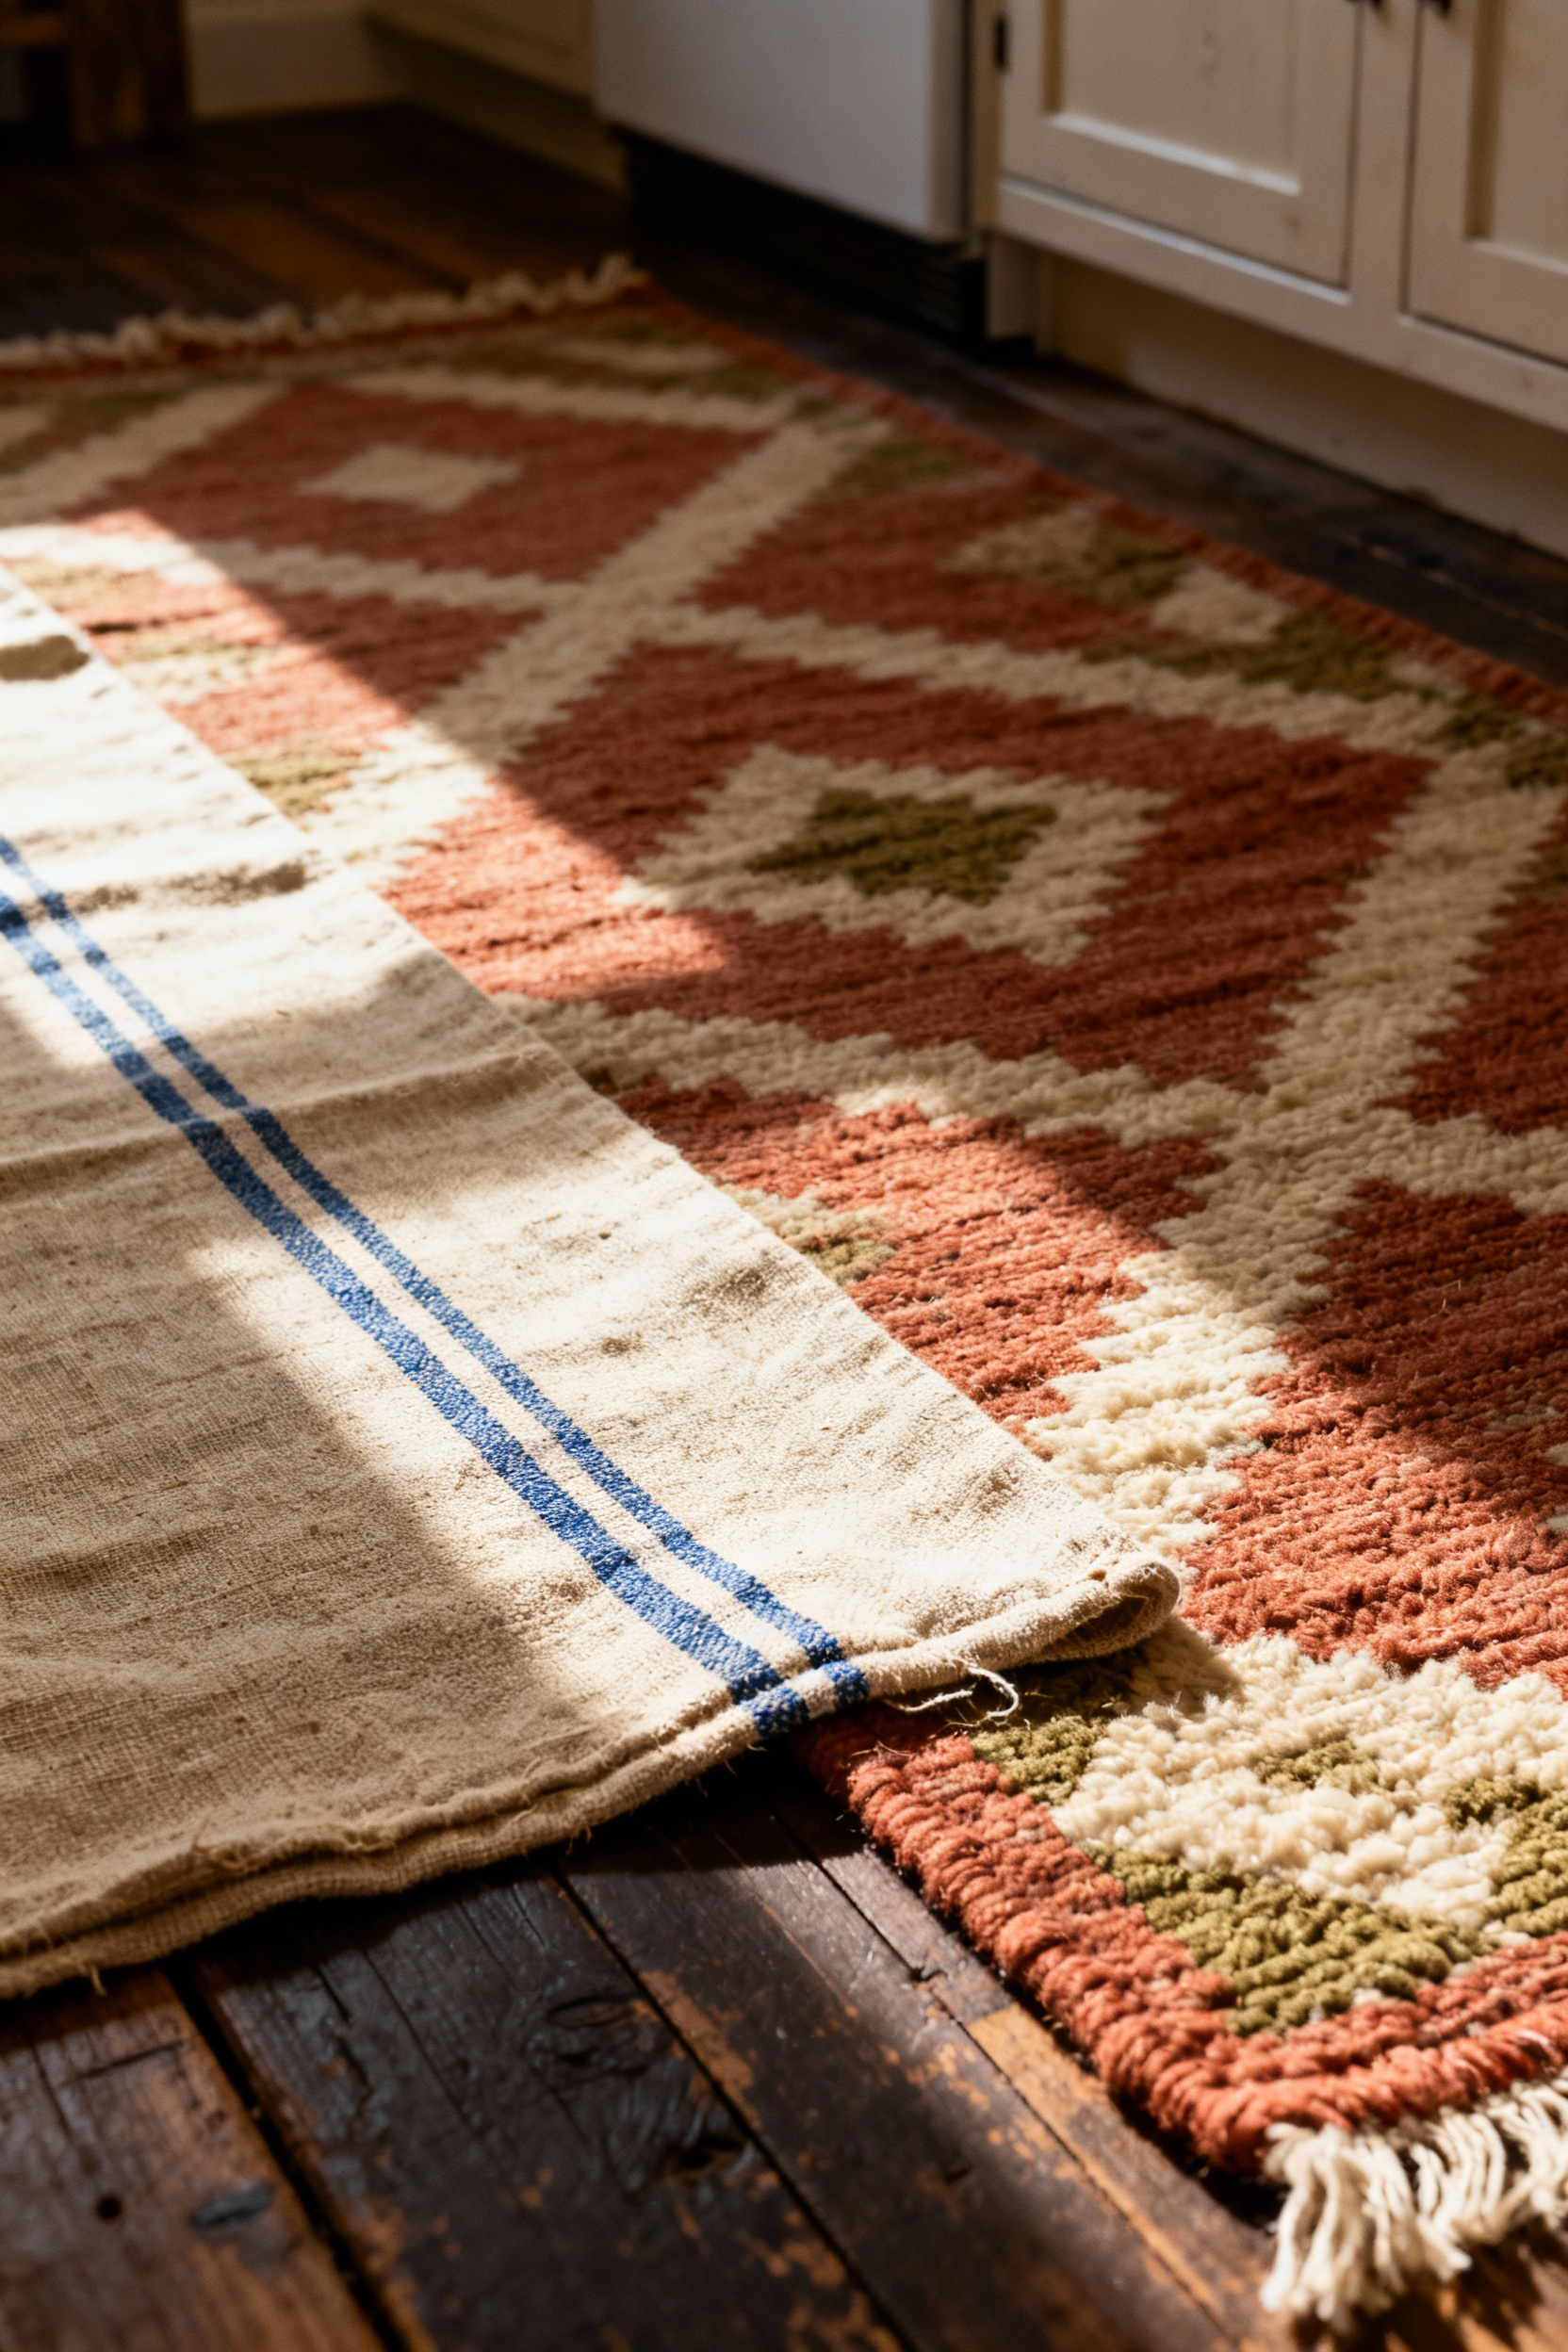
Functionality is just as vital as aesthetics in a working kitchen. Anchor your workspace by placing a substantial wool runner directly in front of the sink or prep island to provide acoustic dampening and ergonomic support during long cooking sessions. Visually, create harmony by echoing the faded red, blue, or black stripes typical of grain sacks within the minor colors of your runner’s pattern. This subtle continuity makes the room feel curated rather than cluttered. Try integrating these resilient vintage fabrics into your daily routine through:
- High-Wear Slipcovers: Use heavy hemp sacks for washable chair cushion covers that resist wear.
- Cabinet Curtains: Replace cabinet doors with grain sack fabric to soften stone or wood surfaces.
- Indestructible Linens: Repurpose smaller scraps as heavy-duty placemats or hand towels that only get softer with age.
13. Imperfect Vessels: Styling Stoneware Crocks and Ironstone Collections
There is a quiet beauty in the resilience of antique ironstone; choosing these survived pieces over mass-produced ceramics is one of the easiest ways to build a sustainable, soulful kitchen. I often encourage clients to stop hiding the crazing, chips, or faded stamps on their finds. These imperfections are evidence of a life well-lived and provide essential warmth when placed against sleek modern elements like stainless steel or quartz. When styling monochromatic ironstone, rely on the power of accumulation by stacking plates and layering platters in odd-numbered groups. This allows the subtle variations in creamy glazes to create texture without the need for bold color.

For heavier stoneware crocks, treat them as functional anchors that ground your counter space. I use a battered two-gallon crock to corral my collection of vintage wooden rolling pins and long-handled spoons, transforming necessary storage into a nostalgic focal point. To keep your displays dynamic, try these styling maneuvers:
* Break the Horizon: Use tall stoneware pitchers to interrupt horizontal stacks of bowls on open shelving, adding necessary vertical rhythm.
* Honor Utility: Fill vessels with bundled fresh herbs or linen napkins to emphasize that these pieces are meant to be used, not just admired.
* Position for Contrast: Place your most weathered pieces front and center to certify the vintage status of the collection.
14. Bringing the Outside In: Dried Herbs, Foraged Branches, and Seasonal Produce
There is a profound sense of comfort in a kitchen that smells of the earth and the garden. As a restorer, I’m always looking for ways to marry utility with beauty, and bringing nature indoors is the ultimate sustainable design choice. Use your vertical space to hang bundles of rosemary, lavender, or sage from iron hooks or exposed beams with natural twine; as they dry, they provide texture and fragrance before eventually ending up in your soup pot. Pair this organic look with vintage vessels—oversized ceramic crocks are perfect for housing wooden spoons or rolling pins, while breathable wicker baskets keep root vegetables like onions and potatoes fresh while adding warmth to your shelving.
Title: Rustic Utility: Dried Herbs Hanging from Exposed Beams
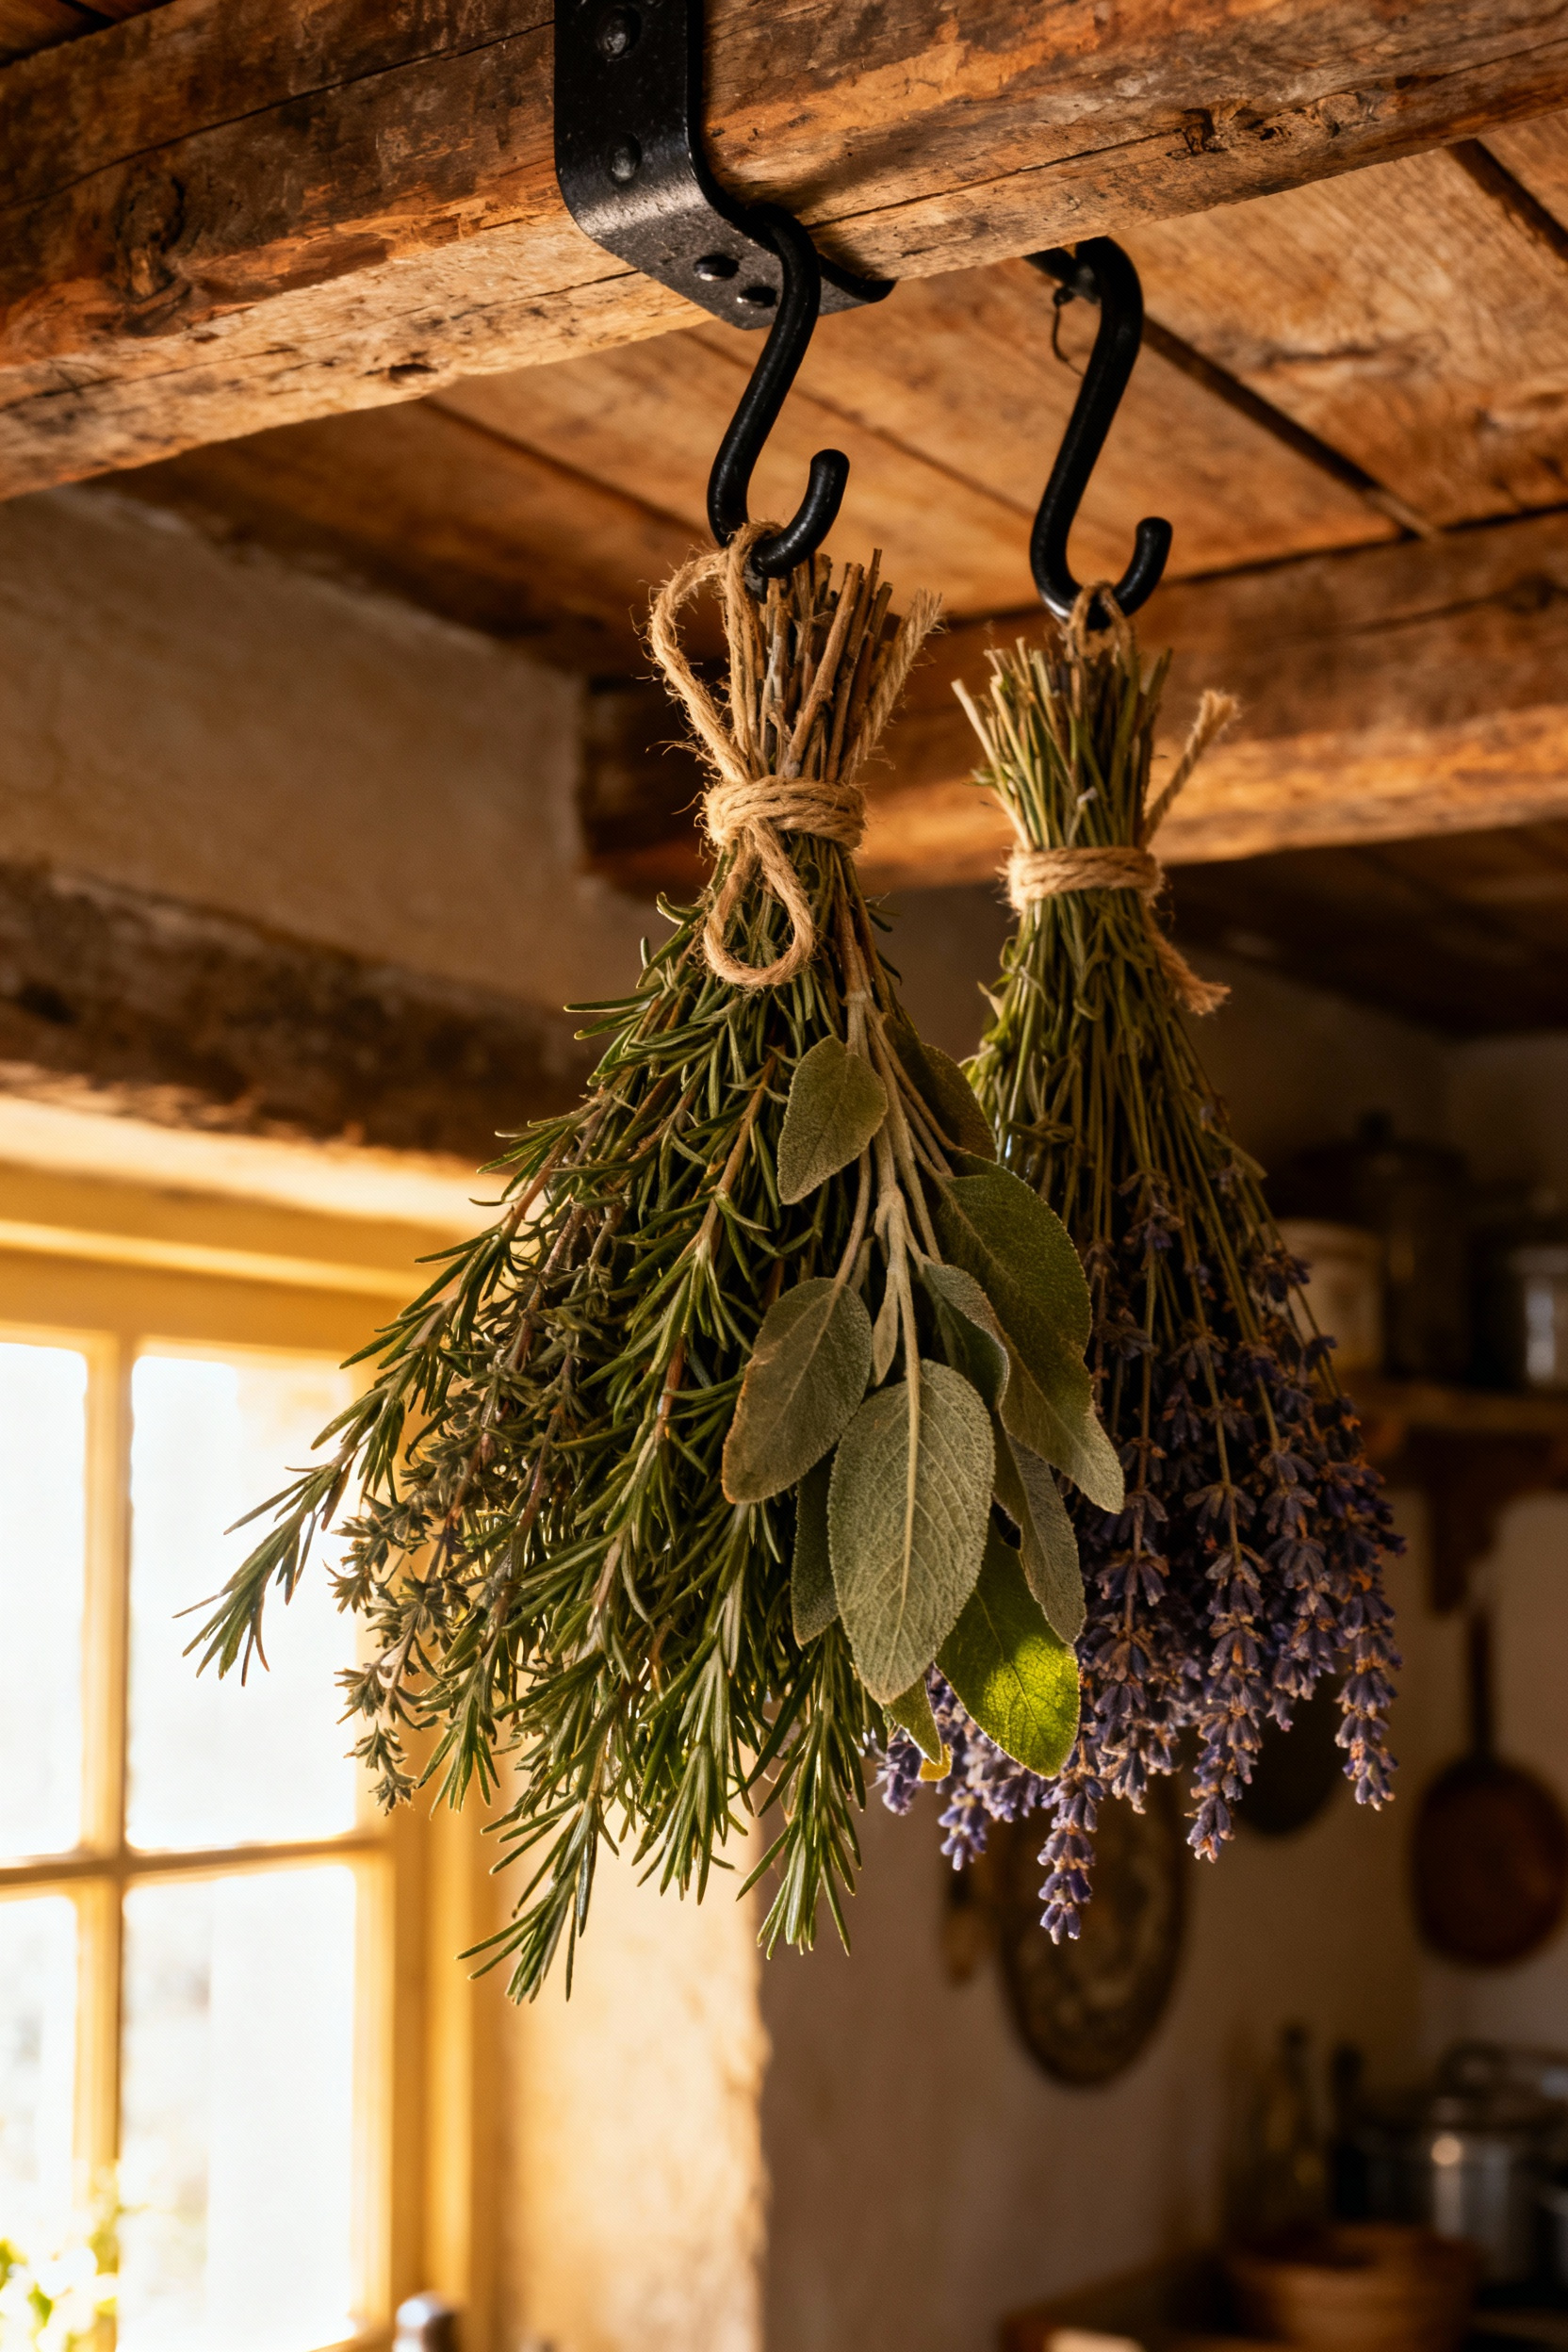
To keep the space feeling authentic rather than staged, let the seasons dictate your decor through “foraged styling.” I often remind clients that the best accessories are found on a morning walk, not in a big-box store. Look for structural elements like birch branches or curly willow to place in heavy floor vases for raw, unrefined height. Keep your countertops dynamic by rotating centerpieces that reflect what is currently growing outside:
* Spring/Summer: Fill Mason jars with wildflowers or display bowls of vibrant citrus like lemons or plums.
* Autumn: Arrange wheat sheaves and unique gourds on the dining table.
* Winter: Bring in pine boughs and smooth collected river stones for a grounded, cozy feel.
Conclusion: Cultivating a ‘Slow Living’ Philosophy Through Rustic Kitchen Design
Adopting a slow living philosophy isn’t about curating a flawless showroom; it’s about creating a space that breathes and ages alongside you. When I’m restoring a vintage piece, I never aim to erase its history, but rather to honor its journey—a mindset that is crucial for authentic rustic kitchen design. By deliberately selecting materials like reclaimed wood countertops or unsealed soapstone, you invite a rich patina to develop over time. These surfaces don’t just resist wear; they record it, turning every scratch and stain into a story that counteracts the disposable nature of modern consumerism.
To shift your home from a place of mere efficiency to one of intentionality, you must engage the senses and invite the eye to rest. Instead of hiding the “work” of the home, celebrate the craft by displaying heirloom cast iron or copper kettles on open peg rails, acknowledging the beauty in the process. Consider these actionable shifts to ground your daily routine:
- Anchor the Room: Install a substantial, unfinished harvest table that prioritizes communal lingering over quick meal prep.
- Layer Organic Textures: Introduce rough-hewn beams, raw stoneware, or woven linens to invite touch and physically slow the pace of the room.
- Celebrate Endurance: Resist the urge to over-polish; let your environment show the evidence of a life well-lived.