
I once unearthed a crate of heavy, glazed subway tiles in a dusty salvage yard, relics from a forgotten Victorian scullery. Holding those ceramic squares, I realized they weren’t designed for beauty; they were armor against the grime of a hidden workspace. Originally, the backsplash was purely functional, born from a strict need for sanitation rather than style. However, as walls came down to embrace open-concept living, the kitchen shifted from a service station to the heart of the home.
Once exposed to the living area, the humble splash guard demanded a promotion. It could no longer be a sterile, white void; it had to bridge the gap between utility and decor. This transition turned the area behind the range into the modern hearth, a place for artistic expression rather than just grease protection. We now look to this space to anchor the room, using it to tell a visual story that links our cabinetry to our conversations.
The options for this vertical real estate are now limitless, ranging from sustainable vintage finds to luxurious, seamless stone slabs that mimic gallery walls. In this article, we will trace the journey of the backsplash and explore how you can reclaim this zone as the soul of your kitchen. Let’s look at how to choose materials that honor the past, withstand the future, and turn a practical necessity into your home’s most captivating feature.
Philosophical Anchor: Materiality over Trends
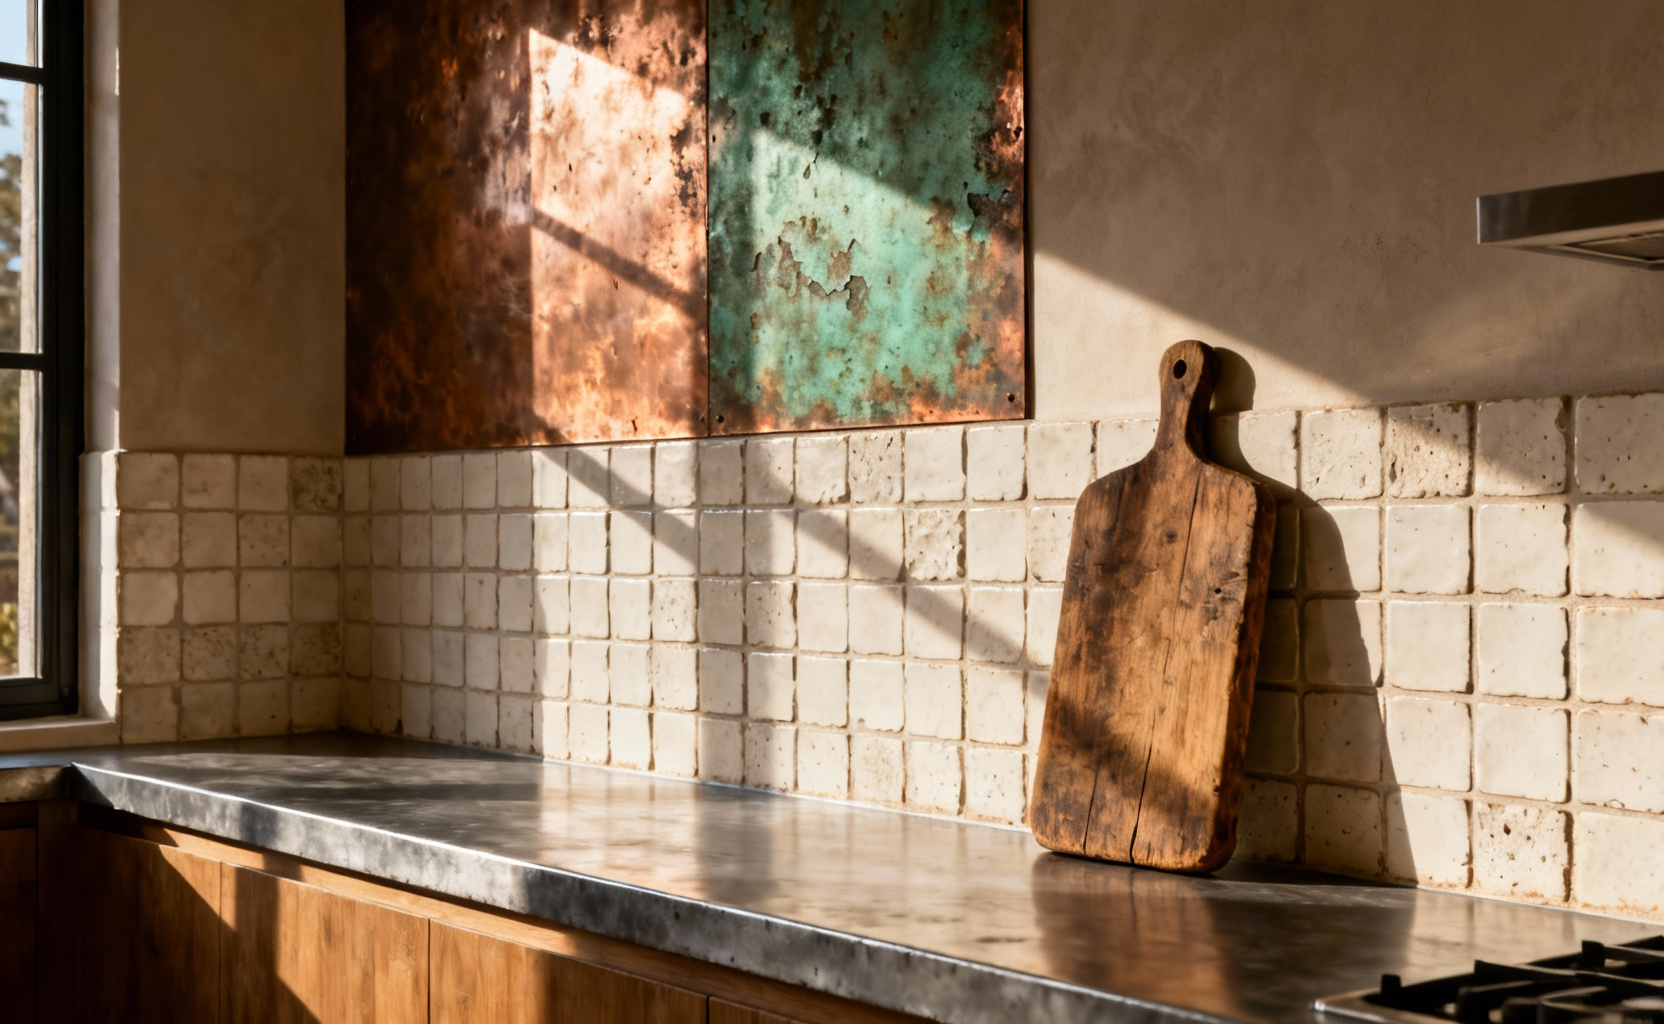
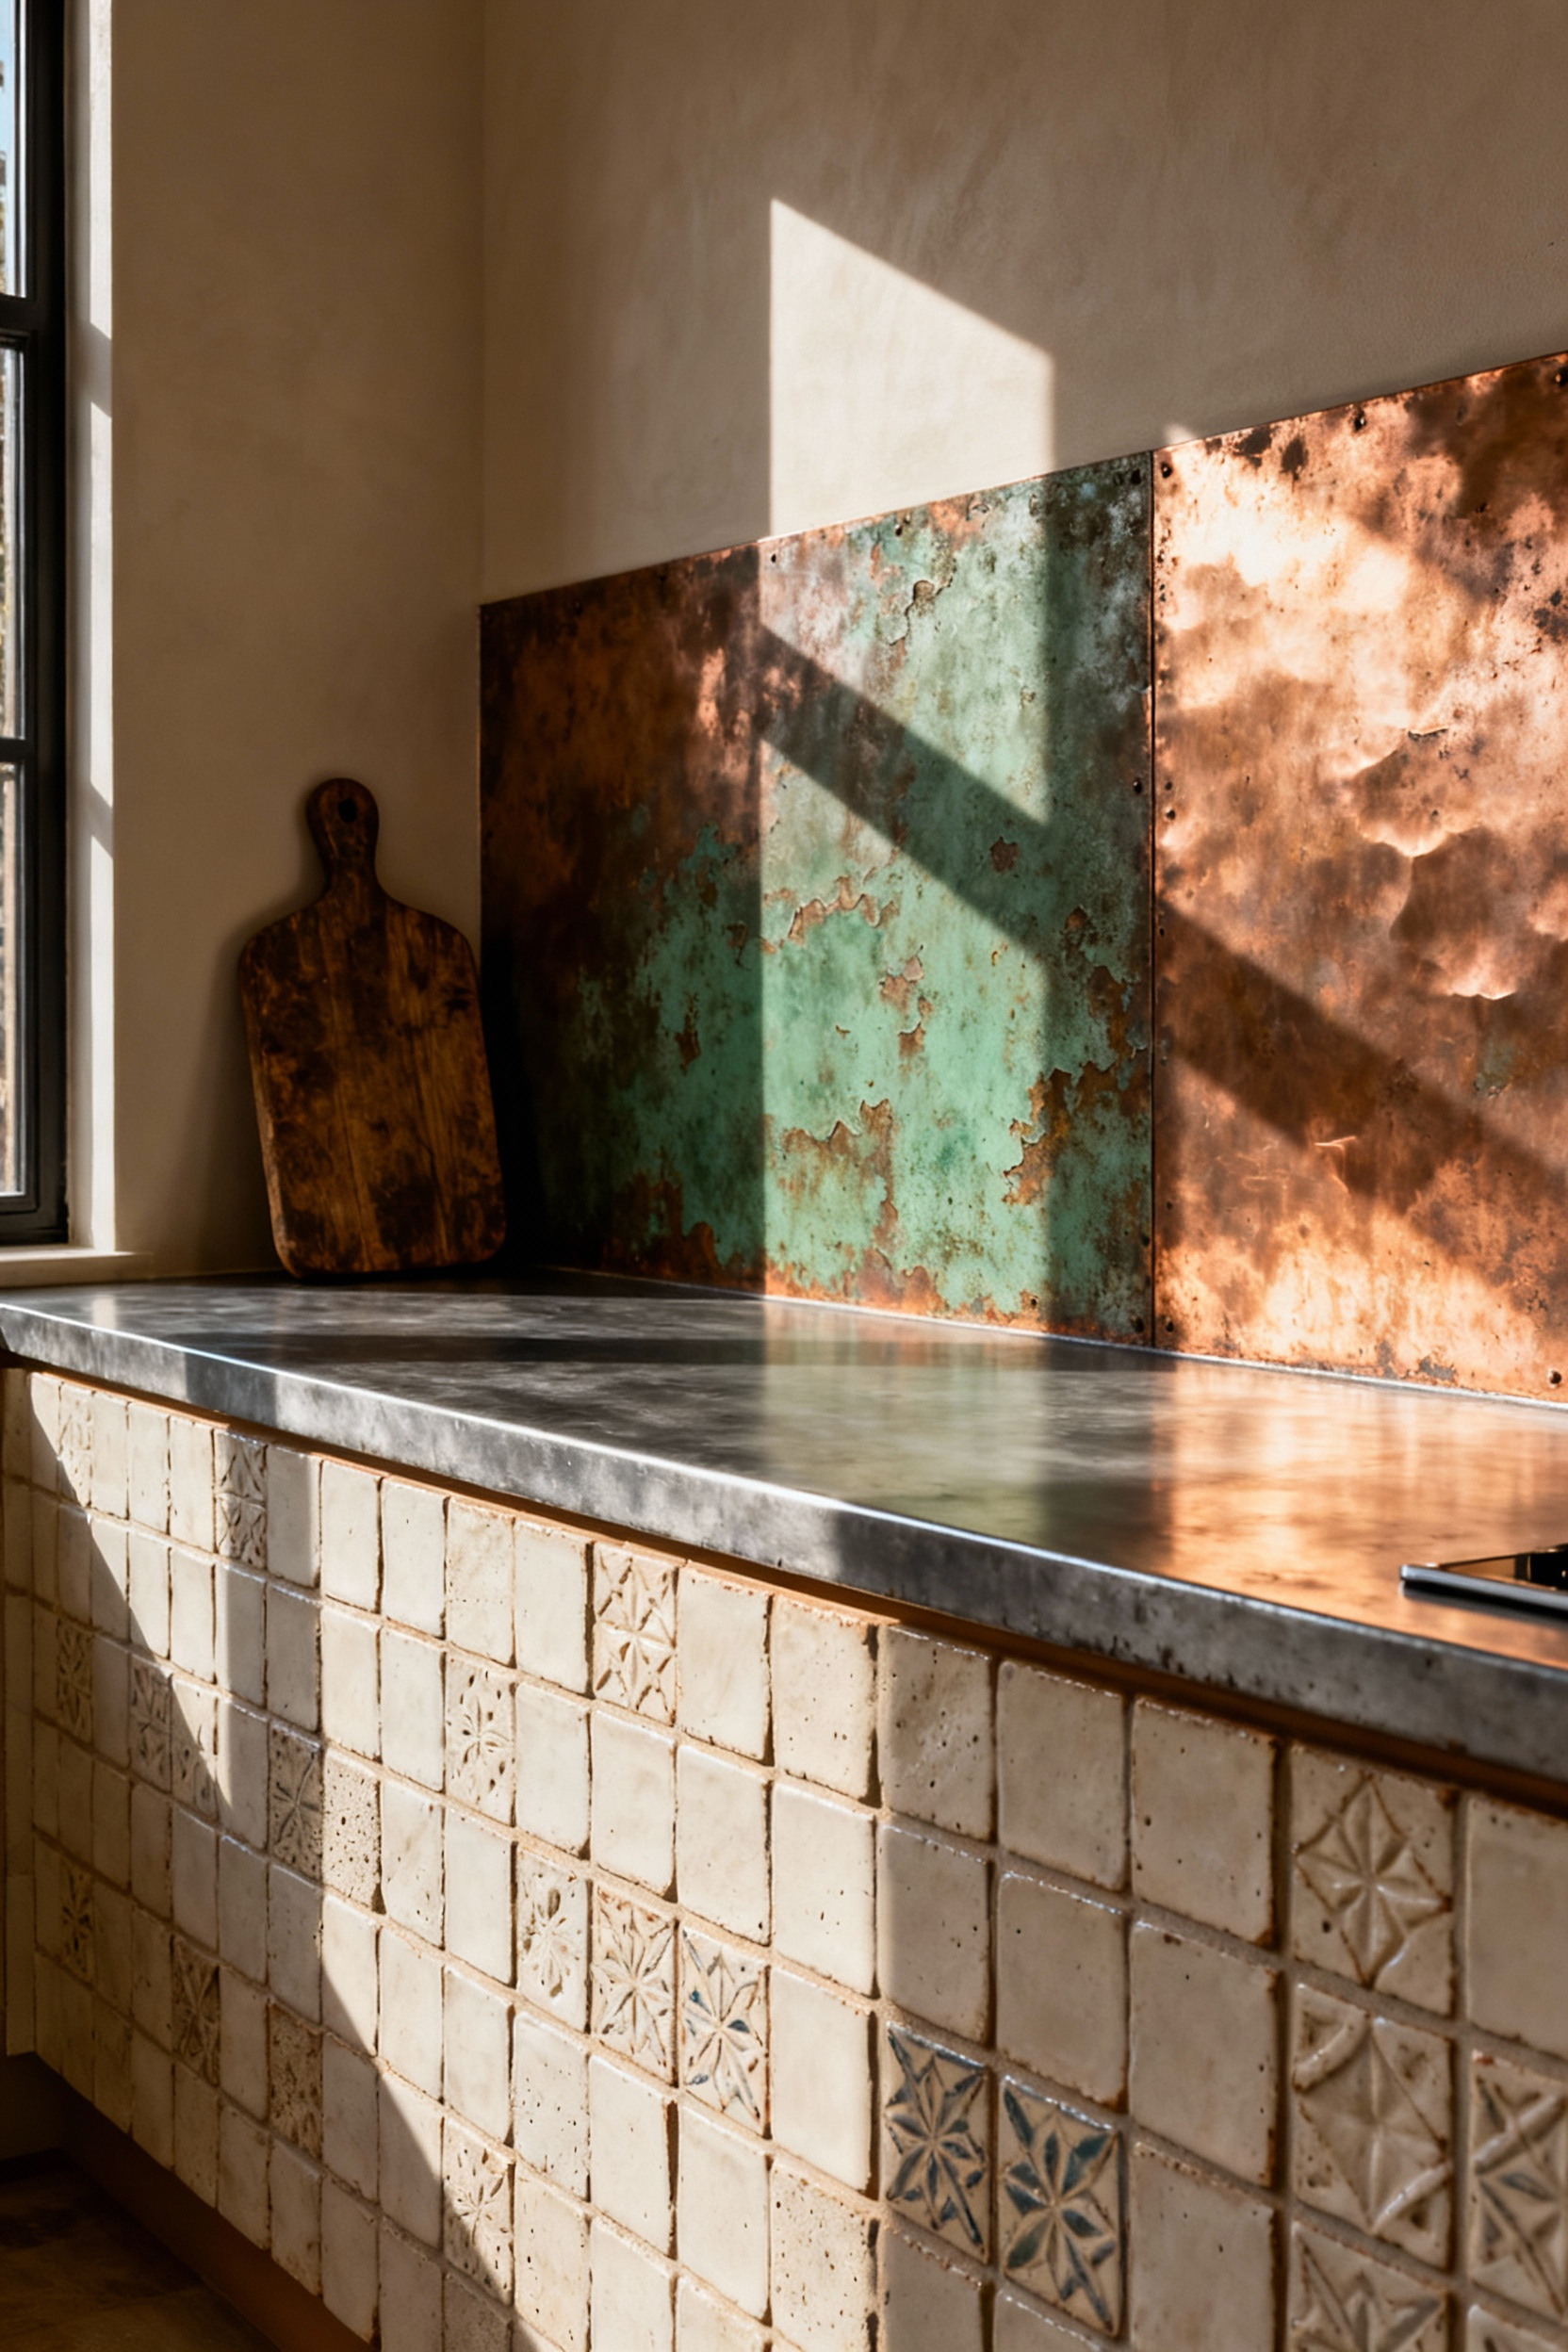
Ignore the fleeting hype of the “Color of the Year.” True design longevity lies in materials that live, breathe, and age alongside you. For a recent renovation, I rescued a sheet of raw copper, and watching it evolve from bright penny-bronze to a rich, oxidized warmth brought the entire room to life. Prioritize surfaces that develop a patina rather than those that merely degrade. Install unsealed zinc or reclaimed brick to gain character from heat and daily use. Select handmade tiles where irregular edges provide genuine depth. These choices favor lasting craftsmanship over industrial perfection and ensure your kitchen tells a story.
Texture always trumps saturation. While bold paint colors date quickly, the complex interplay of light on a tactile surface remains timeless. Invest in full slabs of veined marble or quartzite to elevate your backsplash from mere decoration to a structural anchor. If stone feels too heavy, opt for carved wood or fluted textures in muted earth tones. Prioritizing materiality offers distinct sustainable benefits:
- Longevity: Natural stone and brick physically outlast trend-driven ceramics.
- Evolution: Living finishes improve with age, reducing the urge to renovate.
- Depth: Physical texture creates visual interest without relying on loud, temporary colors.
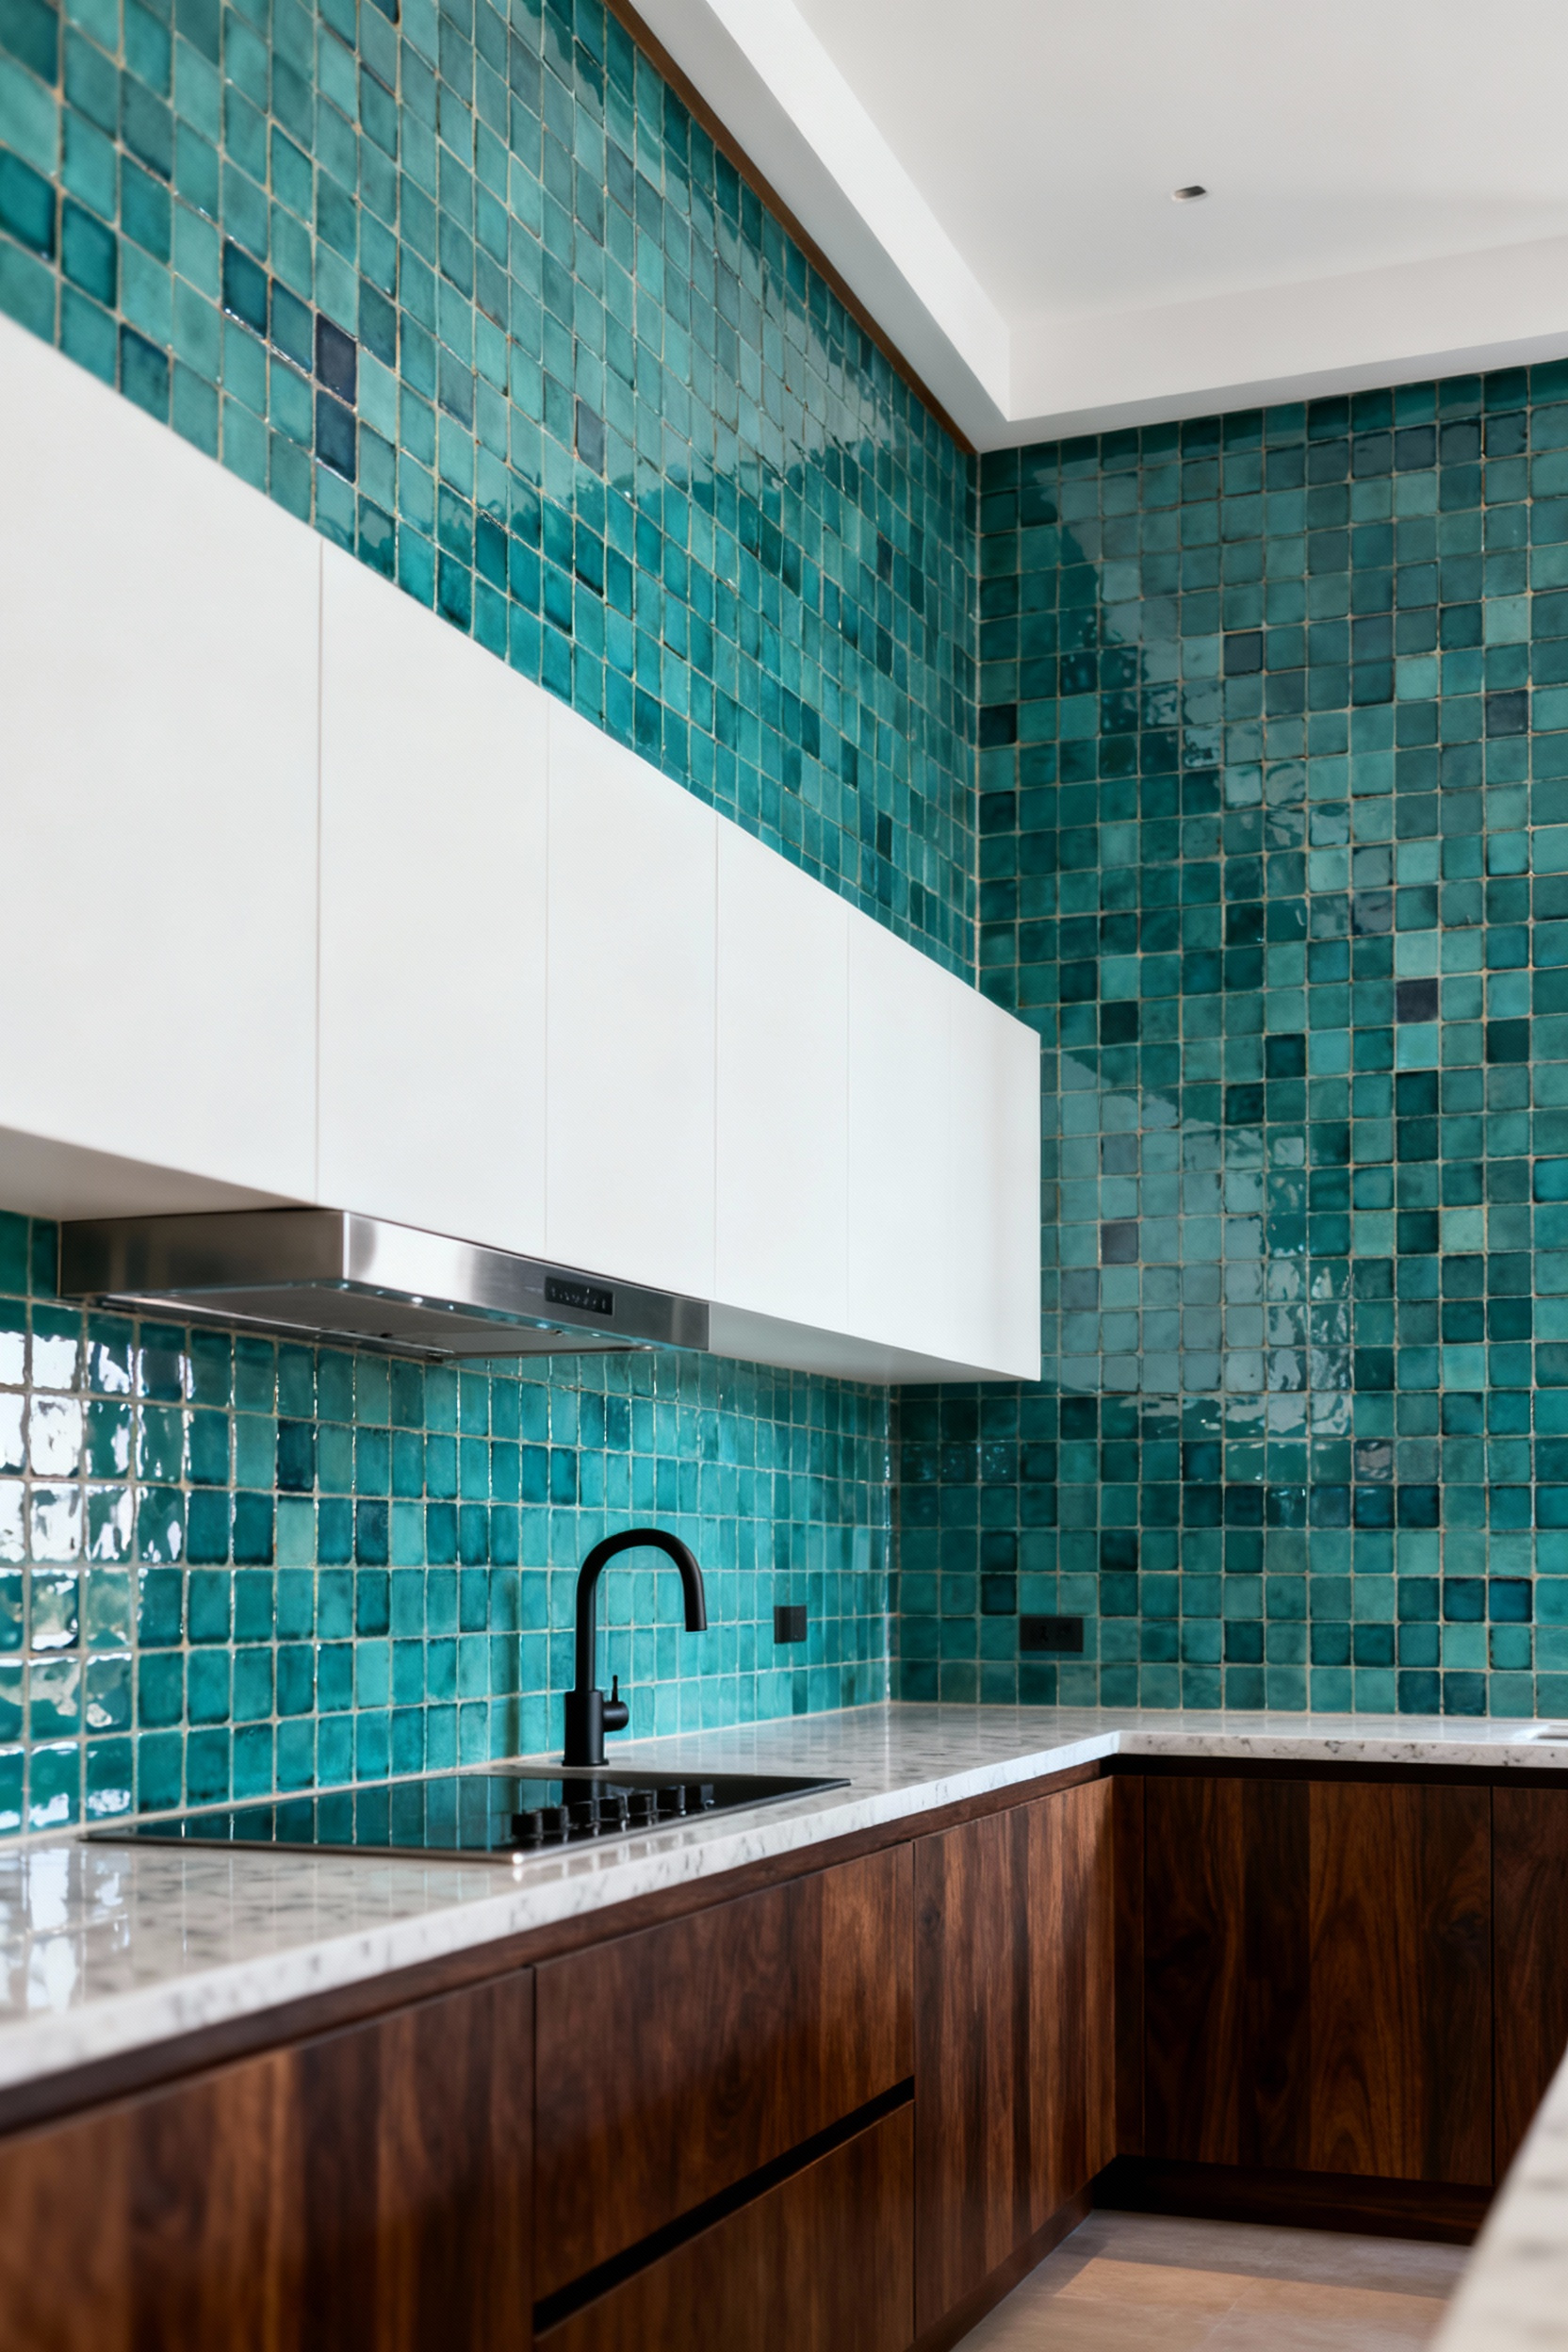
1. The Zellige Revival: Embracing ‘Perfectly Imperfect’ Edges
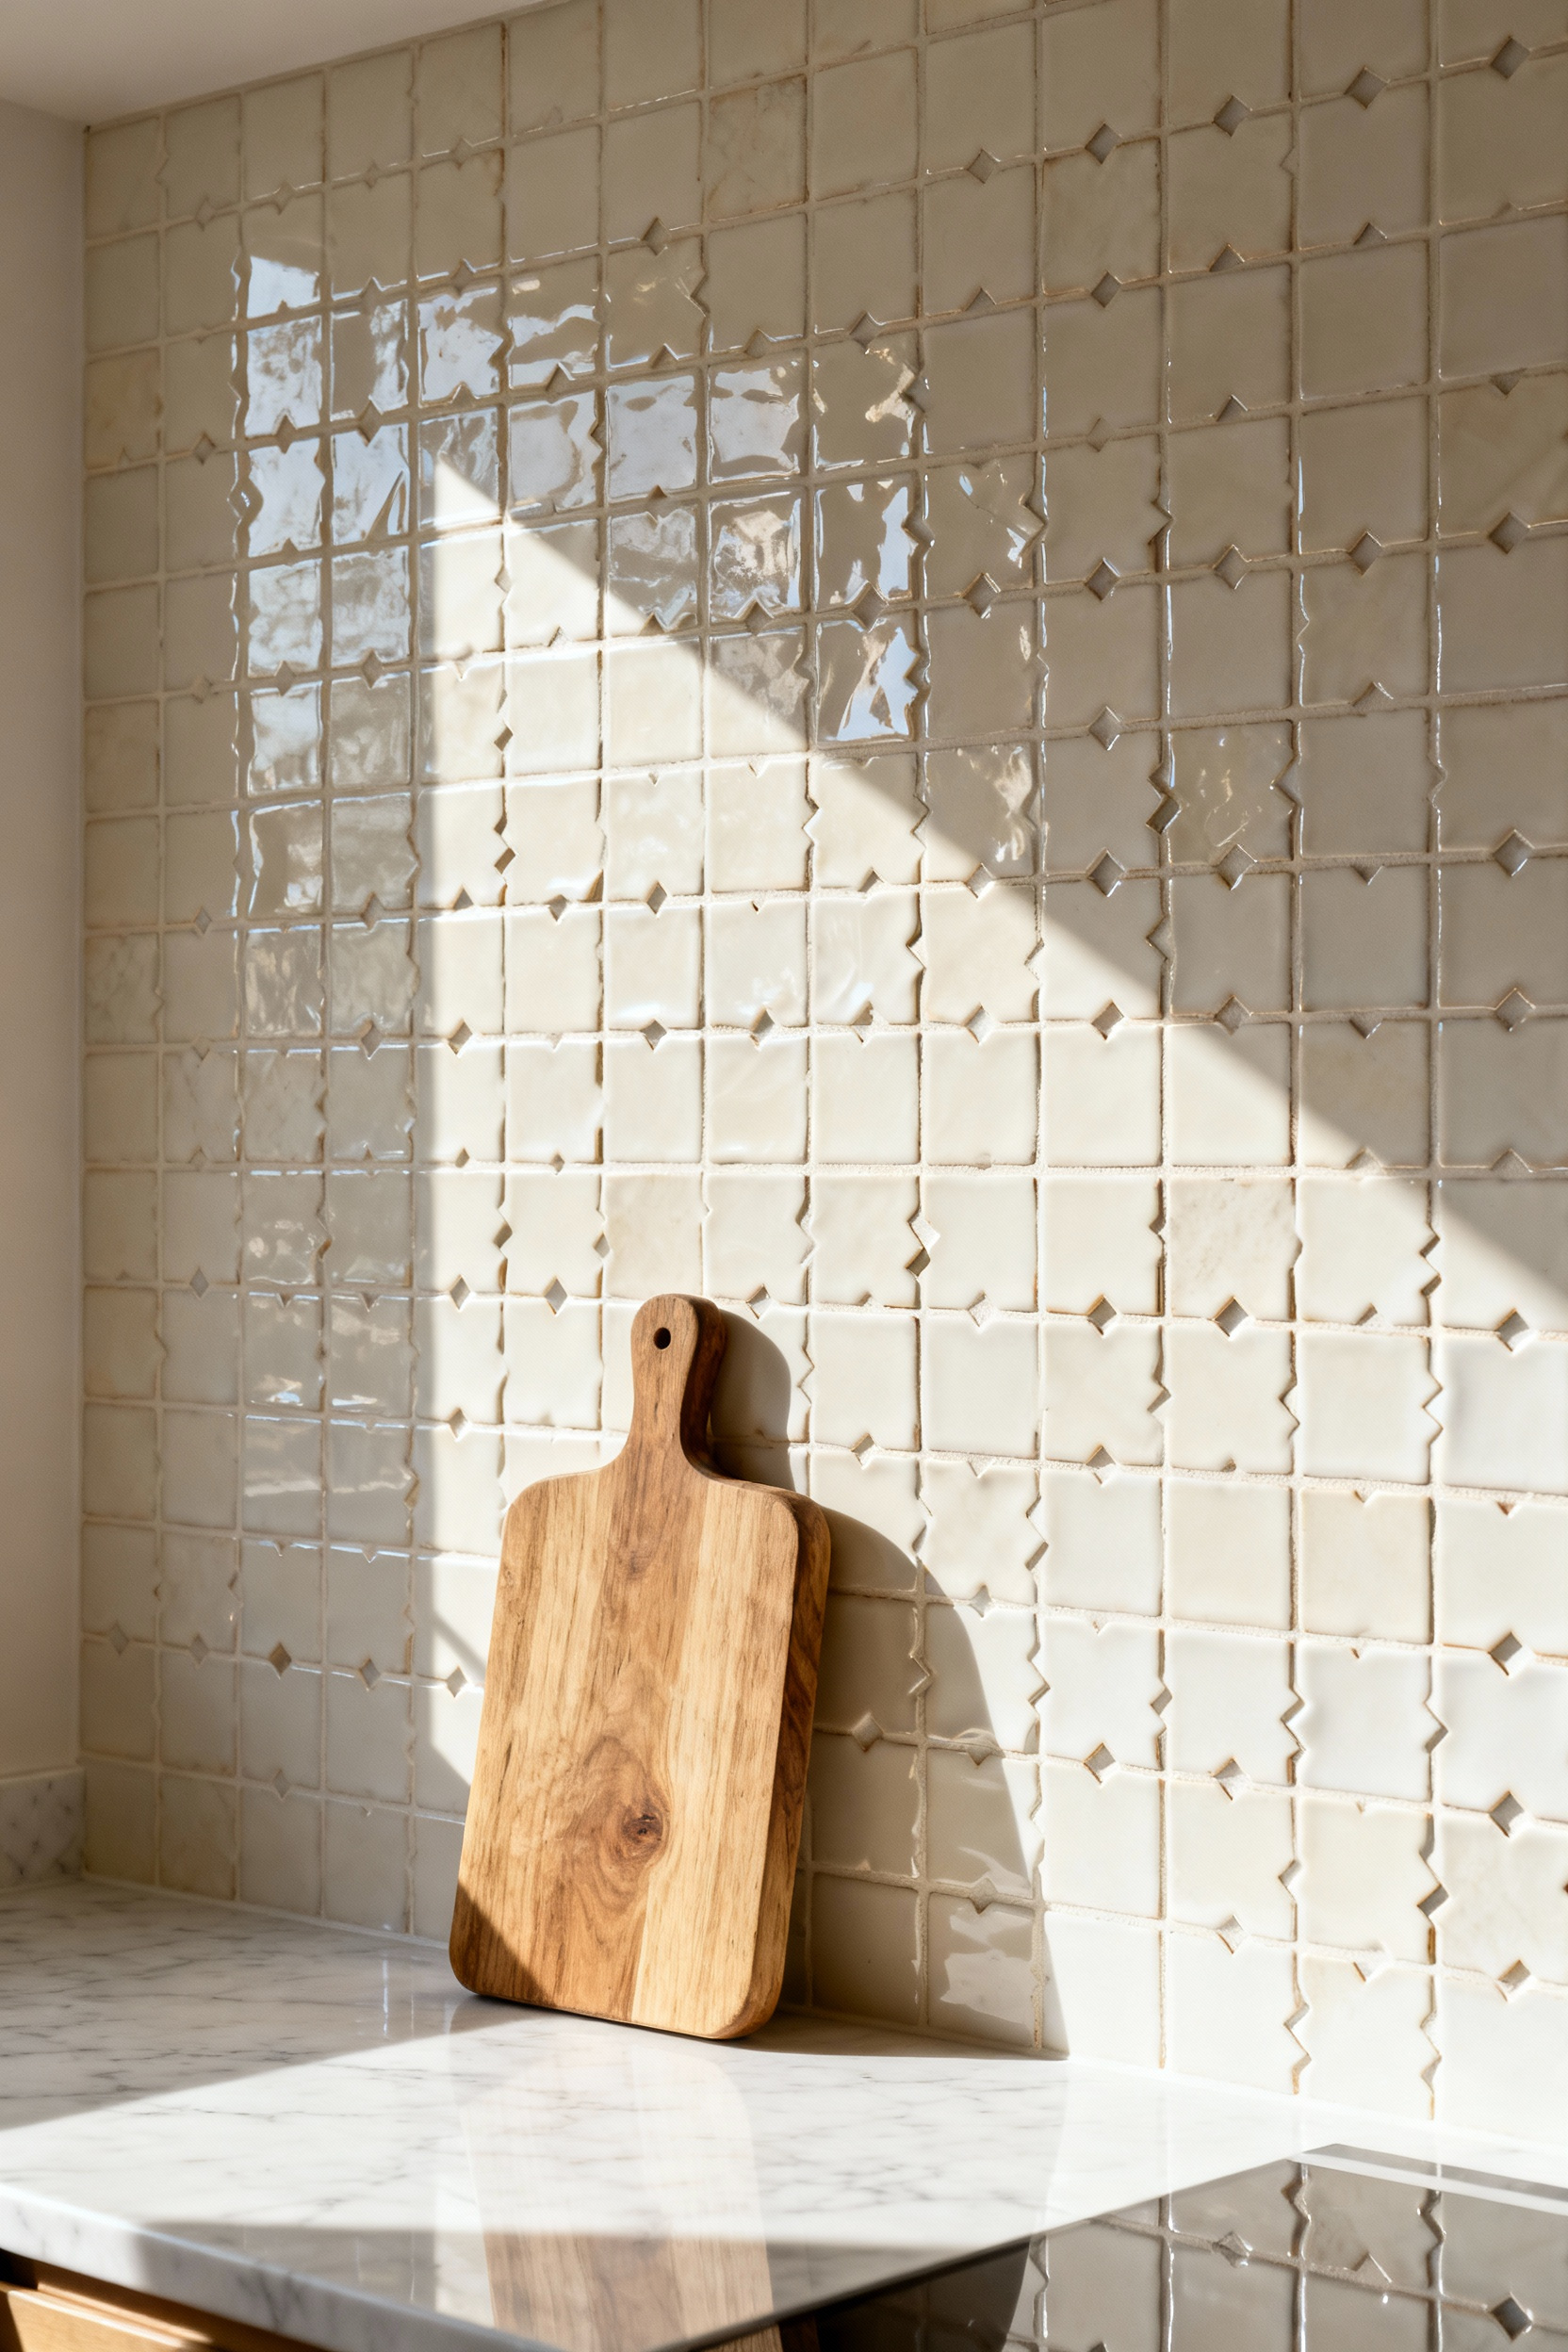
My appreciation for raw textures began with a box of chipped terracotta; that same ancient soul lives in Zellige tiles. Originating from Fez, these hand-cut clay pieces reject machine-made uniformity for a “perfectly imperfect” finish. The uneven glaze captures sunlight, creating a dancing, three-dimensional effect that flat ceramic simply cannot mimic. To let this texture dominate, skip the contrasting grout. Instead, select a grout color that matches the tile—creamy bone or soft grey—so the natural light play tells the story, not the grid lines.
Authentic craftsmanship creates a sustainable connection to the past, but it often carries a higher price tag. Be resourceful. Treat Zellige as the room’s jewelry by installing it only on high-impact areas, like the splash guard behind your vintage stove. However, these porous tiles require protection to survive a working kitchen. Follow these maintenance rules to preserve their beauty:
- Pre-seal the raw terracotta before grouting to stop installation haze.
- Re-seal with a high-quality penetrating sealer every 2–3 years.
- Clean splashes immediately to protect the natural glaze from oil absorption.
2. Reclaimed Terracotta: Grounding Contemporary Cabinetry
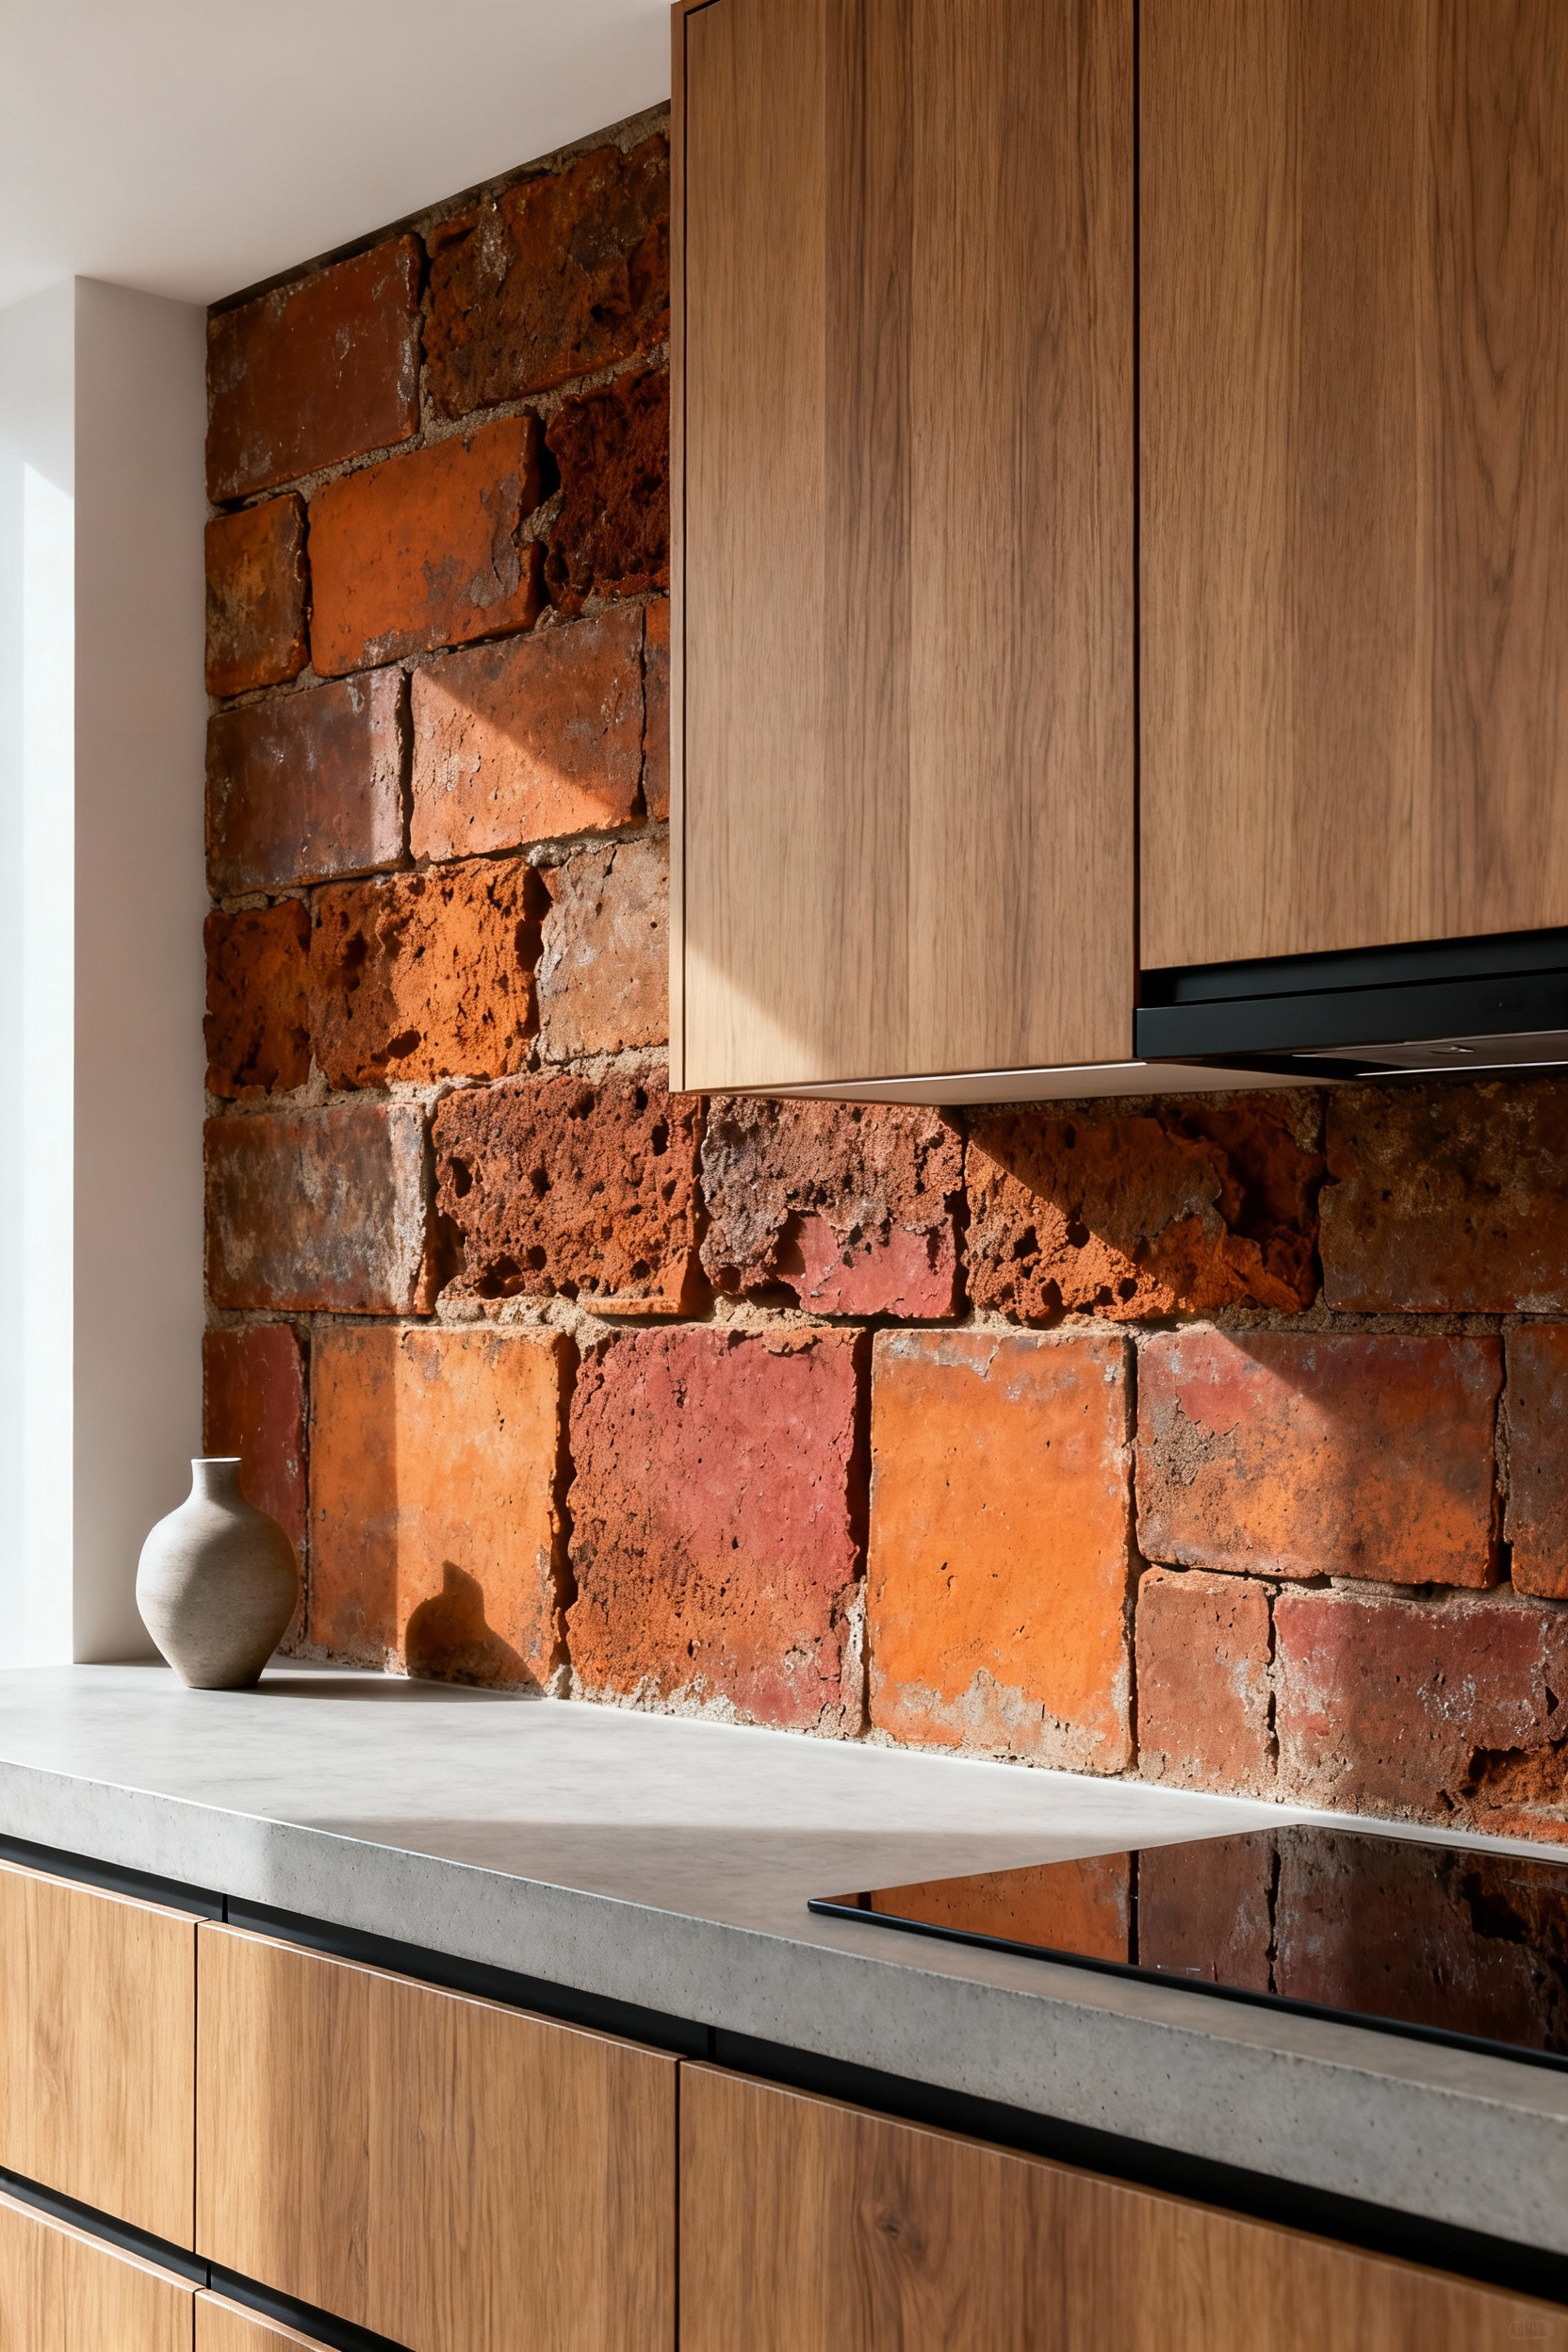
Nothing beats the soul of “Cotto Antico.” These hand-cut clay tiles carry centuries of history, offering a sustainable way to add instant character to a new build. In a recent mid-century restoration project, I used reclaimed terracotta to ground the airy space, letting the rough, earthen texture create a stunning contrast against sleek, flat-panel rift-sawn oak cabinetry. To nail this look, pair the rustic tiles with modern, minimal hardware like matte black or brushed steel handles. The juxtaposition keeps the room from feeling dated and highlights the unique imperfections of the clay.
However, you must preserve these earthen treasures with the right preparation. Since reclaimed terracotta is highly porous, it absorbs grease and water quickly. Follow this protocol to ensure your floor withstands modern life:
- Seal Aggressively: Apply two to three coats of a penetrating, matte sealant *before* grouting to block cooking splatters.
- Embrace Width: Use wide grout joints, typically 3/8″ to 1/2″, to accommodate irregular edges.
- Select Sandy Tones: Choose a buff or sandy-colored grout to mimic traditional mortar settings.
- Verify Authenticity: Look for chips, color variations, and hand-cut irregularities to ensure you aren’t buying synthetic reproductions.
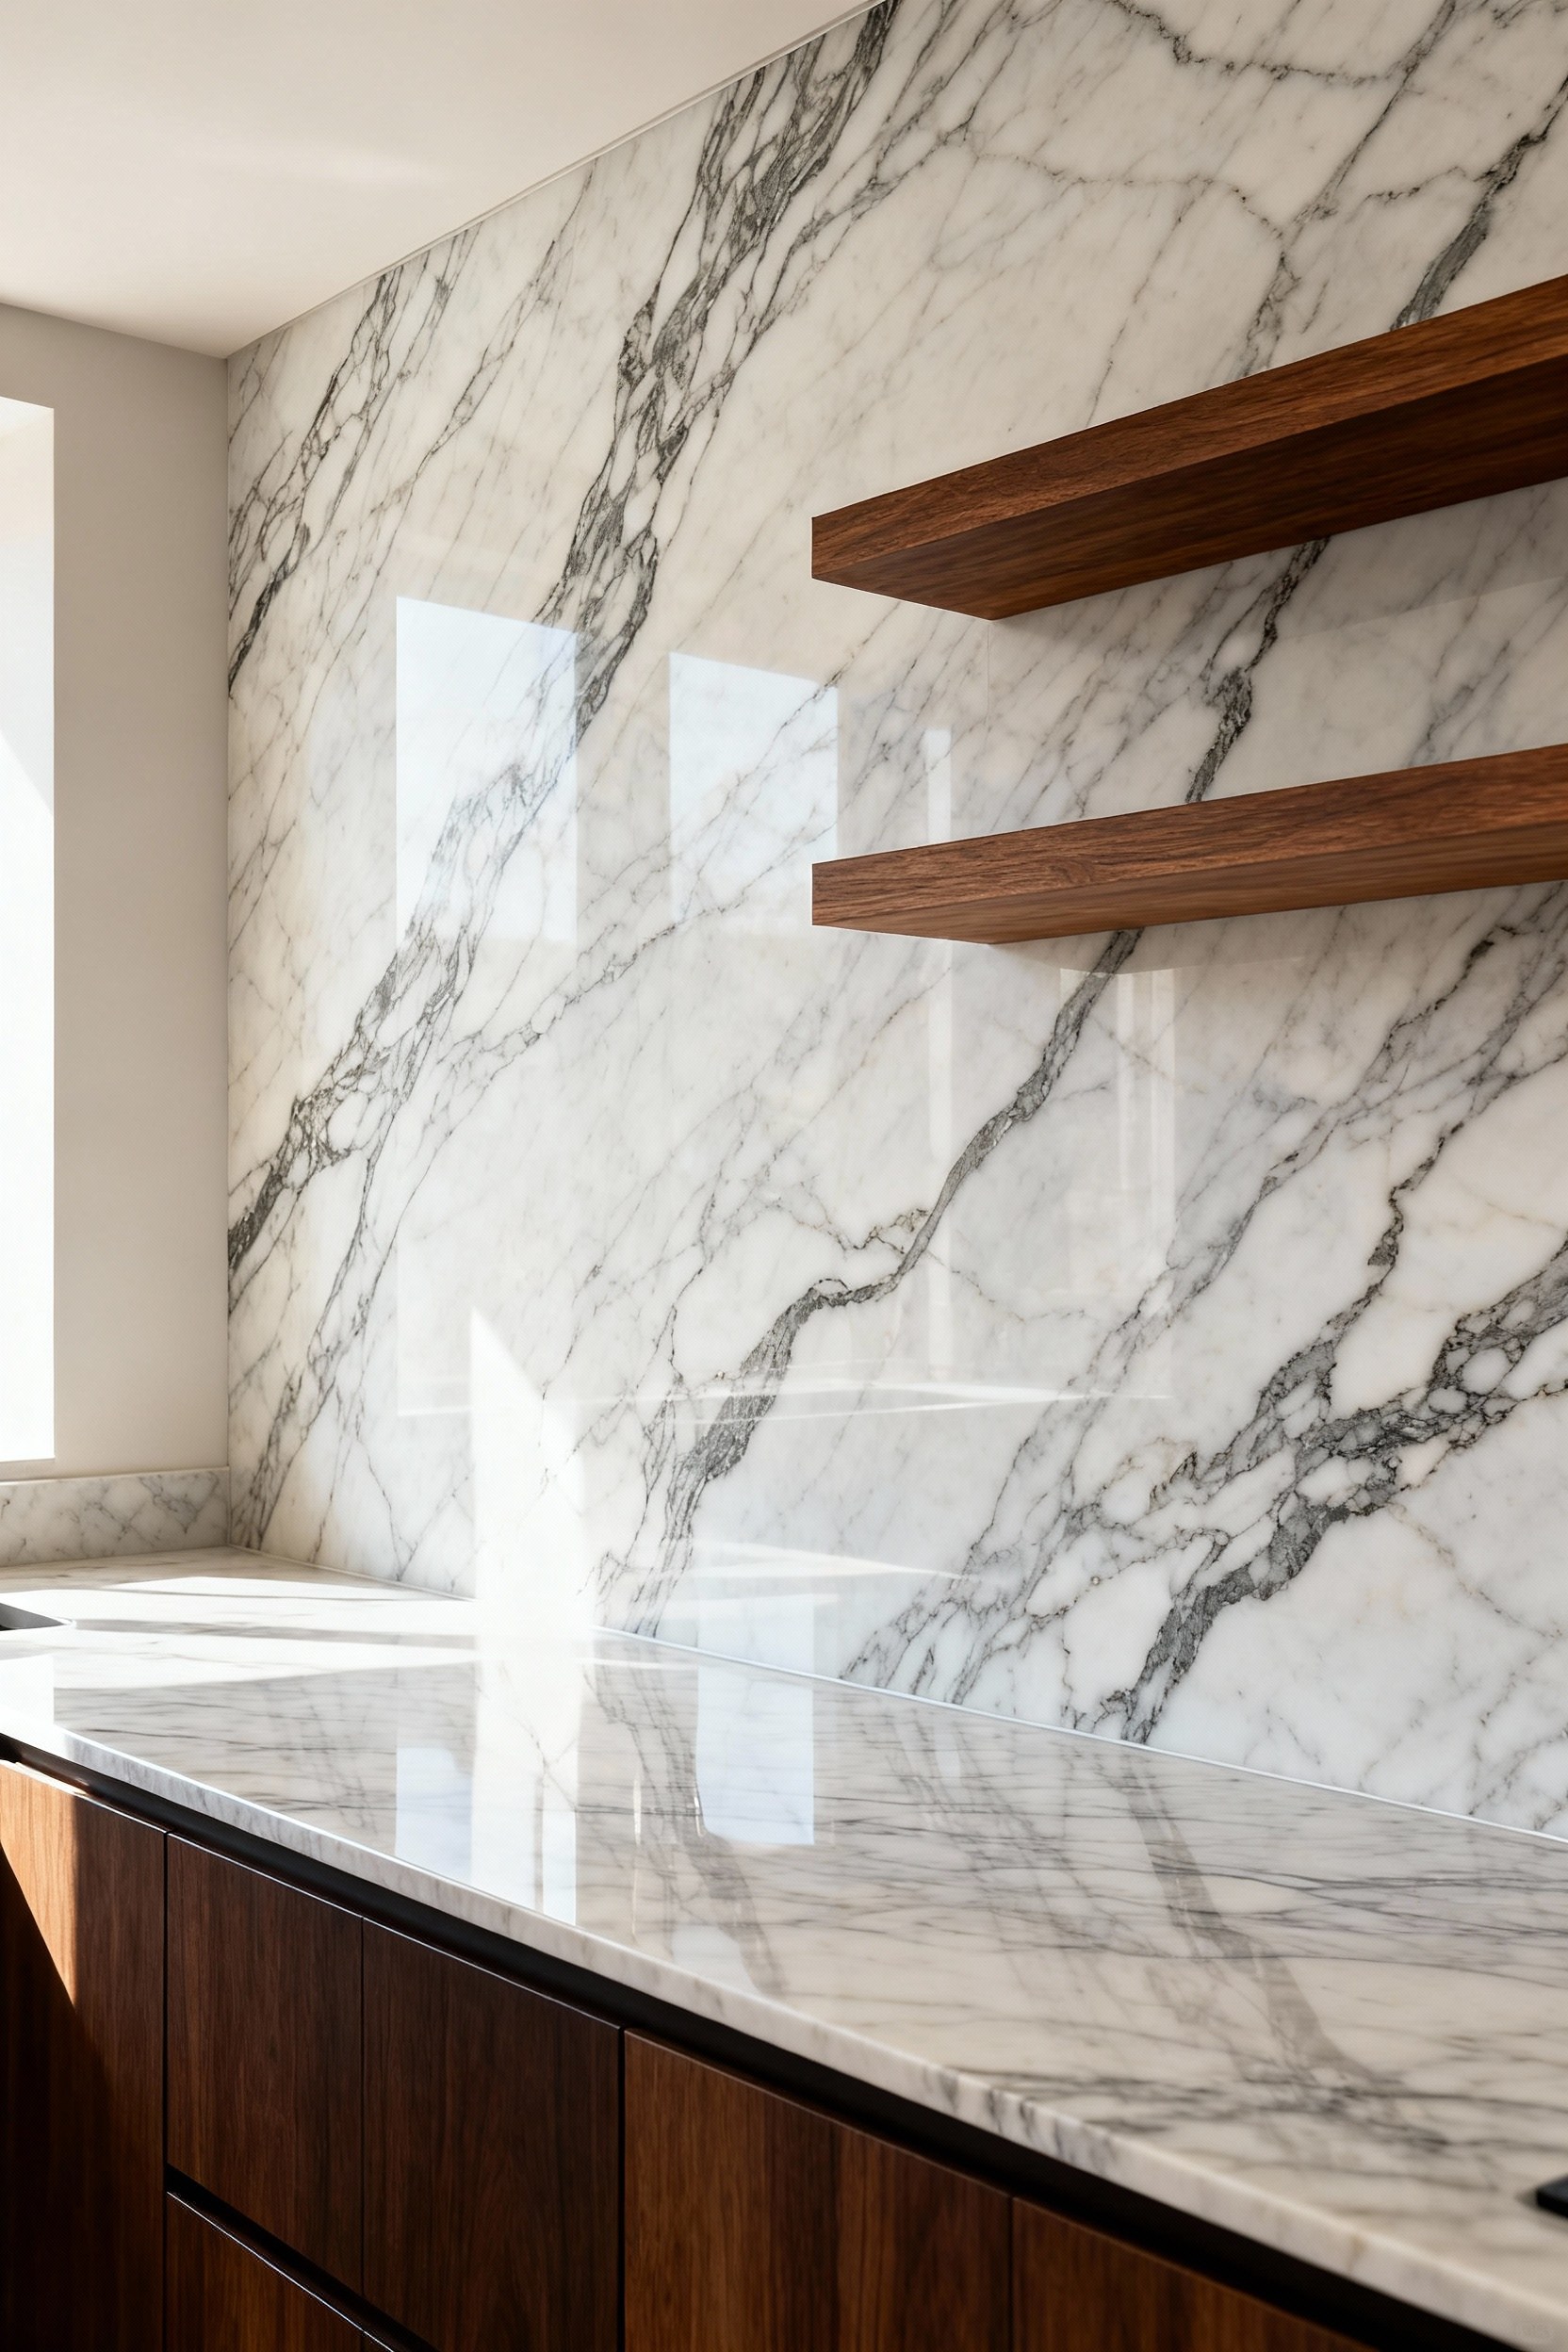
3. The Seamless Slab: Visual Quiet and Dramatic Veining
Finding a lonely, dusty slab of Calacatta in a stone yard’s “boneyard” can feel like discovering buried treasure. By extending your countertop material up the wall, you immediately eliminate visual clutter and pesky grout lines. This technique achieves “quiet luxury,” letting the stone’s ancient history serve as your art. To truly honor the material, skip heavy upper cabinets. Instead, install open floating shelves. This keeps the dramatic veining visible and creates an airy, expansive feel that celebrates the stone’s natural journey.
Authentic natural beauty requires commitment. Marble demands regular sealing to resist acidic lemon or vinegar splashes. For a more durable, resourceful alternative, consider engineered quartzite or high-quality porcelain slabs. These materials mimic nature’s drama without the fragility or high maintenance. When hunting for your seamless backsplash, keep these sustainability tips in mind:
- Hunt for Remnants: Check local fabricators for leftover “orphan” pieces perfect for smaller backsplashes to reduce landfill waste.
- Bookmatch for Impact: Mirror two adjacent slabs to create a symmetrical masterpiece, effectively doubling the visual impact of smaller stones.
- Choose Timelessness: Pick veining you will love for decades, ensuring your design outlasts fleeting trends.
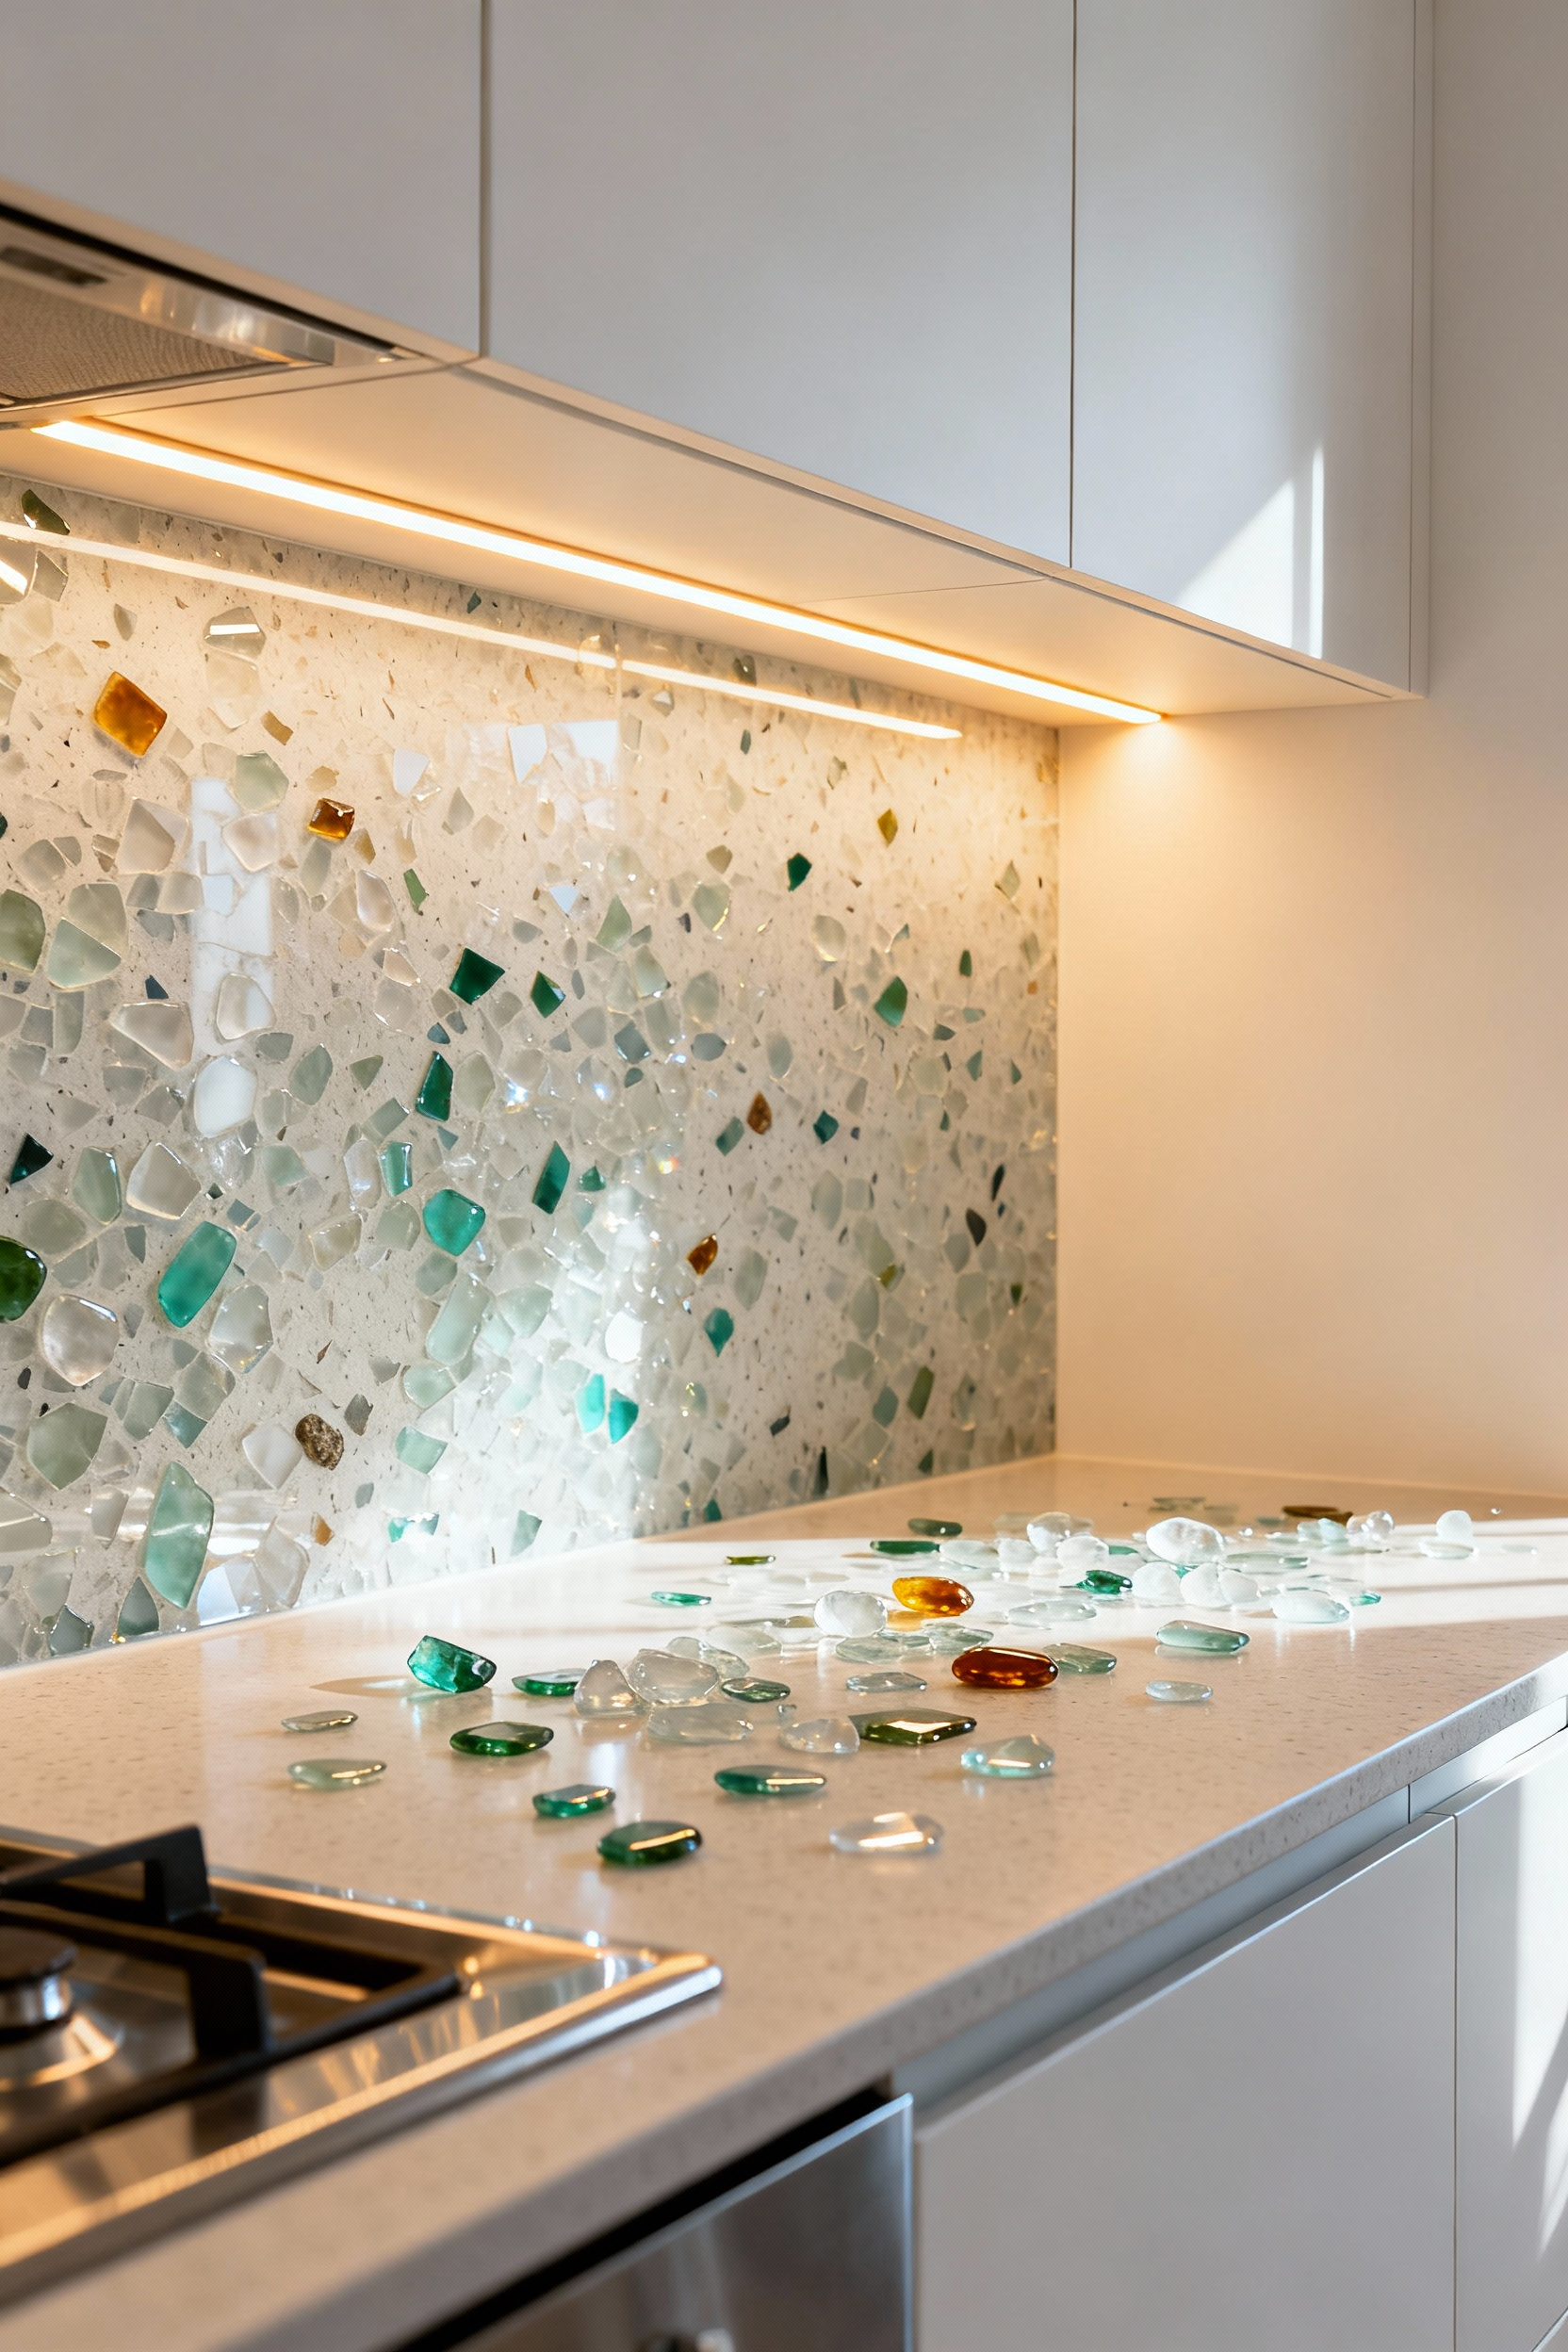
4. Sustainable Glass Composites: Capturing Light with Recycled Materials
The thrill of finding tumbled sea glass on the shore is replicated by sustainable glass composites in the kitchen. Manufacturers transform forgotten bottles and jars into dazzling, terrazzo-style slabs that capture light unlike any other material. Consequently, the embedded crushed glass refracts under-cabinet lighting beautifully, creating depth and making compact kitchens feel expansive. Furthermore, choosing large-format engineered surfaces eliminates busy grout lines, offering a seamless, modern aesthetic that remains easy to clean. You aren’t just installing a backsplash; you are preserving a dazzling story of renewal.
Years spent stripping varnish off mid-century furniture taught me the vital importance of indoor air quality, so scrutinize the engineering behind the sparkle. True sustainability requires safety alongside beauty. When selecting your composite material, prioritize these specs:
- Check the Content: Select composites featuring 80% or more post-consumer recycled material to maximize real landfill diversion.
- Breathe Easy: Insist on resin binders that meet low or zero-VOC standards to ensure your kitchen remains a healthy gathering place.
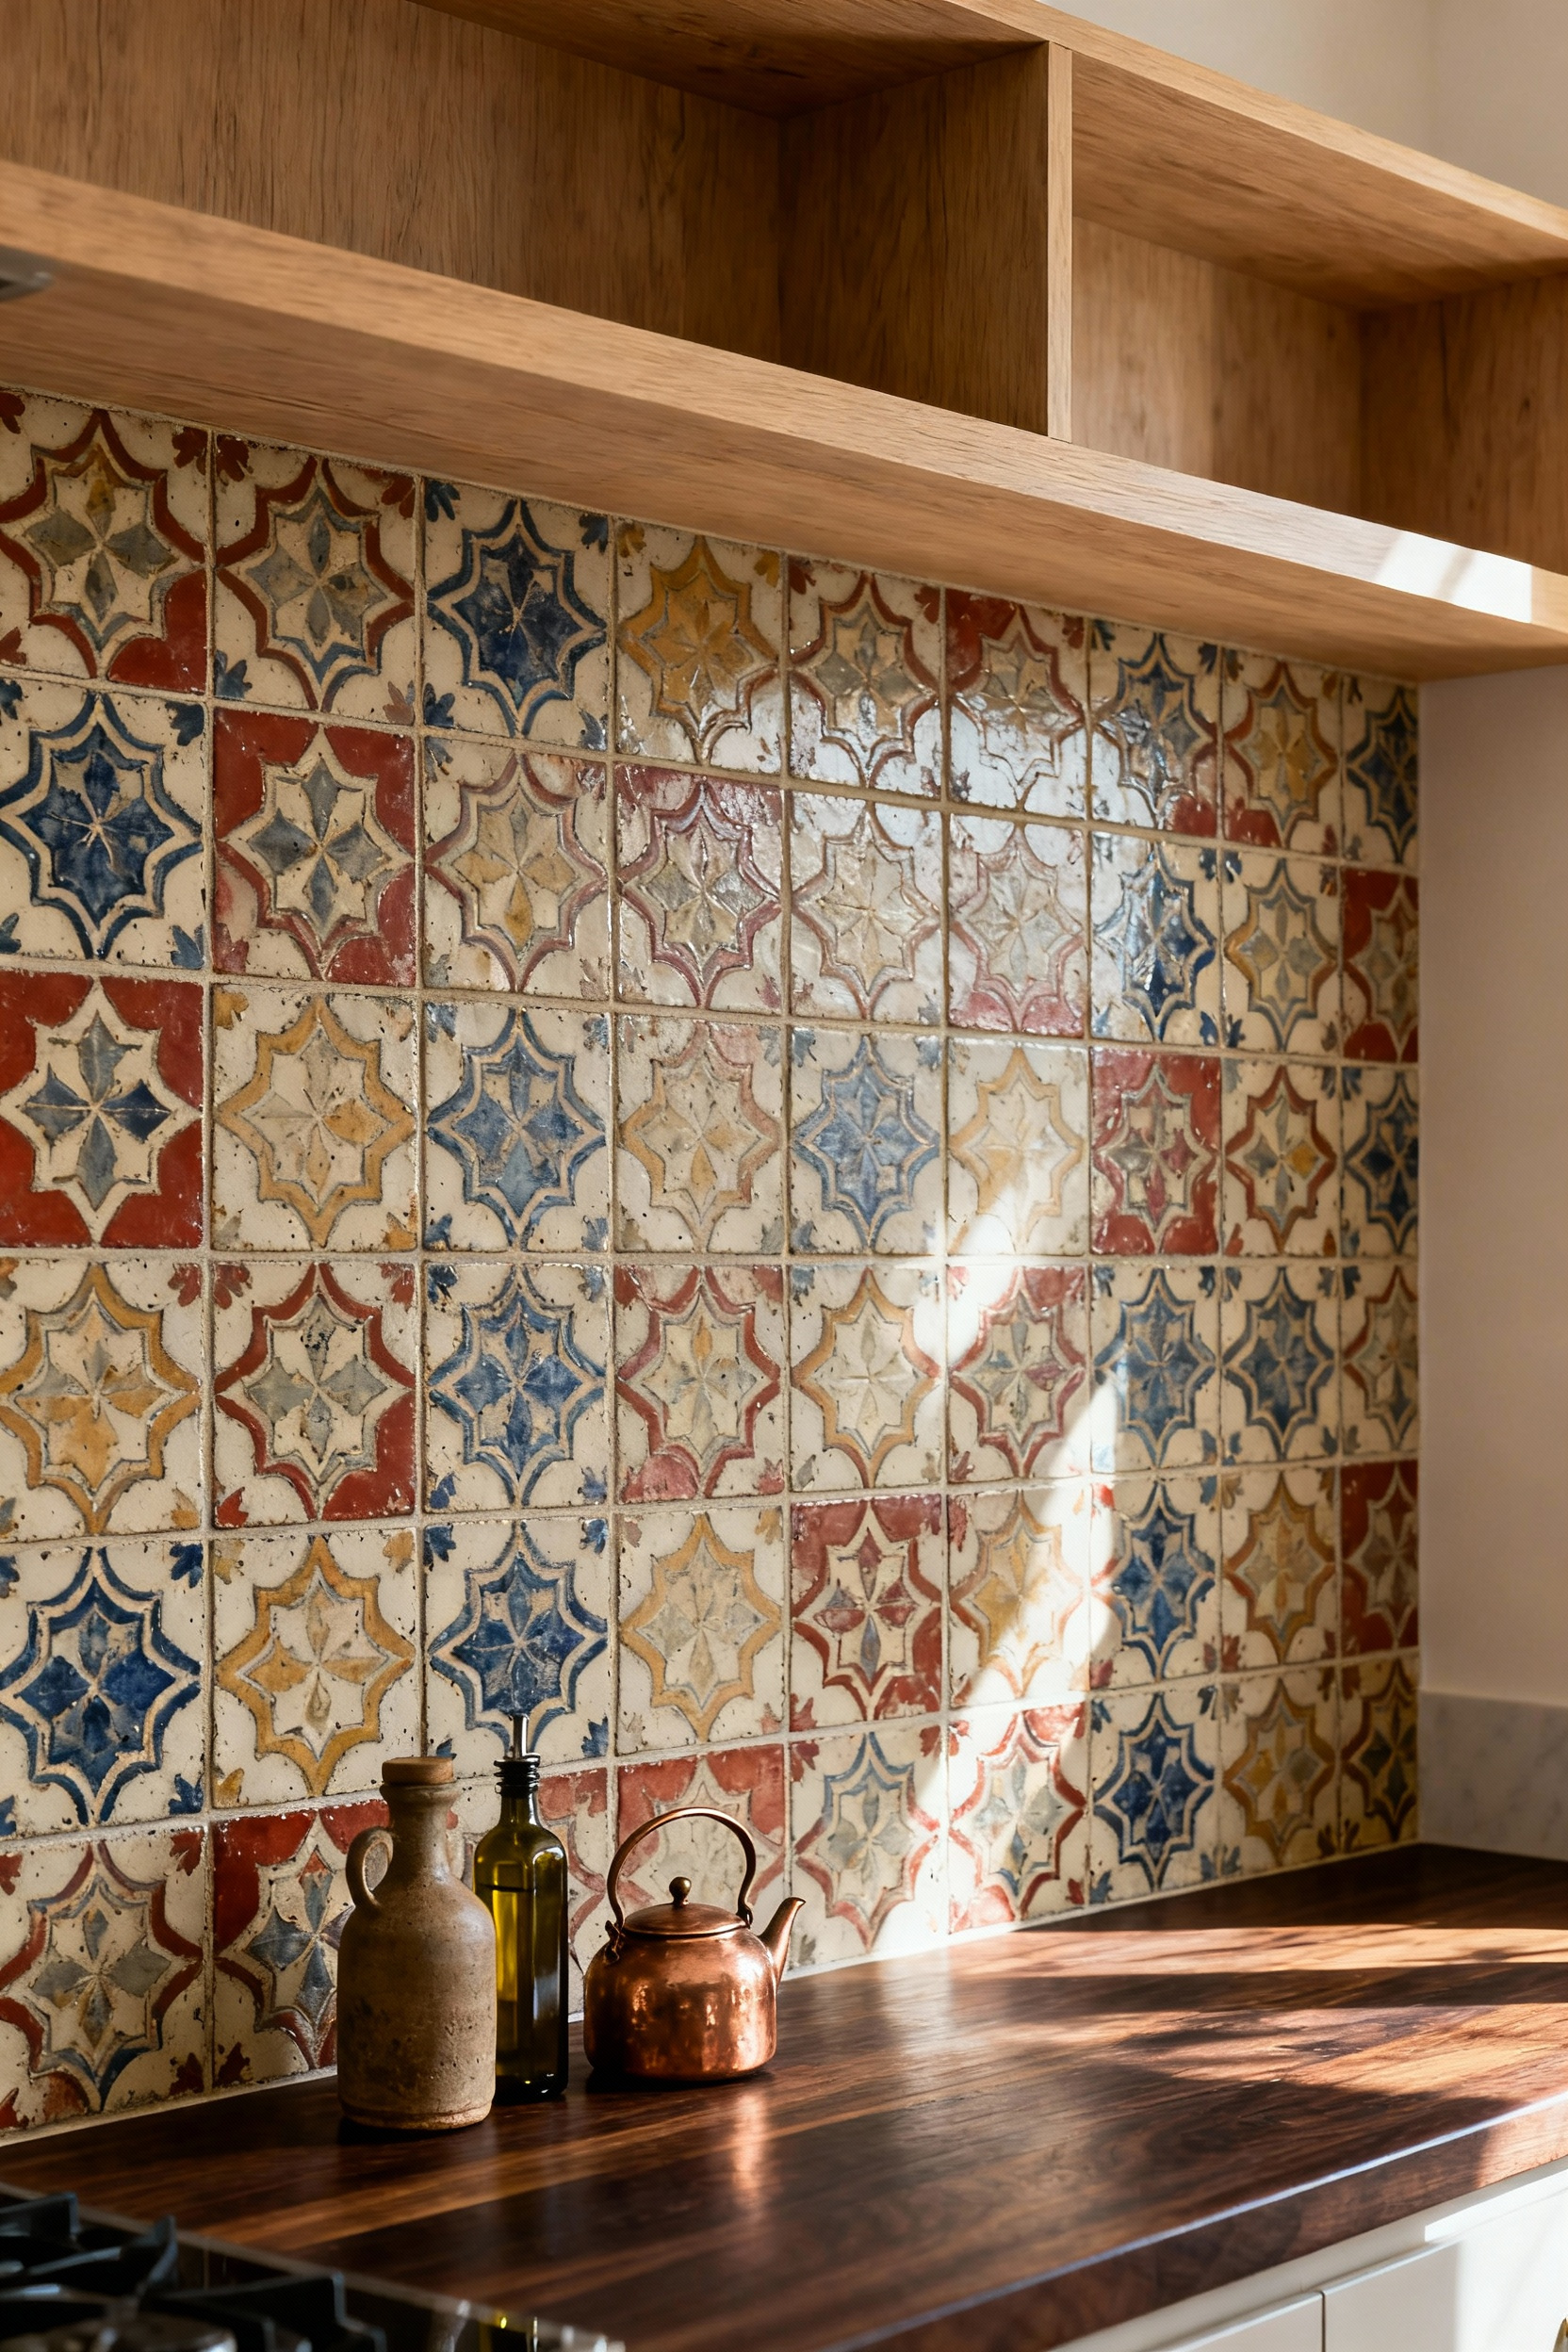
5. Hand-Painted Encaustics: Geometric History and Cement Durability
Holding a reclaimed Victorian cement tile reveals a story of enduring craftsmanship through sheer weight. These hand-painted encaustics bring a velvety, matte finish and historical gravity that glossy modern ceramics simply cannot mimic. Their deep earth tones and Moorish geometries ground a space instantly, transforming a simple backsplash into a piece of living history. However, true cement is porous and demands respect. To honor this material without creating a cleaning nightmare, follow these sustainability-minded guidelines:
- Seal Religiously: Apply a high-quality penetrating sealer *before* grouting and every few years thereafter to repel grease and acidic splashes.
- Focus the Design: Restrict heavy, 1-inch thick cement tiles to focal points, like behind the stove, to manage installation depth transitions easily.
- Consider Replicas: Opt for high-quality matte porcelain alternatives if you want the geometric soul without the high-maintenance patina.
6. Vertical Stacking Logic: Heightening Low Ceilings
While post-war ranches offer distinct charm, their modest ceiling heights often feel oppressive. Don’t tear down the roofline; simply rotate your perspective. Turn rectangular tiles ninety degrees into a straight vertical stack to force the eye upward. This technique mimics the grandeur of structural columns without the construction waste, perfectly embodying the resourceful spirit of mid-century design. I used this method to restore a cramped 1955 galley kitchen; salvaging 2×8 ceramics and orienting them vertically immediately drew the gaze toward the soffits, making the tight space feel surprisingly vast.

To master this optical illusion, you must prioritize elongation and light. Ditch the standard brick pattern and follow these rules for maximum visual lift:
- Choose Narrow Formats: Opt for 2×8 or 2×10 tiles to create long, uninterrupted vertical joints.
- Go High: Run the backsplash from countertop to ceiling to eliminate horizontal visual breaks.
- Add Gloss: Select high-gloss, light-colored glazes to bounce natural light upward.
This approach creates a sense of airiness and honors the architectural history of the home, proving that smart, sustainable design often relies on simple geometry rather than expensive renovations.
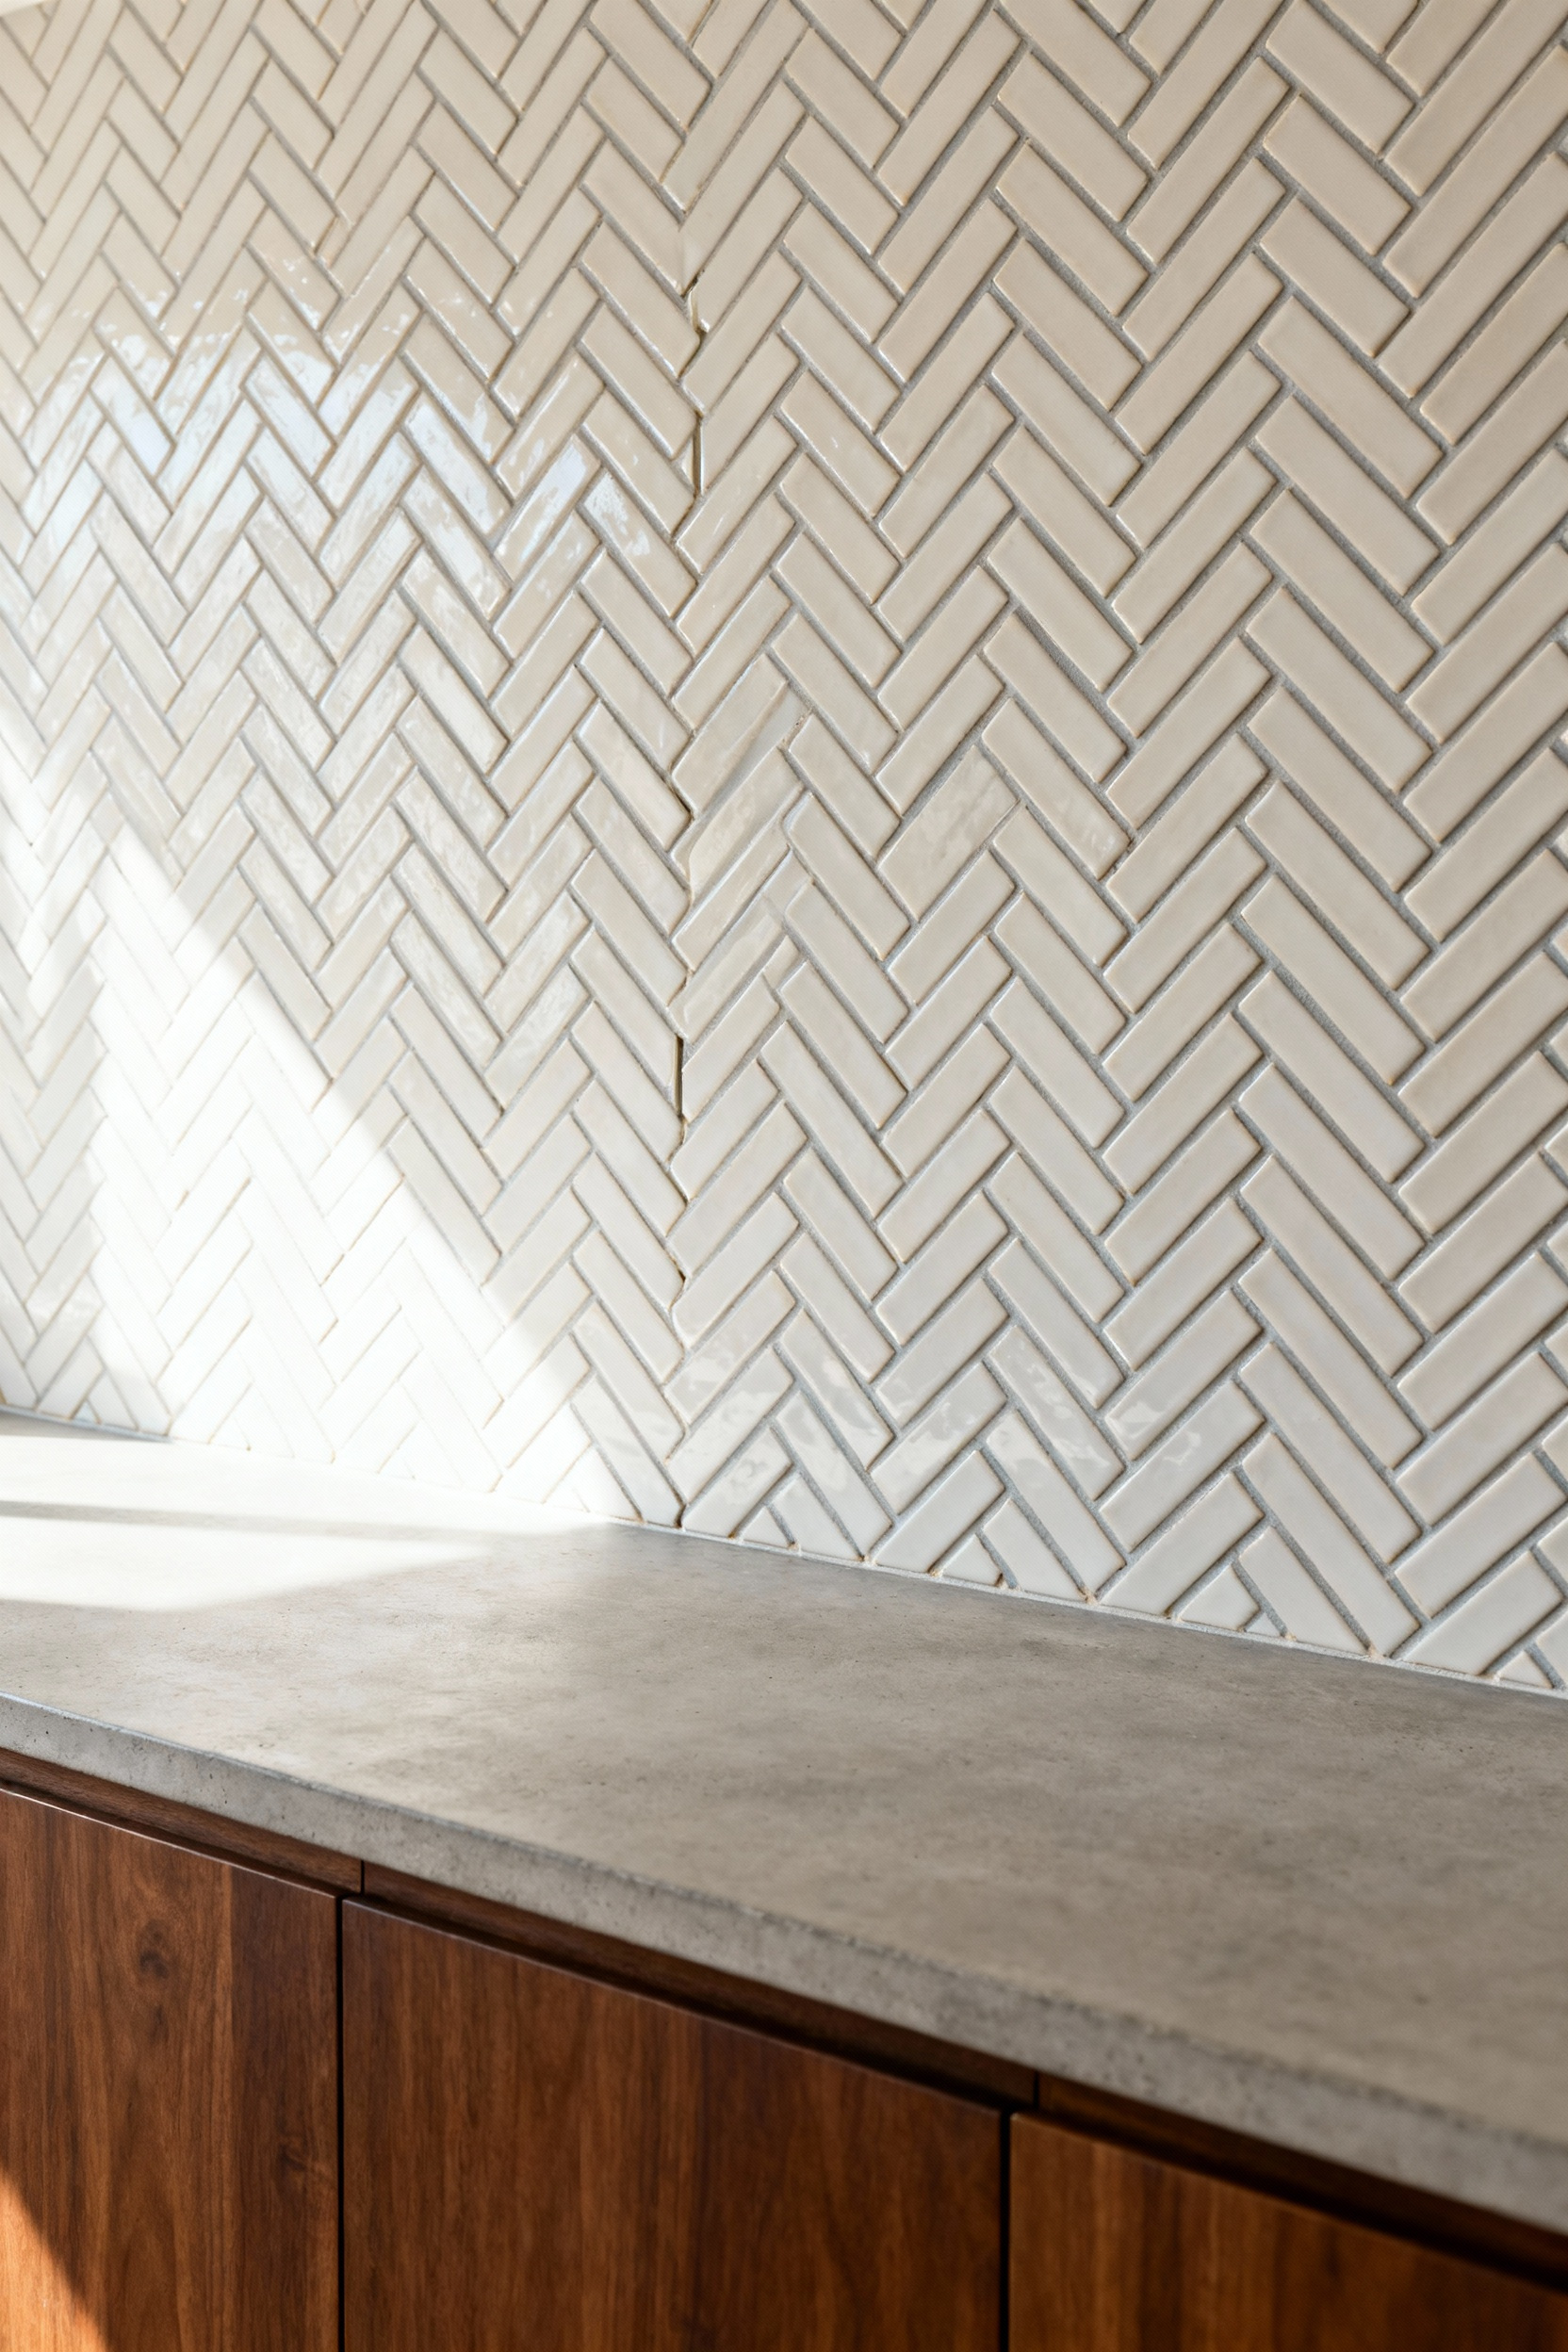
7. The Herringbone Pivot: Complex, Woven Layouts
Standard subway tiles serve as the reliable workhorses of kitchen design, yet a simple ninety-degree turn transforms these humble rectangles into a sophisticated, woven tapestry. To heighten this visual complexity, pivot away from the standard 3×6 ratio. Instead, hunt for skinnier, longer proportions like 2×10 or 1×8 to create a tighter, denser weave that mimics the texture of mid-century parquet flooring. This approach honors sustainability by elevating basic, affordable materials into something custom and timeless without requiring exotic resources.
Ensure your geometric artistry remains visible by selecting a medium-to-high contrast grout. Without this definition, the intricate labor blends into a flat, textureless surface. Since this pattern requires precise cutting and generates more scrap, apply these strategies to manage your resources effectively:
- Zone the Impact: Limit the herringbone layout to focal areas, like behind the range, and transition to a simple running bond elsewhere to define boundaries.
- Calculate Overage: Budget for 18–20% material waste due to angled cuts, preventing the carbon footprint of rush-shipping a second batch later.
8. Grout as a Design Element: Modernizing Vintage Ceramics
Don’t demolish those vintage ceramics; redefine them. Grout acts as your secret weapon for modernization, transforming dated surfaces into contemporary statements without sending materials to the landfill. By applying a contrasting pigment—like charcoal against classic white subway tile—you instantly shift focus to the graphic geometry of the grid. This technique proves essential for small-format finds like hexagons or penny rounds. Without high contrast, these intricate mosaics blur into visual noise; with it, every unique edge pops. For a project involving dusty, mid-century bone-white hex tiles, we grouped them with a deep terracotta grout; suddenly, the backsplash felt like a customized modern art piece rather than a relic.

For a sophisticated twist, try the “subversive inversion” method. Pair rich, jewel-toned antique tiles with stark white or ivory grout to soften heavy colors while rigorously defining the shape. However, true sustainability requires durability. When committing to these bold choices, always select pre-pigmented epoxy grout. Unlike traditional cement, epoxy resists cooking splatters and locks in that vibrant contrast, ensuring your restoration survives actual life in the kitchen.
- Highlight Geometry: Use dark grout to turn plain shapes into a structured, modern grid.
- Define Mosaics: Prevent visual blurring on small tiles with high-contrast colors.
- Ensure Longevity: Select epoxy formulas to repel grease and maintain color integrity.
9. Mixed Media Transitions: Blending Brass and Tile
Vintage brass strips—relics from a closed hardware shop, perhaps—are the perfect “jewelry” to break up a monochromatic tile field. Integrating metal inlays directly into your backsplash creates a sophisticated, permanent transition that honors the sleek lines of mid-century modern design. However, prioritize longevity and sustainability by choosing solid brass or stainless steel rather than wood. While wood offers warmth, it often warps near heat and moisture, whereas quality metal endures and develops a rich, living patina over time.
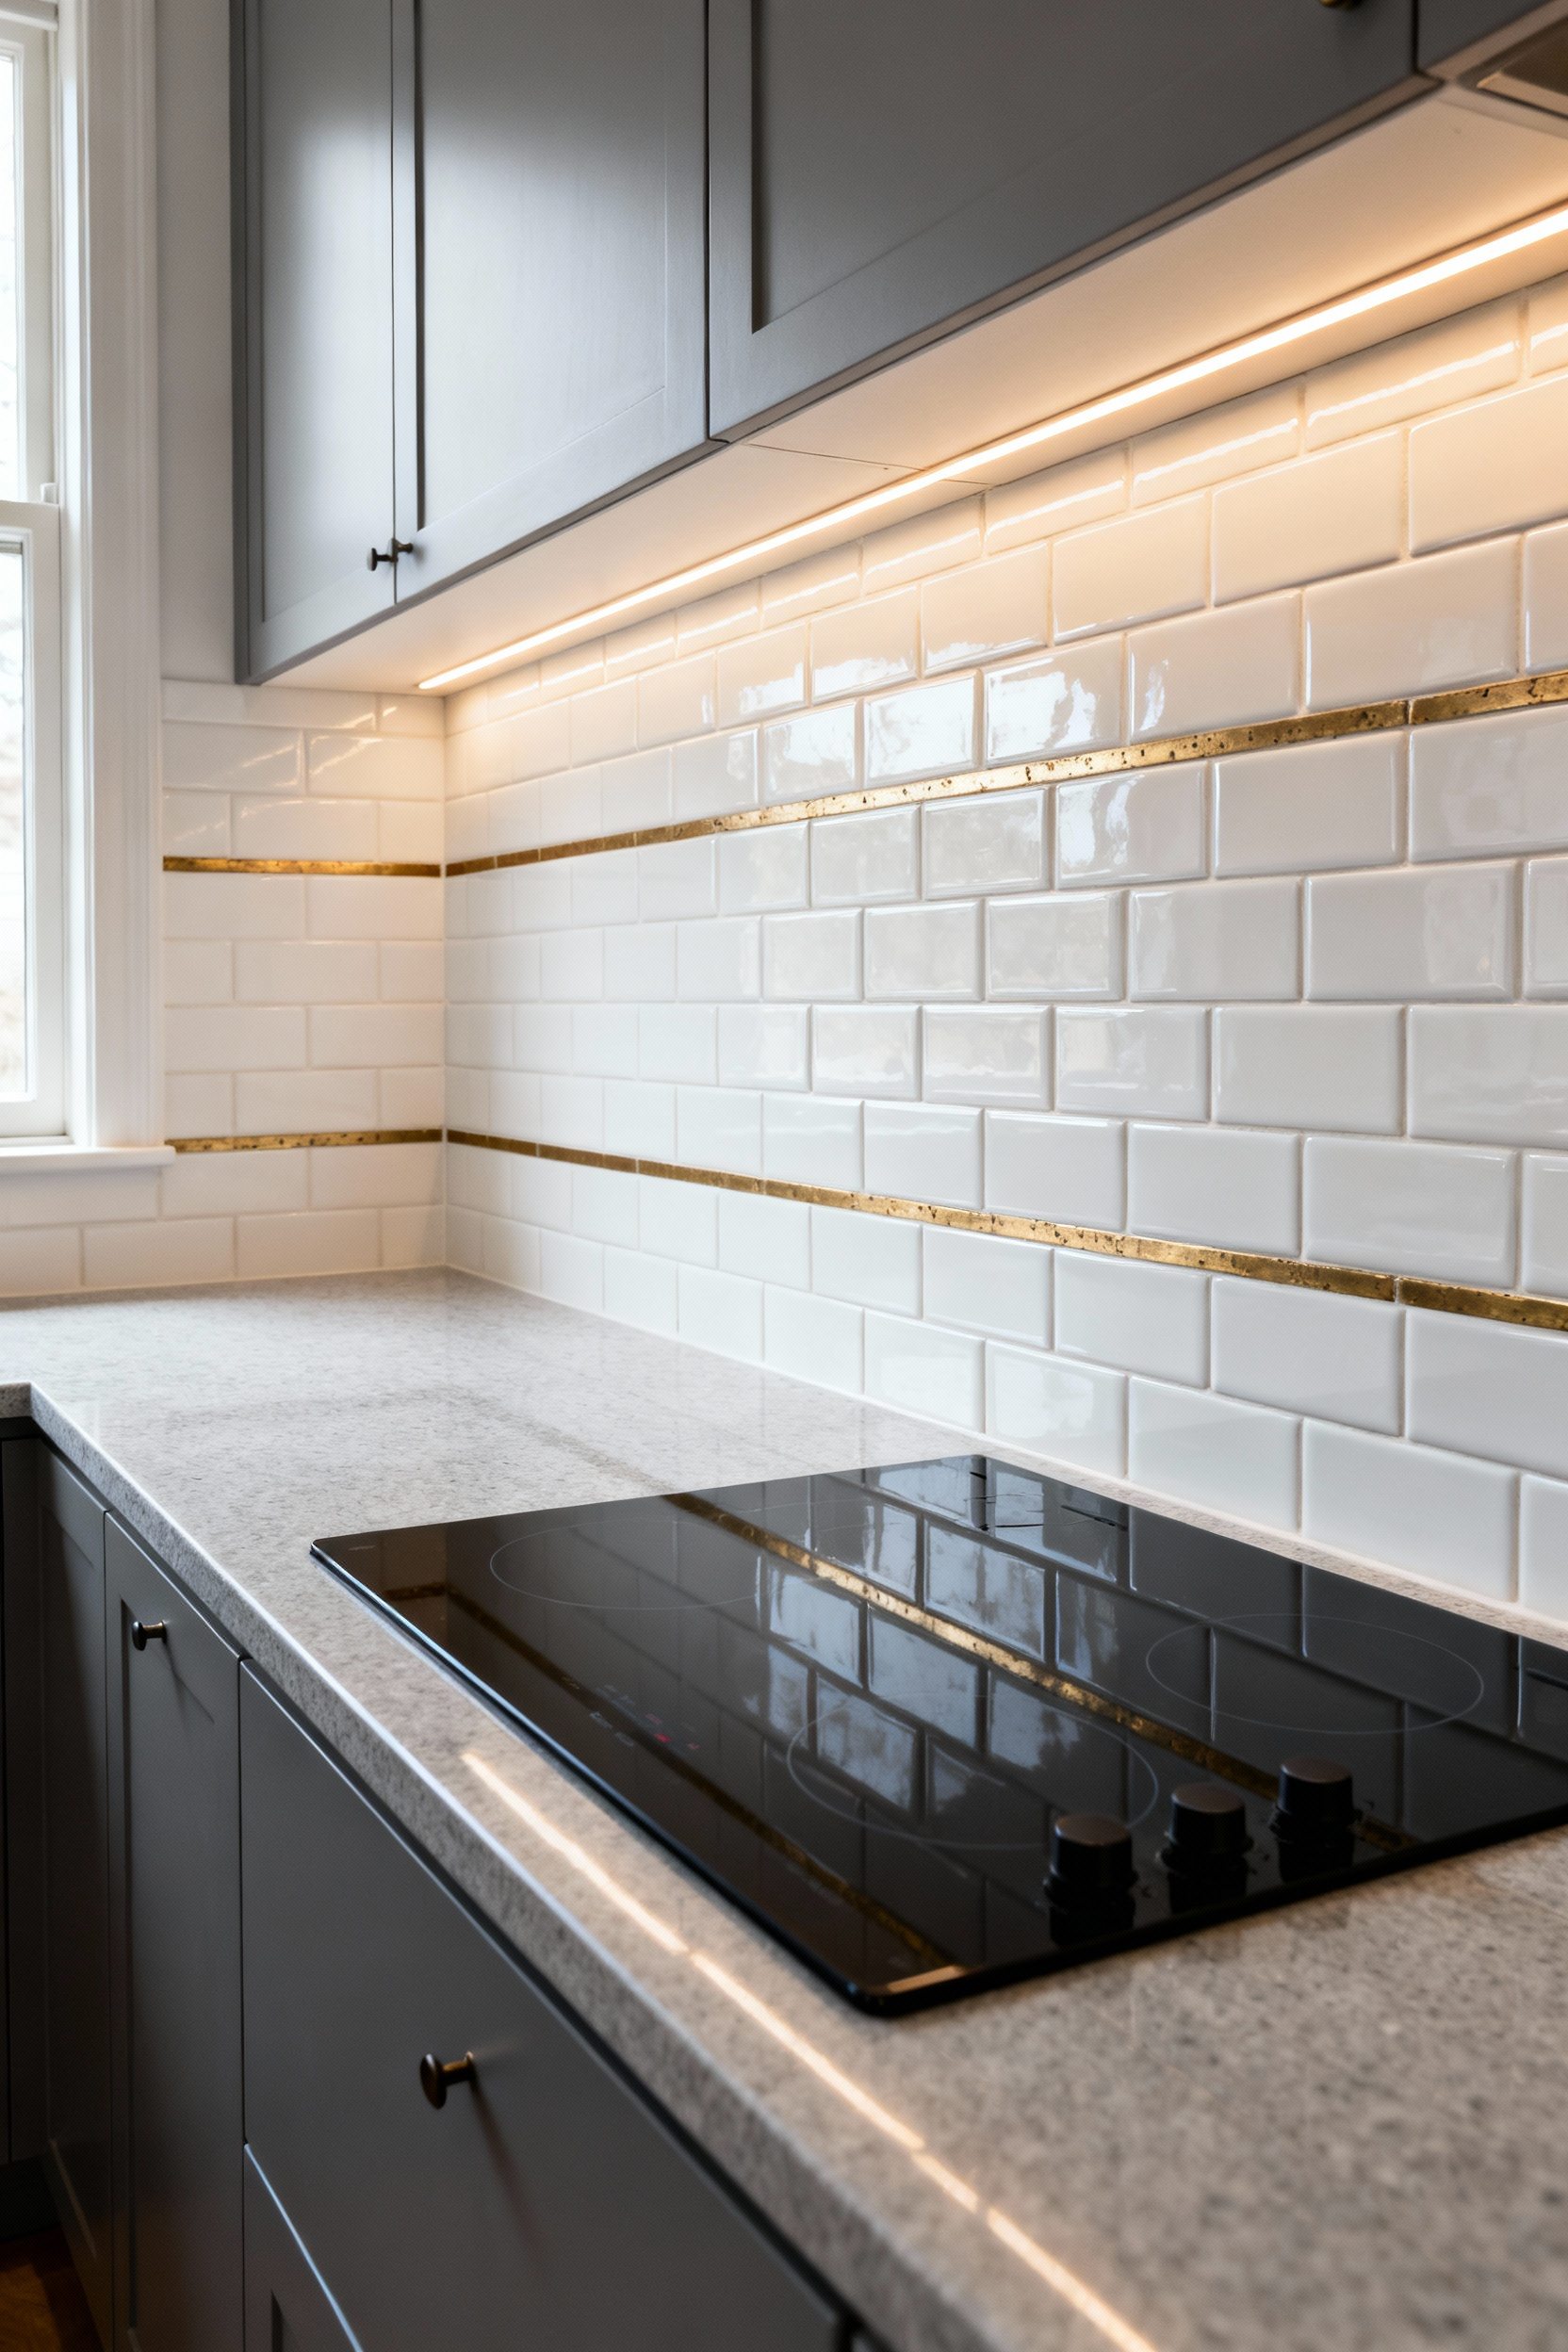
To achieve this seamless finish, precision is your best friend. You must flush-mount the metal with the tile face using custom U-channels or Schluter profiles set deep in the mortar. Furthermore, ensure the inlay thickness matches the tile gauge perfectly to avoid jagged, dirt-trapping edges. Use this architectural technique strategically to:
- Frame the Range Hood: Create a distinct “backsplash rug” effect.
- Echo Vertical Lines: Match the lines found in your cabinet hardware.
- Define the Border: Cleanly separate the countertop from upper cabinets.
10. The ‘Appliance Garage’ Backdrop: Cohesive Hidden Storage
Treat your appliance garage like a hidden treasure chest, much like a velvet-lined drawer in a vintage sideboard. Apply that same philosophy here by extending your backsplash material—stone, tile, or glass—completely behind your hidden appliances. This creates a seamless visual flow when the doors stand open. Furthermore, this choice supports sustainability through durability. A non-porous stone or glazed tile interior wipes clean effortlessly, protecting the raw cabinet wood from steam and coffee stains. This simple act preserves your cabinetry for decades.
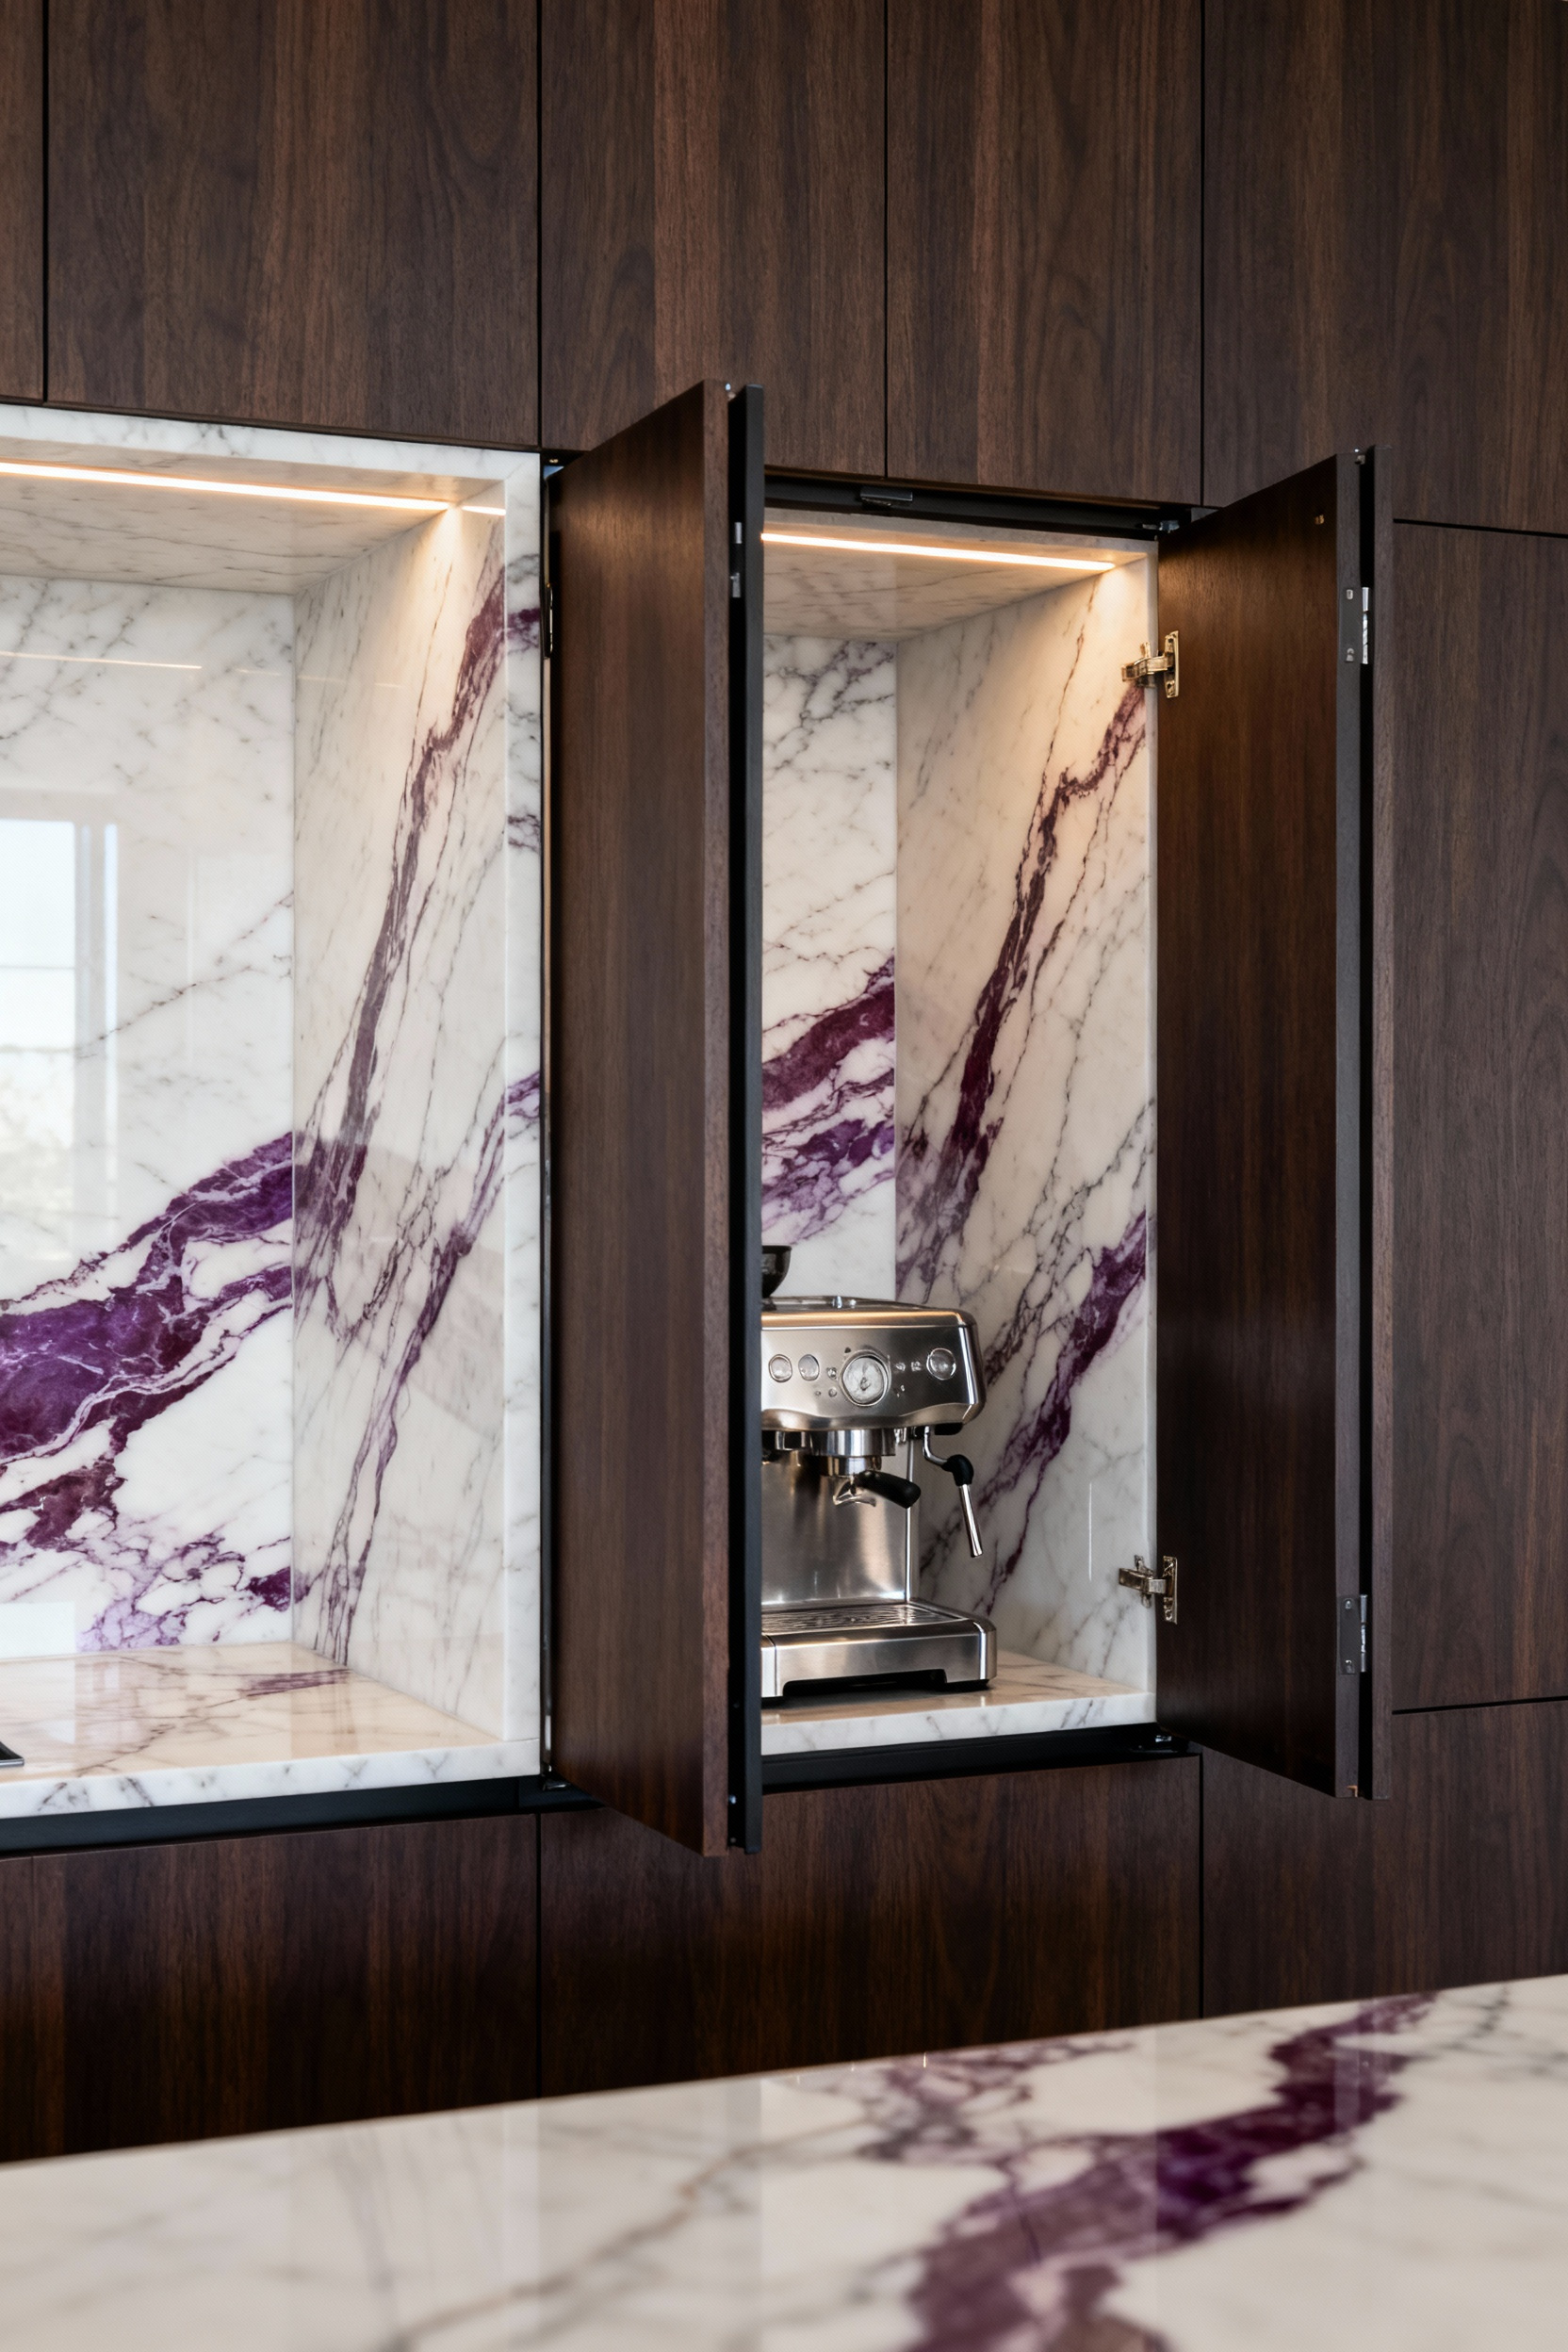
Be resourceful with your dimensions during installation. Space inside these nooks is precious, so select materials that maximize clearance without sacrificing style.
- Go Thin: Use 3mm to 6mm porcelain slabs or veneers rather than bulky tile to save depth for toasters and mixers.
- Integrate Power: Install outlets flush within the backsplash material for a sleek, uncluttered look.
- Invest Wisely: Prioritize high-impact stones here to elevate the perceived value of the entire kitchen.
11. Ceiling-Height Drama: Breaking the Grid
Don’t let your design momentum stall at the bottom of the upper cabinets; instead, let that tile climb all the way to the ceiling. Rescuing a small batch of surplus 1960s hand-glazed tiles taught me a valuable lesson: extending them fully upward transforms a cramped kitchenette into a soaring, cohesive space. This technique draws the eye upward, instantly maximizing verticality. To maintain sophistication, prioritize seamless materials like large-format slabs or uniform colors rather than a busy grid. Always hunt for deadstock or reclaimed tile batches first to reduce waste and add instant soul to your statement wall.
Furthermore, a ceiling-height backsplash provides a necessary anchor for open shelving. Without a continuous backdrop, floating shelves can feel disconnected, but a wall of tile unifies the space. Follow these steps to maximize the effect:
- Mount Reclaimed Wood Shelves directly over the tile to display your vintage stoneware collection.
- Install Directional Lighting aimed at the vertical surface to highlight texture.
- Select High-Gloss Glazes to bounce light and illuminate dark corners.
- Treat the Tile like Wallpaper, creating a durable, sustainable surface that outlasts trendy paint colors.
12. The Integrated Ledge: Functional Stone Shelving
Forget decorative bullnose trim. Instead, reclaim that vertical space for purpose. By extending a 4-to-6-inch stone ledge from your backsplash, you transform a simple border into a substantial workhorse. I recently salvaged a beautiful slab remnant from the landfill to craft a sleek shelf behind a client’s vintage range, instantly clearing their counters of daily essentials. This resourceful approach minimizes waste while maximizing utility, blending mid-century practicality with modern clean lines.
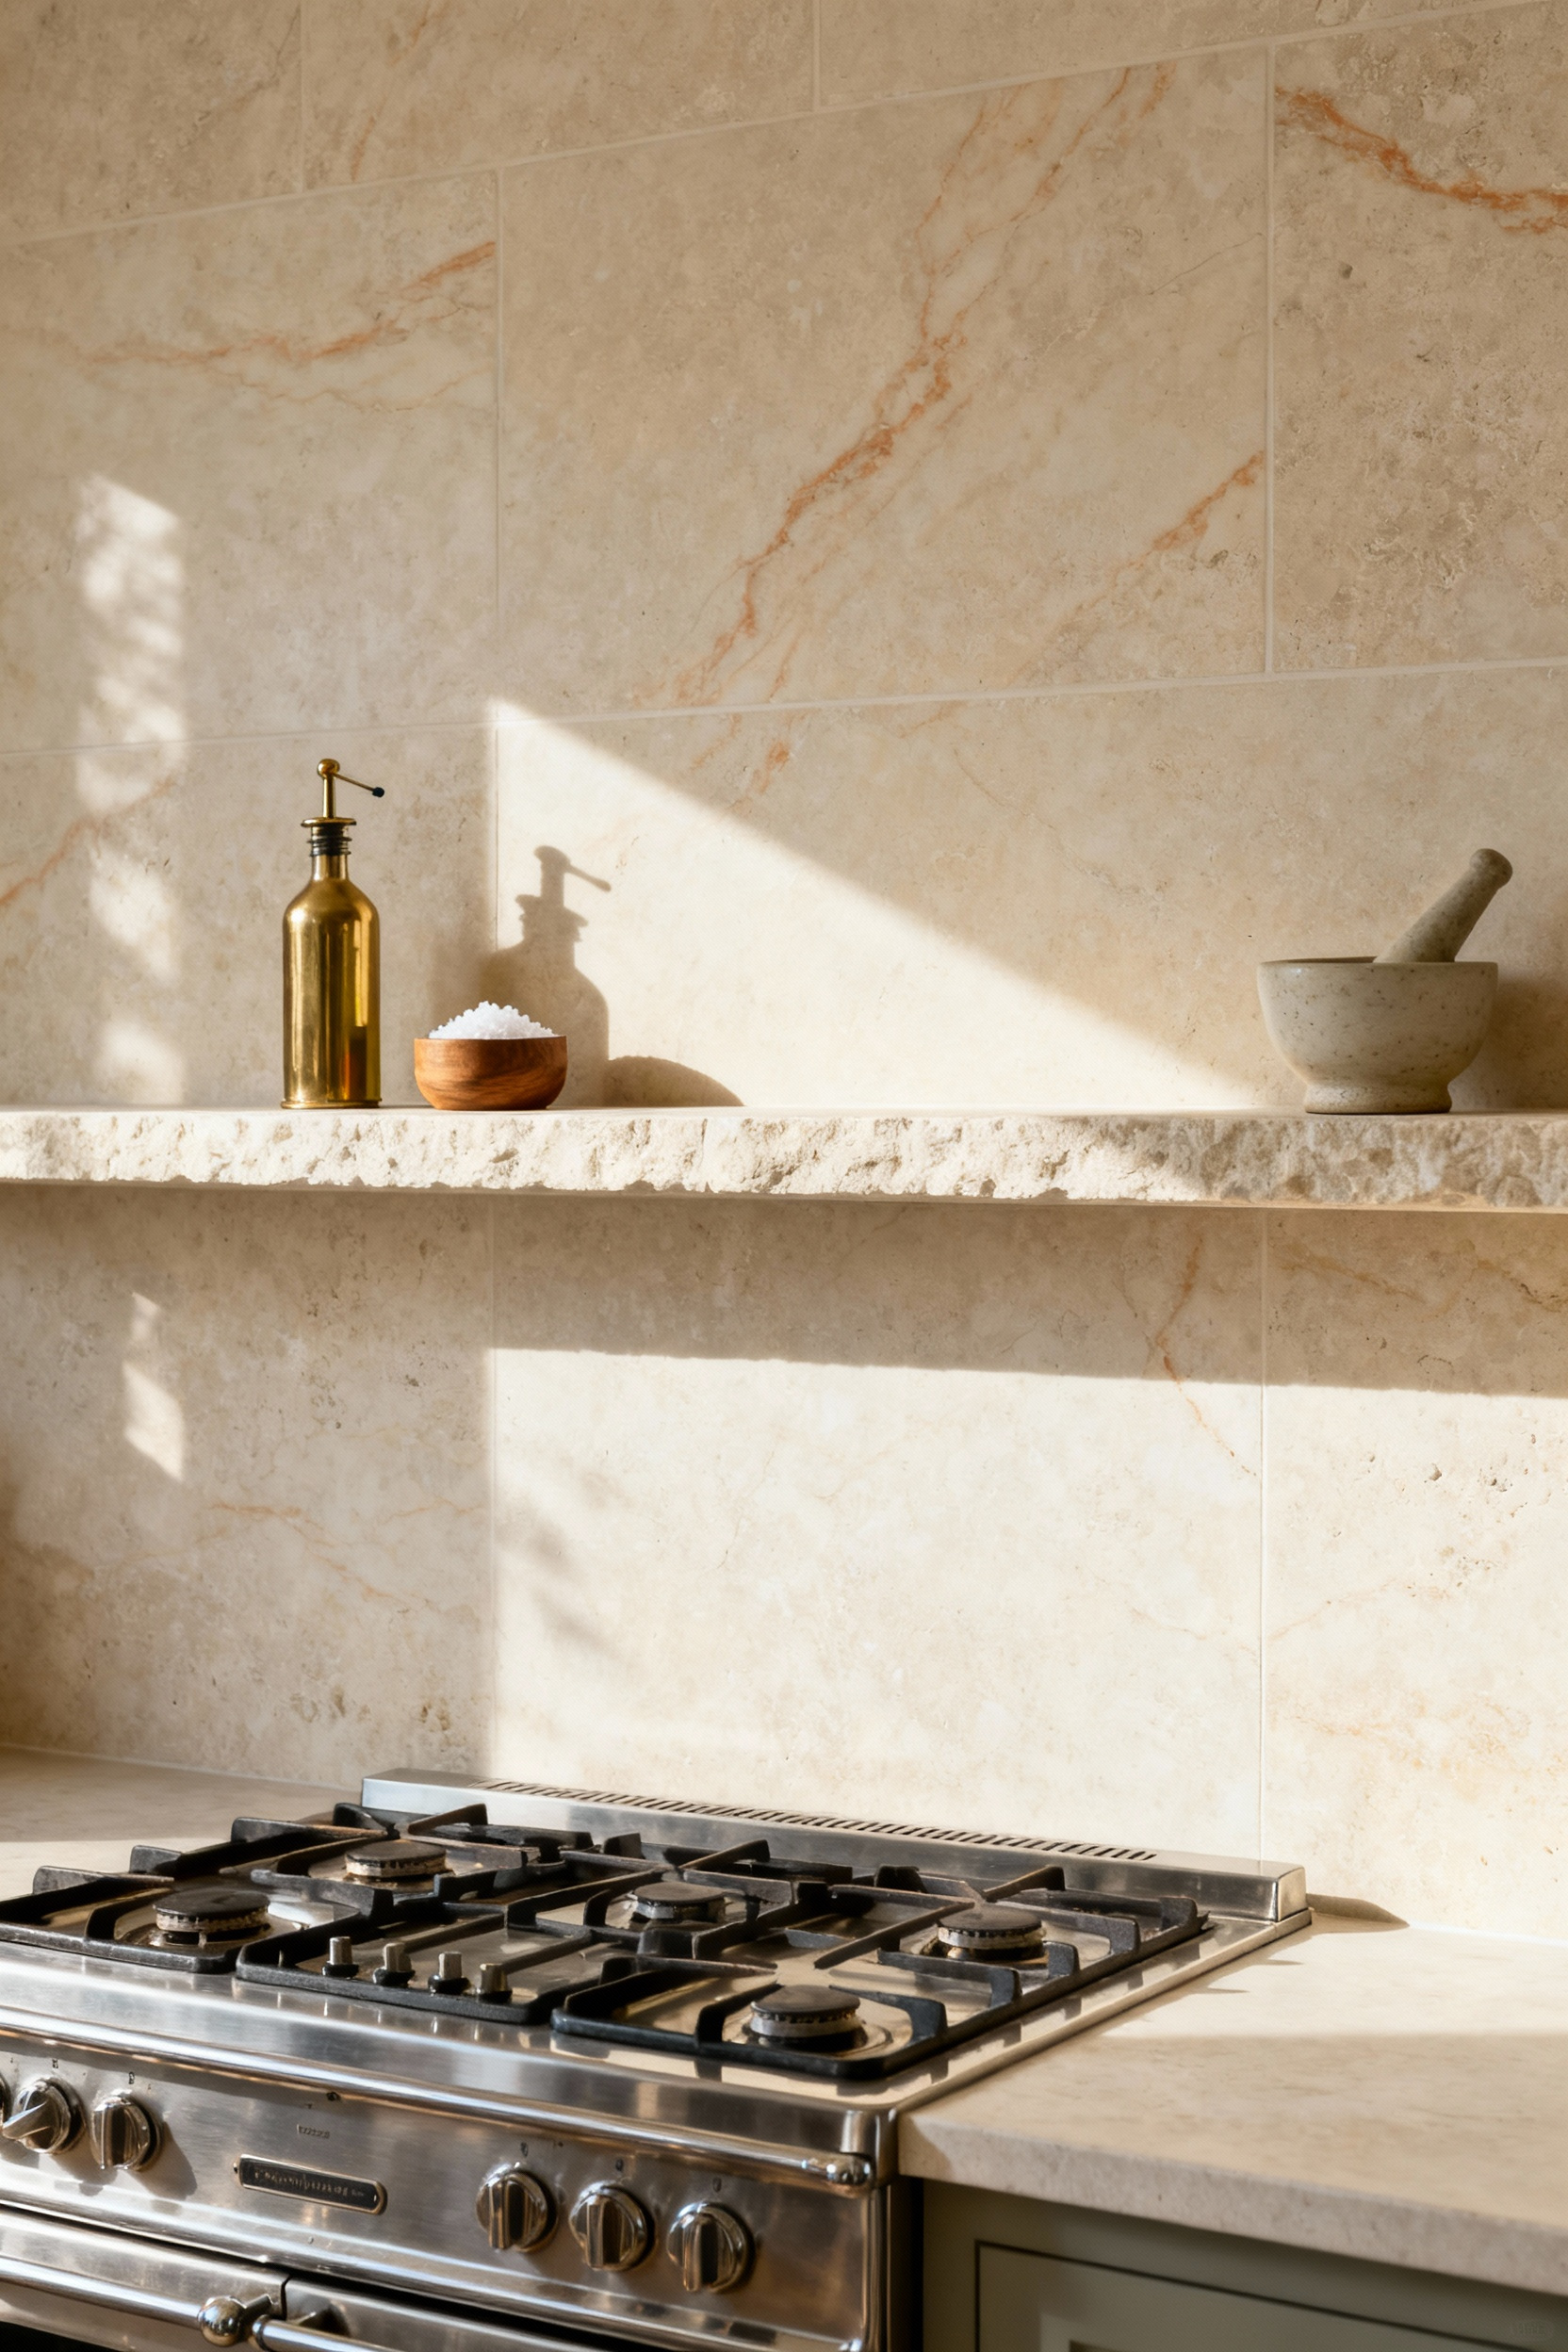
To achieve this timeless aesthetic, prioritize structural integrity and visual flow. Unlike lightweight tile trim, this heavy stone feature demands specific preparation. Follow these guidelines for a lasting installation:
- Anchor Firmly: Install steel brackets into wall studs *before* placing the backsplash to support the weight safely.
- Match Materials: Use the exact same stone as your counter for seamless, architectural continuity.
- Span the Width: Run the ledge across the full workspace to create a deliberate, cohesive break in the design.
13. Lighting the Texture: Strategic Illumination
I adore the stories hidden within the craze lines of salvaged mid-century tile. To bring those distinct imperfections to life, you must master the “graze effect.” Position your sustainable LED strips at the very front edge of the upper cabinet rather than the back. This steep angle casts tiny, dramatic shadows that reveal the texture’s three-dimensional soul. Conversely, rear-mounted lights flatten the surface and hide the tile’s hard-earned character.
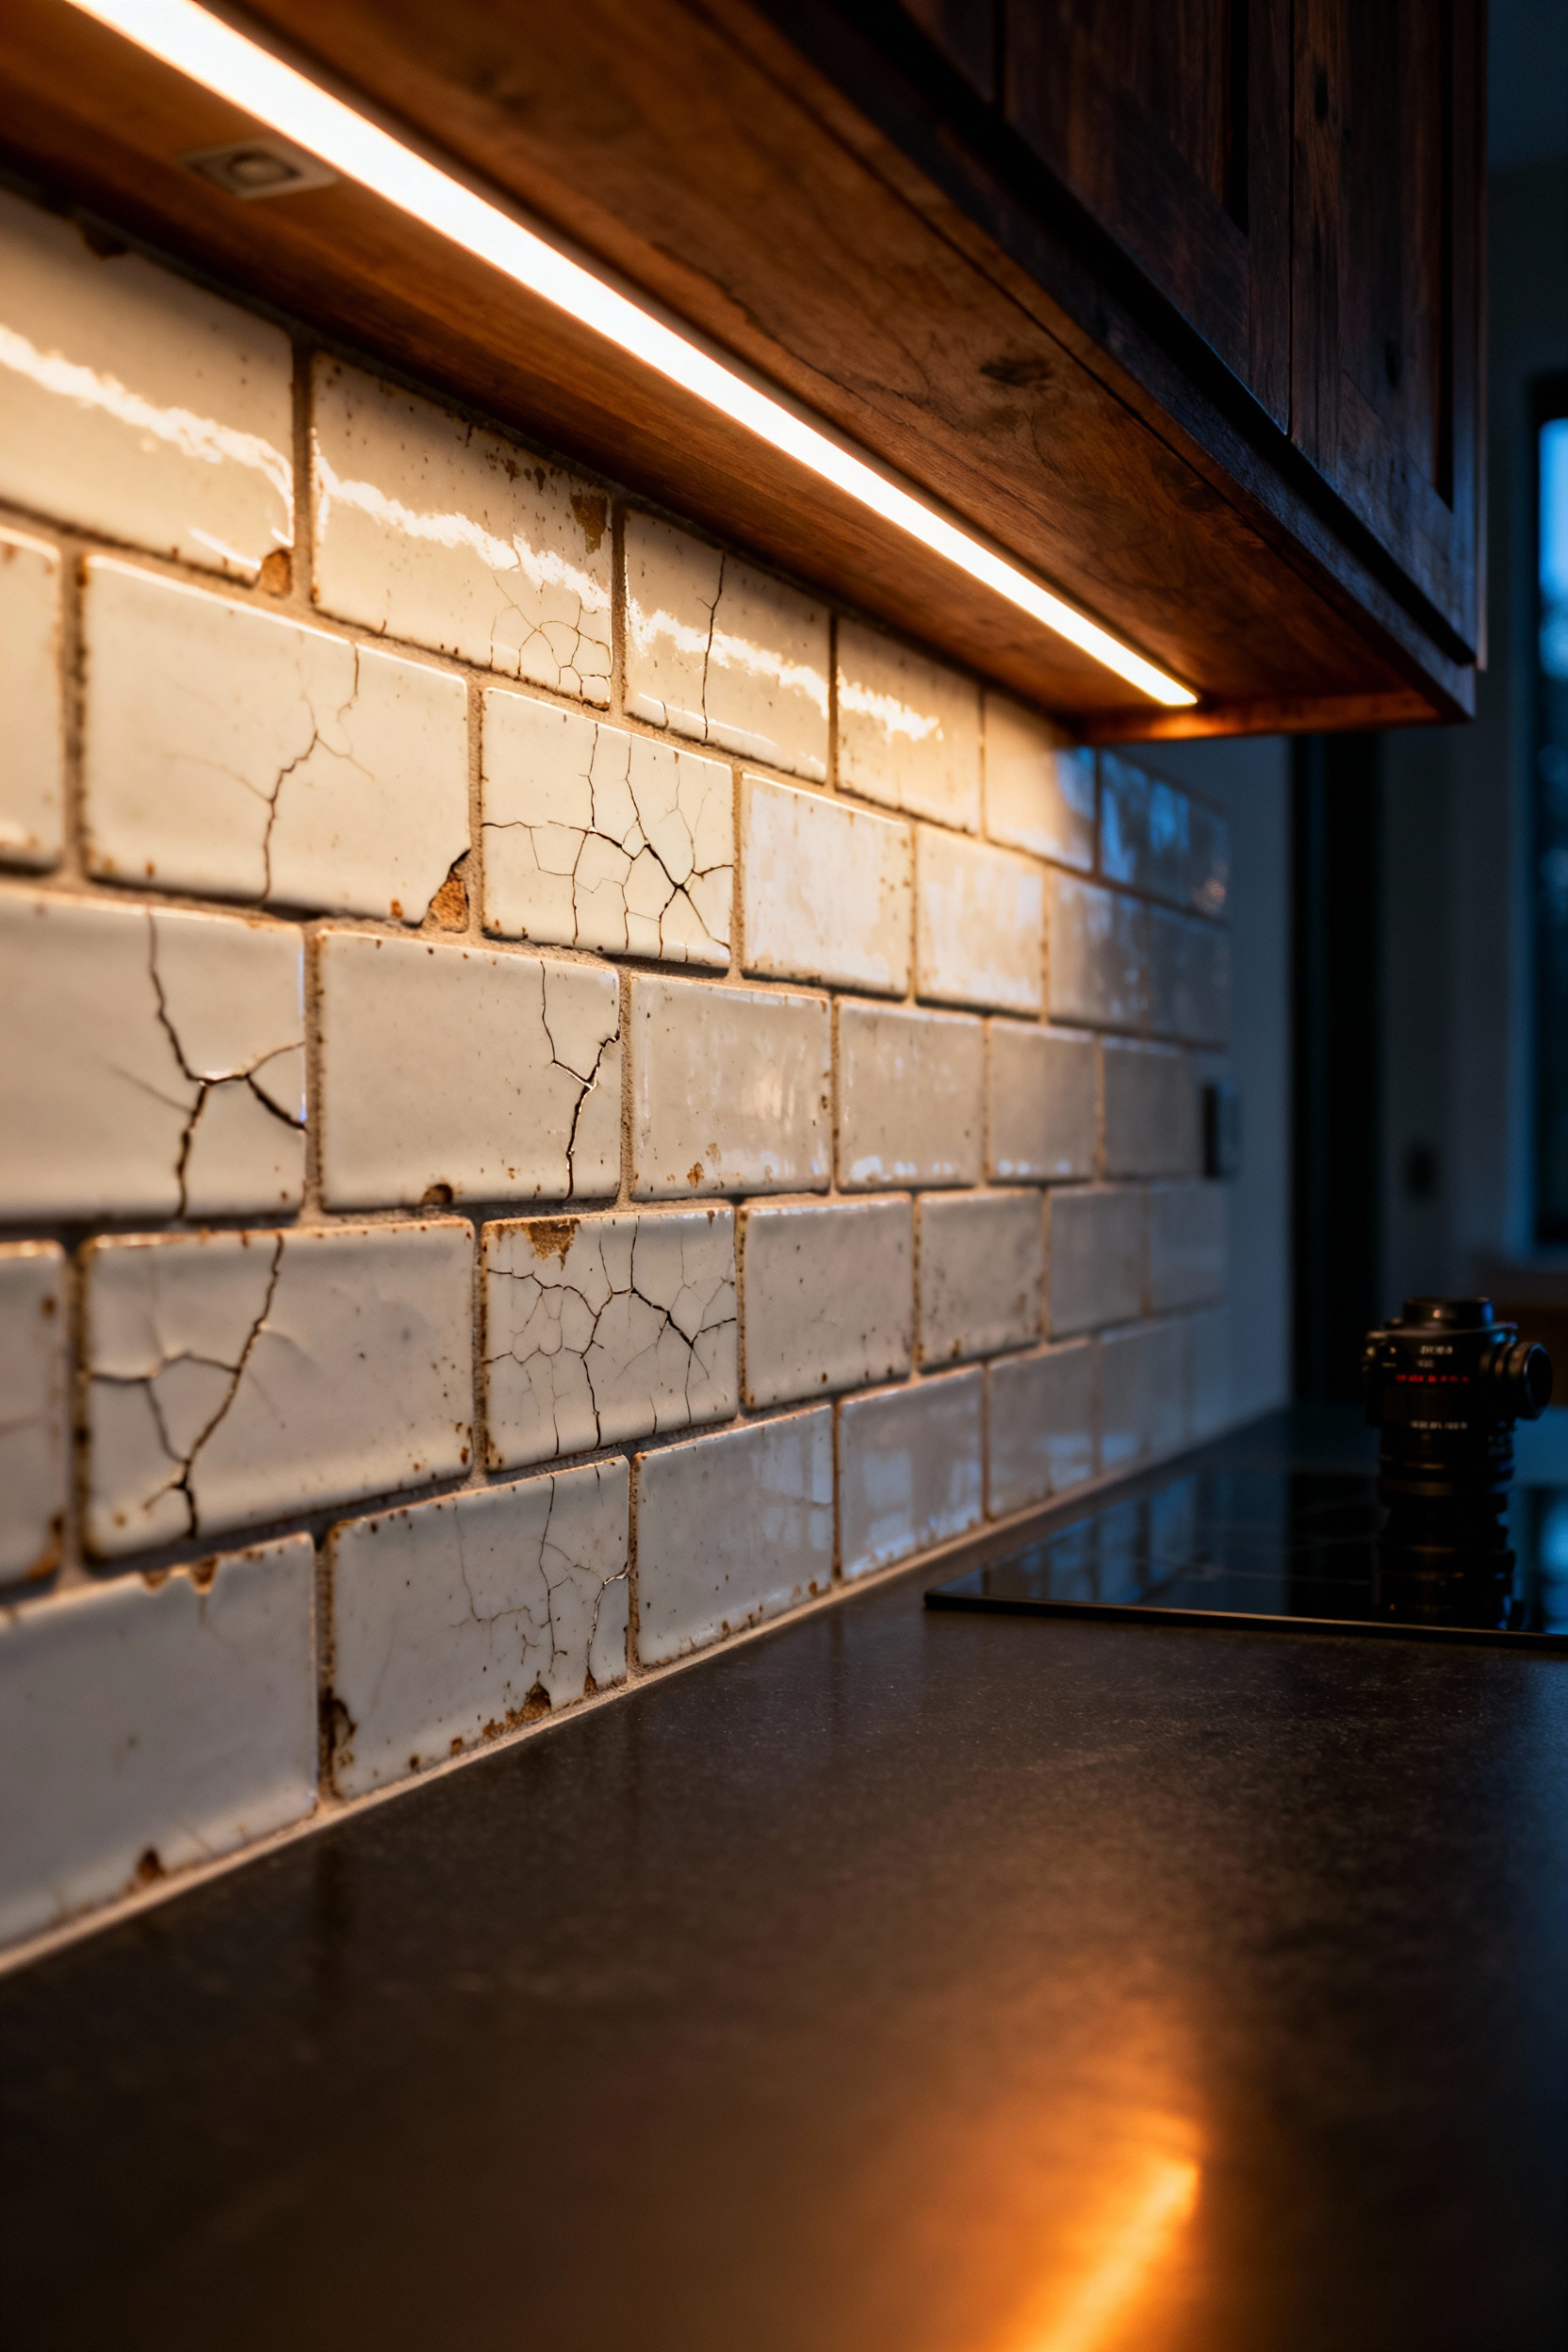
Furthermore, the quality of light defines the mood of your restoration. Treat your vintage finds with respect by following these essential lighting rules:
- Select Warmth: Use 2700K to 3000K bulbs to enhance the rich, nostalgic patina of aged glazes.
- Demand Fidelity: Ensure a CRI of 90+ so colors remain true and vibrant.
- Soften the Glow: Install frosted diffusers to eliminate harsh “hot spots” on glossy finishes.
- Dim It Down: Use dimmers to fine-tune contrast and reduce energy consumption.
14. Vintage Restoration: Cleaning and Sealing
Uncovering original mid-century tile feels like striking gold, but preserving that history requires a gentle, sustainable touch. Never use vinegar; acidic cleaners dissolve the lime in old cement-based grout, causing it to crumble. Instead, opt for pH-neutral enzymatic cleaners or a simple baking soda poultice to draw out deep stains. On my recent restoration projects, I have relied on a low-pressure steam cleaner. It effortlessly lifts decades of grease without scrubbing away the character or damaging fragile glazes.
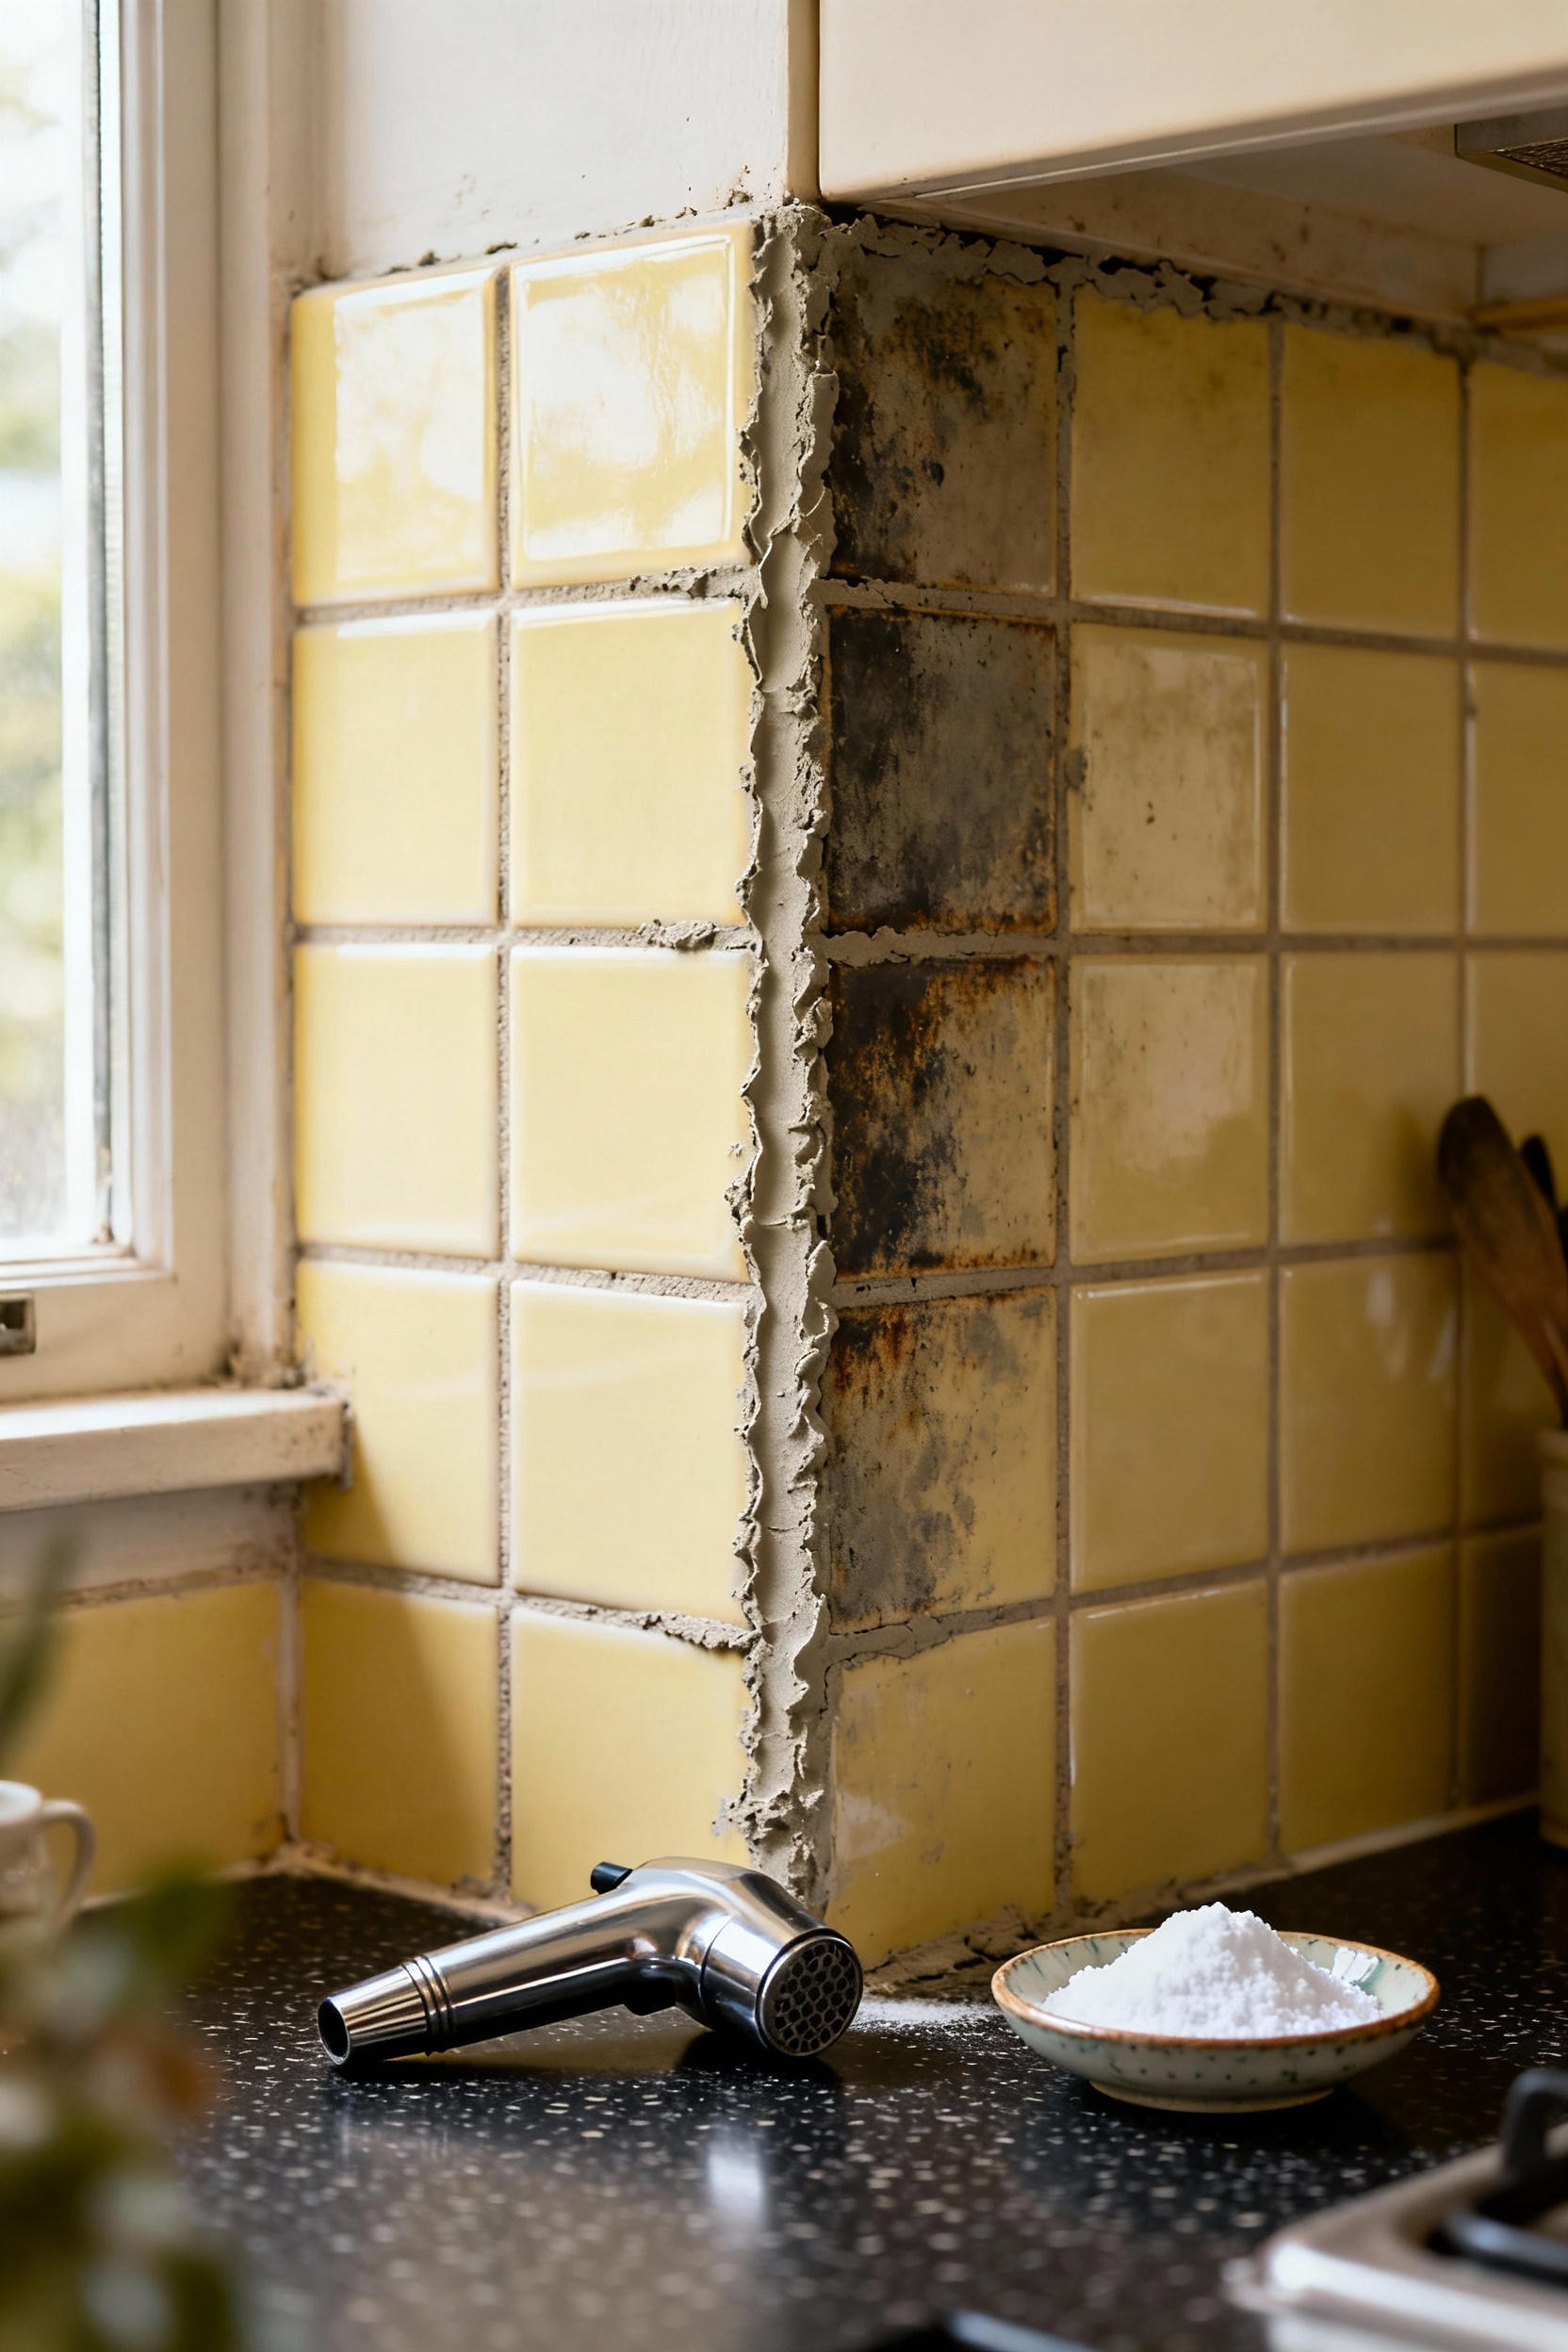
Once your backsplash sparkles, protect it for the next generation. Allow the area to dry for a full 48 hours, then lock in that vintage beauty. Follow these essential steps for lasting protection:
- Apply an Impregnating Sealer: This sinks deep to block oil and food splatter without altering the original matte finish.
- Inspect for Crazing: Look closely for fine, spiderweb cracks in the glaze.
- Seal the Entire Surface: If crazing exists, coat the full tile face—not just the grout—to prevent moisture from penetrating the clay body.
Conclusion: Curating a Backdrop with Soul
Designing a backsplash acts as the ultimate restoration project for the soul of your kitchen. You want the warmth of history without the fragility of a museum piece. By selecting heritage materials like soapstone or terracotta in modern, large-format cuts, you capture timeless charm while minimizing troublesome grout lines. Extending these textures from the counter to the ceiling creates a grand architectural statement. This approach honors the craftsmanship of yesterday but stands strong against the splashes and spills of today’s busy lifestyle.
True sustainability lies in longevity, so prioritize materials that age gracefully while resisting wear. Opt for historic color palettes sealed with non-porous, high-performance glazes to ensure your vintage aesthetic remains hygienic and easy to clean. Be clever with your modern conveniences, too. Tuck under-cabinet lighting and power strips out of sight to keep the visual focus on those rich, earthy tones. This balance ensures your space functions flawlessly without breaking the spell of your design.
Ultimately, the best workspace blends memory with utility. Don’t be afraid to mix that antique aesthetic with high-tech durability. Look for materials that speak to you and installation methods that make daily maintenance a breeze. Go ahead and curate a backdrop that handles the heat of a modern dinner party but still whispers stories of the past. Your timeless, resilient kitchen awaits.