Many homeowners operate under the belief that selecting high-end finishes, like honed concrete or reclaimed timber, guarantees a stunning renovation. You spend months curating materials and reviewing guides on luxury kitchen surfaces. Yet, when construction ends and you finally flip the switch, the room often feels flat and sterile.
This disappointment is known as “Switch-On Failure.” It happens when a strategic kitchen lighting design is swapped for a generic overhead grid. The result? Harsh shadows that dull your investment. No matter how exquisite your cabinetry is, low-quality fixtures with poor color rendering (CRI <90) will make the space look washed out and “off.”
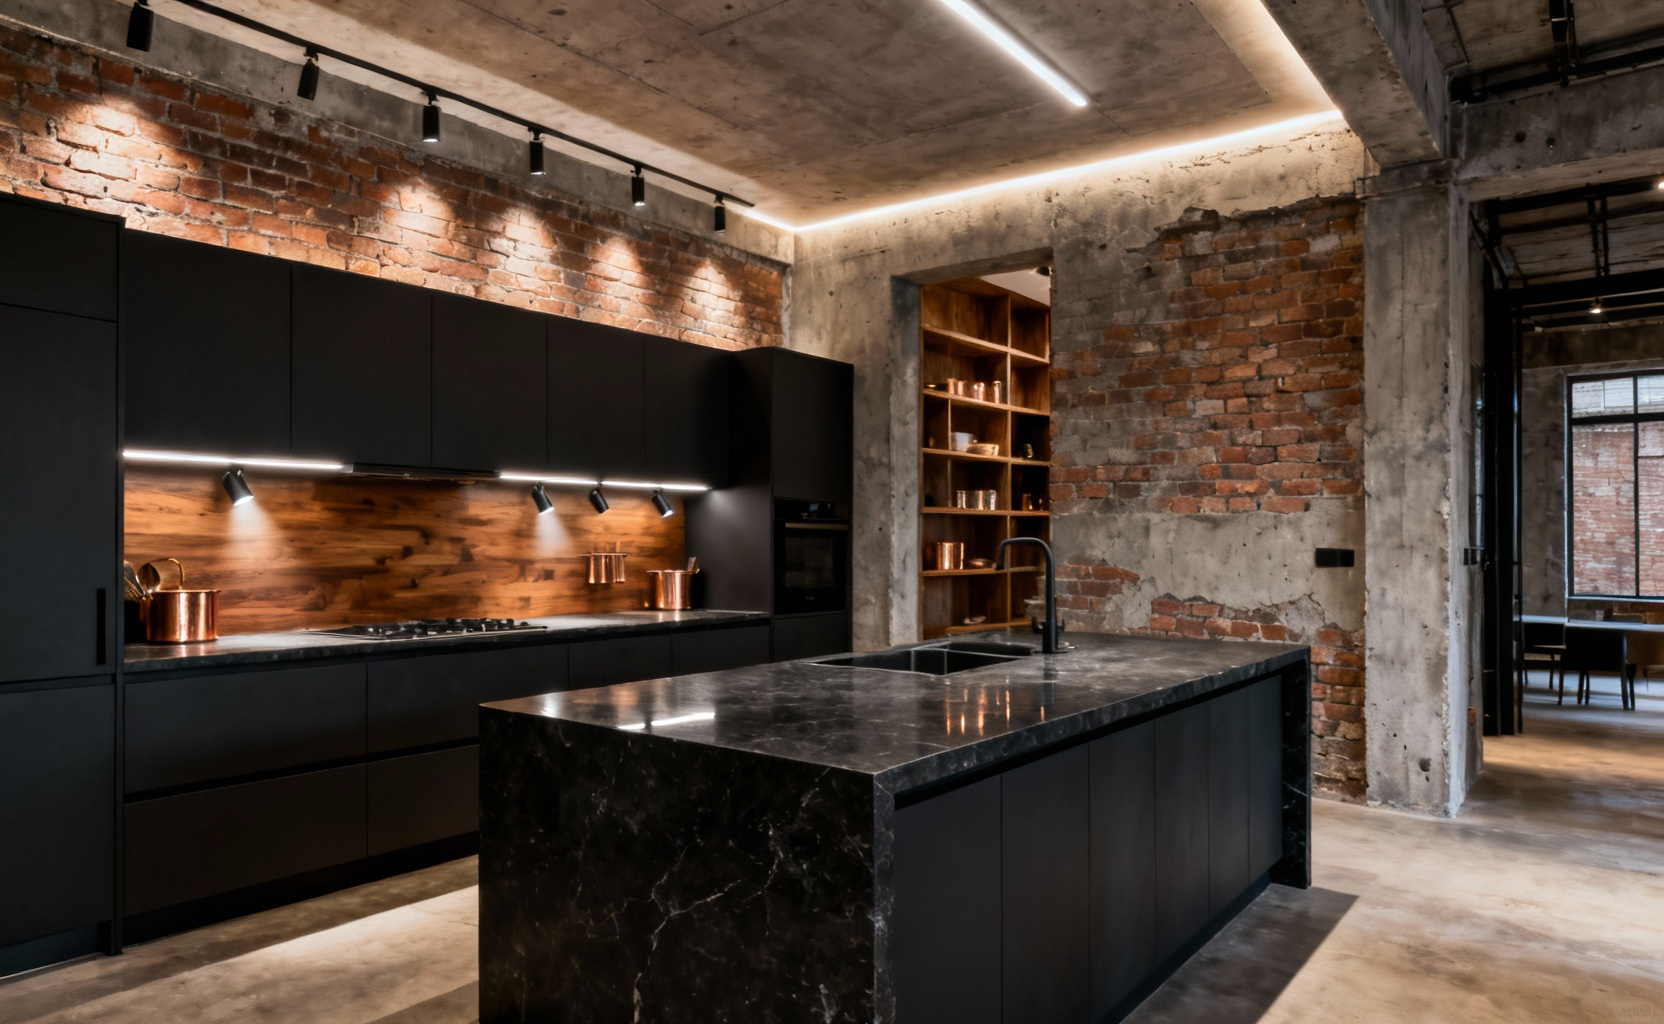
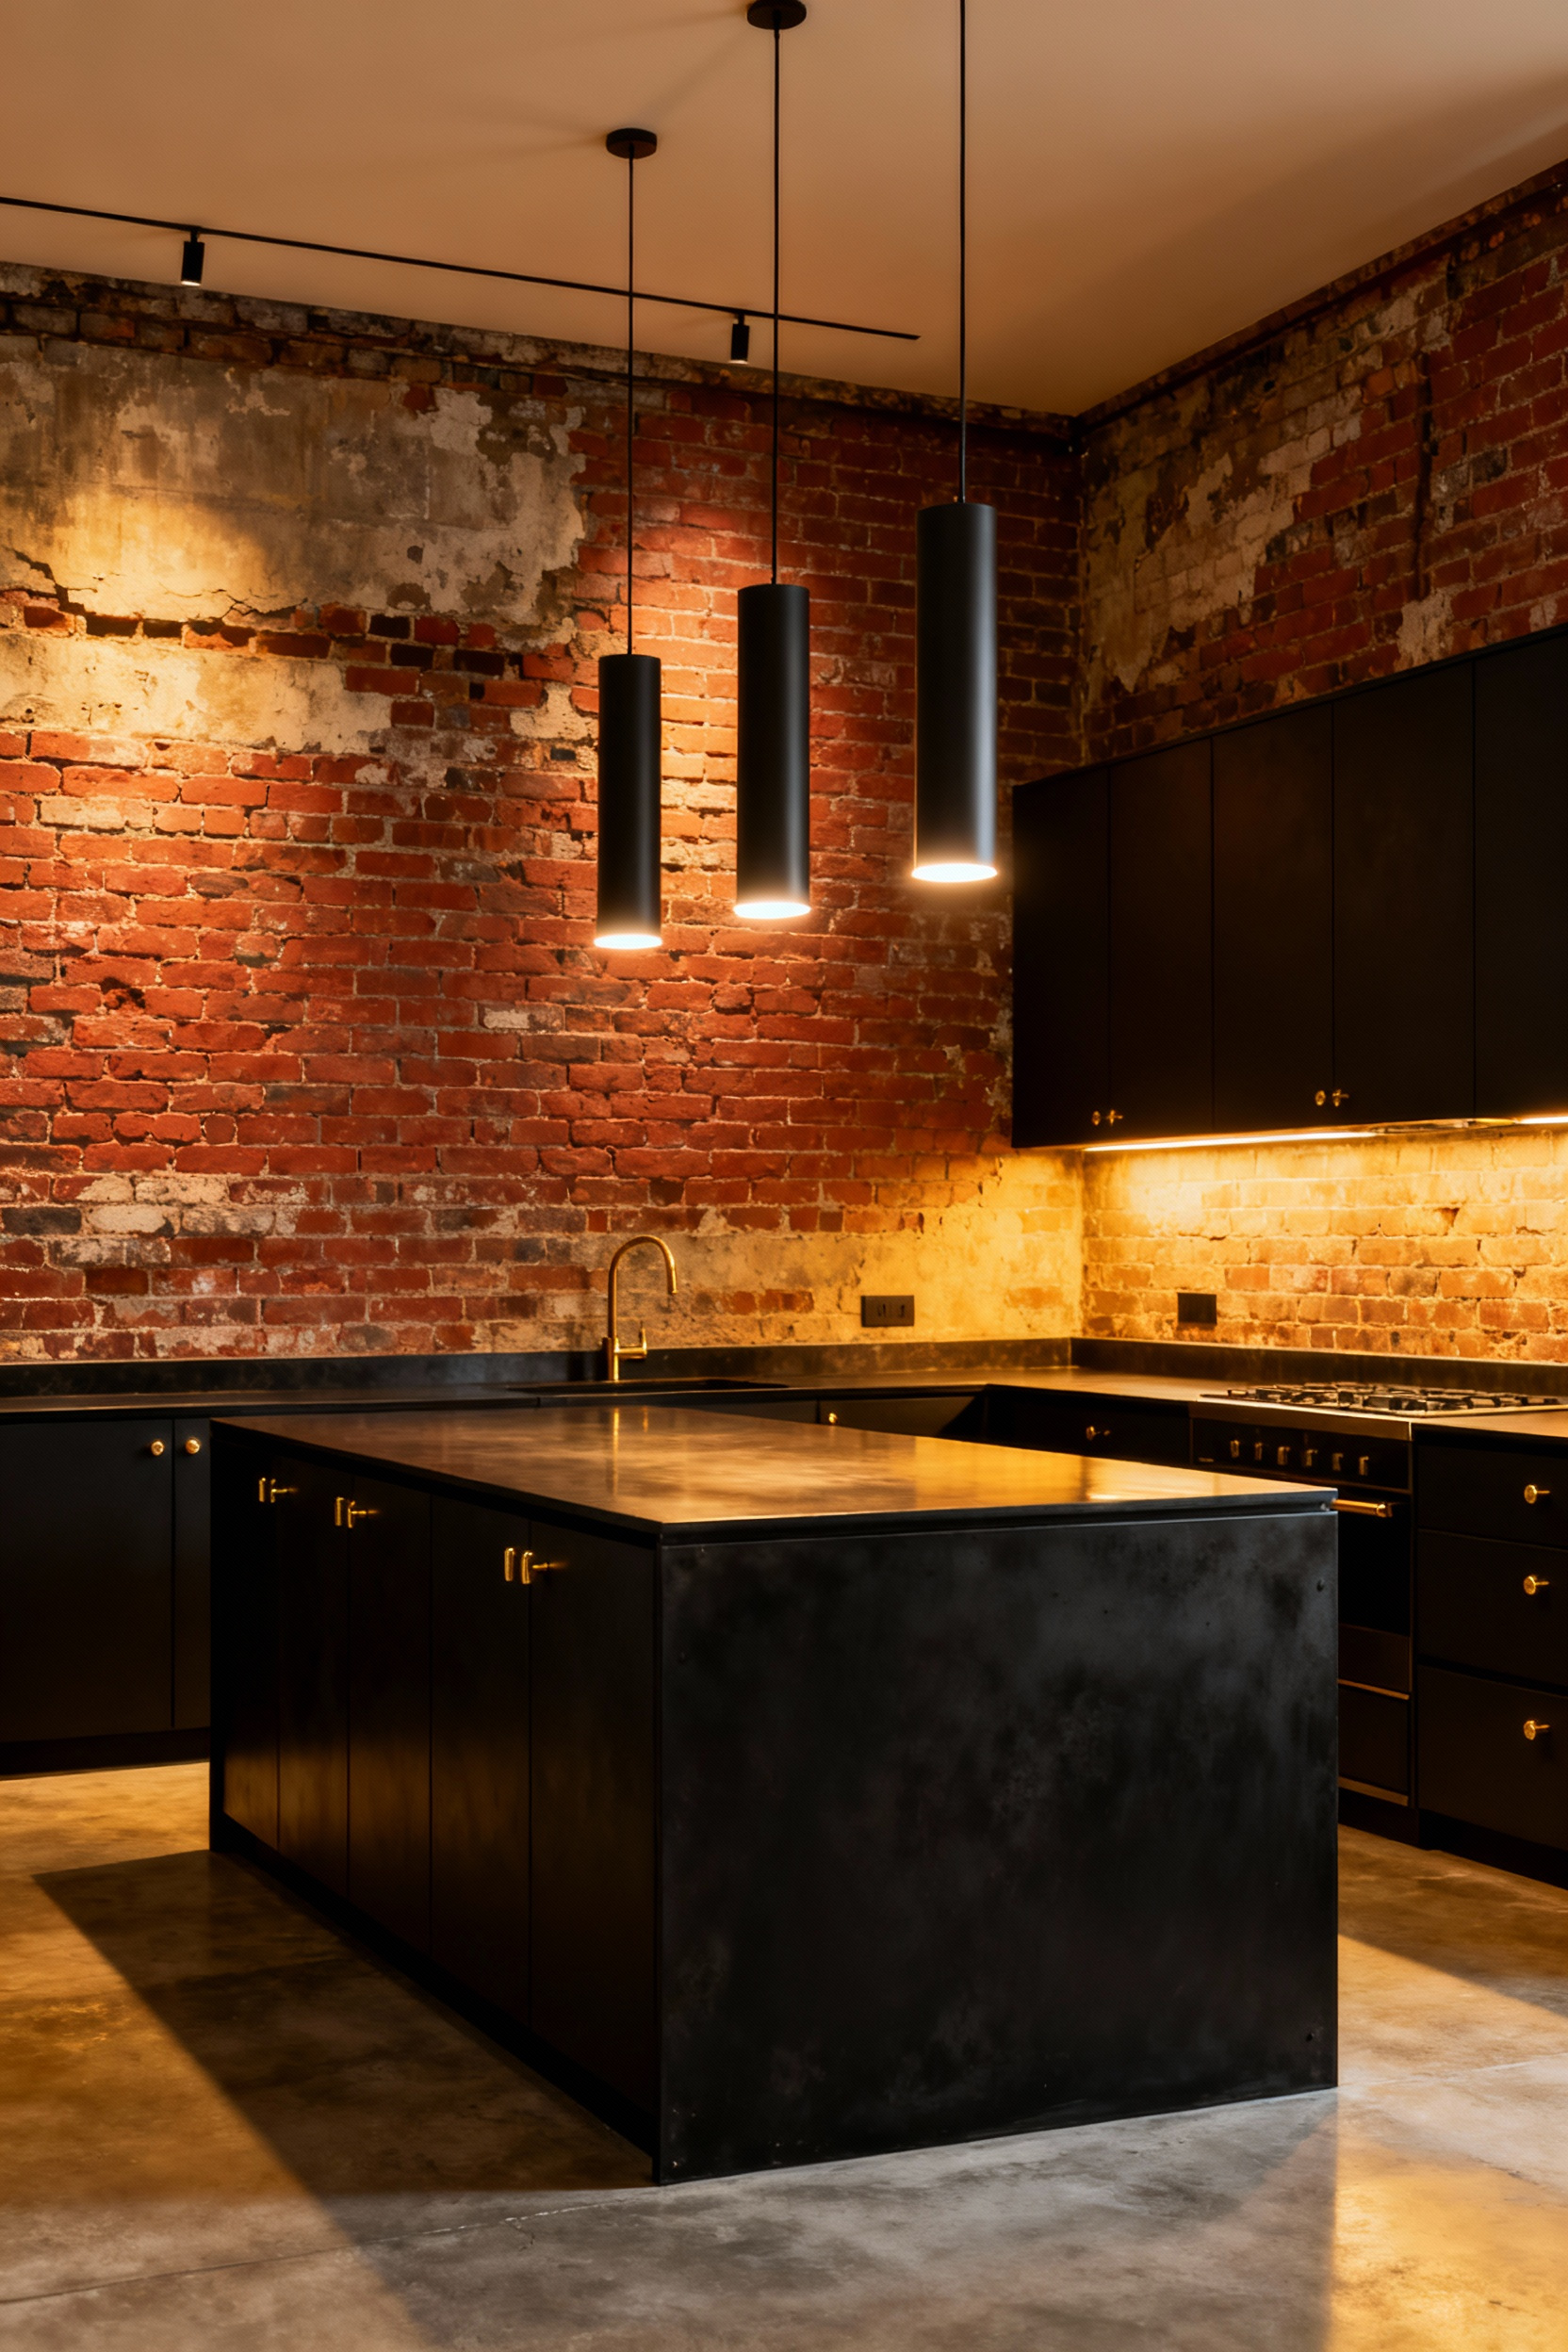
To transform an industrial volume into a sophisticated home, you must treat lighting as a primary structural element, not a decorative afterthought. Architectural professionals reject single-source lighting in favor of a robust three-layer framework: ambient light for volume, task lighting for prep zones, and accent lighting to highlight architectural details.
This approach demands a shift in how you plan. While standard renovations often treat illumination as a line item to value-engineer, creating a livable urban environment requires prioritizing lighting systems before the first wall is framed. This guide establishes the “12% Rule,” an architectural benchmark designed to eliminate poor illumination. We will move beyond basic grids to design around specific work zones, ensuring high-CRI fixtures reveal the true depth of your materials.
The Hierarchy of Light: Understanding the critical difference between ‘illuminating a room’ and ‘designing a lighting plan’.
Merely illuminating a room relies on a single, general light source to provide basic visibility. In spacious industrial layouts or open-concept lofts, this approach creates harsh shadows and functional blind spots.
Designing a lighting plan requires a strategic approach known as the Hierarchy of Light. This method layers distinct light types to ensure safety, functionality, and architectural depth, transforming a utility space into a sophisticated contemporary kitchen decoration.
To implement a professional lighting plan, build the design across three specific levels:
- Ambient Lighting: This establishes the general baseline for the room. Use warmer tones (2700K–3000K) to create a comfortable, inviting atmosphere that fills the volume of the space.
- Task Lighting: Prioritize safety by installing focused LEDs directly over work surfaces like counters, sinks, and stoves. Select a cooler, neutral white light (3500K–5000K) here to maximize clarity and eliminate the dangerous shadows cast by overhead fixtures.
- Accent Lighting: Add the finishing touch with toe-kick LEDs, in-cabinet puck lights, or pendants over an island. These fixtures highlight architectural features and add visual weight, providing the “high-end” feel of a custom design.
True flexibility comes from control. Install dimmers and smart controls on every circuit, particularly for ambient and accent fixtures. This creates an adaptable environment where you can instantly shift the room’s mood from a bright, high-functioning workspace to a softer, intimate setting for dining. By managing the intensity and color temperature across these layers, you ensure the lighting serves both the architecture and the resident.
Foundation Level: The Grid vs. The Zone – Why symmetrical recessed cans are outdated and how to map light based on foot-traffic patterns.
Traditional lighting plans often rely on a symmetrical grid of recessed cans. This approach is functionally flawed because it illuminates the center of the floor rather than your countertops. Worse, standing at a counter creates a “head-shadow” effect over your work surface because the light source is behind you.
Instead, adopt a “Zone” philosophy. Map your lighting to specific functional areas—task, ambient, and accent—rather than adhering to a rigid geometric pattern.
To implement this, prioritize task lighting over general ambient placement. Position recessed fixtures closer to the edge of the countertop run rather than centered in the ceiling aisle. This ensures the beam hits the work surface directly, eliminating shadows and maximizing utility.
For versatility, always install these recessed lights on dimmers. This allows you to transition from bright, functional illumination during prep work to a softer ambient glow for entertaining.
Finally, analyze movement through the space to determine switch placement. Map your light based on foot-traffic patterns to ensure a clear, lighted path exists from every entry point to the nearest control. For safety and flow, utilize accent lighting such as toe-kick LED strips. These provide a low-level guide for movement between activity centers at night without requiring the high intensity of main overhead fixtures.
The Kelvin Architecture: Why 3000K is the non-negotiable urban standard for modern materials (and why 4000K belongs in a hospital).
Industrial renovations require a delicate balance between raw aesthetics and livability. While 4000K lighting offers superior visual clarity, using it as a primary light source creates a sterile, clinical environment better suited for surgery than a dinner party.
3000K acts as the necessary residential anchor. It softens the hard edges of exposed brick, concrete, and steel, creating the welcoming atmosphere essential for a living space. Without this warmth, a converted warehouse feels less like a sanctuary and more like the factory floor it once was.
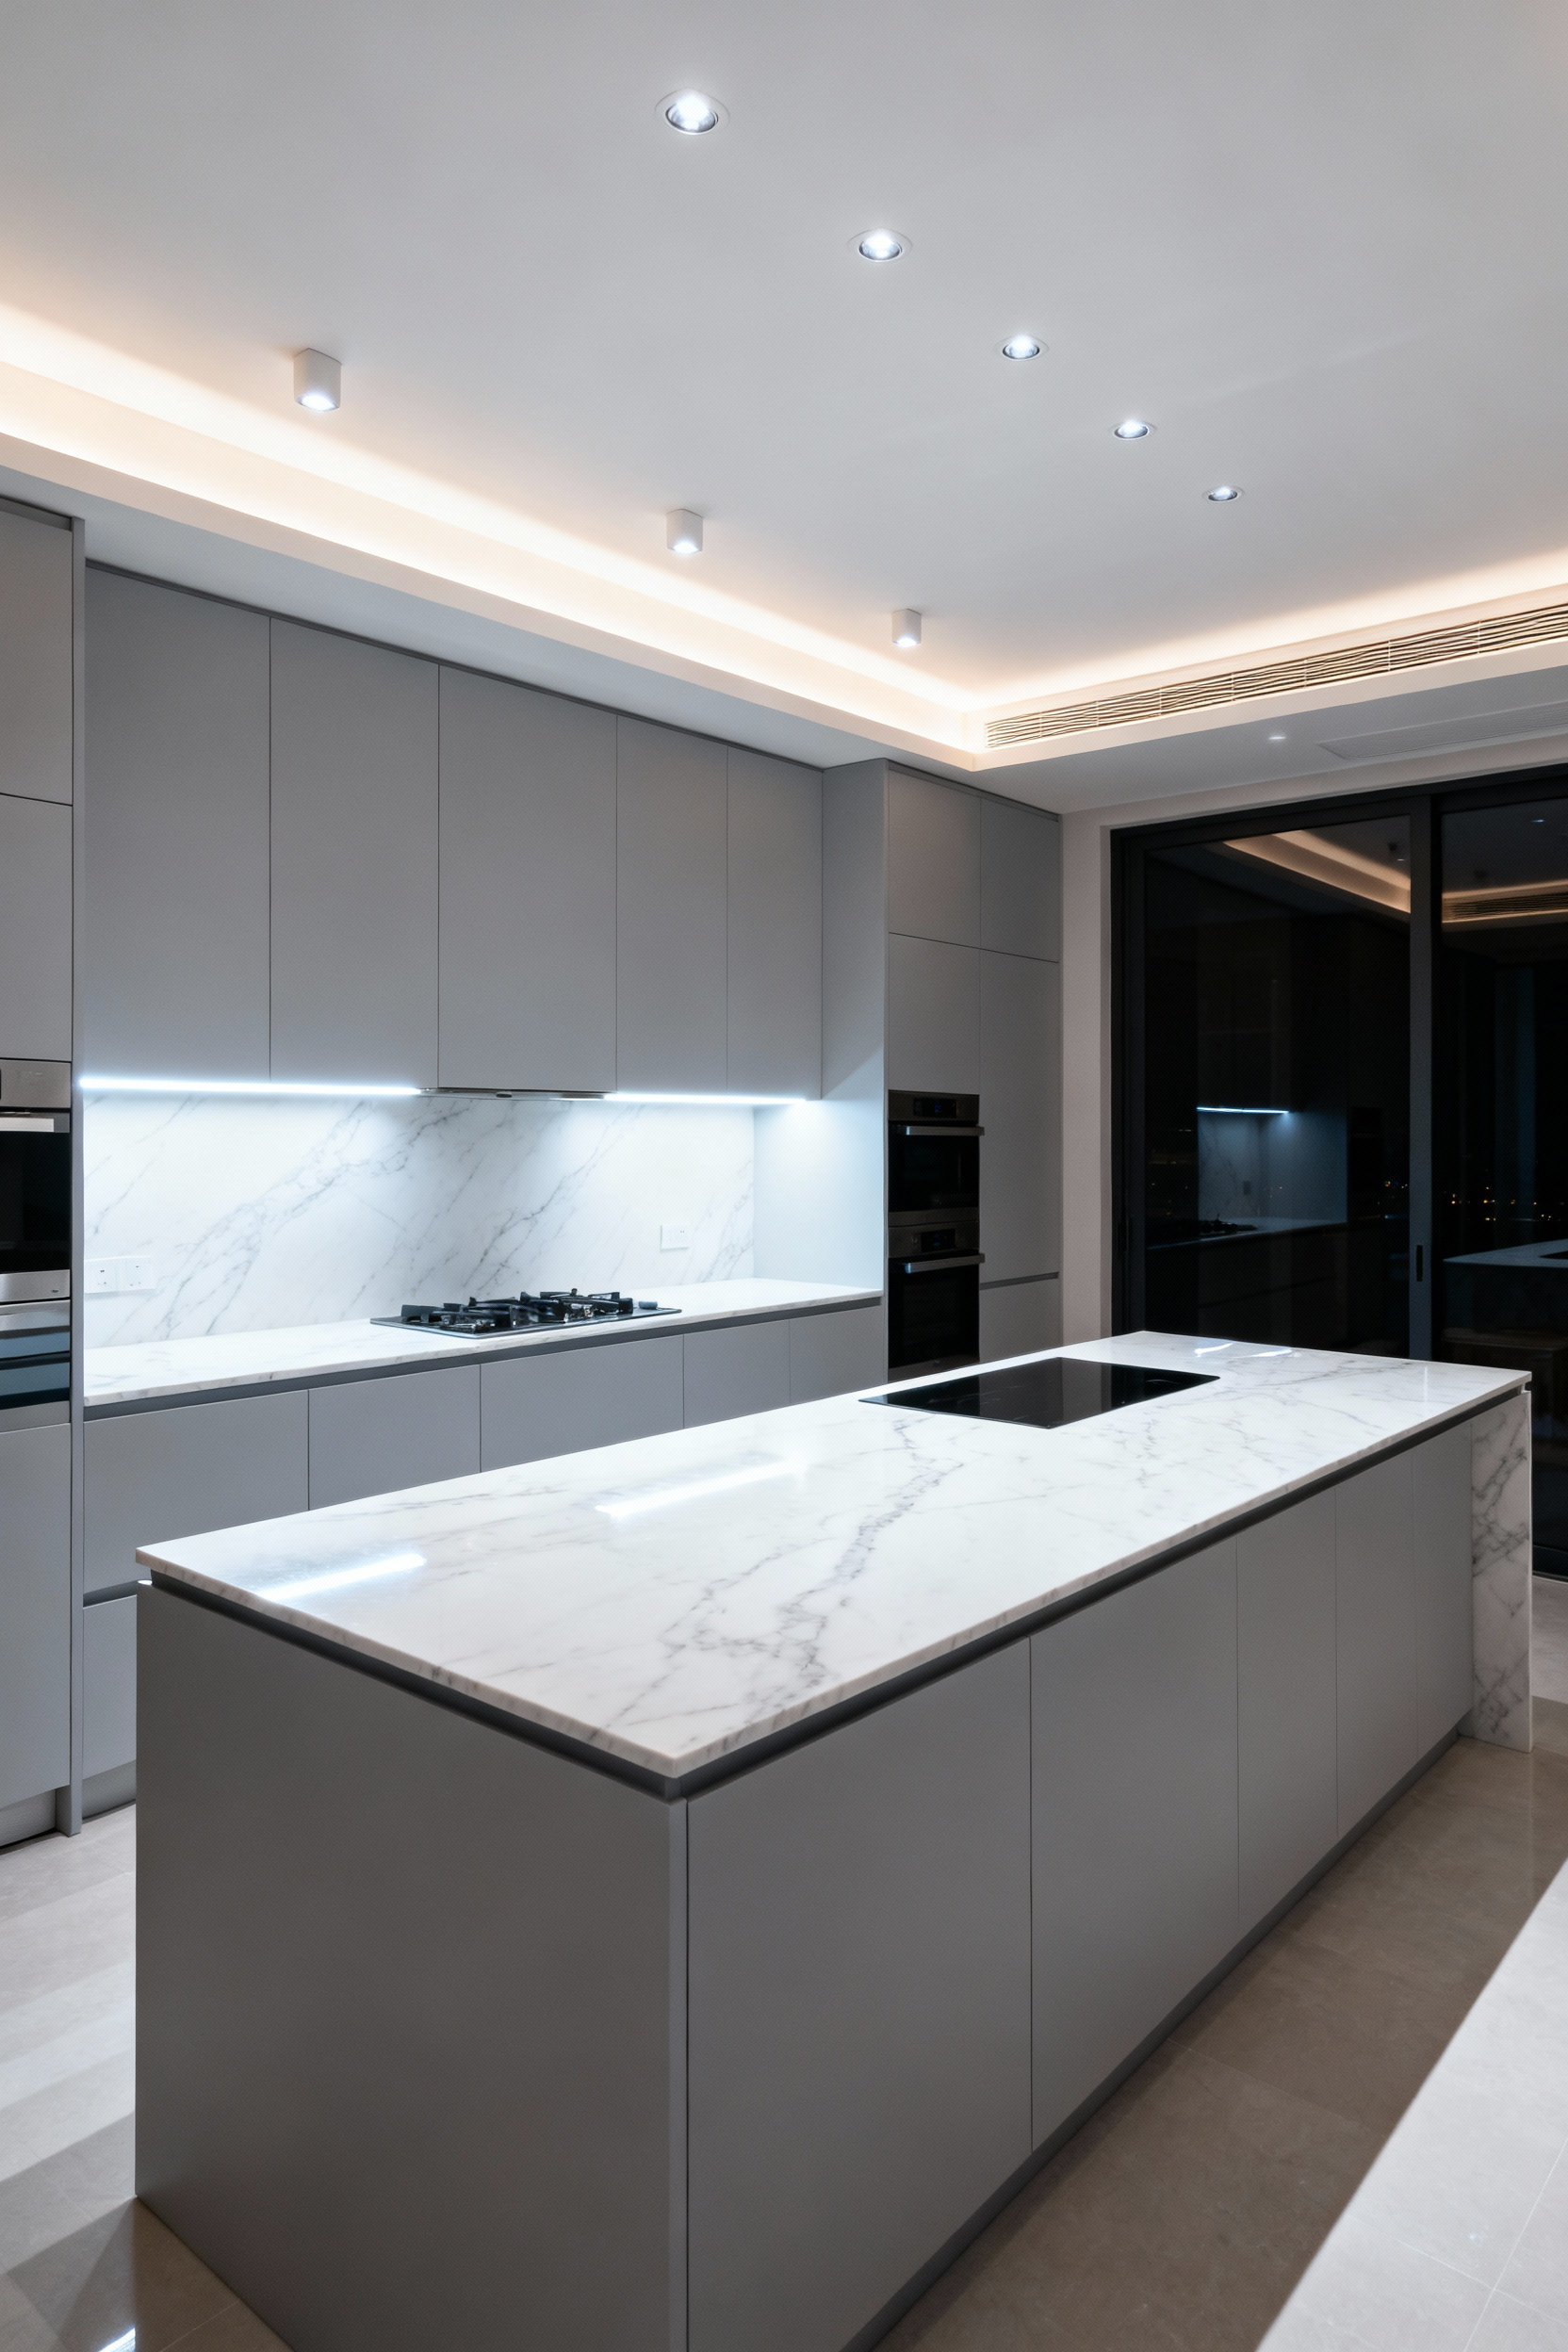
However, modern finishes present a challenge. Crisp white cabinetry and stainless steel surfaces can appear yellow under warm light, losing their intended sharpness. To solve this, professional design dictates a layered approach that separates atmospheric lighting from functional utility. This ensures you maintain the integrity of your materials without sacrificing comfort.
- General Ambiance: Install 3000K bulbs in pendants, chandeliers, and recessed cans to define the mood and prevent the space from feeling cold.
- Precision Tasks: Utilize 4000K specifically for under-cabinet strips and pantry lighting. This neutral white provides the high color accuracy needed for food preparation and reading recipes.
- Material Integrity: Use 4000K in toe-kicks or localized spots near bright white quartz to maintain the material’s true, clean appearance without overpowering the room’s warmth.
The Lumen Calculation Formula: A mathematical approach to ensuring you have enough raw power before installing a single dimmer.
Before installing a single dimmer, you must establish the room’s maximum potential brightness through a layered calculation. The raw power requirement is the sum of your Ambient, Task, and Accent lighting needs.
Begin this calculation with Task Lighting, as safety demands the highest intensity. Target 50–70 lumens per square foot for critical zones like islands and countertops to ensure precision work is effortless. Remember, a dimmer allows you to subtract light for ambiance, but it cannot generate power that isn’t there. You must specify fixtures that meet or exceed this maximum requirement to ensure the kitchen remains functional when fully illuminated.
Theoretical math rarely survives contact with reality, so you must adjust your calculations for material absorption and hardware aging. Industrial environments often feature light-absorbing finishes like dark cabinetry, exposed brick, or concrete. These surfaces “eat” lumens rather than reflecting them, meaning you may need to double or even quadruple your output compared to a white room to achieve the same perceived brightness.
Additionally, apply a Light Loss Factor (LLF) to account for dust accumulation and LED depreciation over time. Divide your total lumen count by 0.80 to build in a necessary buffer. This guarantees your system delivers sufficient raw power throughout the fixture’s lifespan, not just on installation day.
Intermediate Layer: Eliminating the ‘Shadow Line’ – The technical requirements for continuous under-cabinet LED integration.
To achieve a seamless beam of light in a kitchen, you must manage the “intermediate layer” effectively. This layer acts as the physical barrier between the light source and the workspace.
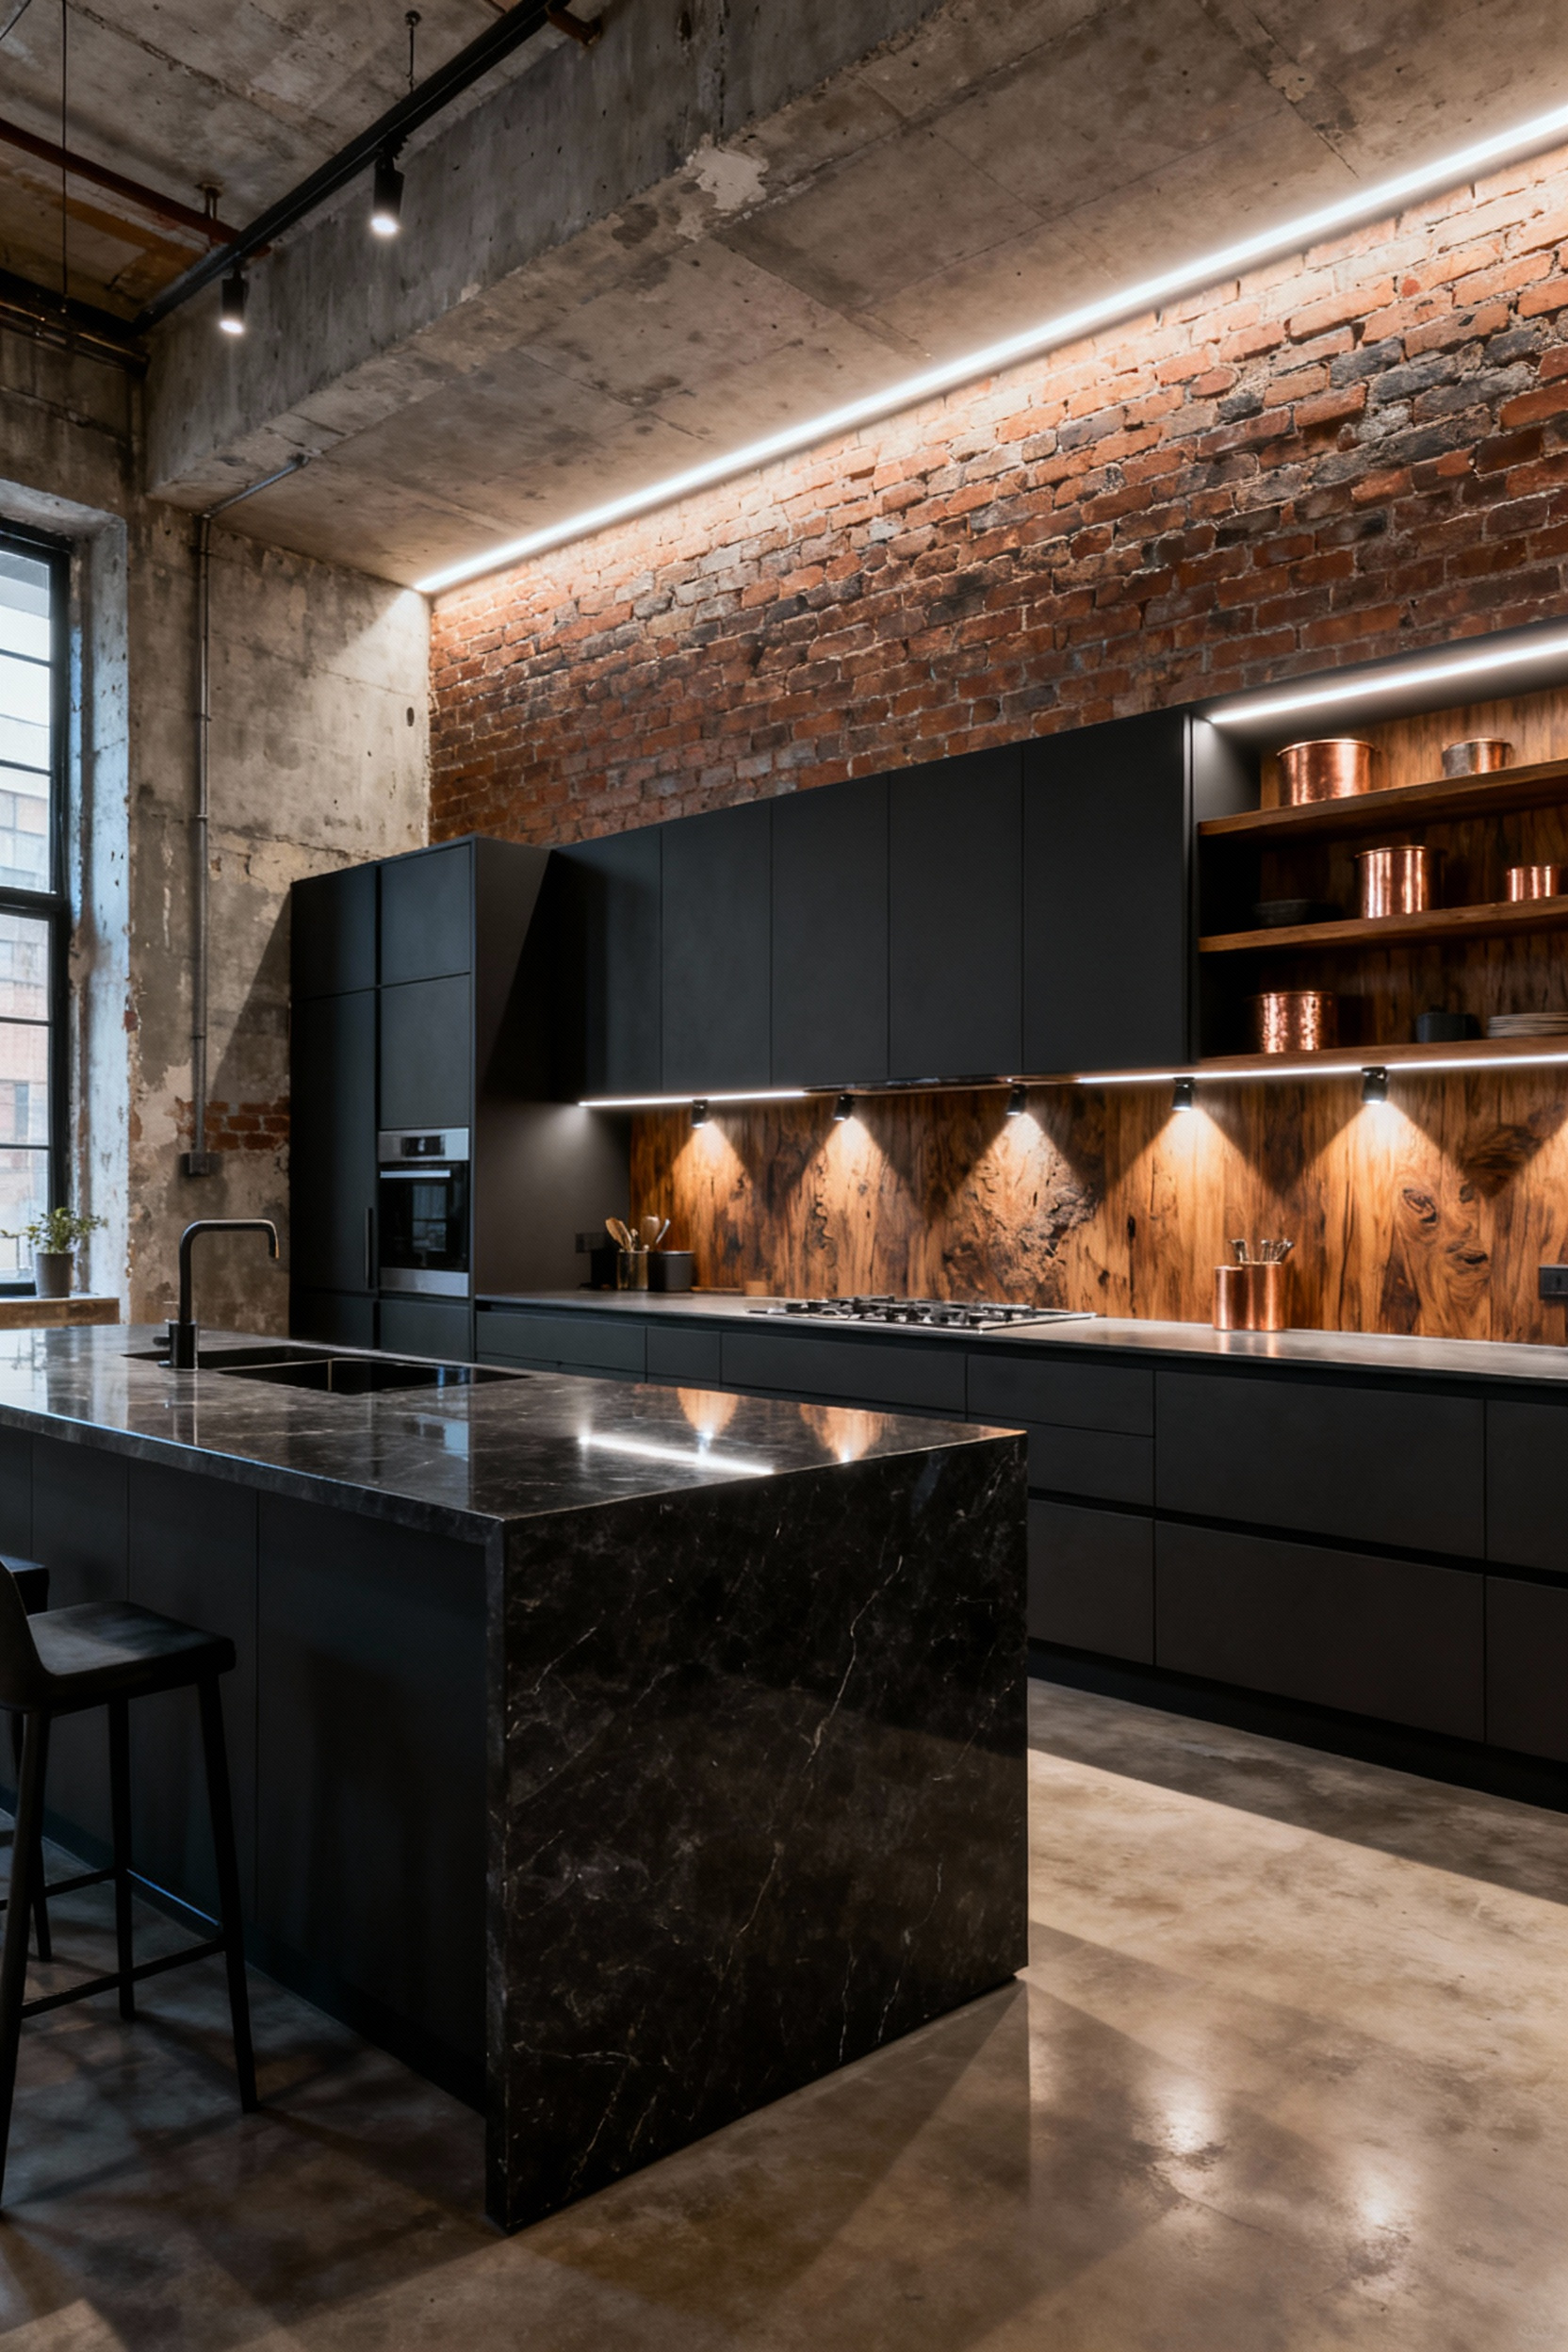
Never apply raw LED tape directly to the cabinetry. Visible individual diodes create harsh, “dotty” reflections on polished concrete or stainless steel surfaces. Instead, always mount the strips inside a shallow-profile aluminum channel capped with a frosted diffuser lens. This specific assembly scatters the light output, transforming distinct hot spots into a uniform, continuous glow.
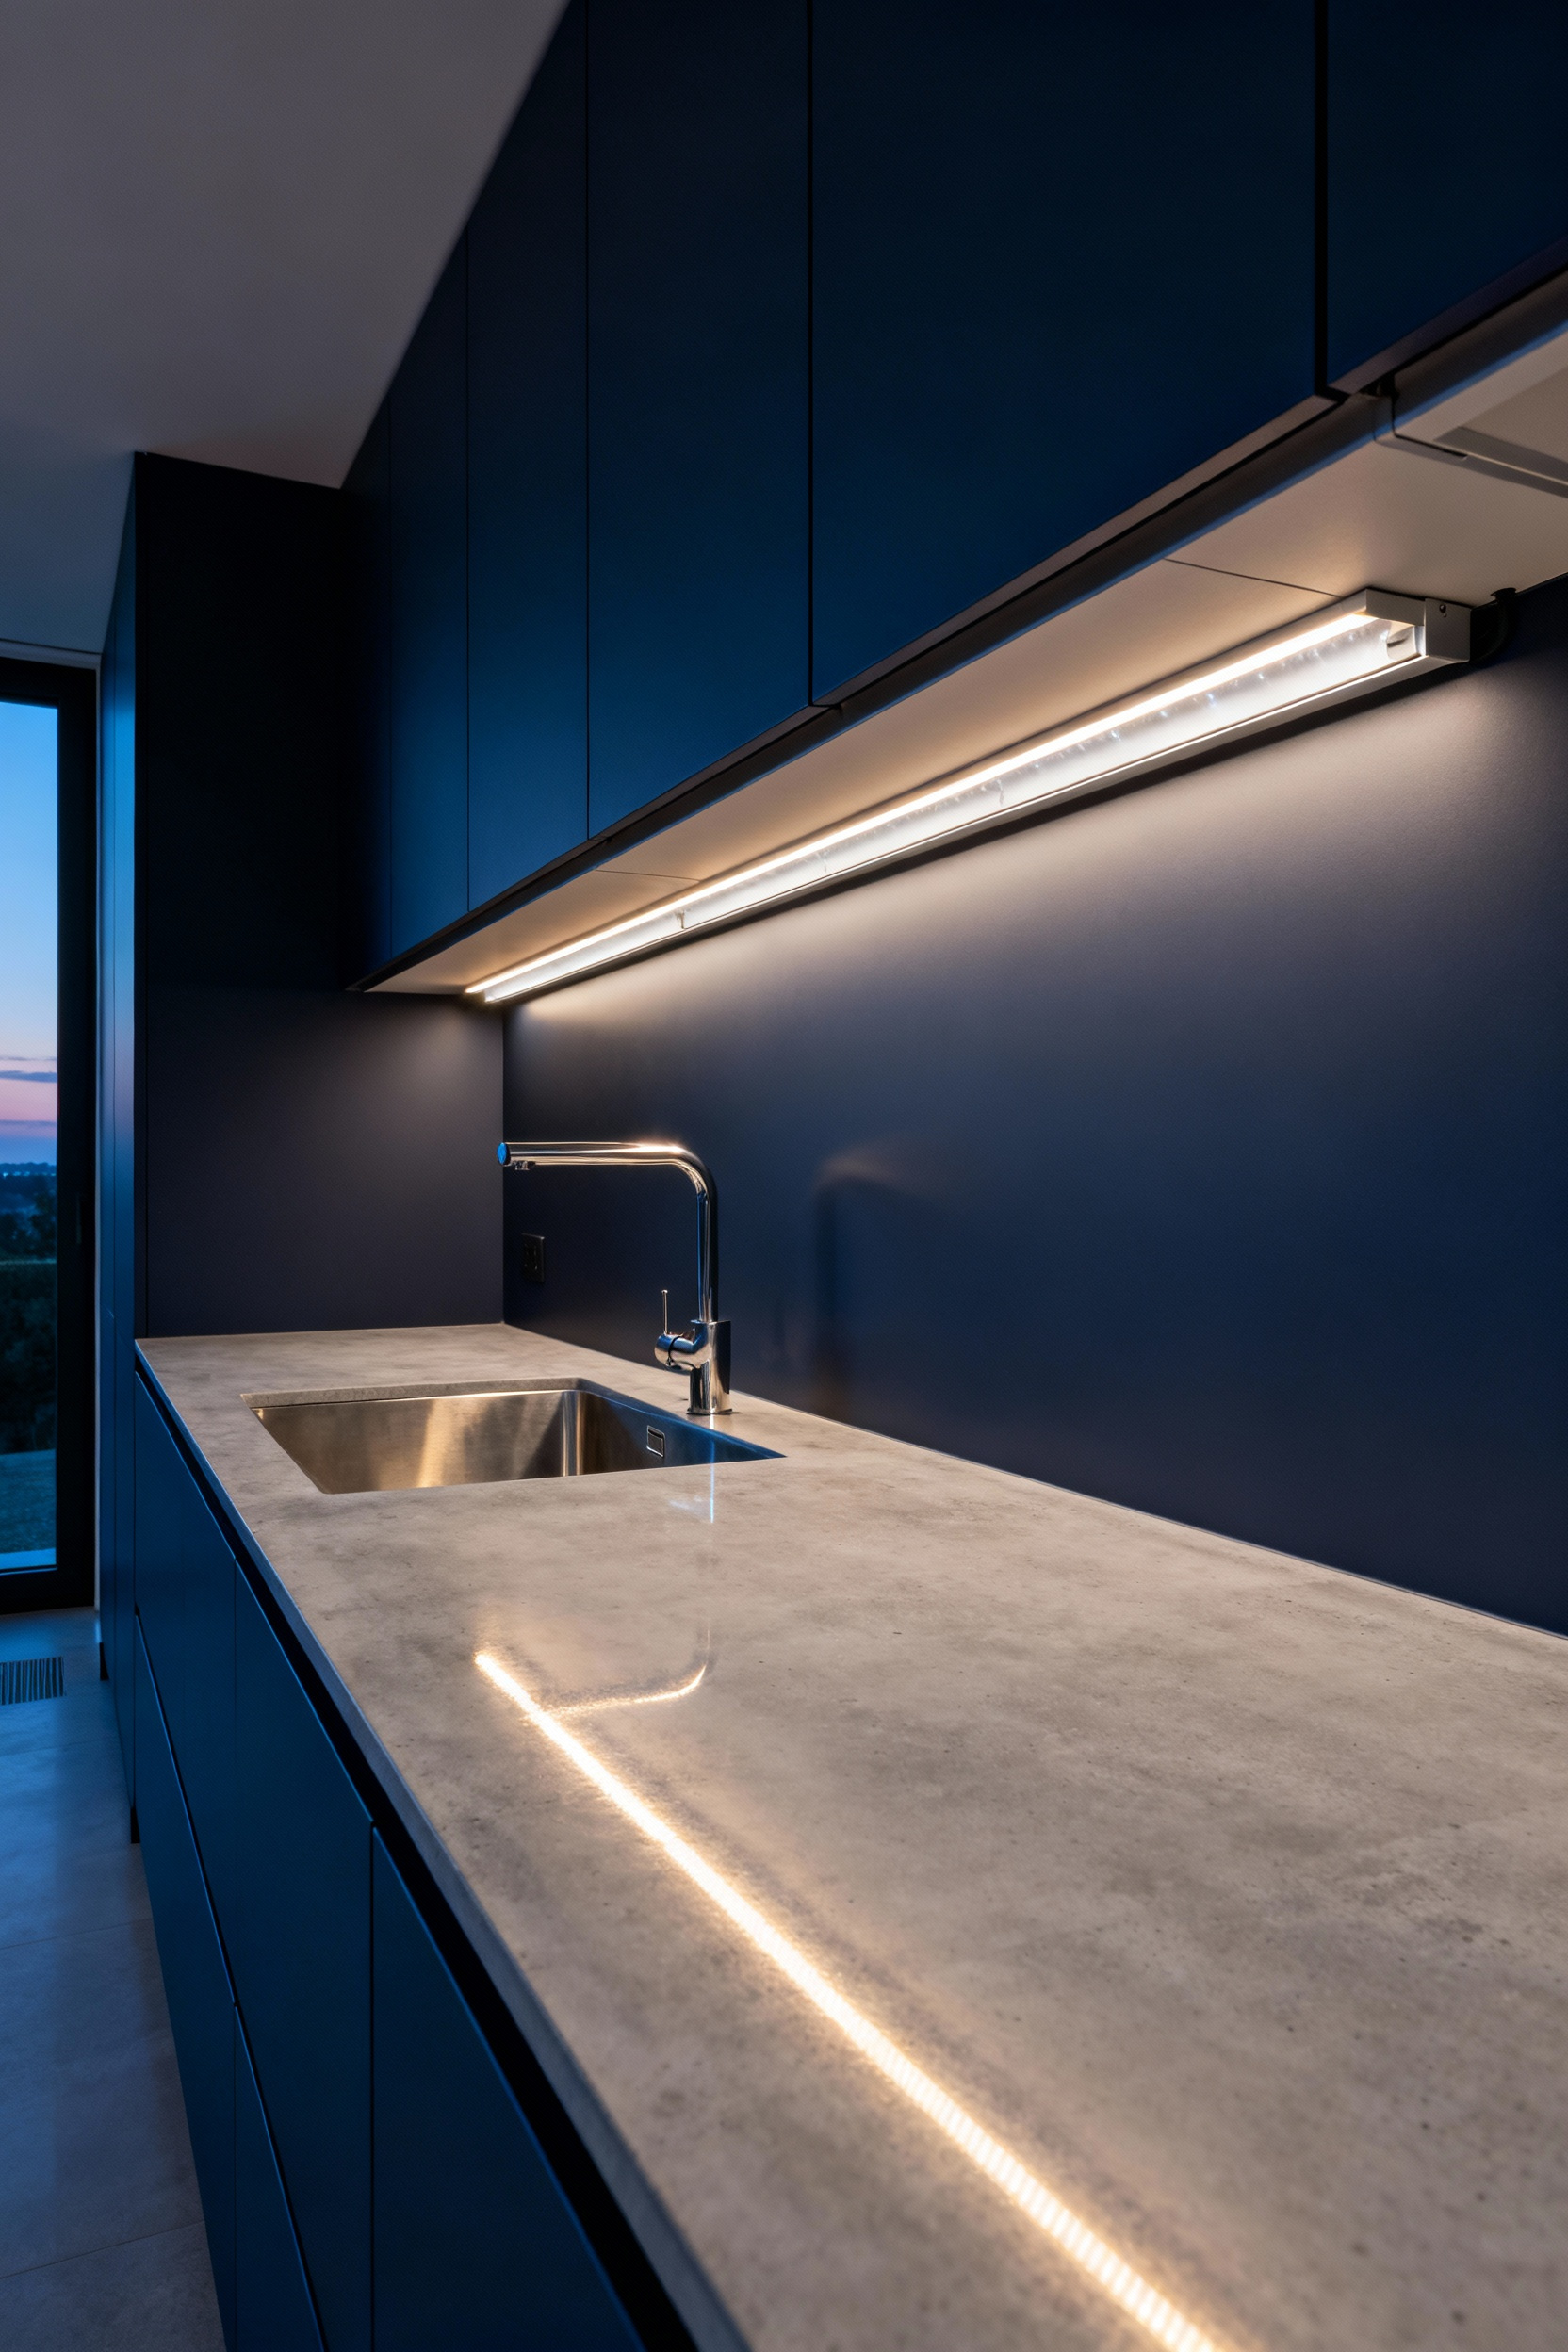
Hardware alone cannot solve every lighting issue; diode density plays a critical role in this equation. Select high-density strips featuring at least 120 LEDs per meter. Closely spaced diodes allow the diffuser to blend the light more effectively over a short distance, eliminating the visual gaps found in cheaper alternatives. When you couple this density with a wide beam angle of approximately 120 degrees, the illumination spreads evenly across the counter without creating dark zones.
Final placement dictates functionality. Install the fixture directly behind the front lip of the cabinet rather than against the backsplash. This forward positioning directs light onto the center of the task area and neutralizes shadows cast by the user’s body. By adhering to these technical standards, you eliminate the “shadow line” and ensure the lighting supports the clean, architectural lines of the room.
The Island Pendant Ratio: The architect’s rule of thirds for suspension height and spacing over varied counter lengths.
In architectural design, suspension height dictates functionality. Position the bottom of your pendant fixtures 30 to 36 inches above the countertop surface. This specific range establishes an ideal intersection between effective task lighting and unobstructed sightlines across the room. While industrial conversions often feature soaring ceilings, you must maintain this distance relative to the counter to ensure the workspace remains properly illuminated. Only adjust this height upward slightly if your ceiling exceeds nine feet.
Proportion determines the visual weight of the installation. Adhere to the “Two-Thirds Rule” for fixture sizing to maintain balance. The total width of your lighting arrangement—whether a linear chandelier or a cluster of pendants—should span approximately two-thirds of the kitchen island’s length. This ratio anchors the space without overwhelming the surface area or appearing insignificant against the scale of the room.
Calculated spacing finalizes the layout. Use the “Pendants + 1” formula to divide the island length mathematically. For example, if you plan for two pendants, divide the total length by three to determine equal spacing segments. Regardless of the formula results, verify your layout against these physical constraints:
- Maintain a buffer of 6 to 12 inches from the pendant’s outer edge to the end of the island.
- Ensure a distance of 24 to 30 inches between fixtures on center.
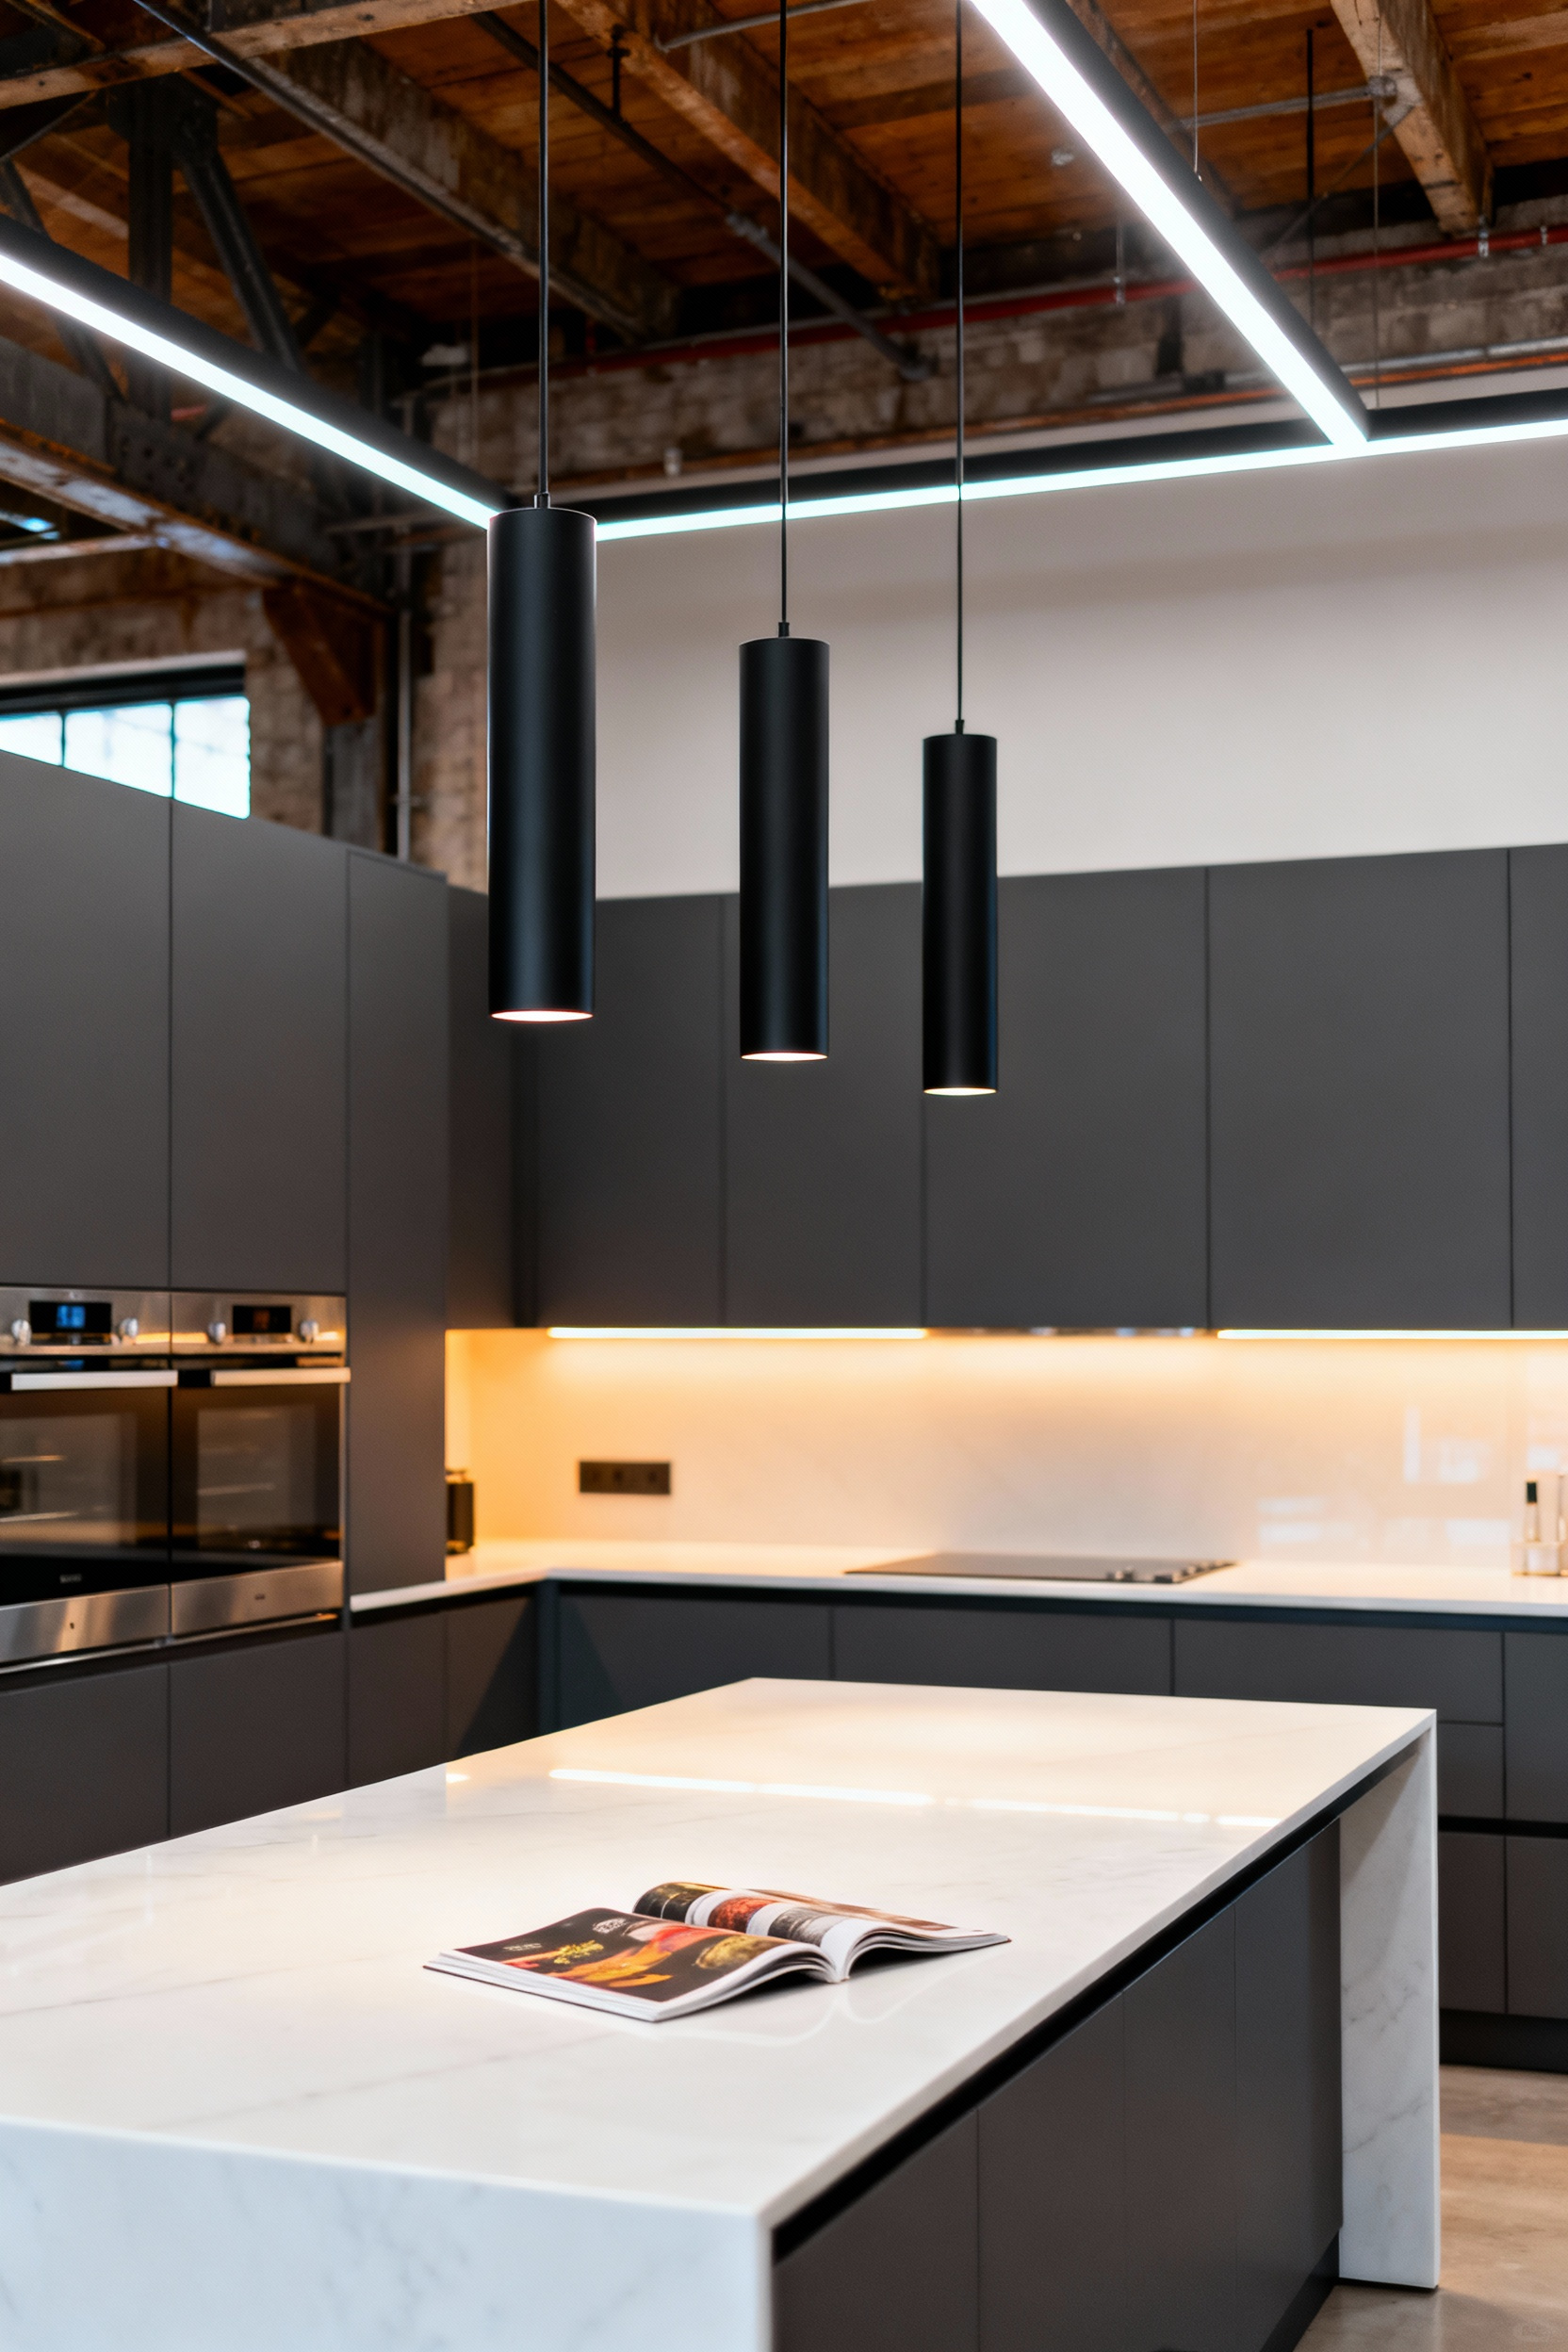
Linear Suspension Logic: When to abandon individual pendants for a single, architectural linear statement piece.
Shift your focus from decorative rhythm to architectural precision when evaluating your lighting plan. While individual pendants create visual repetition, a single linear suspension simplifies the horizon. This approach aligns best with modern or minimalist aesthetics where the goal is a cohesive, sculptural form rather than a series of drops.
Functionally, a continuous light source outperforms multiple bulbs by eliminating shadow pockets. It guarantees uniform, glare-free illumination across the entire work surface, ensuring the island serves as a functional preparation zone rather than just a social gathering point. If your objective is a sense of flow and tranquility, consider the principles involved in Designing Minimalist Kitchen Layouts.
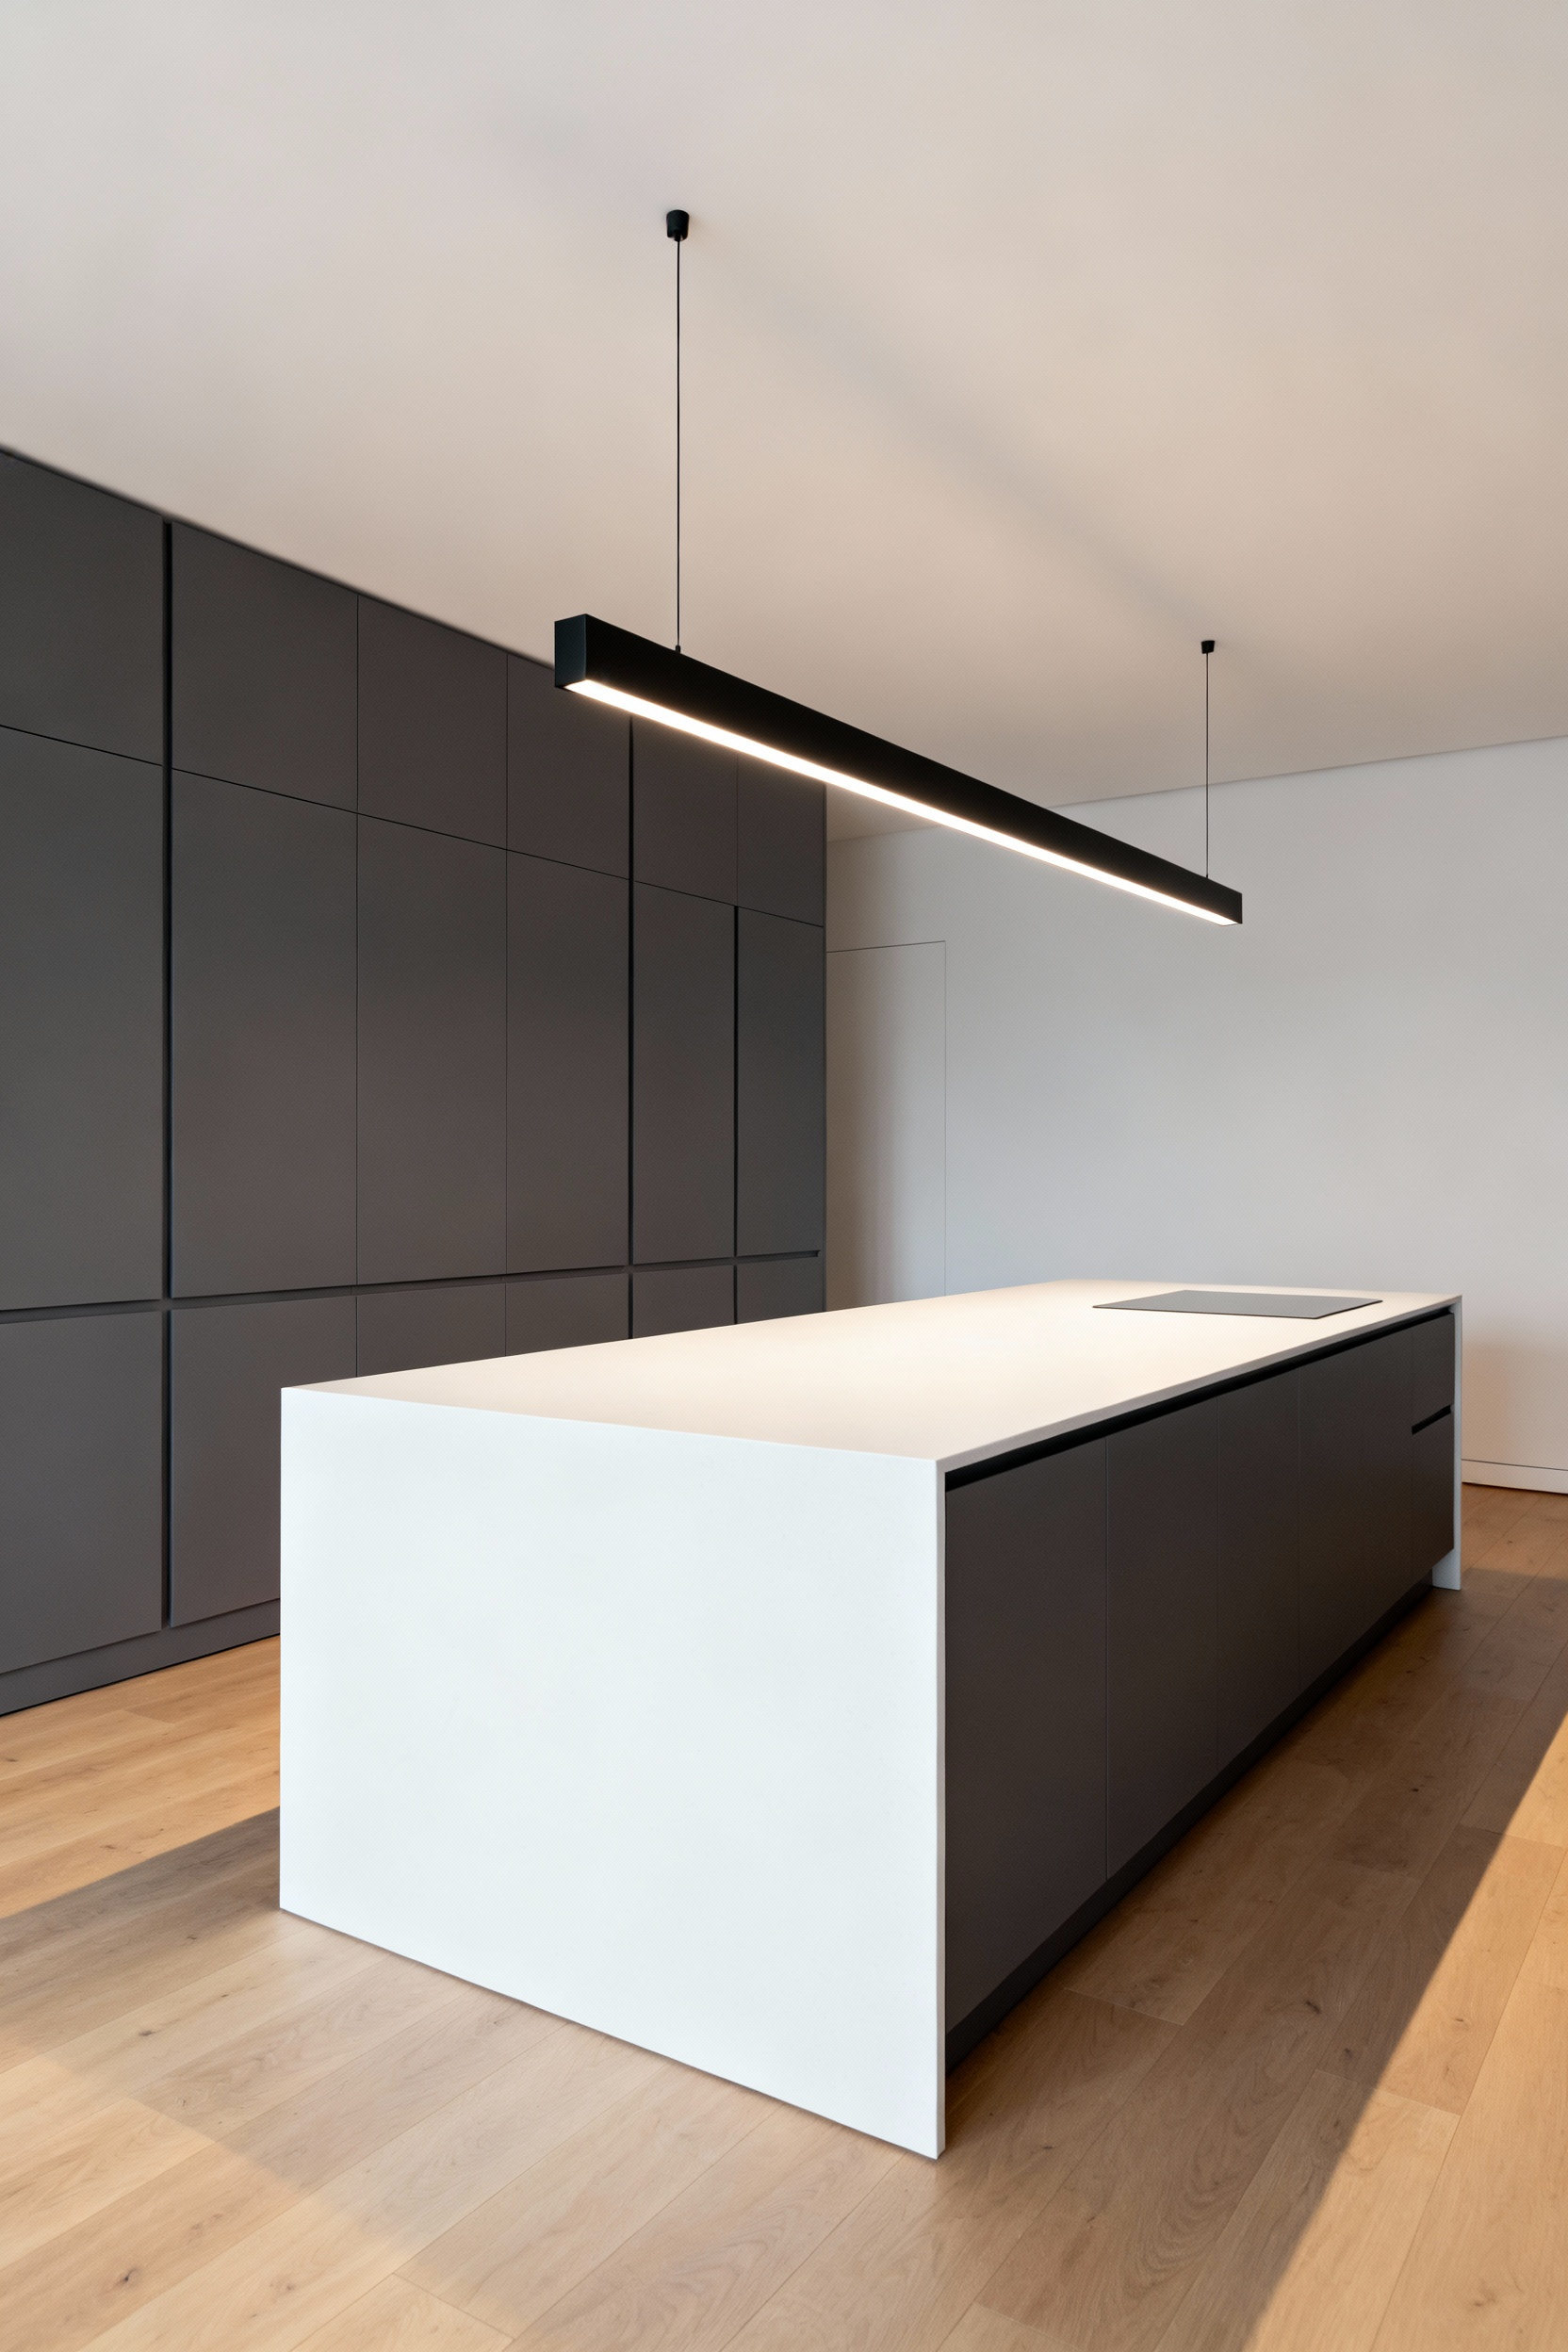
Scale and spatial constraints dictate the success of this installation. To ground the room effectively, select a fixture that spans approximately 60% to 80% of the kitchen island’s length. This ratio ensures the piece feels substantial without overwhelming the surface area.
Furthermore, linear designs solve the challenge of standard or lower ceiling heights often found in renovated lofts. A sleek, singular profile minimizes visual clutter and keeps sightlines open, preserving the sense of volume that defines a well-executed industrial conversion.
The Sink Vector: Managing beam spread and glare reflection on stainless steel and composite basins.
Illuminating a kitchen basin demands geometrical precision. The goal is delivering light to the basin’s floor without creating visual noise. Select fixtures with medium-narrow beam spreads, typically ranging from 25° to 40°. A tighter angle concentrates the lumens directly on the task, ensuring visibility for cleaning and prep work. This focused approach prevents light spillover, which otherwise causes distracting secondary reflections on adjacent countertops.
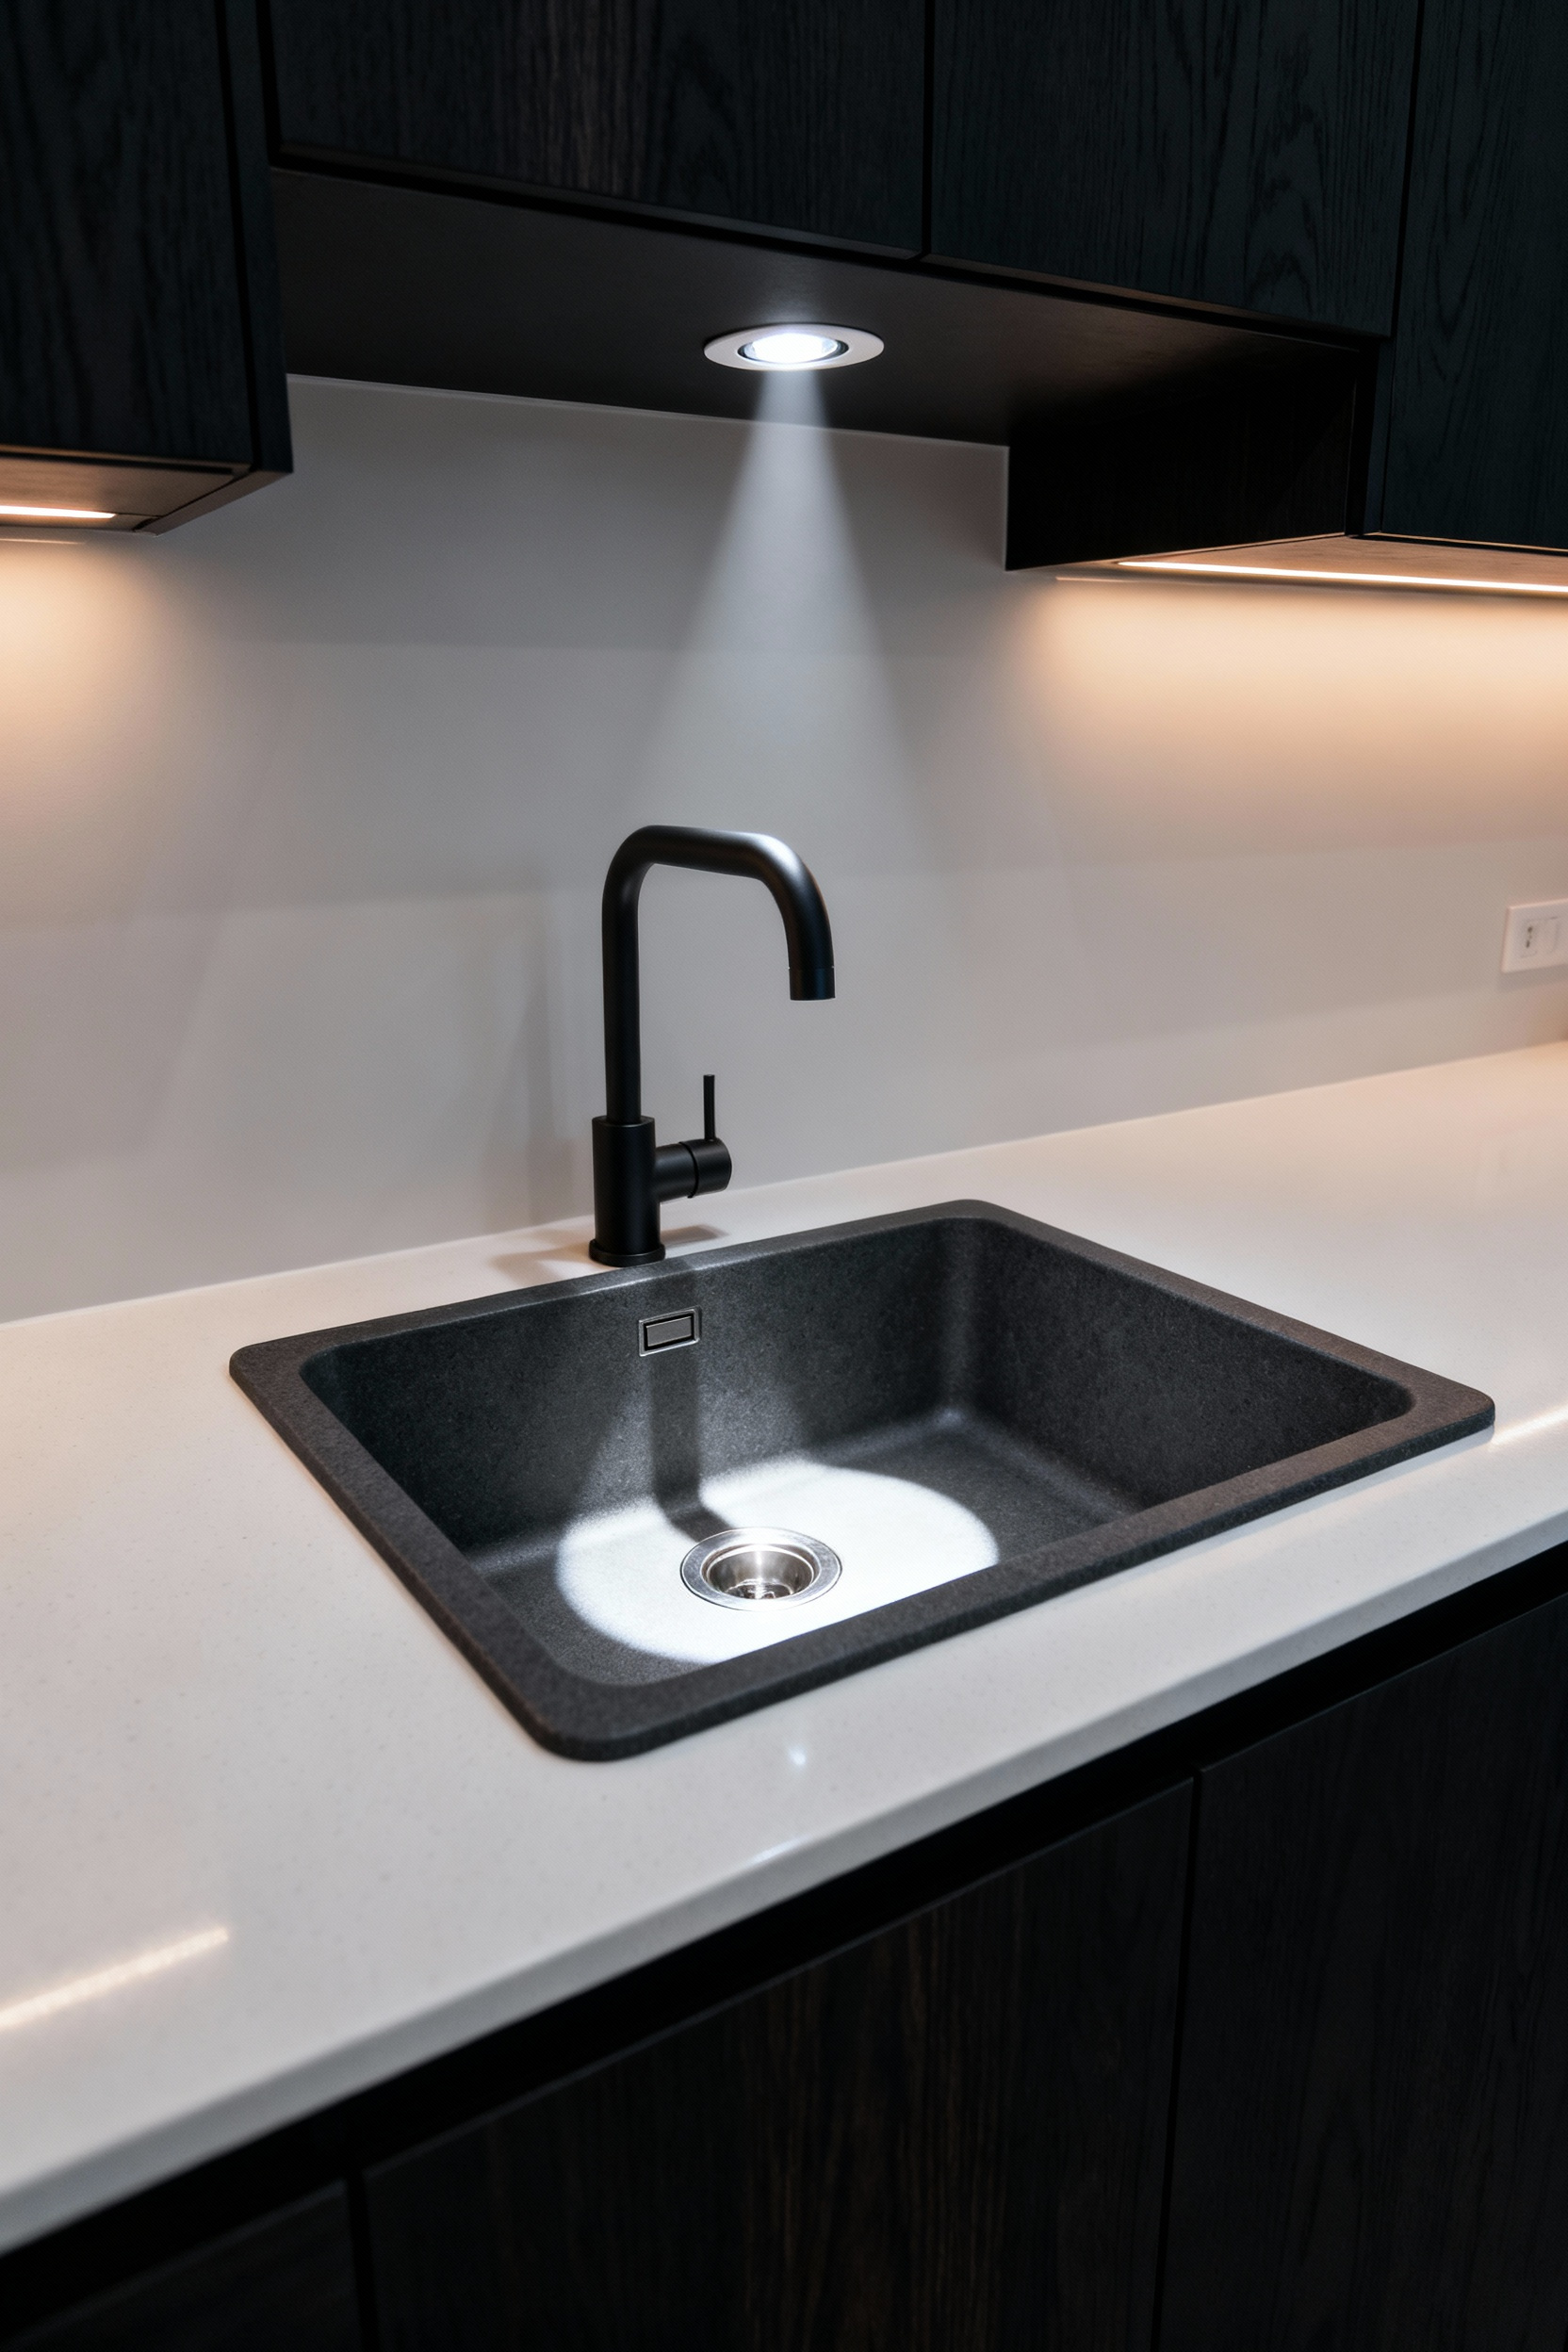
Your material palette dictates your lighting hardware. Stainless steel basins present a high risk of specular reflection, essentially acting as a mirror for overhead sources. To mitigate this, specify fixtures with diffusers, deep regressed trims, or opaque dome pendants that conceal the bulb and soften the output. Conversely, dark composite or matte finishes absorb light rather than reflecting it. These surfaces require higher lumen output to prevent the basin from becoming a “dark spot,” ensuring you maintain visibility of dishes and food scraps.
Placement and color quality act as the final control mechanisms. Position task lighting to shine at a slight angle rather than directly vertical; this geometry scatters primary reflections away from the user’s line of sight. Pair this positioning with two technical specifications:
- Dimmability: Install dimmers to allow users to manage intensity based on ambient conditions and reduce eye strain.
- Color Temperature: Utilize a cooler range between 4000K and 5000K to enhance contrast and clarity, making it easier to identify texture and cleanliness.
Pantry Architecture: Implementing vertical LED channels and motion sensors for industrial-grade utility.
Eliminate the inefficiency of single-source overhead lighting. In deep storage zones, top shelves cast shadows that obscure the items below. Resolve this by installing recessed or surface-mounted vertical LED channels with diffusers along the inner side walls or support standards.
This architectural approach provides cross-shelf illumination. It ensures full visibility from the floor to the ceiling, eliminating dark pockets regardless of how you adjust the shelving height.
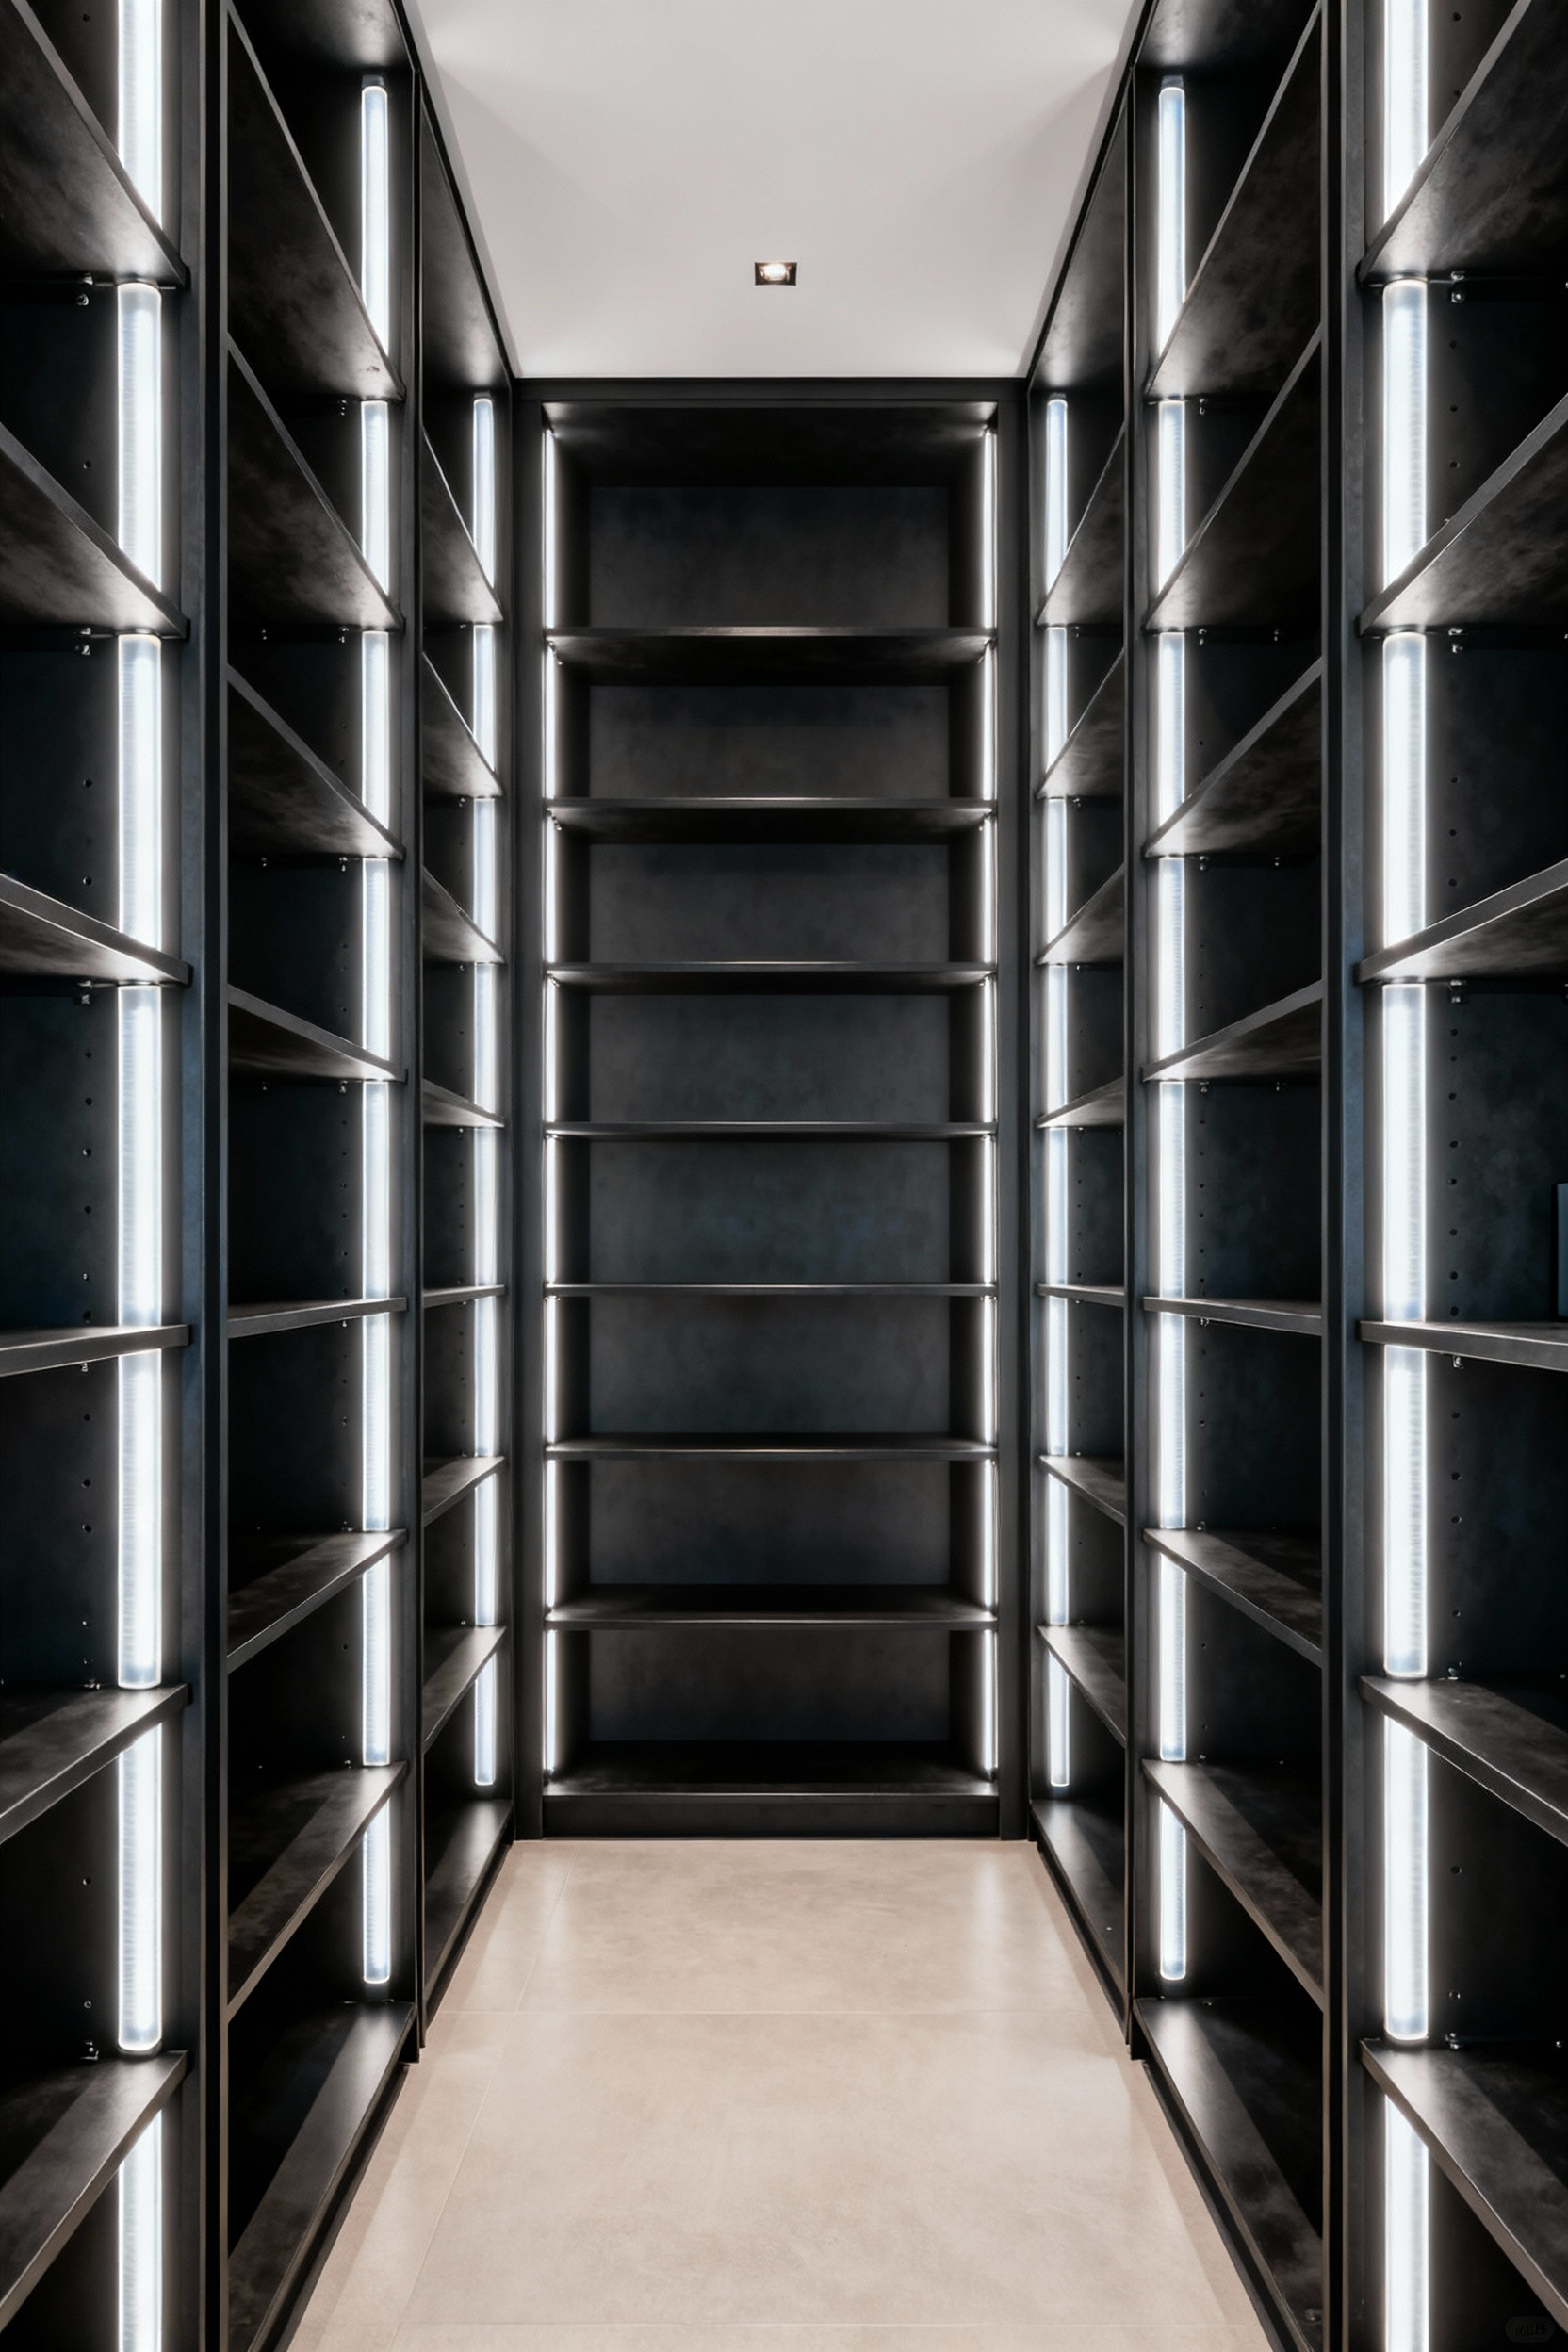
Operational efficiency requires hands-free automation. Specify hardwired door-jamb switches or ceiling-mounted motion sensors rather than consumer-grade battery-operated alternatives. Hardwired systems provide industrial-grade reliability and eliminate the maintenance burden of battery replacement. Immediate light activation allows for seamless entry and exit, which is critical when carrying heavy loads or managing a busy kitchen workflow.
To ensure the pantry functions as a high-utility work zone, adhere to strict technical specifications for the fixtures:
- Durability: Select LED strips with a minimum IP44 rating. These vapor-tight fixtures resist dust and moisture, making them robust enough to wipe clean without damage.
- Clarity: Use LEDs with a Color Rendering Index (CRI) of 90+. High CRI guarantees accurate color perception, allowing you to distinguish fresh ingredients and read small labels easily.
- Intensity: Target a high lumen density of 200 to 400 lumens per square foot. Unlike ambient residential lighting, this brightness level supports safety and rapid inventory checks.
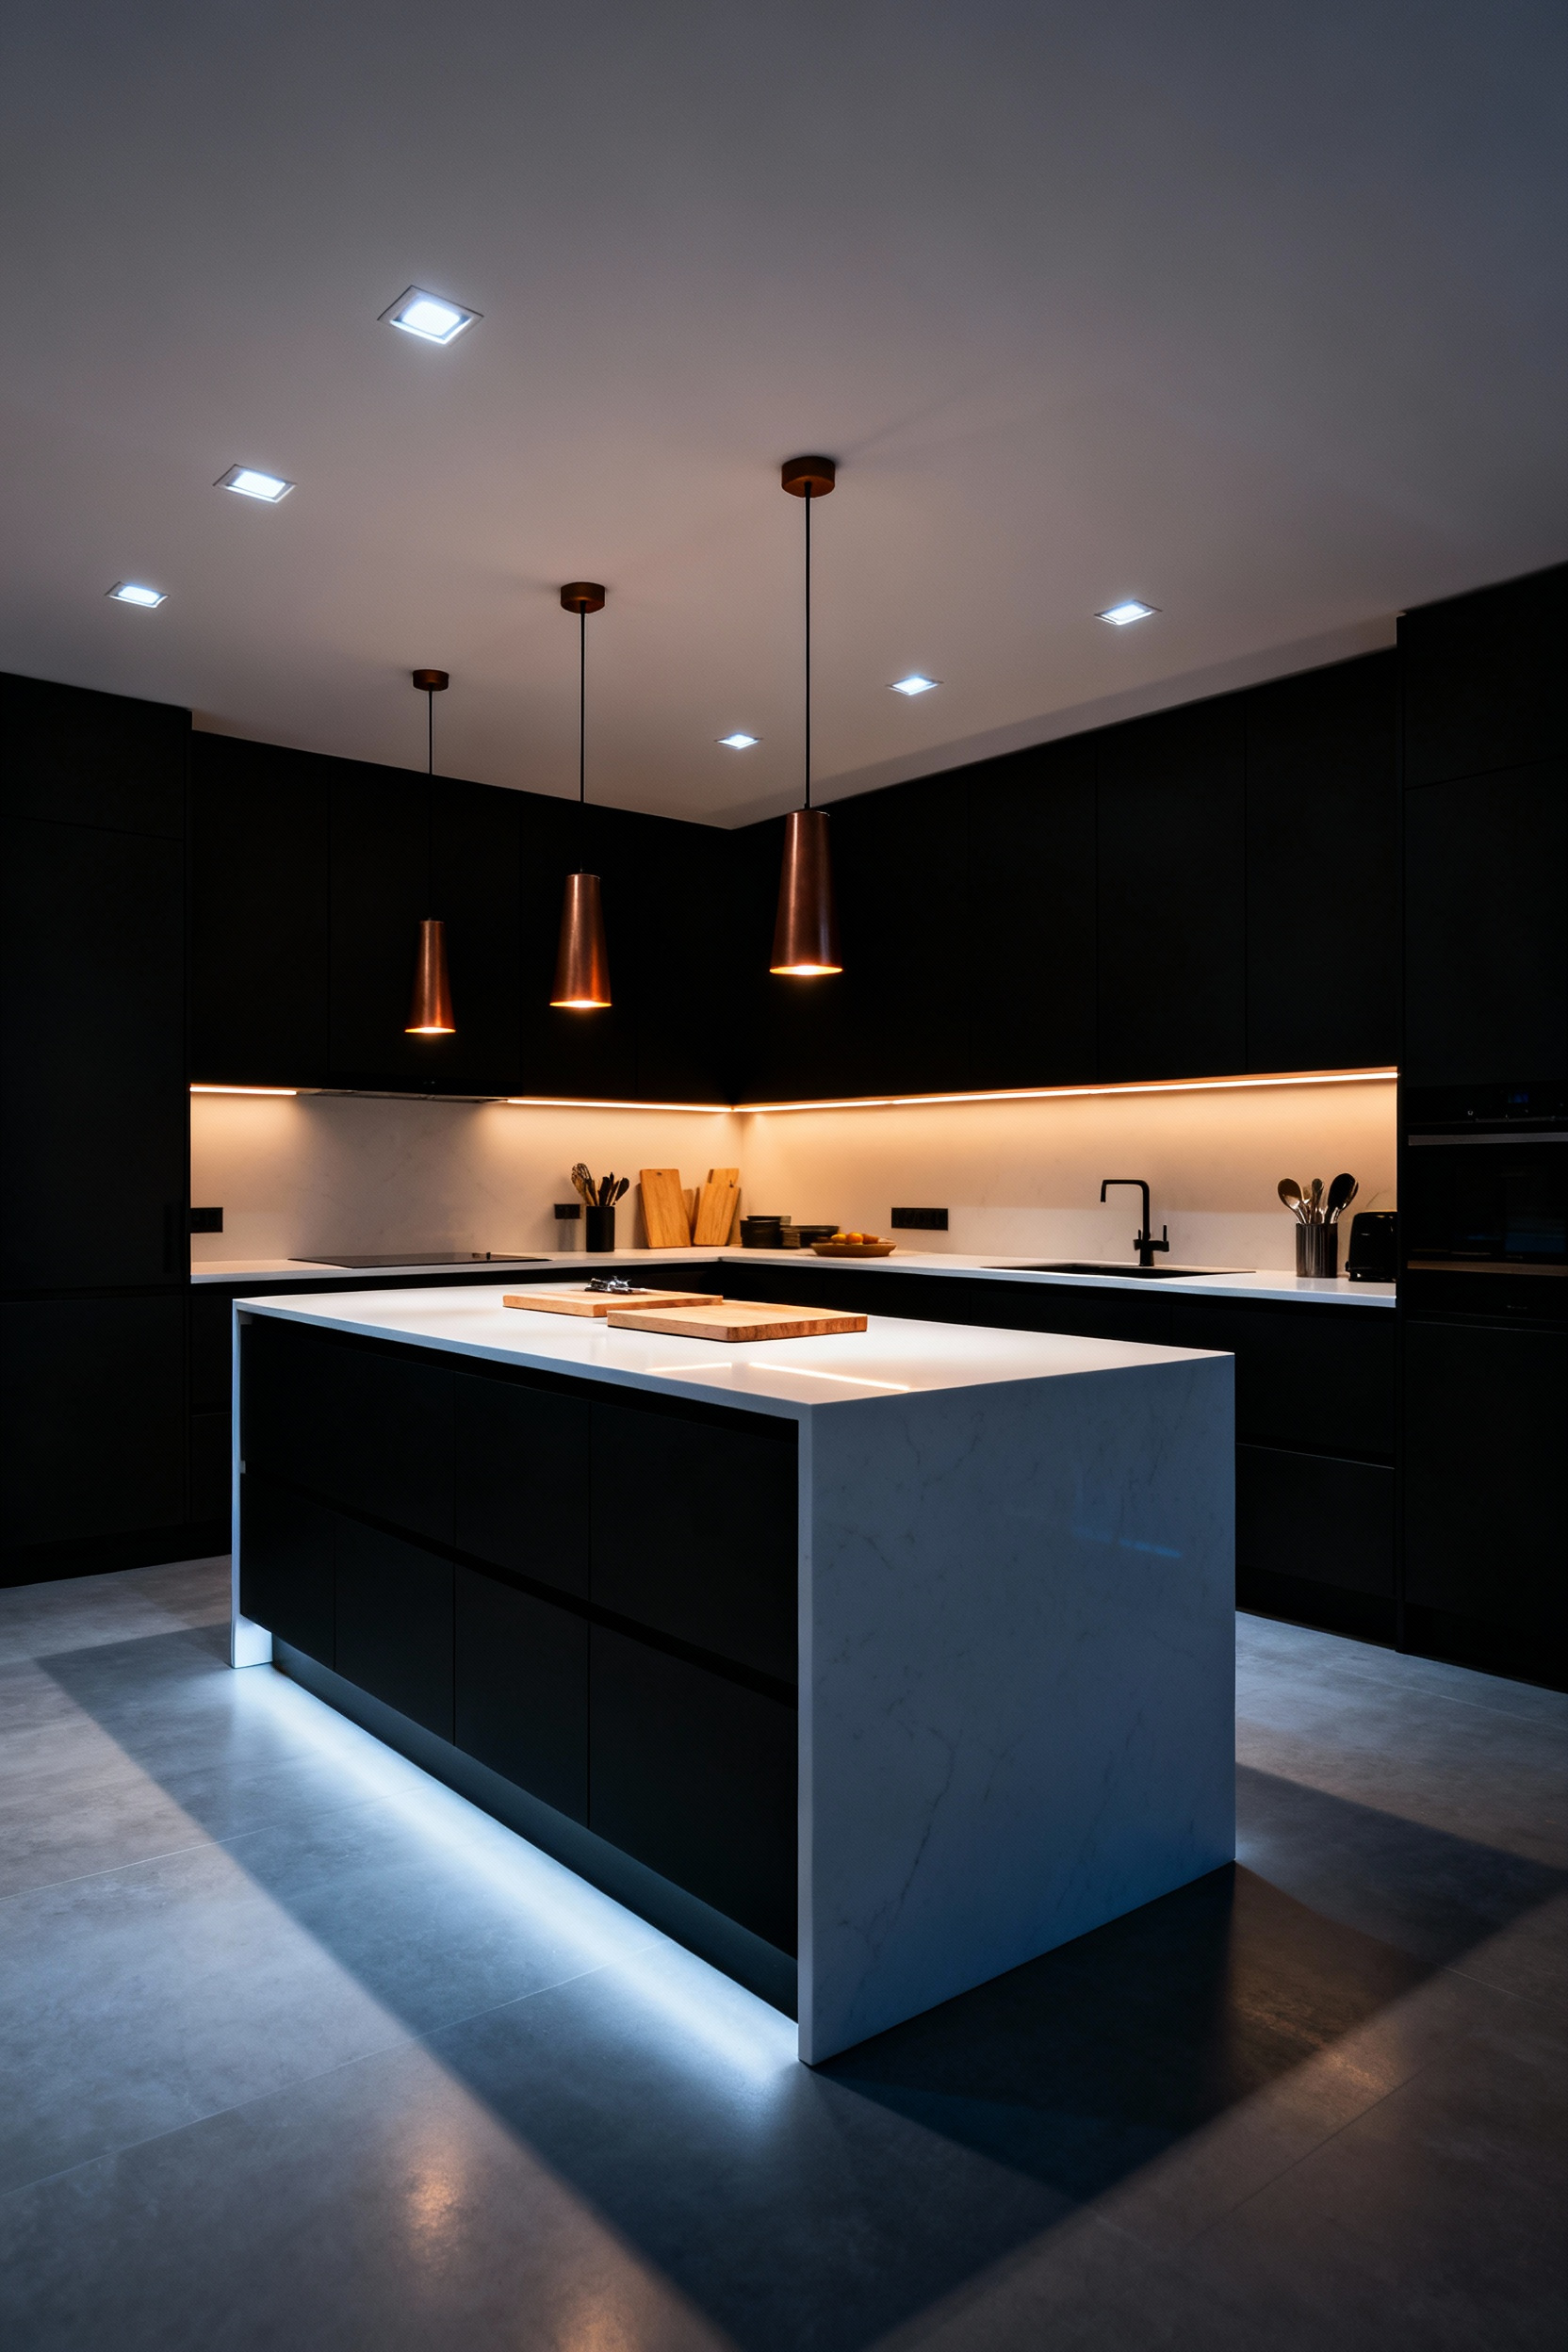
Advanced Application: The ‘Floating’ Kitchen – Installing toe-kick lighting to reduce visual weight of heavy industrial cabinetry.
Industrial kitchens often feature imposing materials like blackened steel or rough-sawn oak. While these textures define the aesthetic, they can make the space feel bottom-heavy and oppressive.
The “floating kitchen” effect counteracts this density by using light to visually separate the cabinetry from the floor. By illuminating the toe-kick recess, you create a negative space that tricks the eye into perceiving massive units as weightless. This architectural sleight of hand preserves the grit of industrial materials while introducing a necessary sense of elevation and modern sophistication.
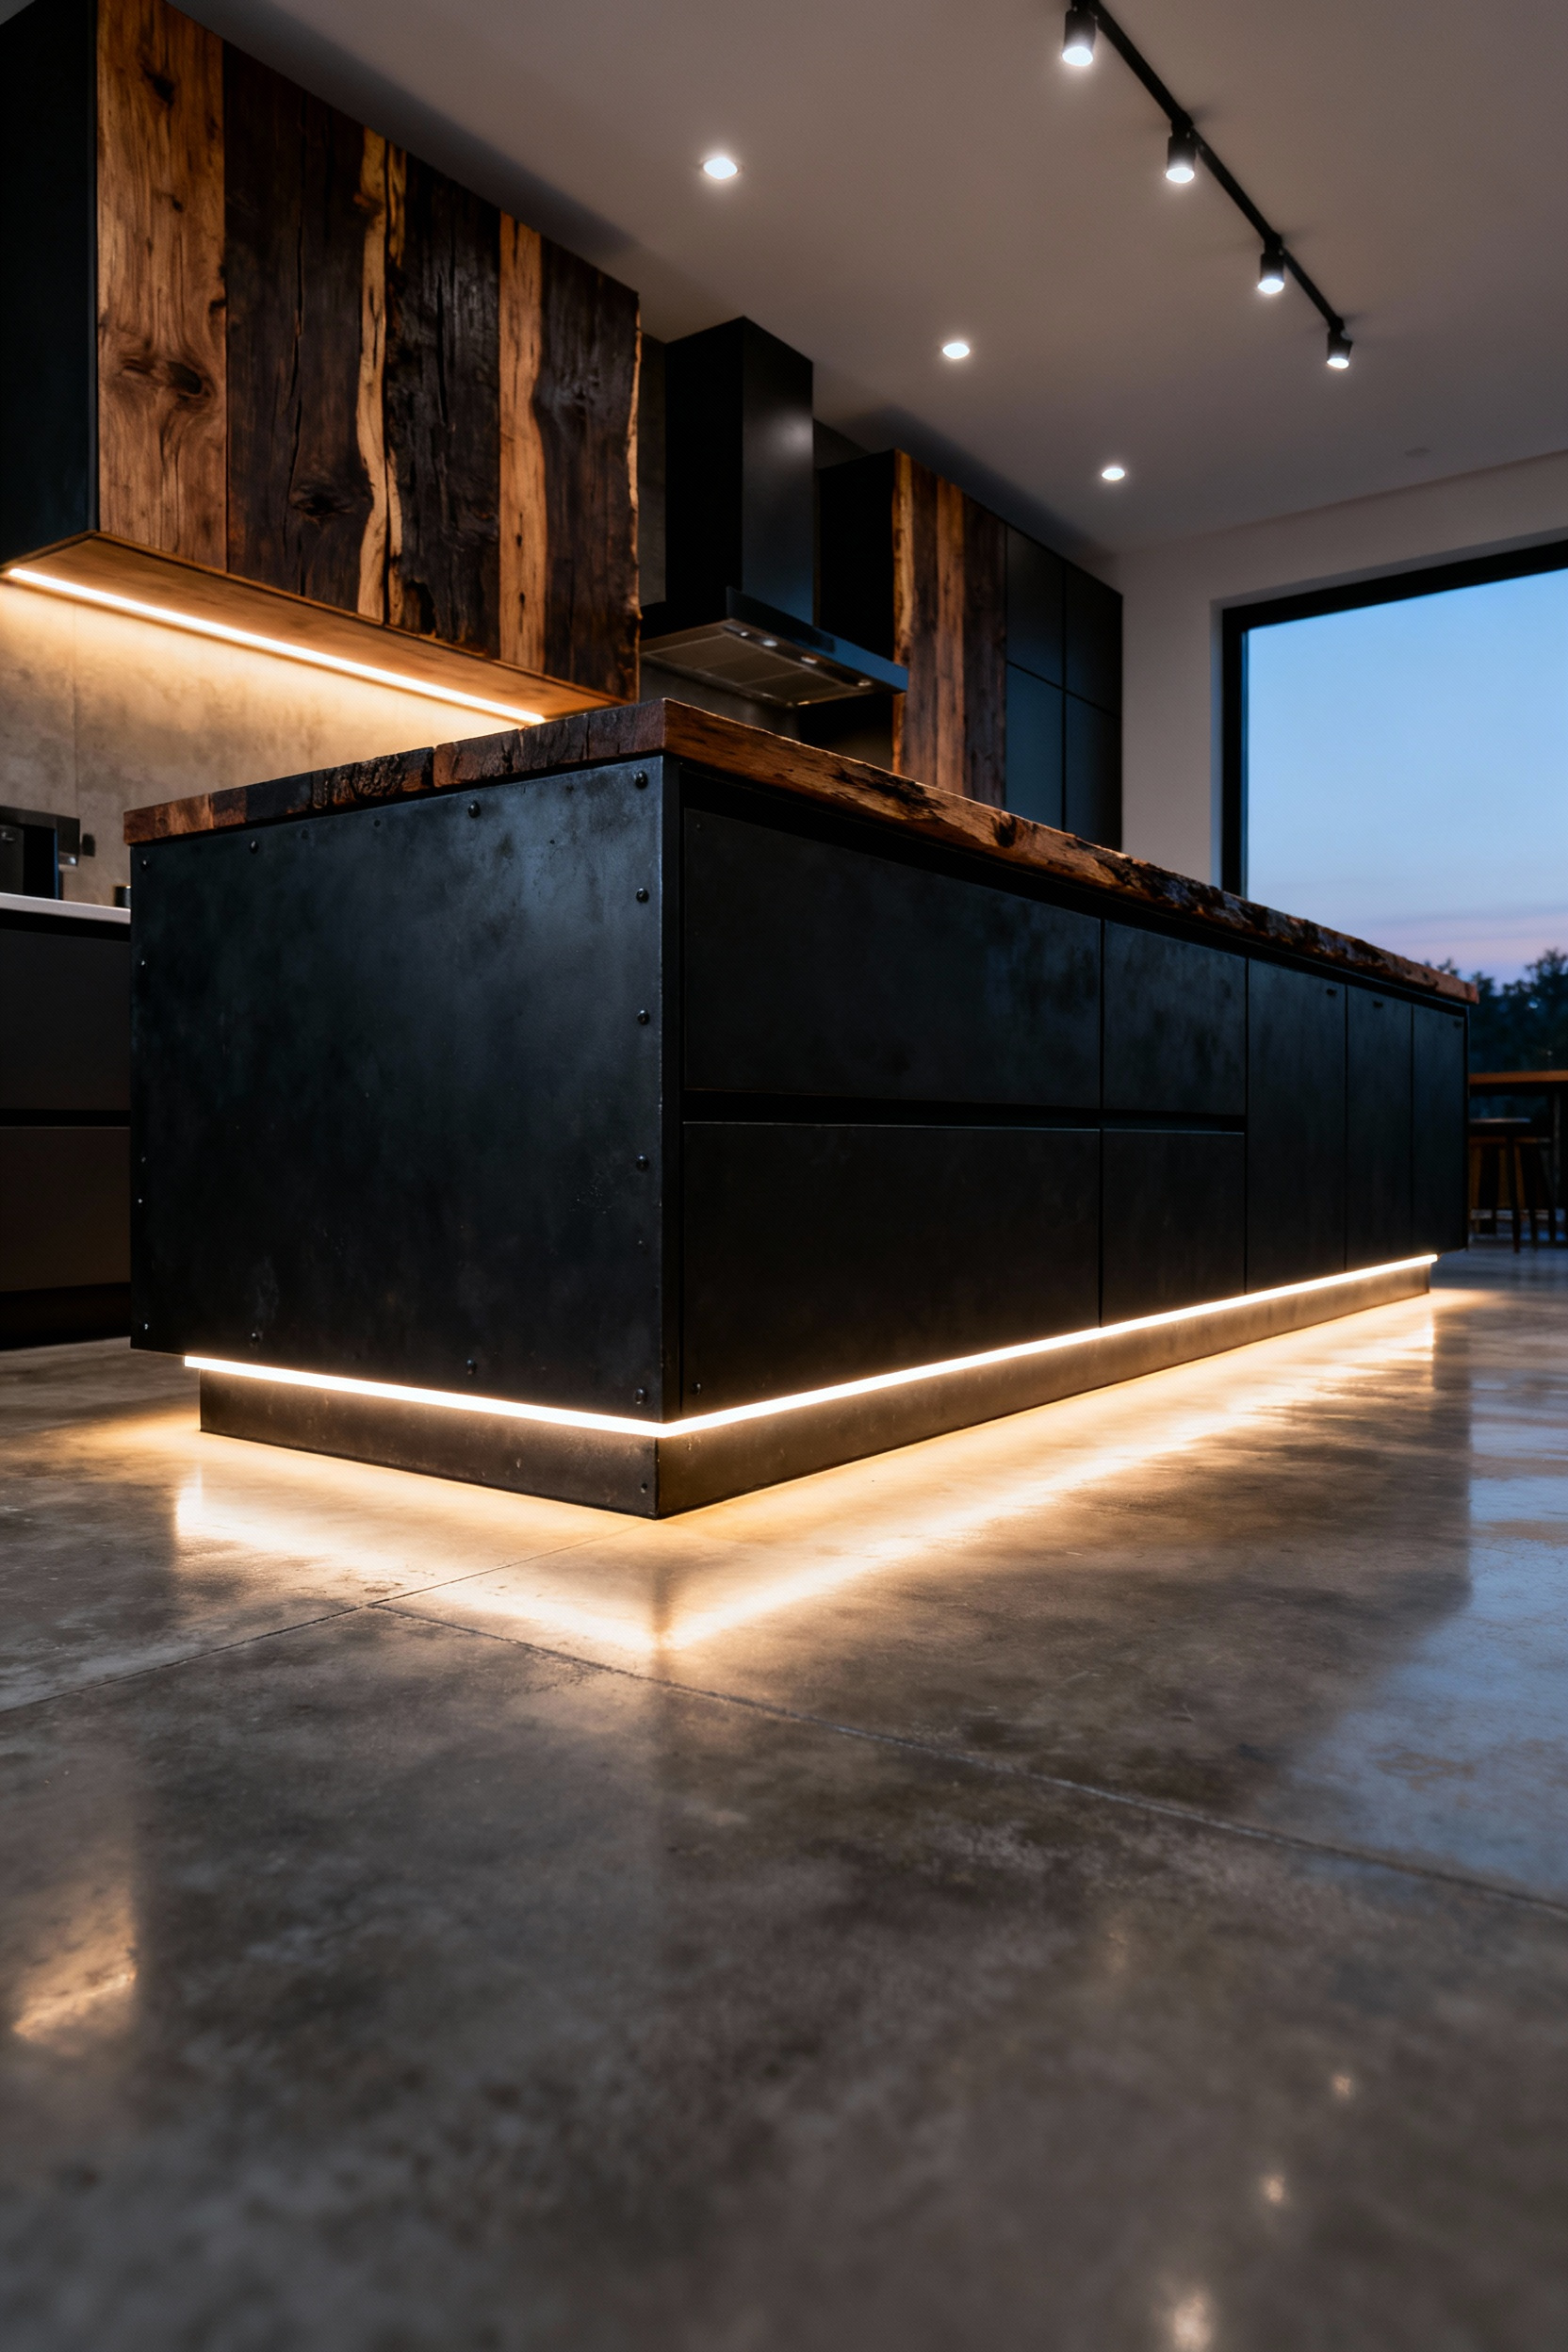
Achieving a convincing illusion requires precise hardware selection and placement. Avoid adhering exposed LED tape directly to the cabinet, as this creates an amateur “disco ball effect” with visible dots. Instead, install high-density LED strips within an aluminum channel topped with a frosted diffuser. This generates a continuous, shadow-free bar of light. Mount this channel as far back in the toe-kick recess as possible to completely conceal the fixture while washing the floor evenly.
To further cut through the visual weight of the cabinetry, select a neutral to cool white temperature between 3500K and 4100K. This crisp light spectrum creates a sharper contrast against dark floors than traditional warm white options.
Modernize the application by integrating smart controls. Connect the system to a dimmable power supply, allowing you to shift from a high-intensity architectural statement during the day to a subtle ambient glow at night. For advanced functionality, incorporate motion sensors into the circuit. This transforms the aesthetic feature into practical wayfinding lighting, automatically illuminating the path as you enter the kitchen without the need to fumble for a wall switch.
Architectural Coves: Using uplighting above upper cabinets to visually raise loft ceilings and expose structural beams.
High ceilings define industrial living, yet standard cabinetry often creates a visual dead end. You can reclaim this vertical volume by installing hidden LED strip lighting along the tops of your upper cabinets.
This technique, known as wall grazing, bounces light vertically to highlight the raw texture of exposed structural beams and roof trusses. To maximize this effect, ensure the ceiling surface directly above the cabinets remains flat and painted a matte white. A smooth, non-reflective finish promotes uniform light dispersion, effectively “lifting” the heavy industrial ceiling.
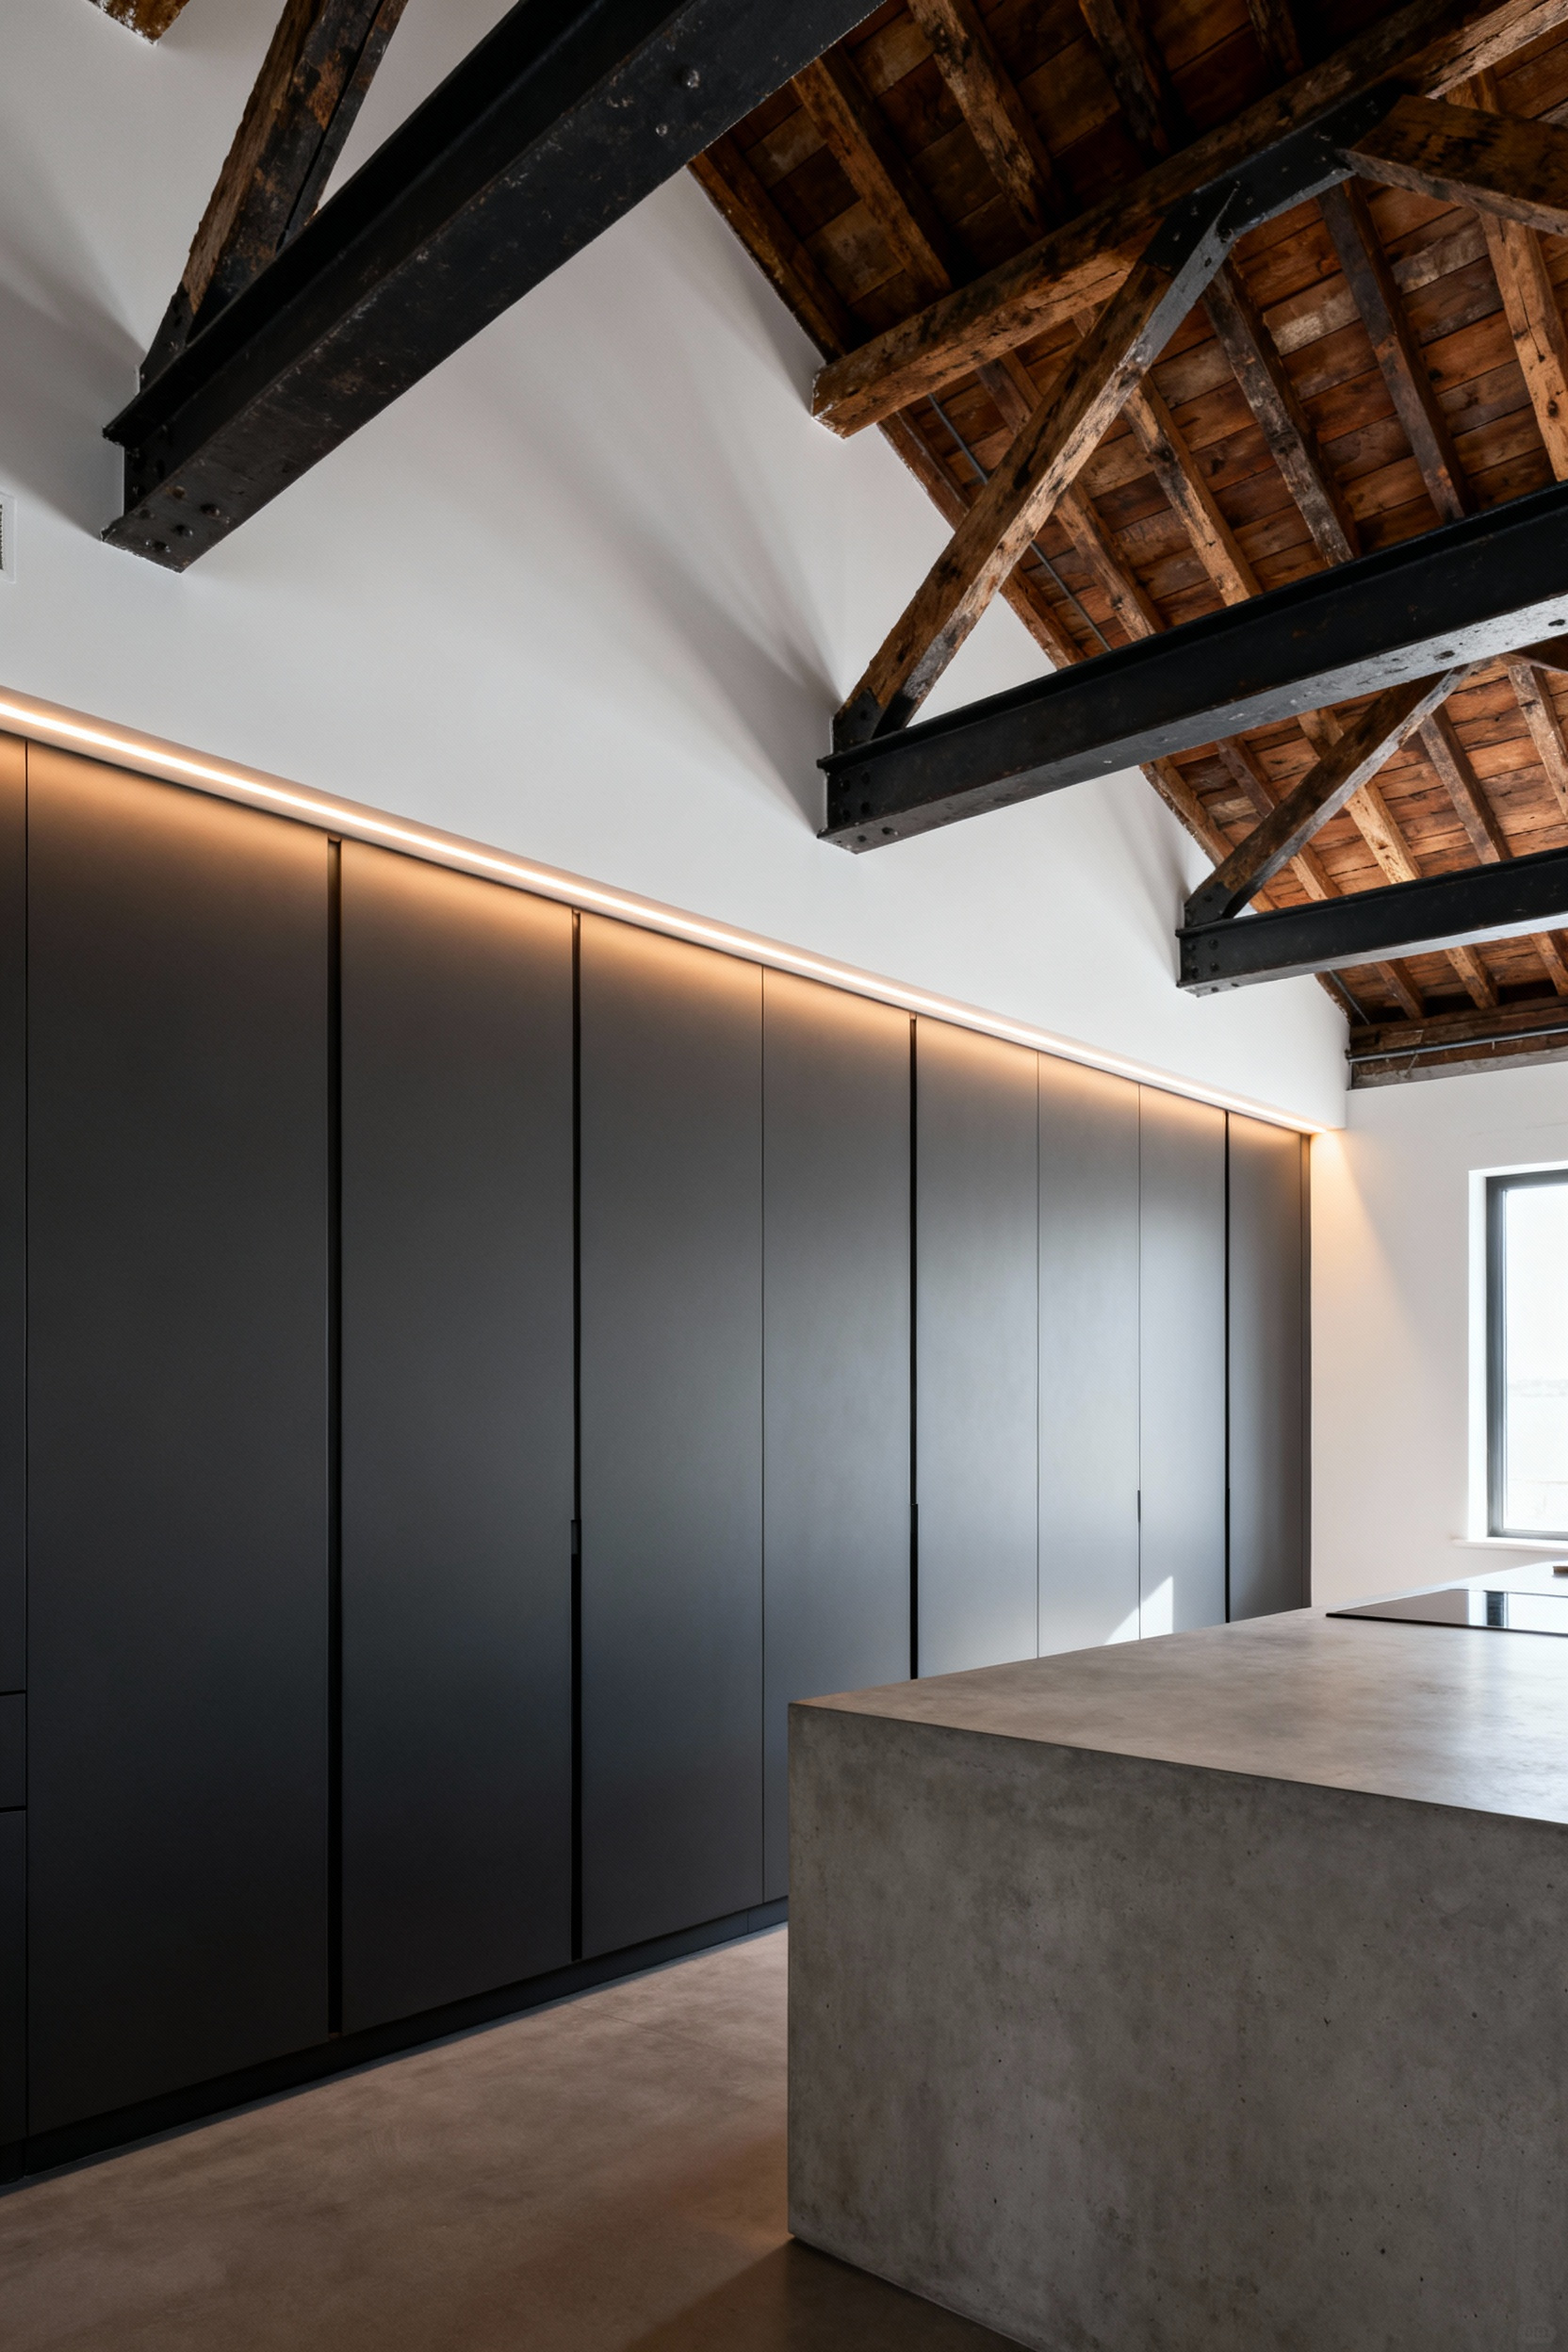
The quality of the light determines the success of this architectural detail. Select a cool white temperature around 4000 Kelvin to reinforce the bright, open atmosphere of a loft. For greater flexibility, consider Tunable White LED strips, which allow you to shift from crisp, functional light to a warm 2700K ambient glow for evening entertaining.
Remember to treat this cove lighting strictly as a secondary ambient layer. It softens the room’s mood but must always function alongside dedicated under-cabinet task lighting to ensure a complete, layered design.
Material Integration: How to mix raw brass hardware with matte black fixtures without creating visual clutter.
To successfully mix metals in an industrial kitchen, you must first establish a clear hierarchy. Randomly placing finishes creates visual noise, so apply a 70/30 dominant-accent ratio to maintain cohesion.
Select matte black as the “hero” finish for large, fixed elements like faucets, door handles, and main hardware runs. This provides a grounded, modern baseline that absorbs light. Use raw brass as the secondary accent to break up the visual weight. Adhere strictly to a maximum of three finishes in the space—typically matte black, raw brass, and stainless steel for appliances—to prevent a disjointed aesthetic.
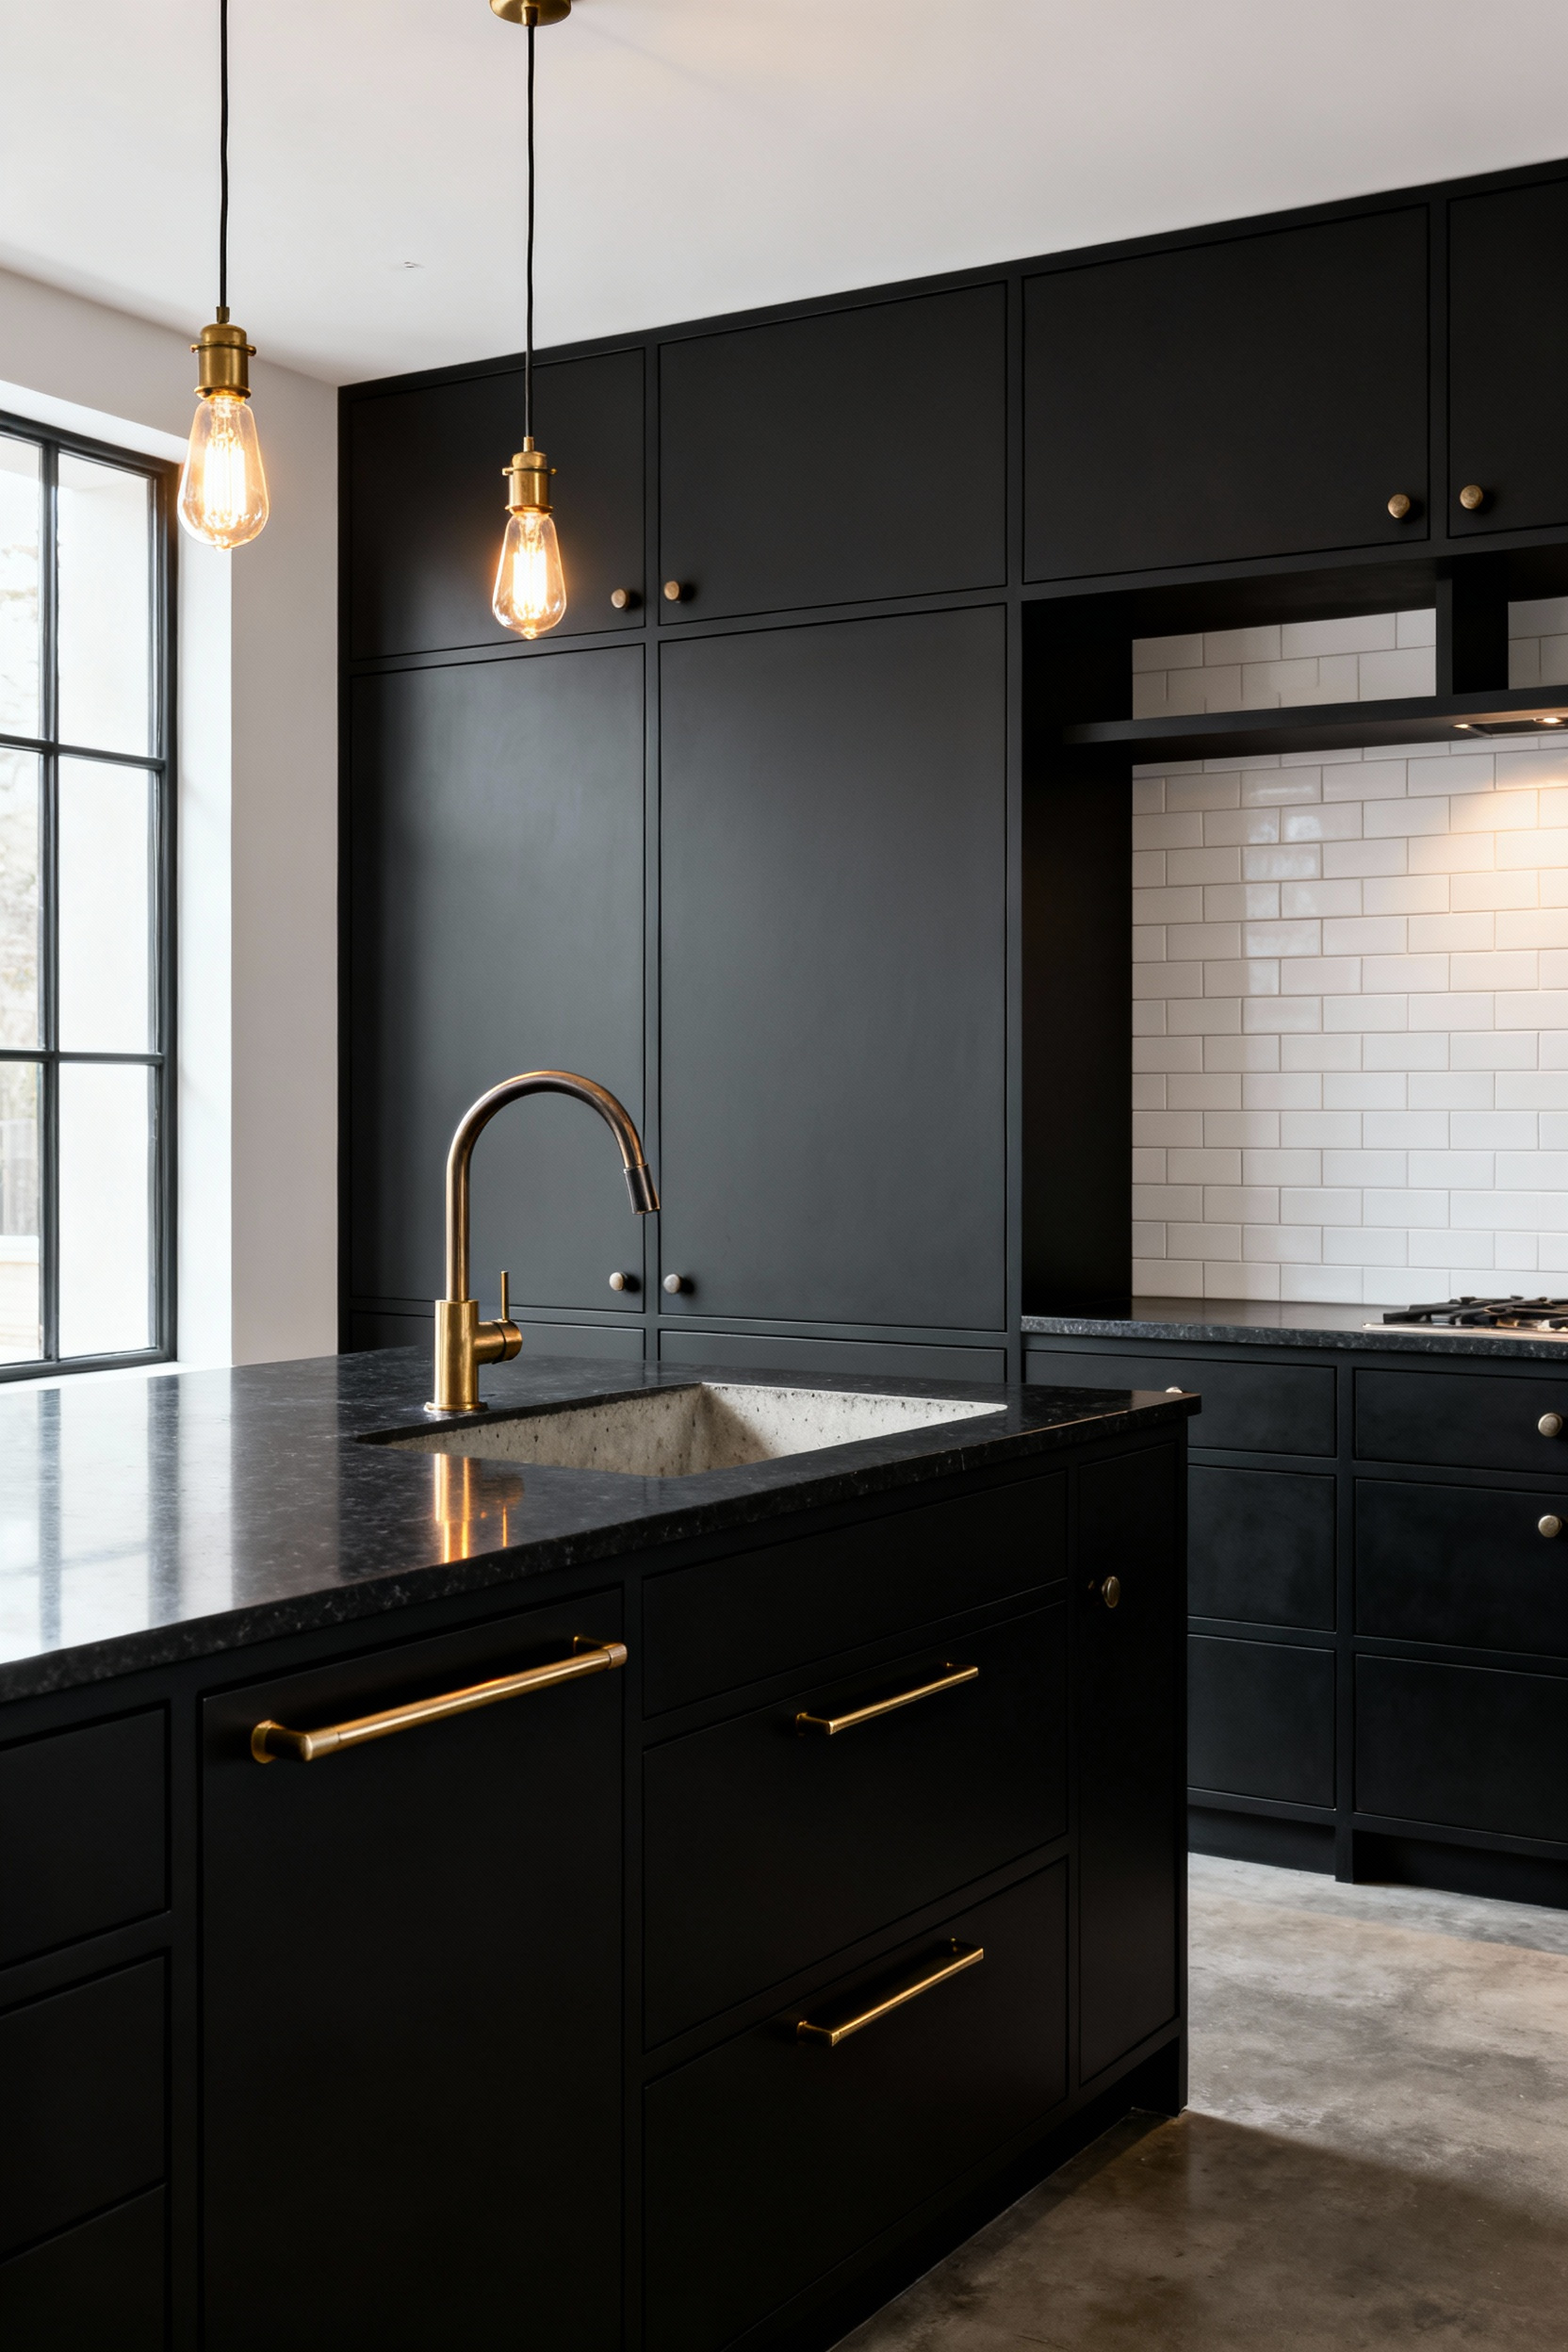
Deliberate placement defines the success of this pairing. Use the contrast between the metals to delineate specific zones. For example, install matte black pulls on lower cabinets to anchor the joinery, then switch to raw brass for upper cabinet hardware or open shelving brackets to draw the eye upward.
In terms of illumination, let the raw brass serve as the focal point. Select a large brass pendant or chandelier over the island to leverage its warm, reflective quality. Keep functional fixtures, such as recessed cans or track lighting, in matte black to ensure the brass fixture commands attention without competition.
The true sophistication of this mix lies in the interplay of texture and sheen. Raw, unlacquered brass is a living finish that develops a patina over time, offering warmth and tactile history essential for industrial renovations. When you pair this evolving texture with the flat, non-reflective sleekness of matte black, you create necessary architectural depth. This intentional contrast—shiny against flat, warm against cool—makes the design feel curated rather than accidental.
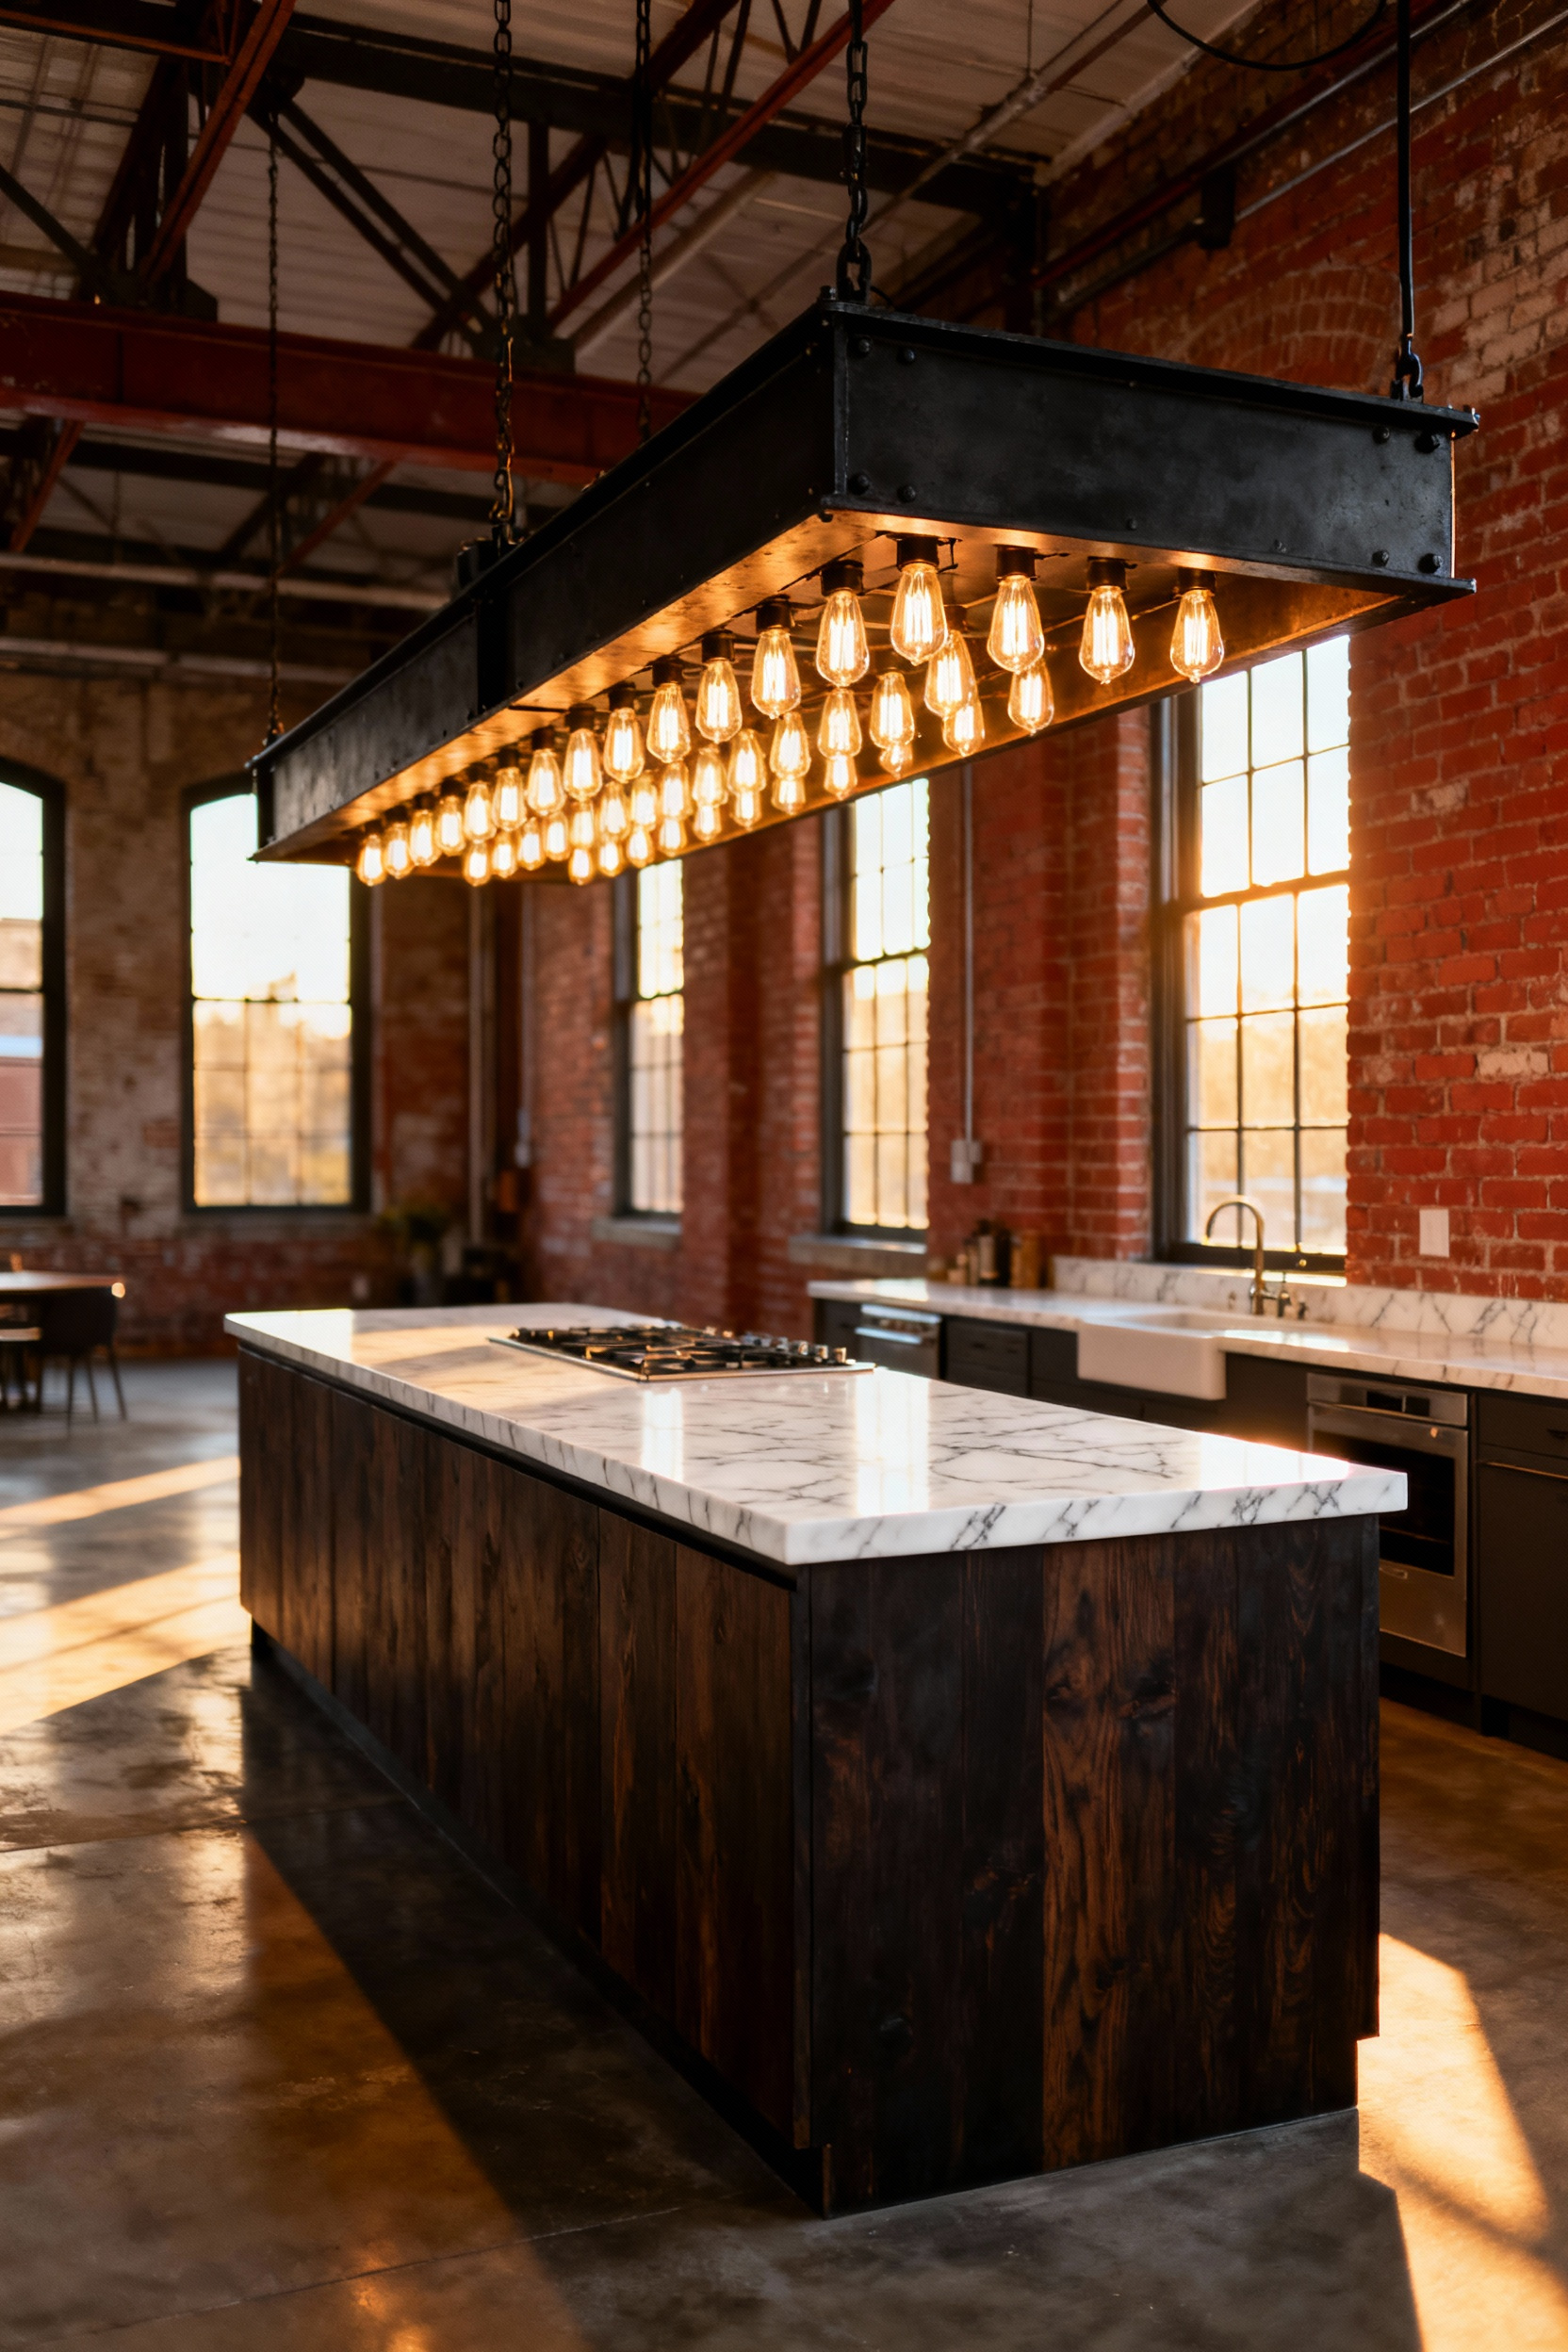
The Exposed Bulb Paradox: Selecting vintage-style filaments that offer warmth without compromising task visibility.
The appeal of exposed filament bulbs in an industrial kitchen is undeniable, evoking the raw history of factory floors. However, relying on them for food preparation creates a functional problem: it is hard to chop vegetables safely in dim, amber light.
The solution is layered lighting. Treat vintage-style pendants as ambient or decorative fixtures rather than primary light sources. Complement these aesthetic choices with high-output recessed LEDs or under-cabinet strips to handle the heavy lifting of task lighting. This separation allows you to maintain the architectural integrity of the space without sacrificing the brightness required for precise knife work.
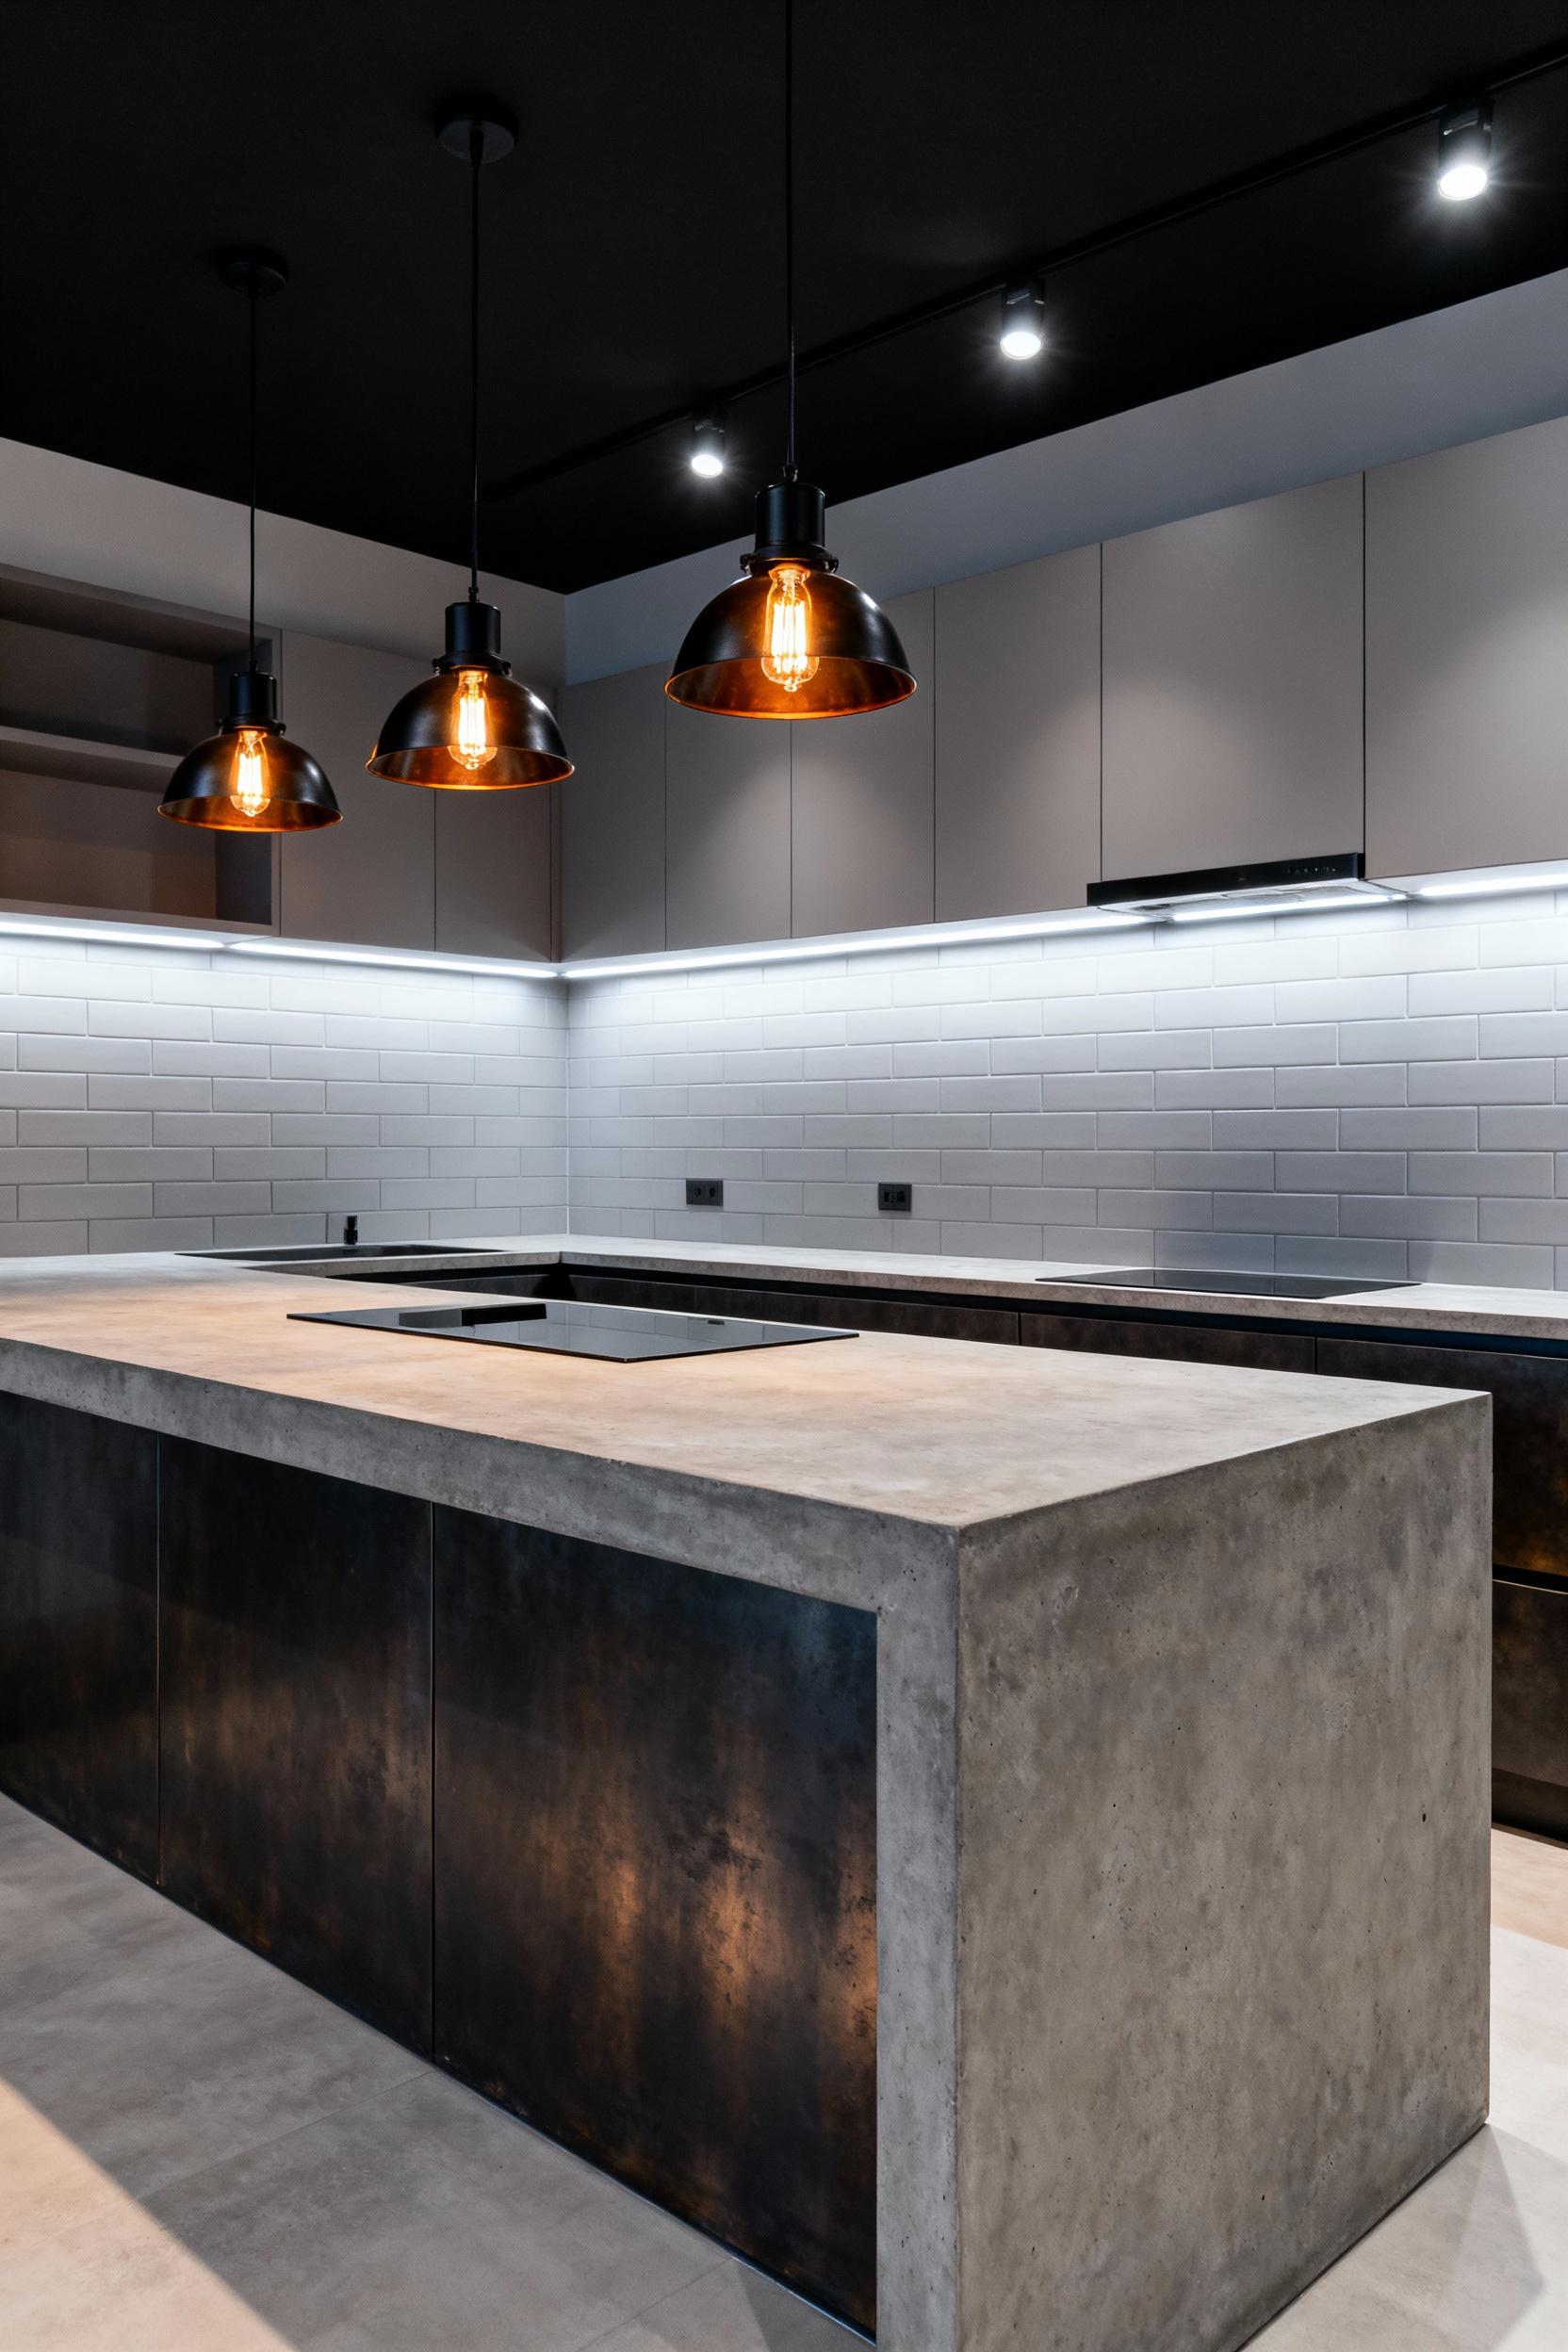
When selecting the bulbs themselves, navigate the technical specifications carefully to find a functional middle ground. Avoid the deep amber glow of 2200K bulbs, as this temperature distorts color and strains the eyes during prep. Instead, choose LED filaments in the 2700K to 3000K range. This “warm white” spectrum preserves the inviting atmosphere but offers enough clarity for functionality.
Furthermore, prioritize clear glass over amber-tinted options. Clear glass maximizes lumen output—aim for at least 600 to 800 lumens per bulb—ensuring the fixture contributes actual light to the room rather than just a mood.
Finally, maximize the versatility of your lighting scheme by installing high-quality dimmers. An open-concept industrial space often serves multiple purposes, shifting rapidly from a workspace to an entertaining area. Wiring your exposed filaments to a dedicated dimmer switch bridges the gap between utility and ambiance. You can utilize the full brightness for visibility while cooking, then dim the fixture down to a low, filament-highlighting glow once the meal is served.
Switching Logic: The ‘Dinner Party’ Matrix – Zoning your dimmers for transition from prep-station to entertaining space.
In open-concept industrial homes, the kitchen often bleeds directly into the living area, making precise lighting control critical. You must treat your lighting layers as independent zones on your wall switch to manage this effectively.
Isolate your high-intensity task lighting—such as under-cabinet strips and focused prep pendants—from your ambient and accent fixtures. This separation allows you to utilize maximum brightness for knife work without flooding the entire loft. When the cooking ends, you can cut power to the utilitarian zones while maintaining a glow on the architectural features.
To avoid the frustration of adjusting five separate sliders, implement scene control with programmable smart dimmers. We refer to this setup as the ‘Dinner Party’ Matrix. By programming a single button, you create an instant, synchronized transition. One press simultaneously fades the functional task lights and brings your accent layers to a pre-set, dimmed level. This automation shifts the room from a high-utility workspace to a sophisticated entertaining environment without breaking the flow of the evening.
Finally, leverage color temperature to reinforce this atmospheric shift. Functional preparation requires cooler, brighter light (3000K–4000K) for safety and visibility, while social spaces benefit from a warmer, candle-like glow (2700K). To achieve this duality, specify fixtures with tunable white capabilities or ensure your independent ambient layers naturally run warmer. When you engage your entertaining scene, the light should not just drop in intensity; it should warm in tone to soften the hard edges of the industrial architecture.
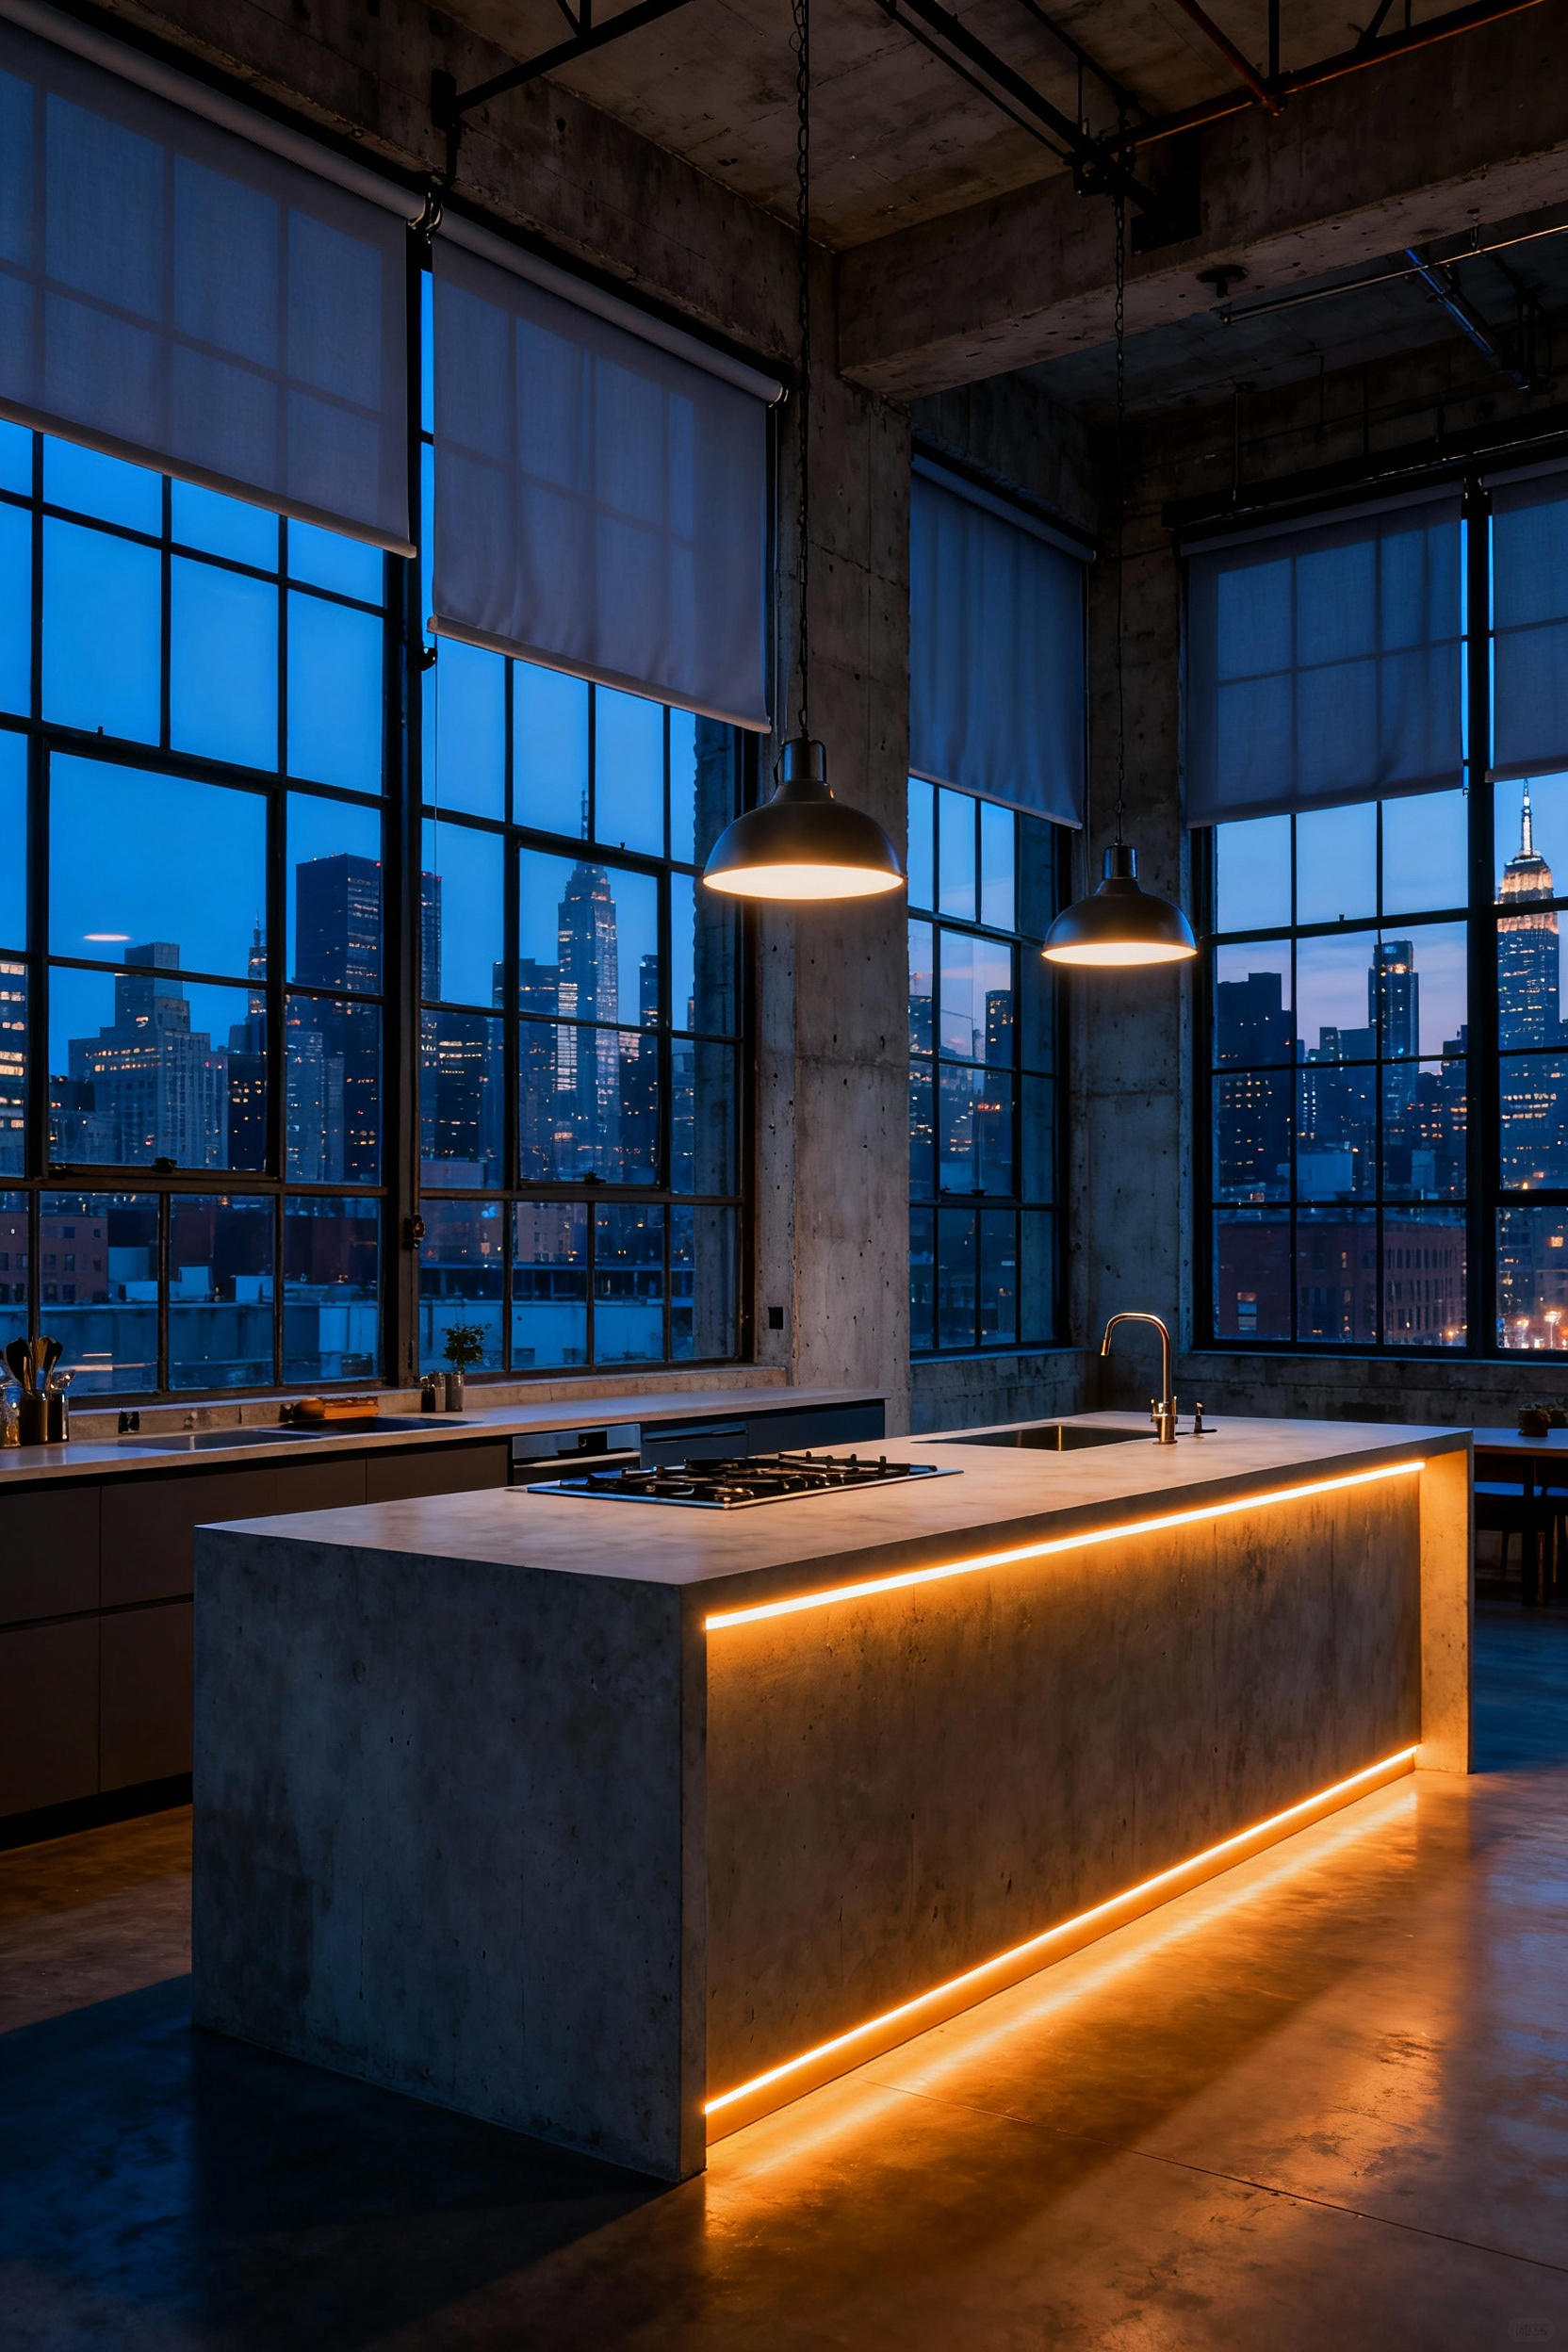
Window Treatment interplay: Balancing natural urban light with artificial fill during twilight hours.
Industrial spaces often feature expansive glazing that connects the interior to the city skyline, but this transparency requires careful management during the twilight transition.
Use layered window treatments to control this shift effectively. Install sheer shades to filter harsh urban glare and provide privacy while still admitting the soft “blue hour” light. Pair these with a secondary heavier layer, such as blackout roller blinds or heavy drapes. This combination allows you to block intrusive streetlights completely once darkness falls, establishing a necessary visual barrier against the active urban environment.
As natural light fades, avoid flooding the kitchen with bright overhead light immediately. Utilize task lighting as your primary transition tool to compensate for the loss of daylight. Activate under-cabinet strips and directional pendants over islands first to eliminate shadows on work surfaces.
Simultaneously, implement dynamic color temperature (CCT) controls. Tunable white fixtures allow you to shift from a cooler 4000K light, which blends with the twilight, to a warmer 3000K glow. This conscious shift prevents the space from feeling cold or washed out against the darkening windows.
Because the sunset window is brief, manual adjustments often prove inefficient. Invest in motorized shades and smart lighting automation to orchestrate this interplay hands-free. Program a specific “Dusk” scene that executes the following adjustments automatically:
- Lowers shades partially to reduce glare from neighboring buildings.
- Dims general ambient light to avoid internal reflections on the glass.
- Increases the intensity of warm accent lighting to prepare the home for the evening.
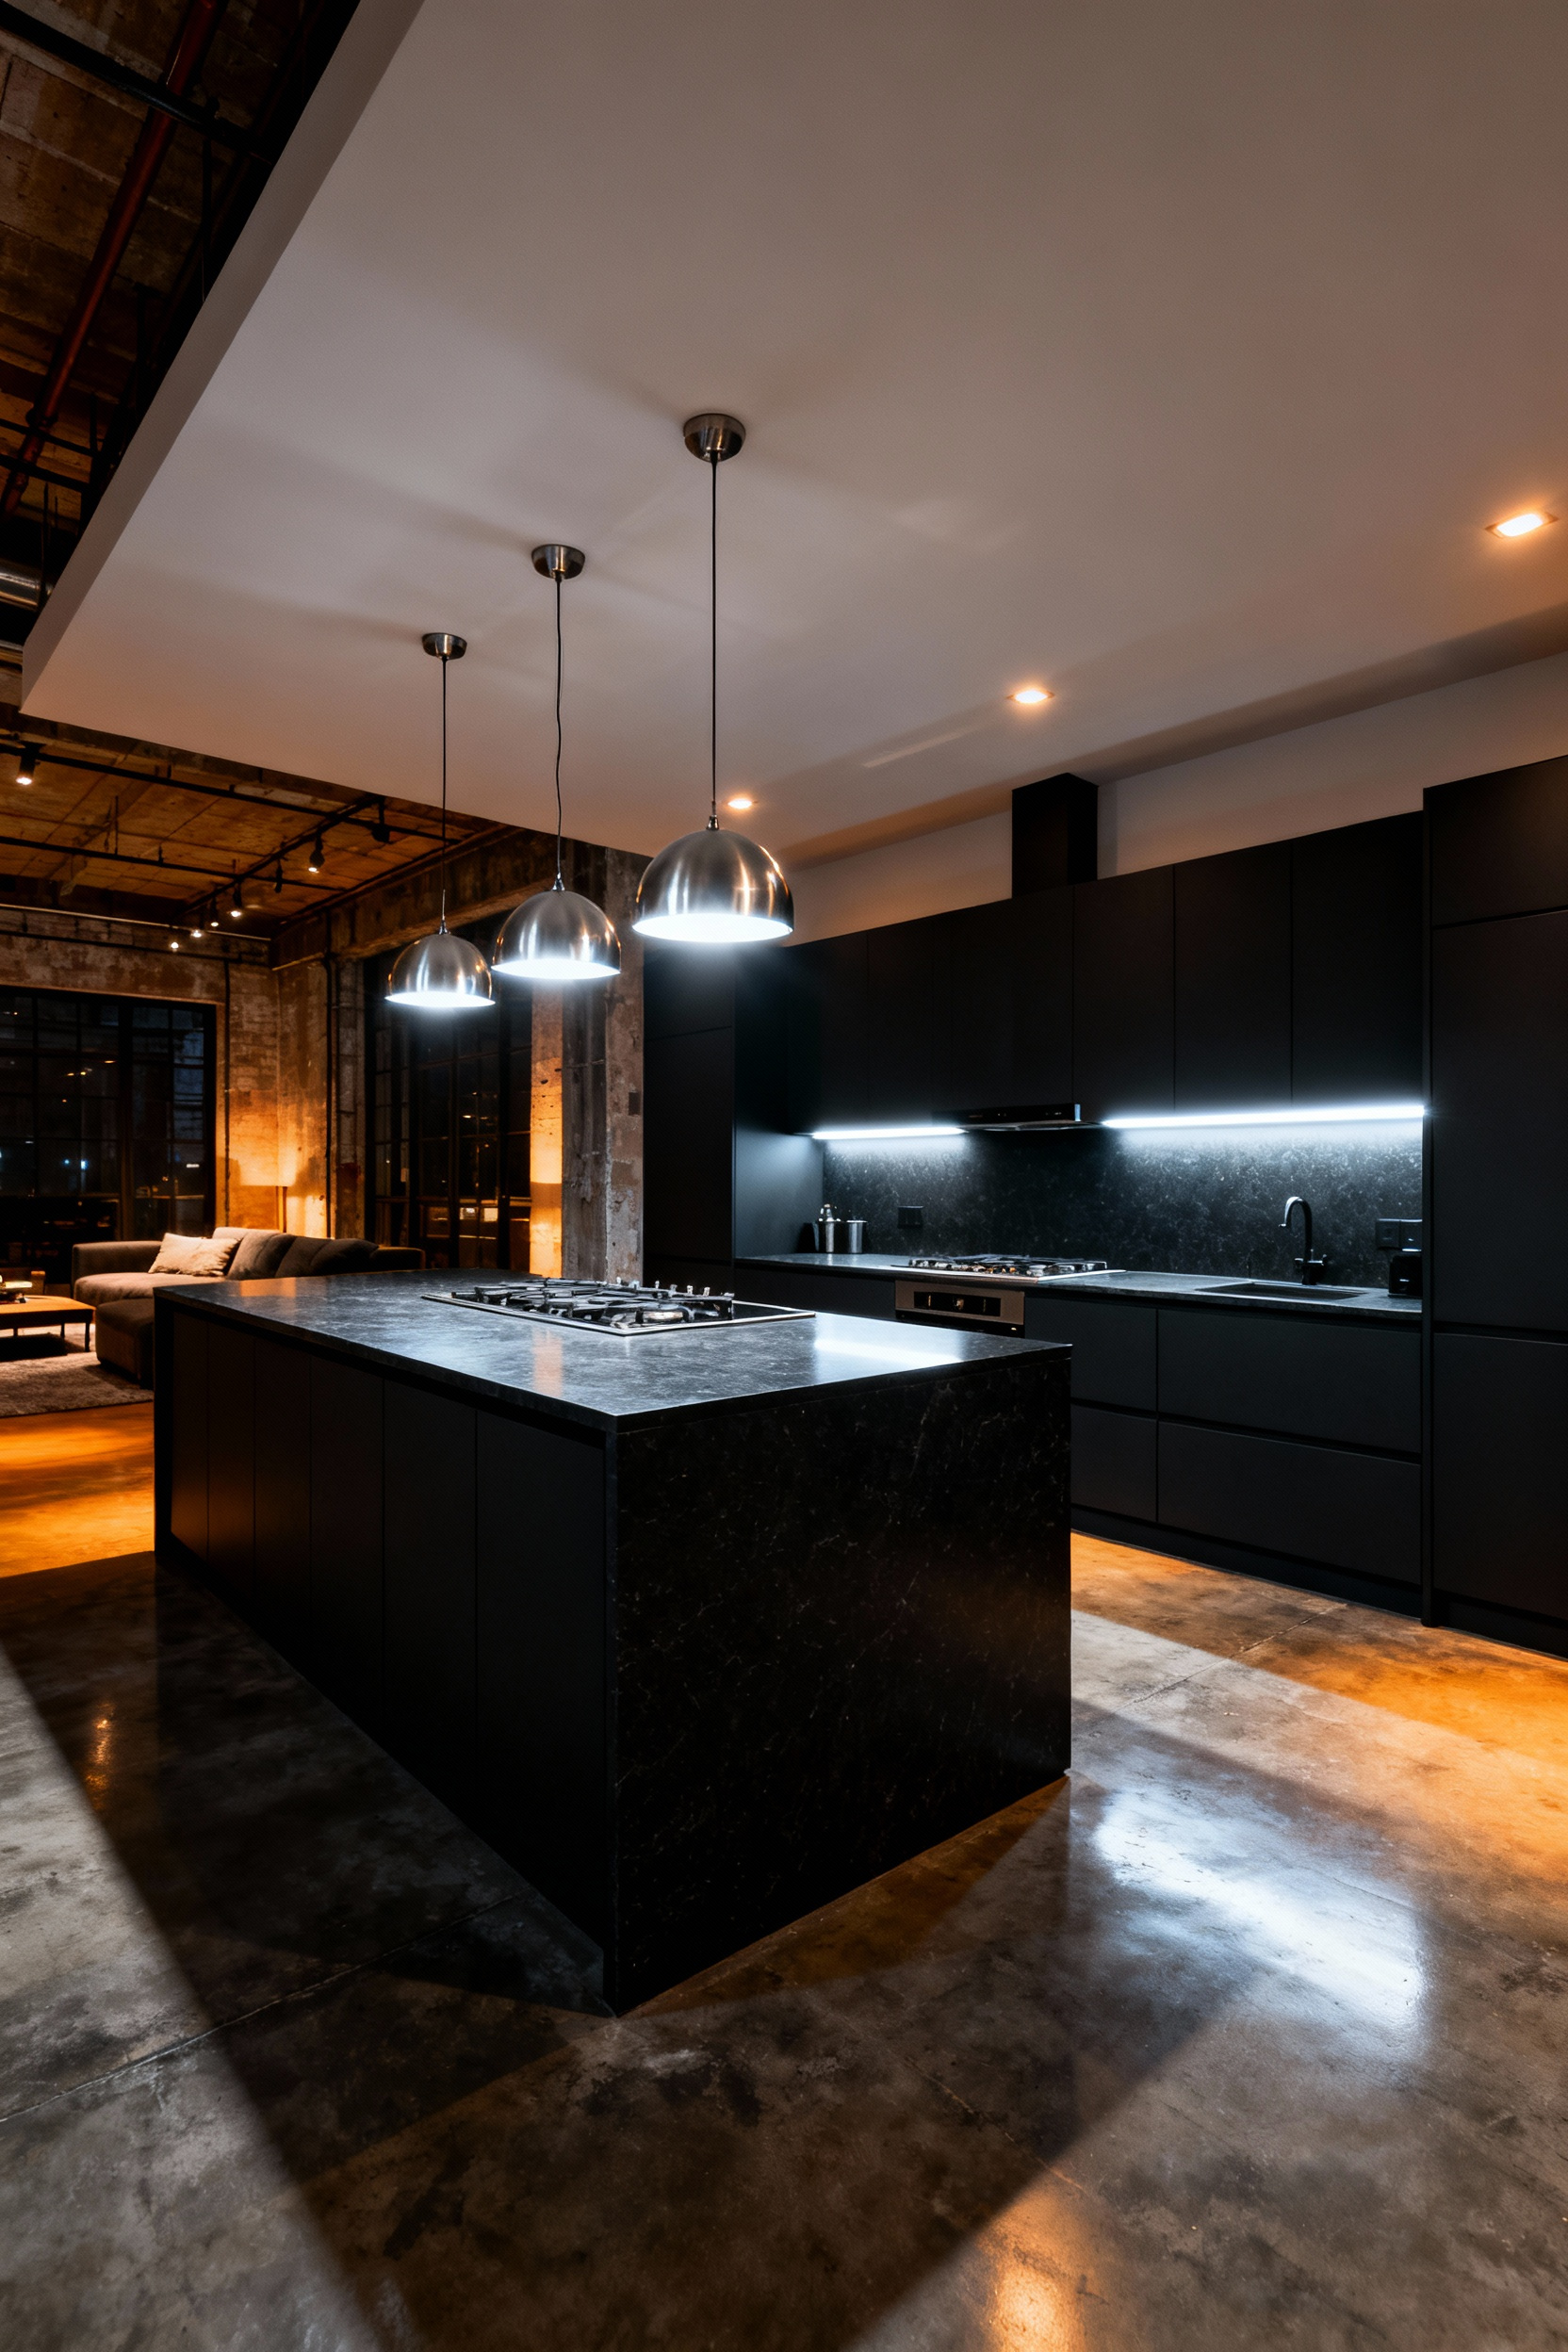
Statement Anchors: Using oversized industrial fixtures to define ‘rooms’ within an open-concept floor plan.
In open-concept industrial conversions, defining distinct zones without erecting walls requires strategic visual weight. A large-scale industrial fixture acts as a visual anchor, effectively carving out “rooms” within the vast square footage.
Select oversized pendants or a substantial linear fixture to hang above the kitchen island. This bold scale creates an immediate focal point that signals where the culinary workspace ends and the social areas begin, grounding the kitchen without interrupting the architectural flow.
Proper installation creates the balance between dominance and visibility. Position the fixture so its bottom edge sits 30 to 36 inches above the countertop. This height commands attention while preserving clear sightlines across the loft. However, a statement piece serves primarily as an ambient anchor; it rarely provides sufficient illumination on its own. Layer the design with practical task lighting, such as recessed cans or under-cabinet strips, to ensure the workspace remains fully functional for food preparation.
To maintain harmony in an open plan, ensure your anchor fixture communicates with the rest of the space. While the kitchen light should stand out, it must share a cohesive element, such as a matte black or brass finish, with fixtures in the adjacent living or dining zones. Finally, consider the atmosphere. Industrial materials can feel cold, so utilize Edison bulbs to introduce a warm, amber glow. This softens the rugged aesthetic and adds a layer of intimacy to the home environment.
Conclusion: The Final calibration – Turning your kitchen from a workspace into an architectural centerpiece.
True industrial design respects the raw bone structure of a building, but lighting is what makes it livable. This final calibration shifts your kitchen from a utilitarian workspace into a legitimate architectural centerpiece.
By layering sculptural fixtures with hidden accents—such as toe-kick strips or over-cabinet uplighting—you highlight textures and volume rather than just surfaces. Integrating smart dimmers and balancing color temperatures allows the space to breathe, transitioning effortlessly from a high-performance culinary lab to an intimate entertaining lounge. These intentional steps elevate your structure into one of the architectural masterpieces redefining the modern luxury kitchen.
Ultimately, mastering sophisticated kitchen lighting design ensures your home adapts to your lifestyle, not the other way around. A well-calibrated lighting scheme honors the integrity of the building while offering the flexibility required for modern urban living. Begin this transformation by auditing your current control systems; replacing standard switches with smart dimmers is the single most effective step toward mastering the mood and unlocking the full potential of your architecture.
Frequently Asked Questions
What is the ideal color temperature (Kelvin) for luxury kitchen task lighting?
For the best color accuracy and safety in task areas (like counters and sinks), the ideal Kelvin range is 3500K to 4000K (neutral white). This cooler temperature minimizes color distortion when preparing food and provides maximum clarity. However, for ambient lighting or decorative fixtures in the same luxury kitchen, a warmer 2700K to 3000K should be used to create a welcoming, soft atmosphere.
How far should recessed lighting be placed from kitchen countertops to avoid shadows?
To avoid the “head-shadow” effect where your body blocks the light over the work surface, recessed fixtures should be placed closer to the counter edge than the ceiling center. A general rule for standard ceiling heights is to position the center of the recessed light approximately 15 to 24 inches out from the wall/cabinet face. Ensure you use fixtures with a wide beam angle (around 40 degrees) to ensure the light beam hits the entire work surface.
What is a reasonable budget percentage for a high-end kitchen lighting system?
For a high-end, bespoke illumination system, architects often recommend dedicating 7% to 12% of the total renovation budget to lighting fixtures, wiring, controls (dimmers, smart systems), and professional installation. This percentage reflects the necessity of incorporating multiple layers (ambient, task, accent) and high-CRI, durable fixtures required to achieve truly sophisticated architectural depth.