I once rescued a battered mid-century credenza from a dusty barn, seeing not just a storage unit, but a future family heirloom waiting to be rediscovered. Your bathroom vanity holds that same potential. Completing a bathroom vanity makeover is the most honest square footage transformation in your home. It stands as the backdrop to your morning routine and your evening unwind. Yet, too many of us treat this intimate corner as a generic showroom display, prioritizing a glossy “look” over the reality of our daily lives.
To create a space that lasts, we must shift our perspective from public appeal to personal connection. True sustainability isn’t just about reclaiming old wood; it is about designing a space so deeply aligned with your habits that you never want to change it. By prioritizing your specific storage needs and aesthetic preferences, you ensure the vanity serves you, rather than you adapting to it.
In this guide, we will reimagine standard renovation. We will look beyond the hardware to identify the soul of the space, ensuring every texture and tone evokes the specific feeling you crave. You will learn to prioritize flow to match your actual movements and discover the joy of hidden organization that supports your routine from the inside out. Let’s breathe new life into this essential focal point and build a sanctuary that feels authentically yours.
1. The Philosophy of the Second Life: Why Restore Instead of Replace?
I often spot potential in the scuffed legs of a discarded mid-century dresser, but sometimes the greatest treasure sits right under your sink. Giving your vanity a “Second Life” is a rebellion against disposable culture. By restoring rather than replacing, you divert heavy materials from landfills and bypass the carbon footprint of new manufacturing. Furthermore, the financial savings are substantial. Keeping the existing structure saves hundreds of dollars, allowing you to allocate your budget toward high-impact details:
- Premium Hardware: Swap generic pulls for heavy, vintage-style brass.
- Healthy Finishes: Apply low-VOC paints to protect indoor air quality.
- Surface Renewal: Resurface the countertop to update the look without messy demolition.
New, off-the-shelf units often lack the “good bones” and narrative of older craftsmanship. Therefore, embrace the character of your existing piece. A hand-painted finish or a repurposed antique cabinet introduces a warmth that mass production cannot replicate. This process creates a one-of-a-kind focal point that honors design history while solving contemporary needs.
Phase I: Surface-Level Revivals for Your Bathroom Vanity Makeover (The Weekend Warrior)
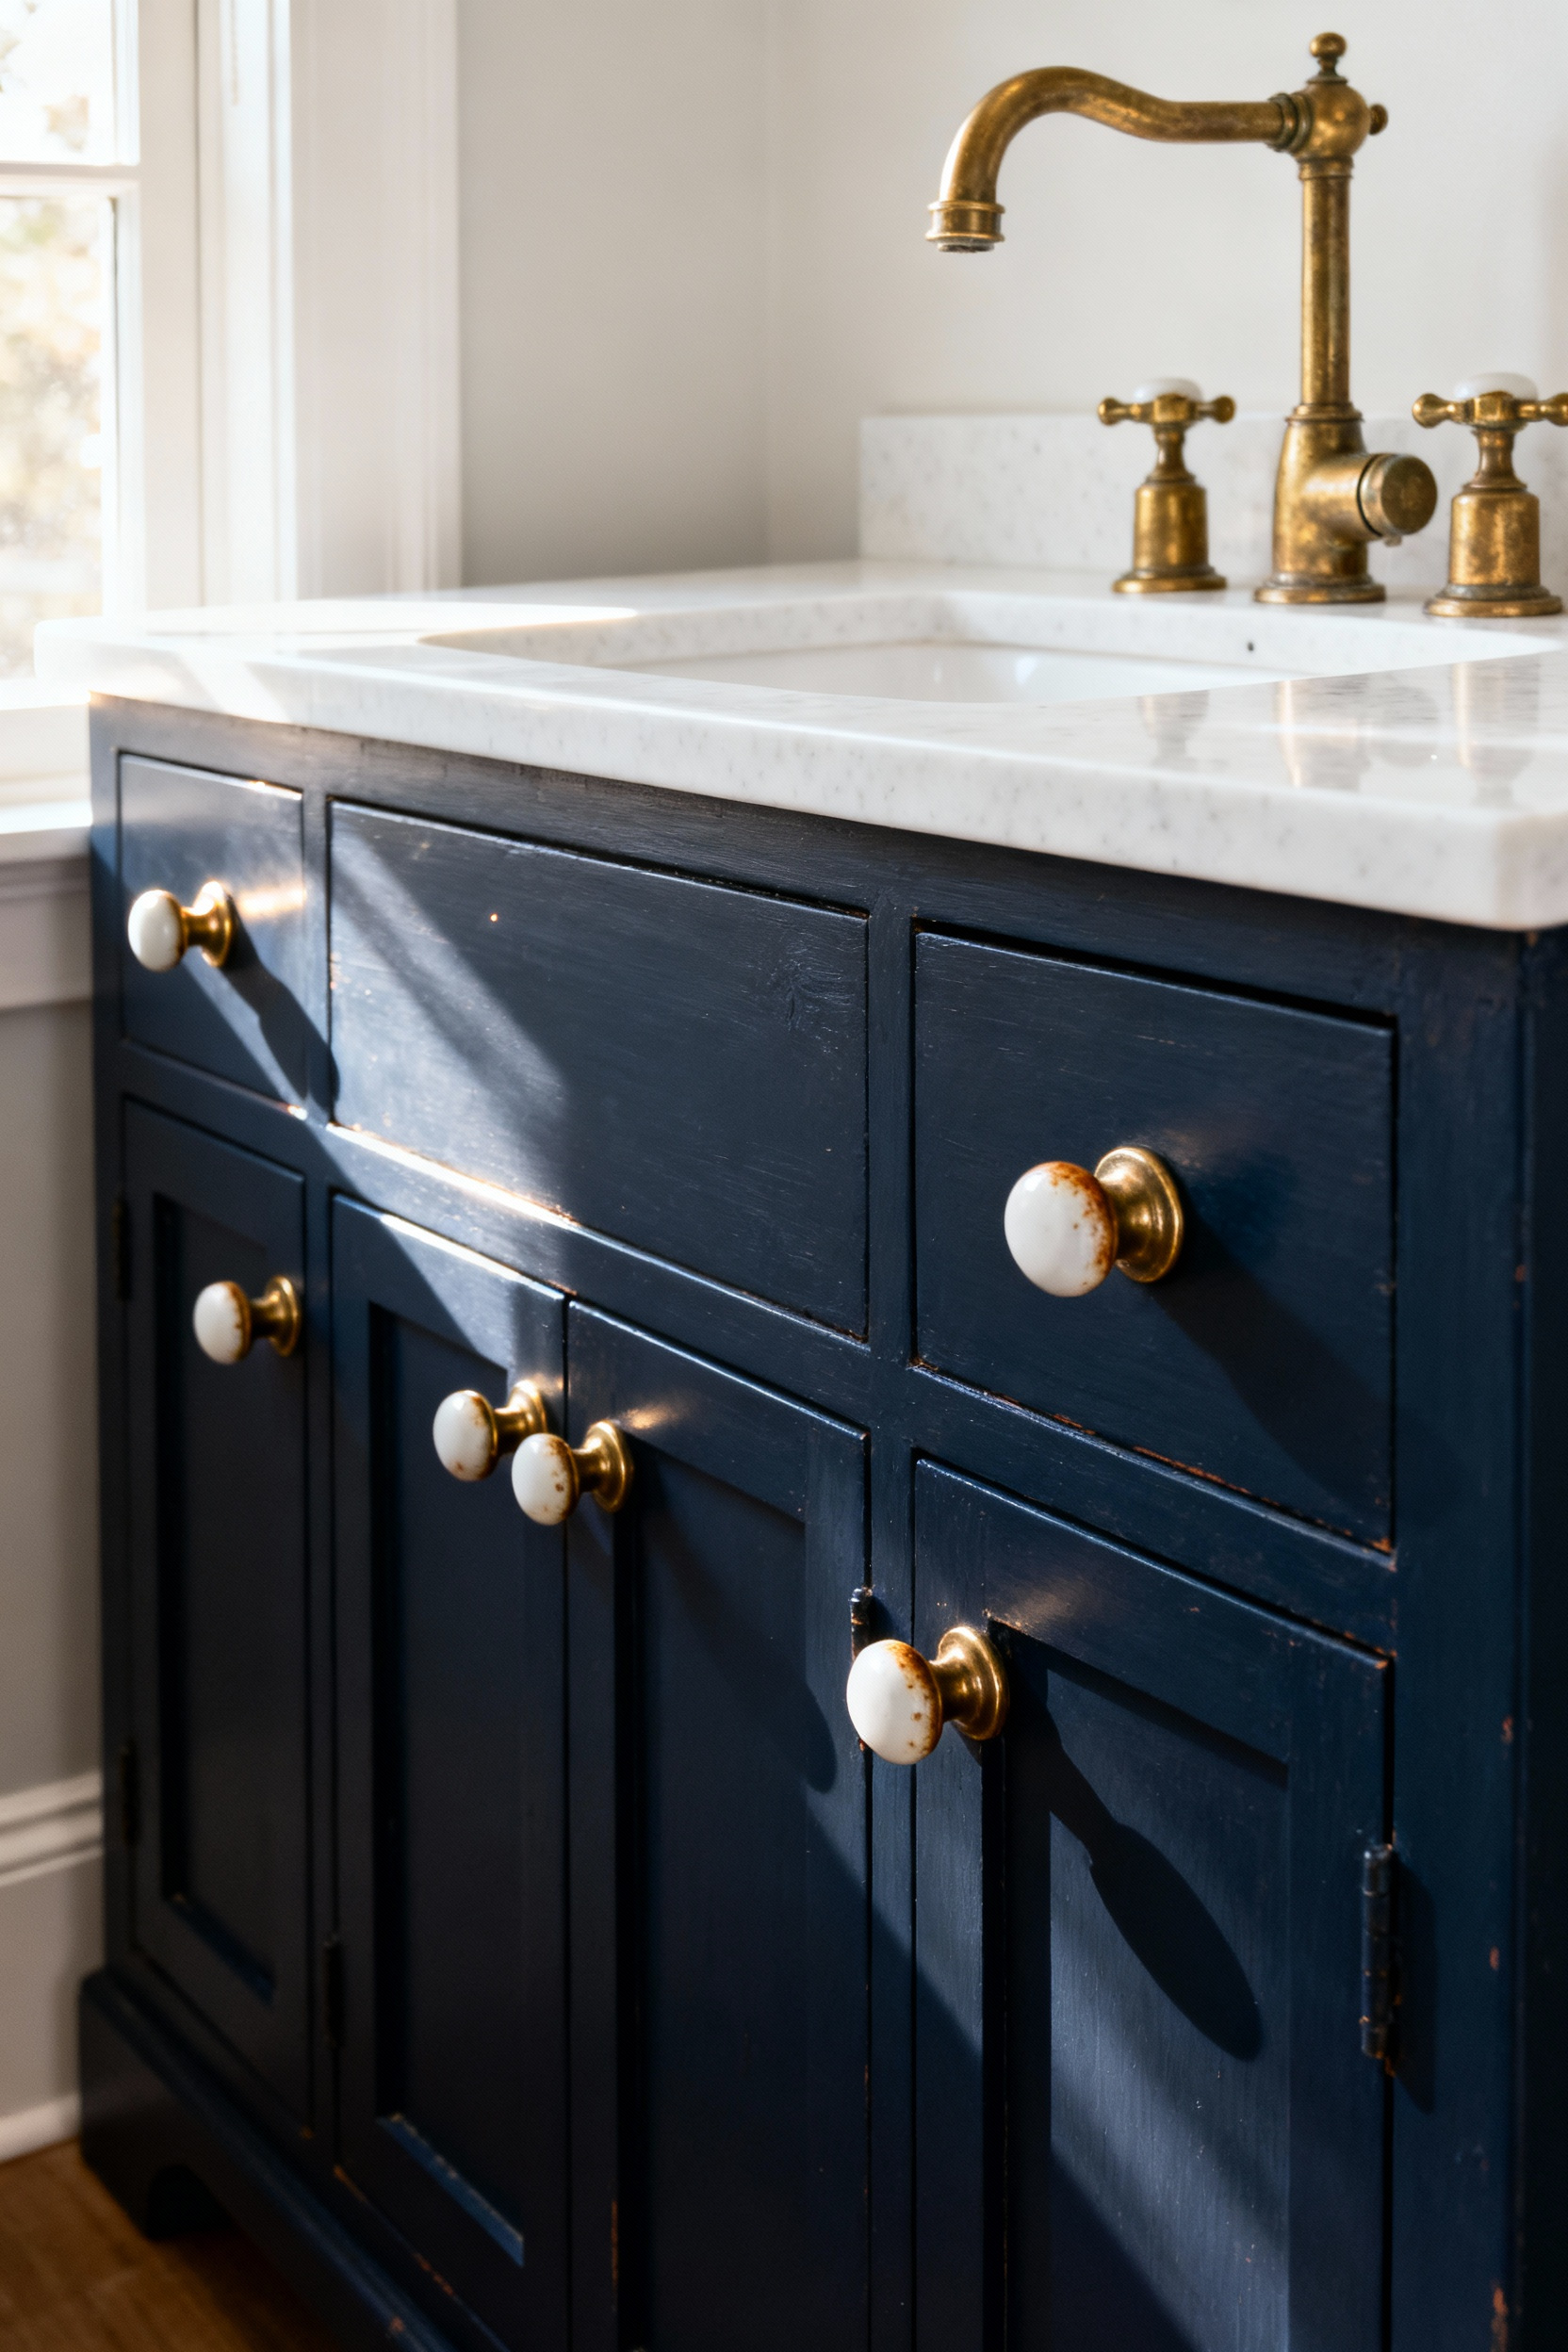
Don’t banish that tired vanity to the landfill just yet. Older cabinets often possess sturdy frames that modern particle board simply can’t match, making them perfect candidates for a sustainable revival. Start with a coat of urethane alkyd enamel paint; this durable finish resists bathroom humidity and instantly modernizes dated wood. I once rescued a drab 1960s cabinet using only a fresh coat of navy paint and vintage-inspired brass pulls. The contrast created a bespoke, high-end look for pennies.
After the base is set, tackle the surfaces to unify the design. You can bypass the waste and cost of a full demolition with these focused updates:
- Refresh the top: Apply a countertop refinishing kit to mimic stone or granite without the heavy lifting.
- Upgrade the faucet: Install a sleek fixture that matches your new hardware to create a cohesive focal point.
- Frame the reflection: Add a custom frame kit directly onto plain builder-grade mirrors for a finished edge.
These simple shifts turn a generic washroom into a curated sanctuary in just 48 hours.
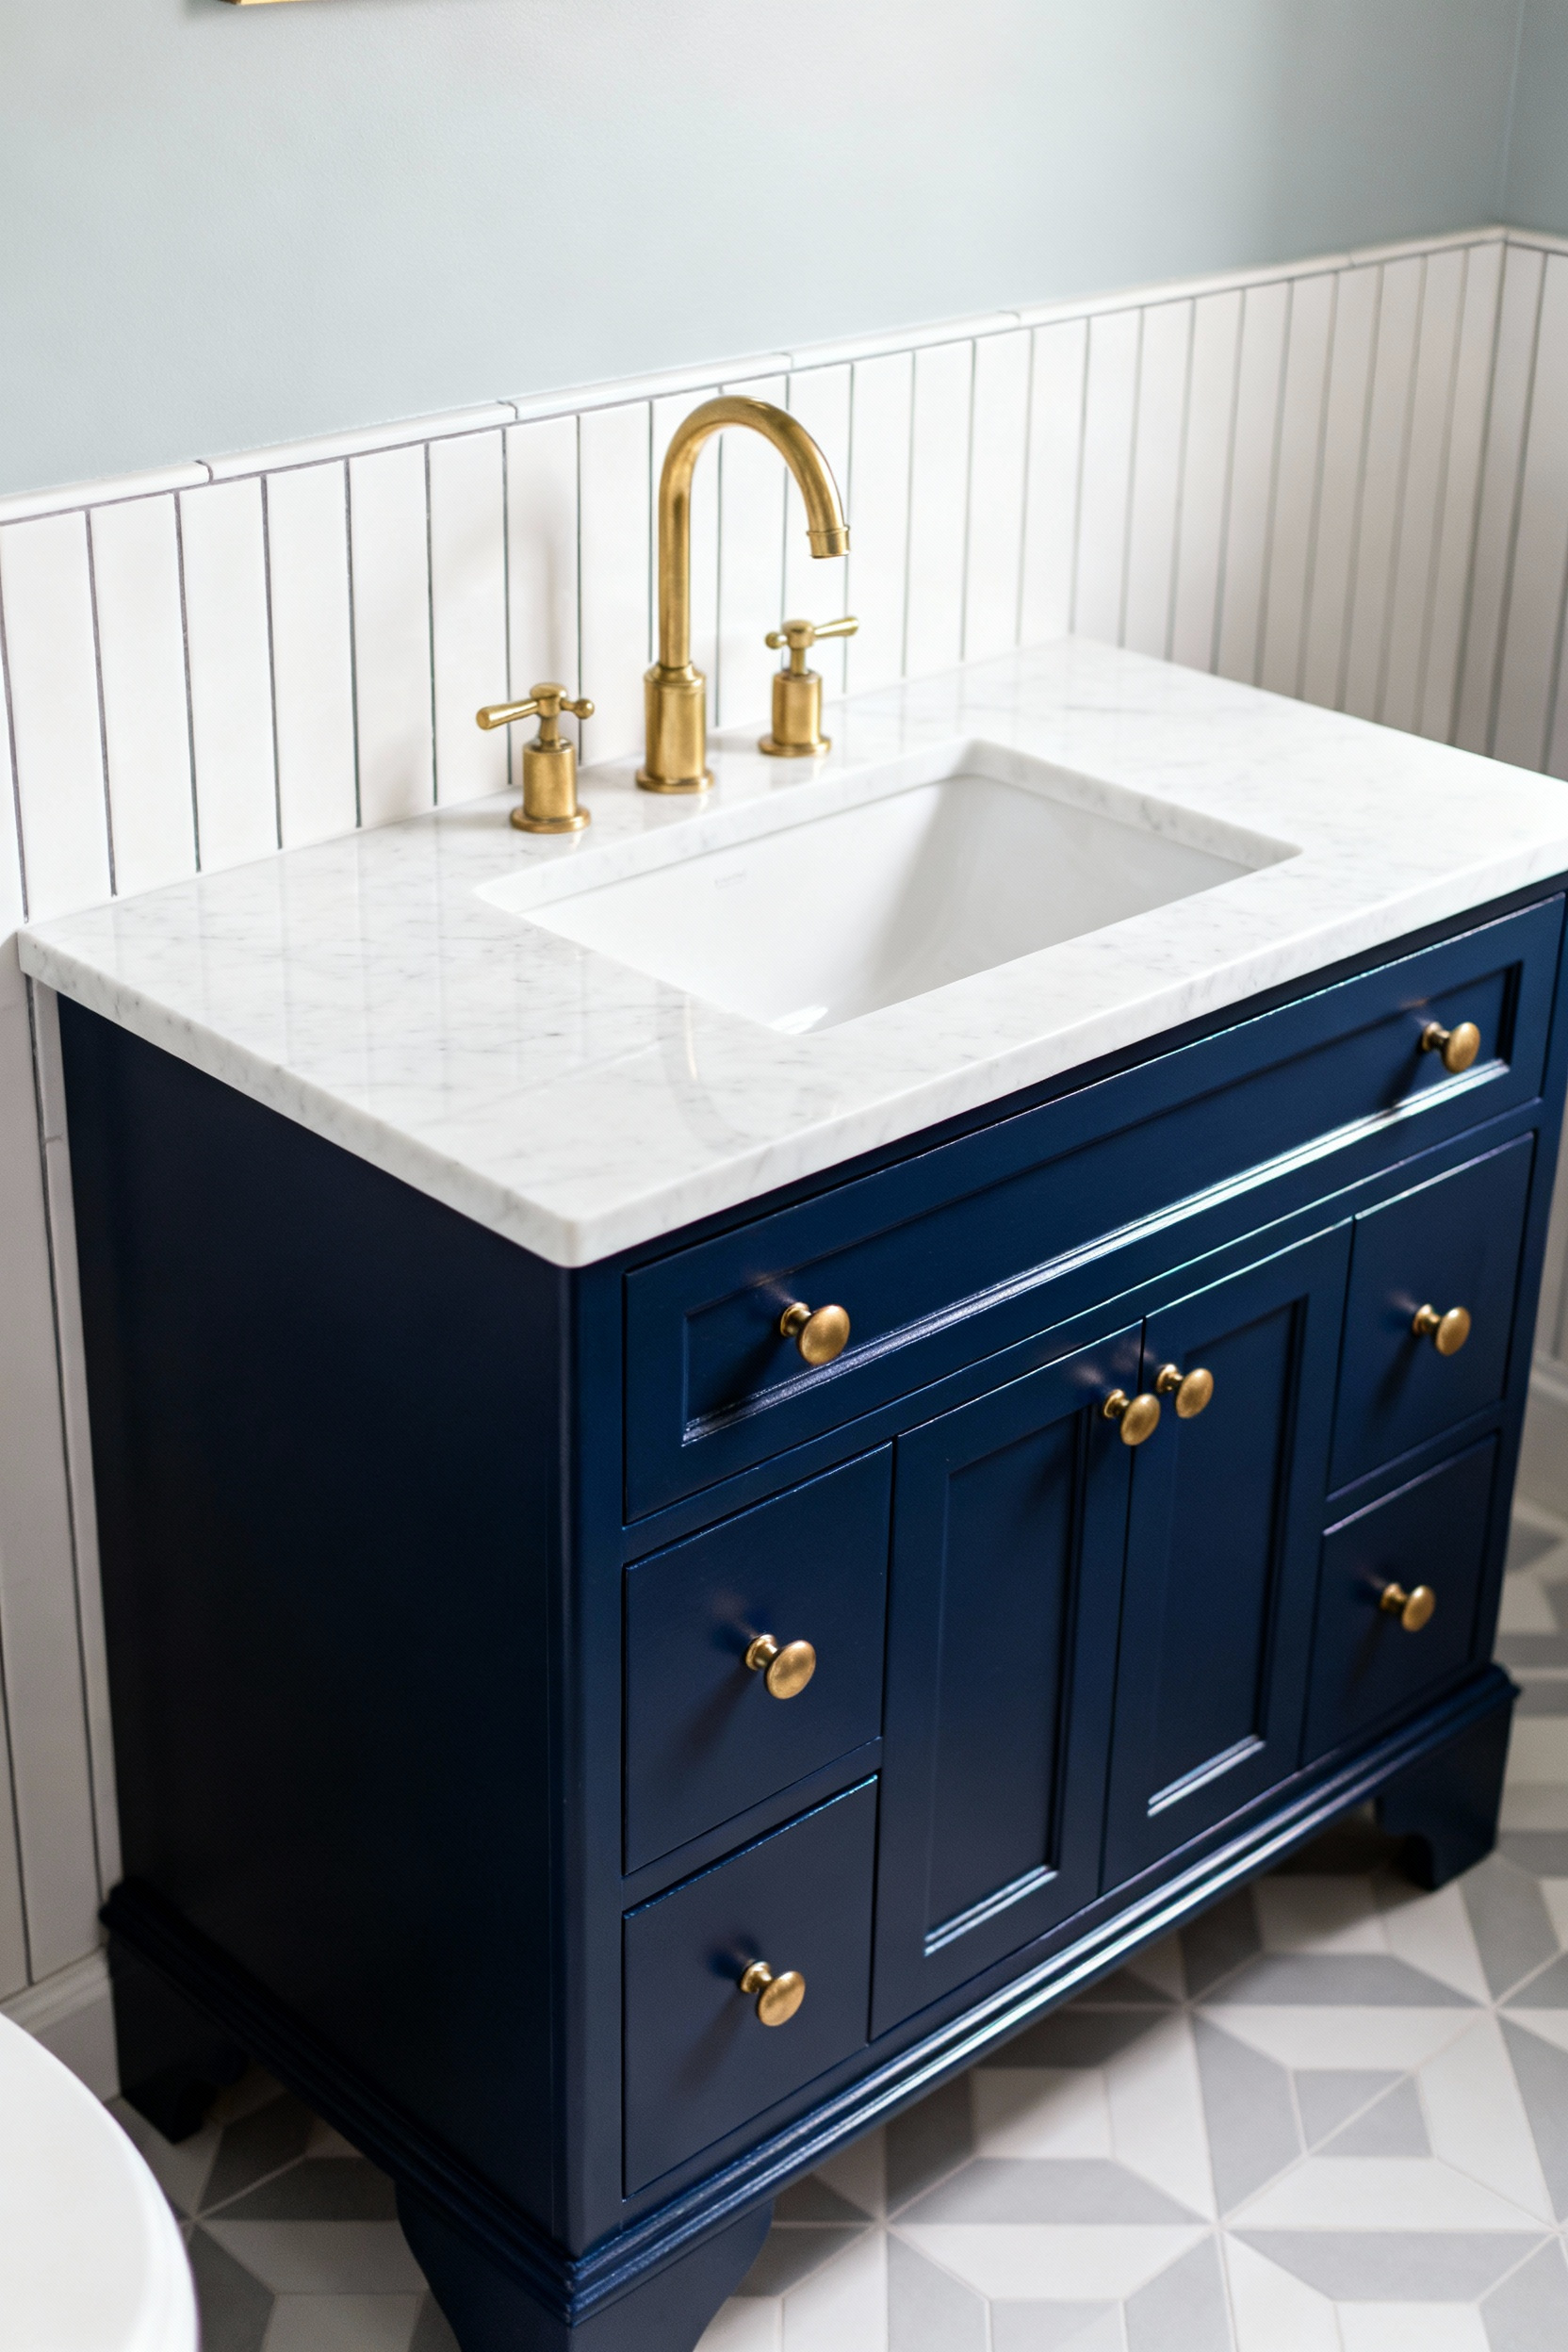
2. The ‘Jewelry’ Upgrade: Sourcing Antique Brass and Ceramic Hardware
Treat vanity hardware like heirloom jewelry; it defines the piece’s character. I often scour local salvage yards for unlacquered brass, as the natural patina tells a story that mass-produced items cannot mimic. This warm metal pairs beautifully with cool white ceramic elements. Together, they create a sophisticated contrast against dark, upcycled cabinetry.
However, mechanics matter just as much as aesthetics. Bring a tape measure on your hunt and follow these rules:
- Check the Center-to-Center (C-C): You must match the distance between existing holes exactly for pulls.
- Choose your finish: Select unlacquered brass for a “living” patina that ages with the room, or sealed antique brass for a consistent, maintenance-free look.
If the measurements prove difficult, pivot to ceramic knobs. They require only a single screw, making them a forgiving, versatile choice for any restoration project.
3. Beyond Builder-Grade White: Choosing Retro-Inspired Mineral Paints
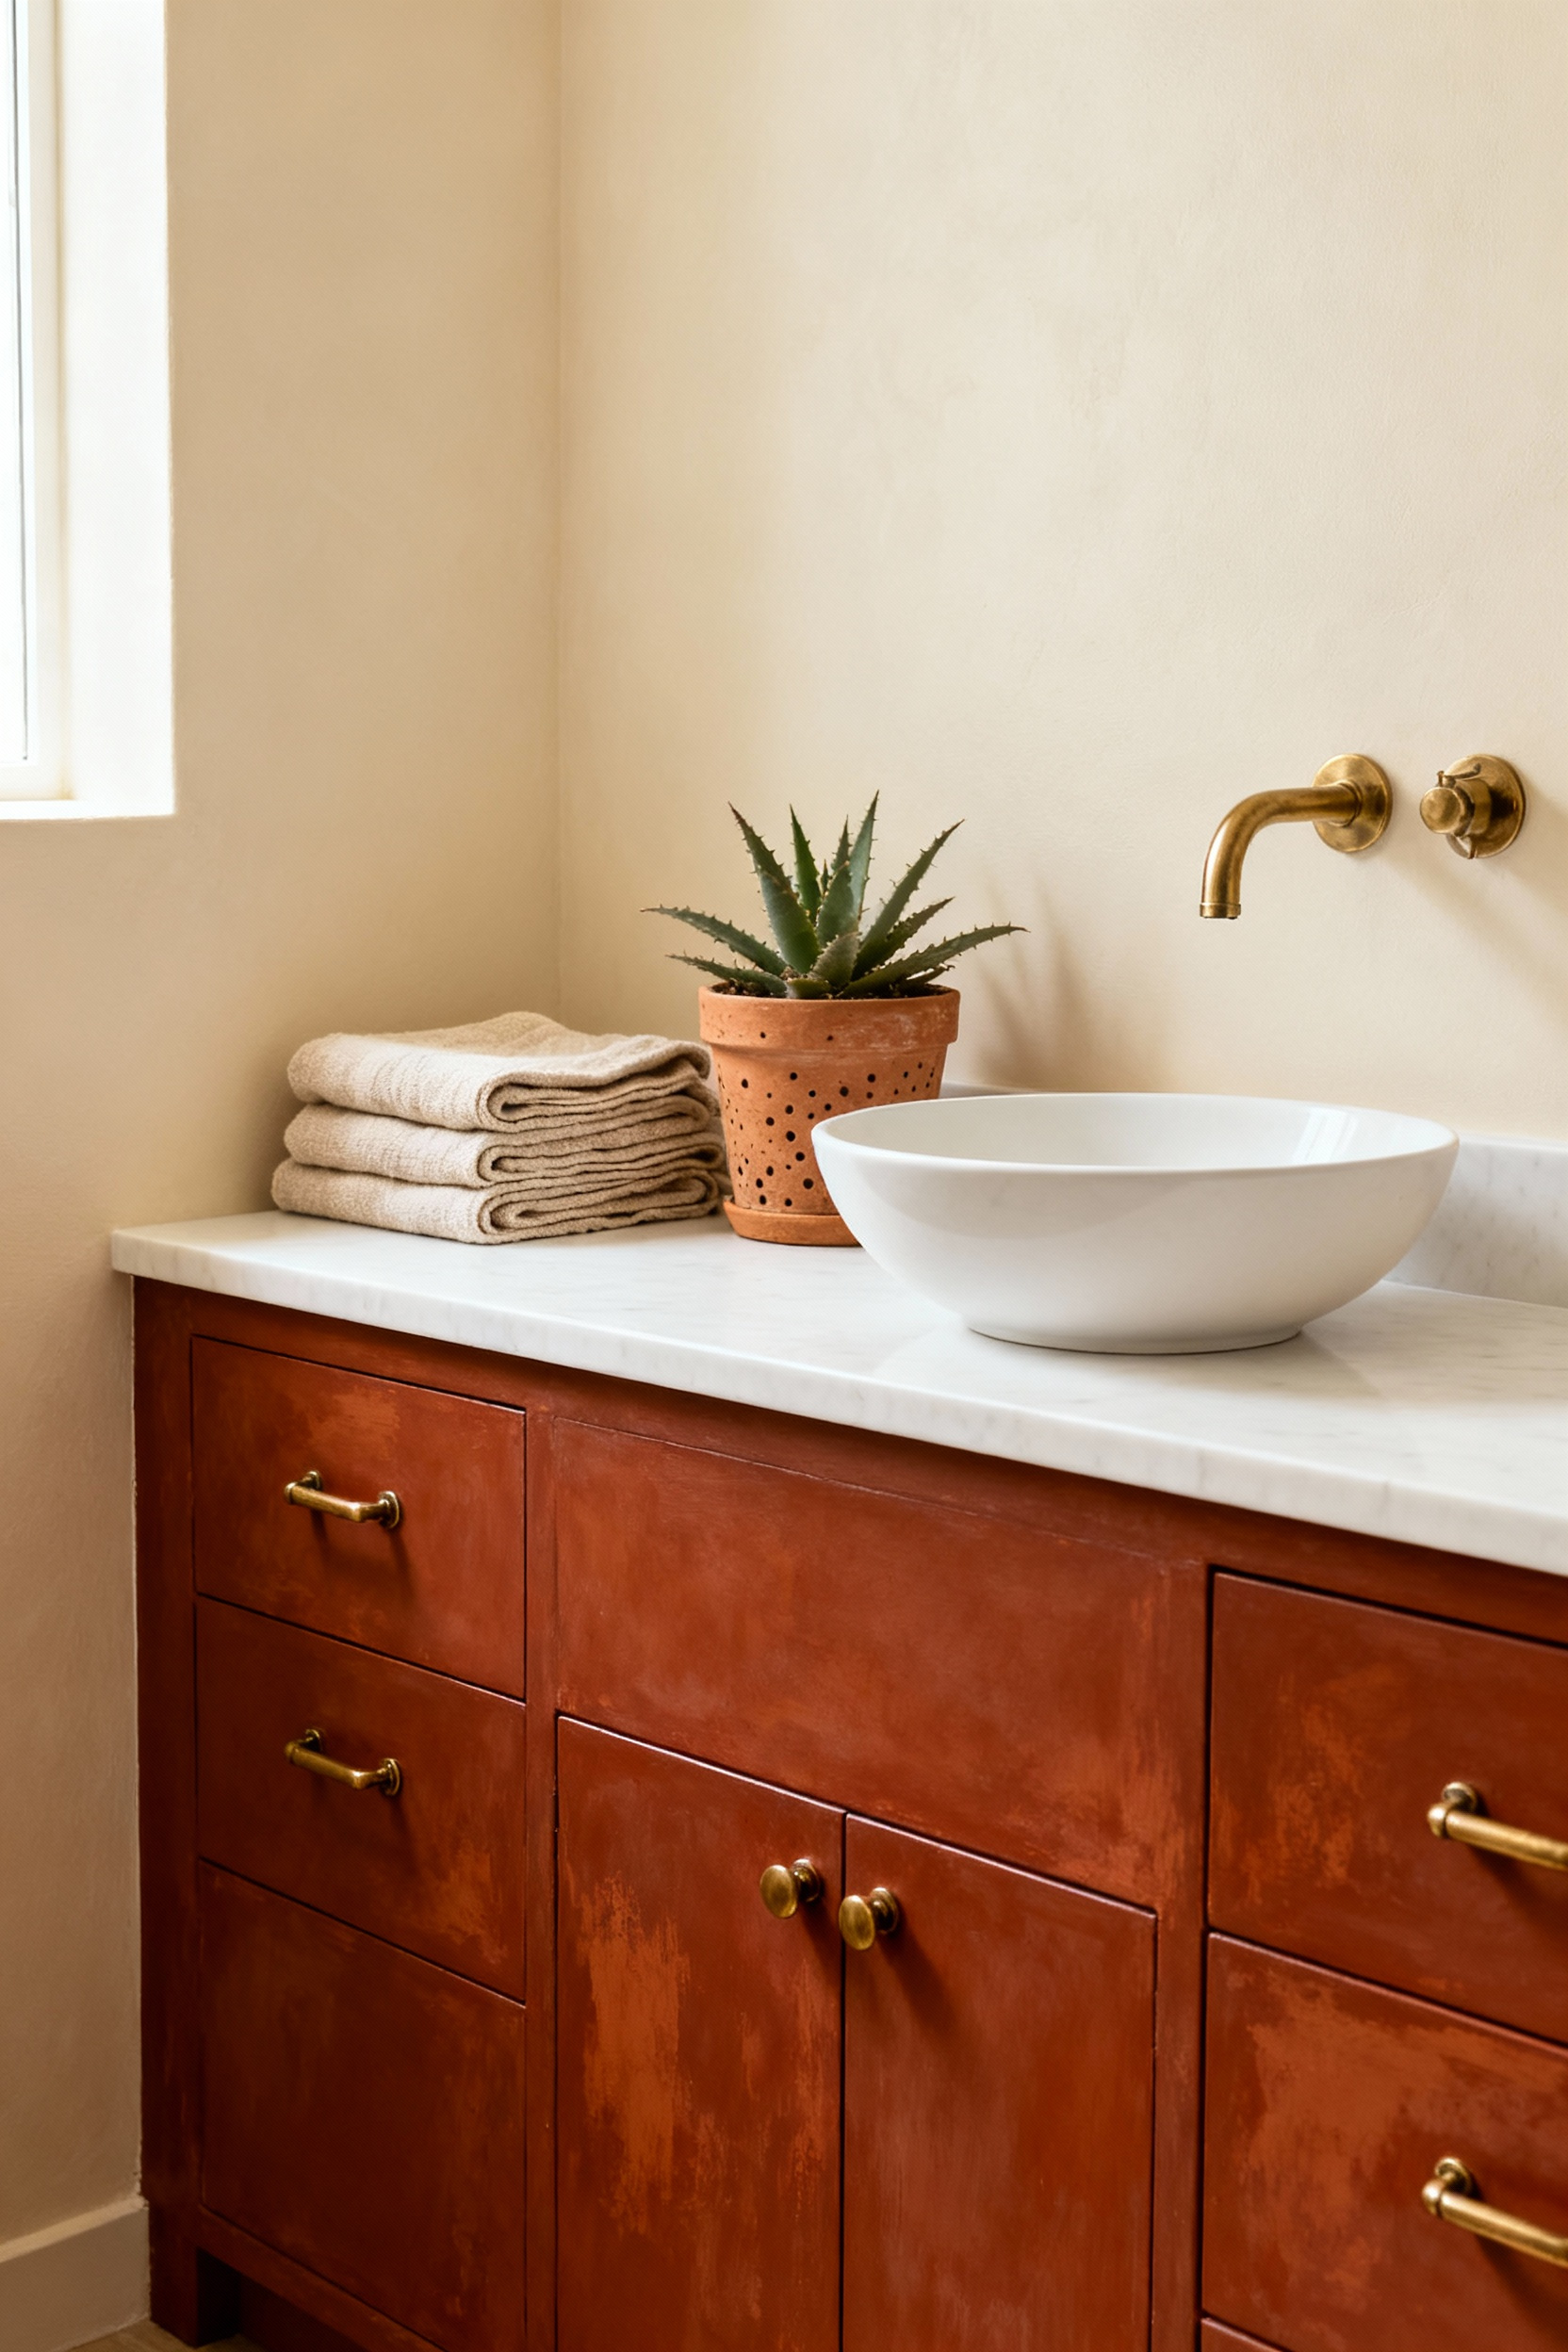
Ditch the sterile builder-grade white for the soulful, saturated hues of the past. Mineral paints offer a depth and matte finish that standard latex simply cannot match. I recently rescued a generic laminate vanity using a rich terracotta mineral paint; the complex pigment instantly grounded the space with history. Furthermore, these formulas champion sustainability. They naturally inhibit mold and contain low VOCs, making them a smart, non-toxic choice for your humid bathroom sanctuary.
Modern mineral hybrids also simplify your workflow. They require no wax, delivering a velvety look with built-in water resistance. Achieve a factory-smooth finish by following these steps:
- Prep lightly: Scuff-sand the surface just enough to remove the gloss.
- Layer thin: Apply two thin coats rather than one thick one to eliminate brush marks.
- Skip the seal: Trust the built-in topcoat to handle moisture.
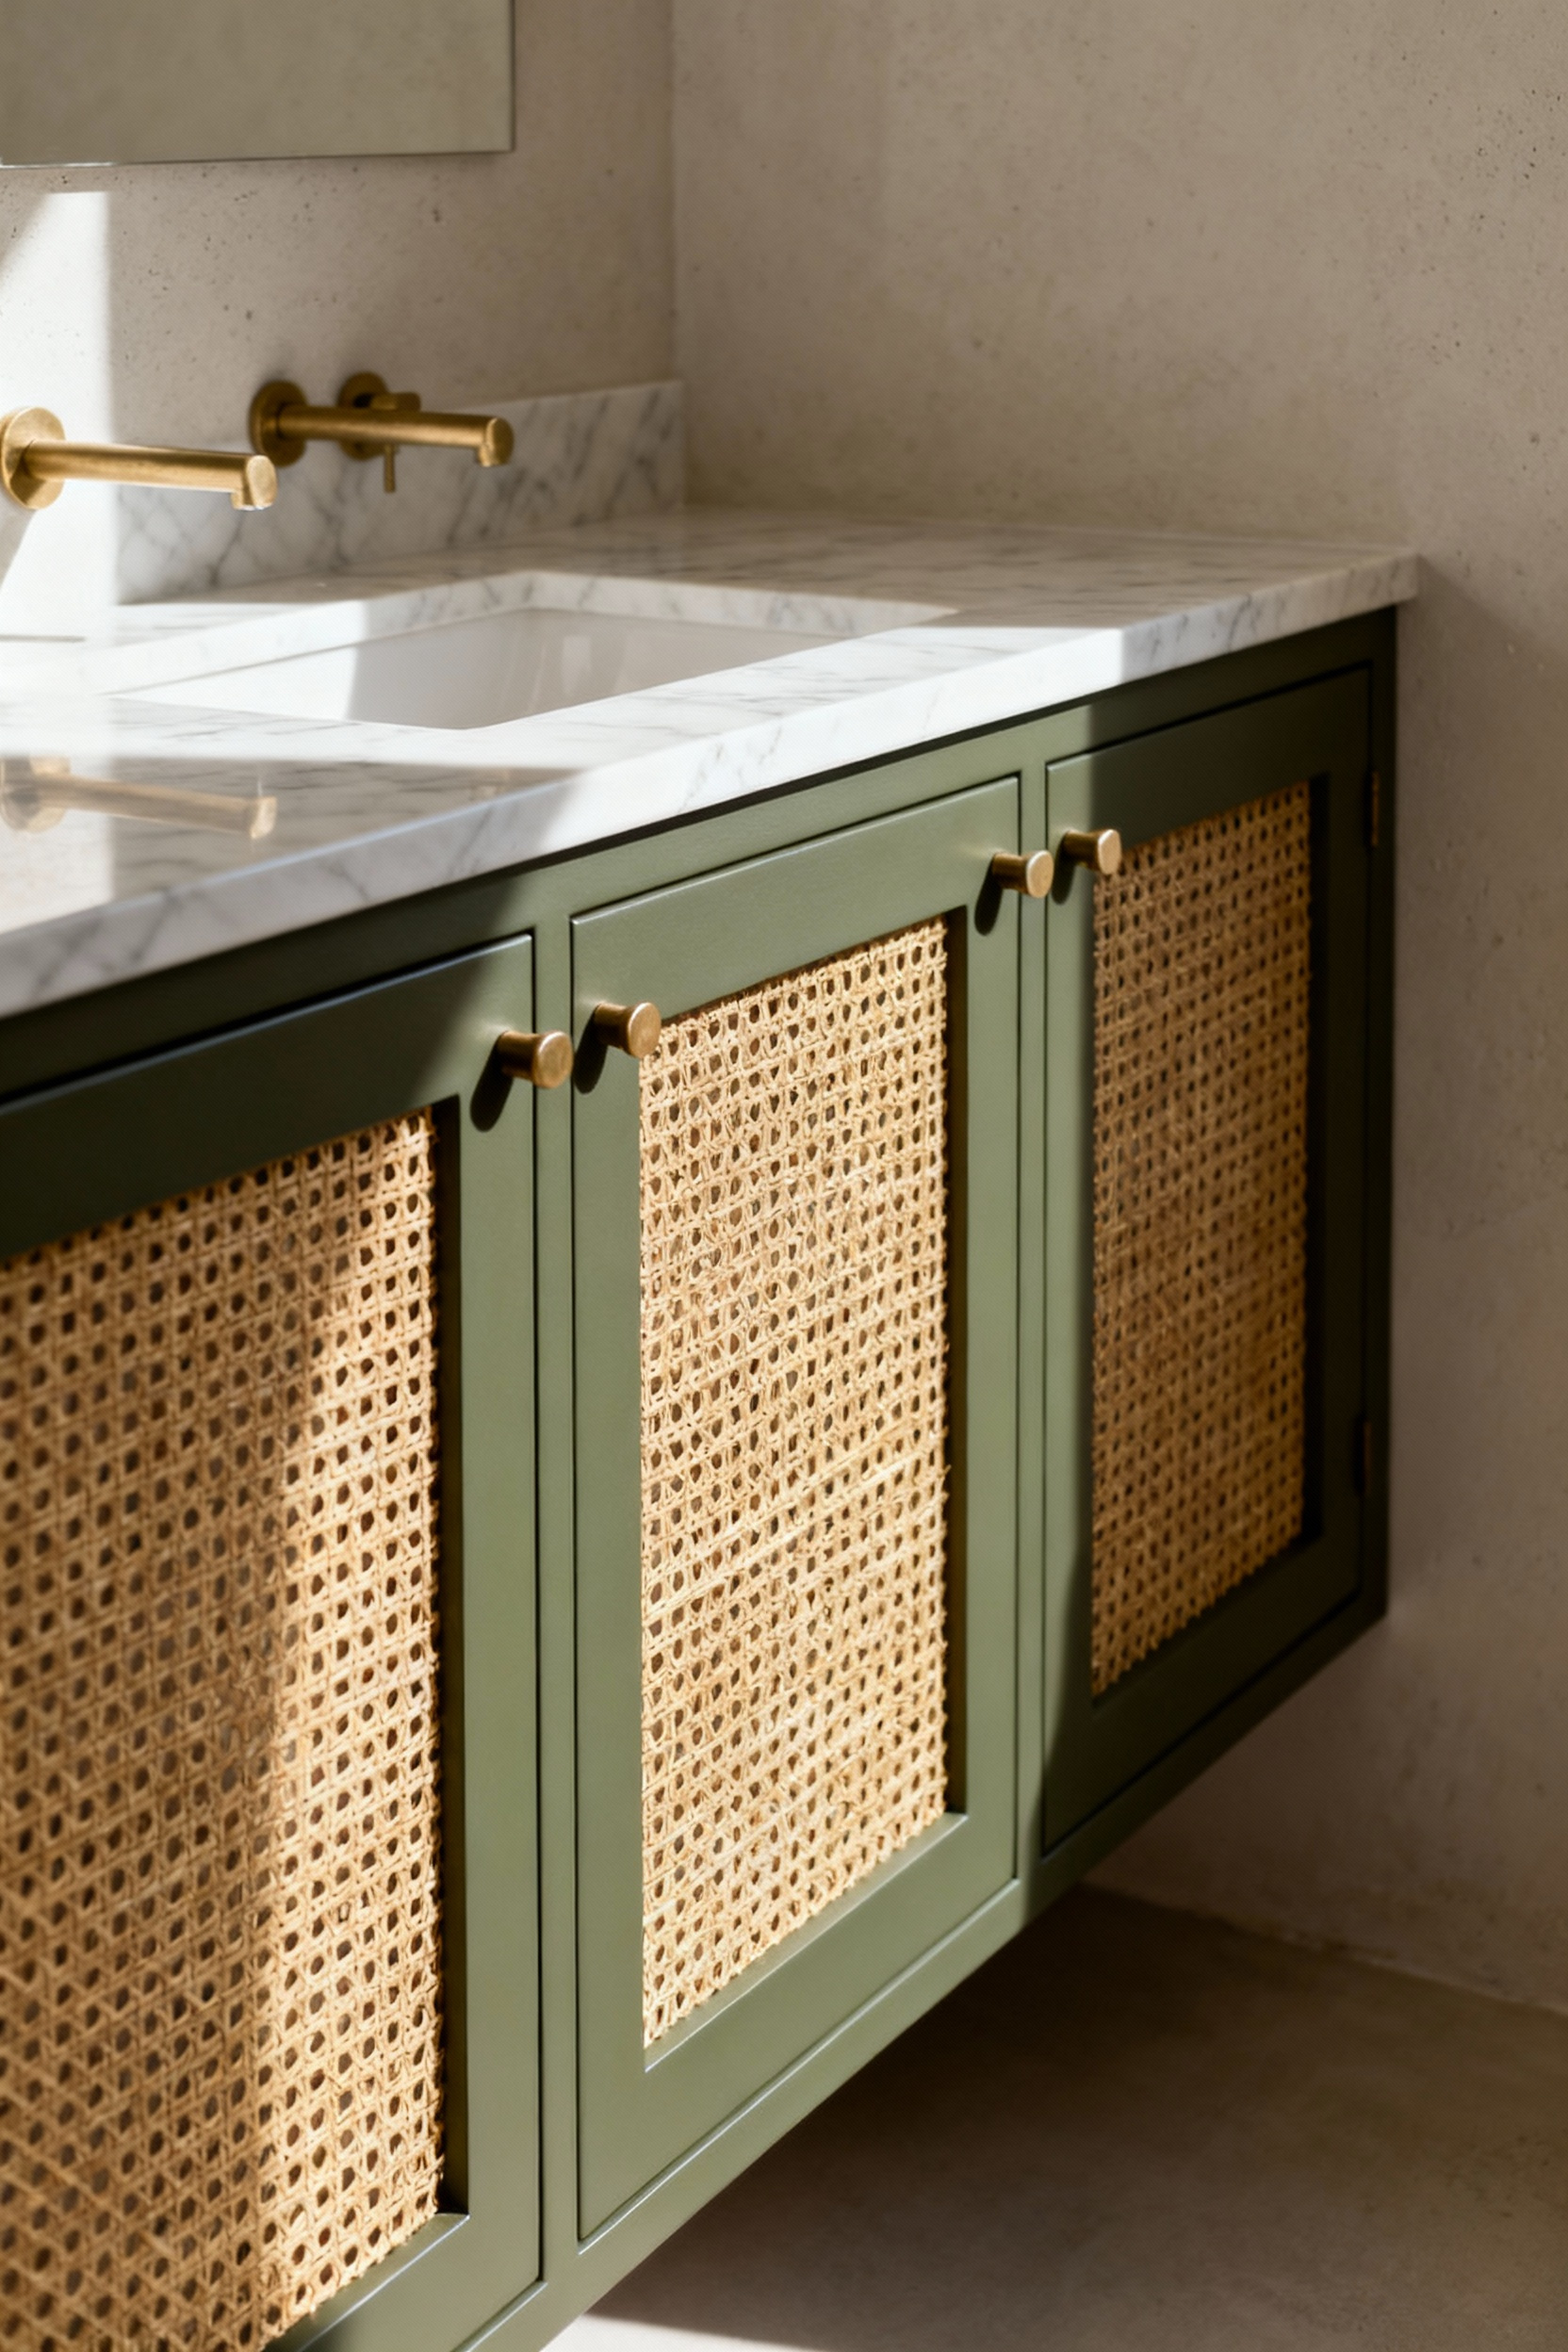
Finally, pair your new dusty blue or sage green vanity with geometric brass hardware to fully lock in that nostalgic charm.
4. The Inner Beauty: Lining Drawers with Vintage Wallpaper Remnants
Treat the inside of your vanity drawers as a hidden treasure chest. Lining interiors with vintage wallpaper remnants turns mundane storage into a secret design moment. I often rescue partial rolls from estate sales, utilizing these scraps to introduce bold patterns that might feel too loud for a whole wall. However, bathrooms present a unique humidity challenge. To protect these delicate papers from moisture and spills, seal them with a water-resistant topcoat like Mod Podge or overlay the lining with clear adhesive contact paper.

Precision creates a professional finish. Vintage pieces rarely feature uniform dimensions, so measure *each* drawer bottom individually rather than assuming they match. Use a straightedge for crisp cuts. Then, choose your adhesive based on your desired permanence:
- Temporary: Apply double-sided tape to the perimeter for an easily changeable look.
- Permanent: Use spray adhesive or liquid starch for a secure, lasting bond.
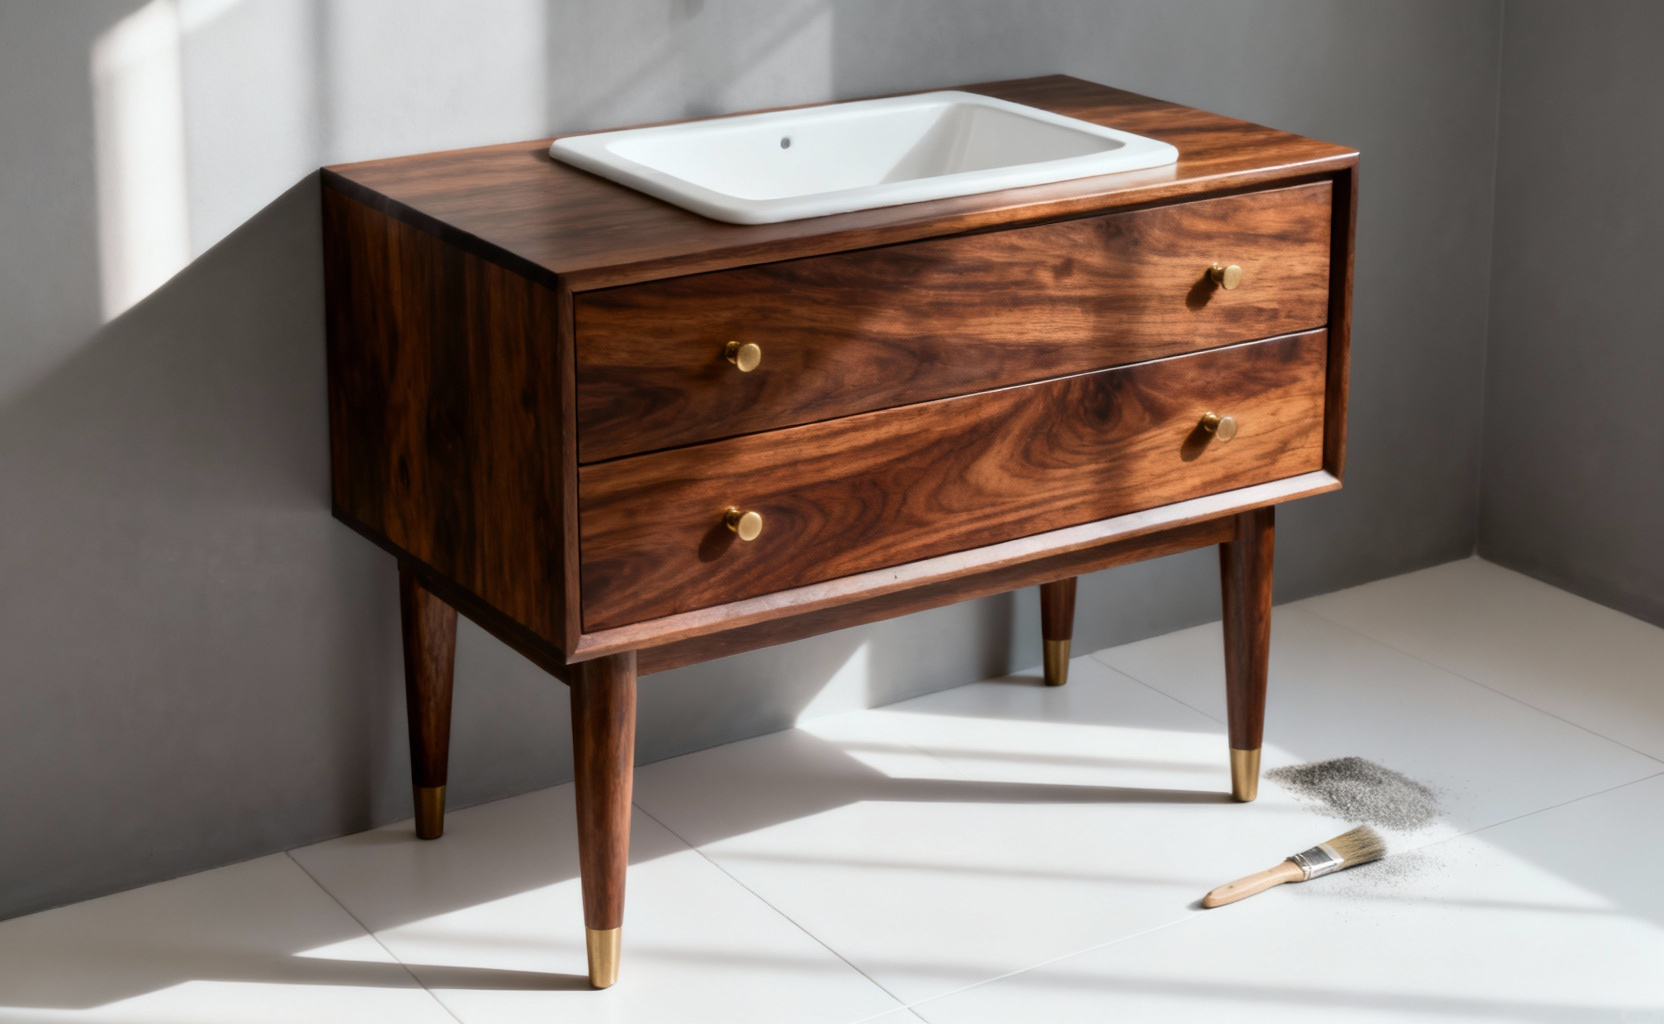
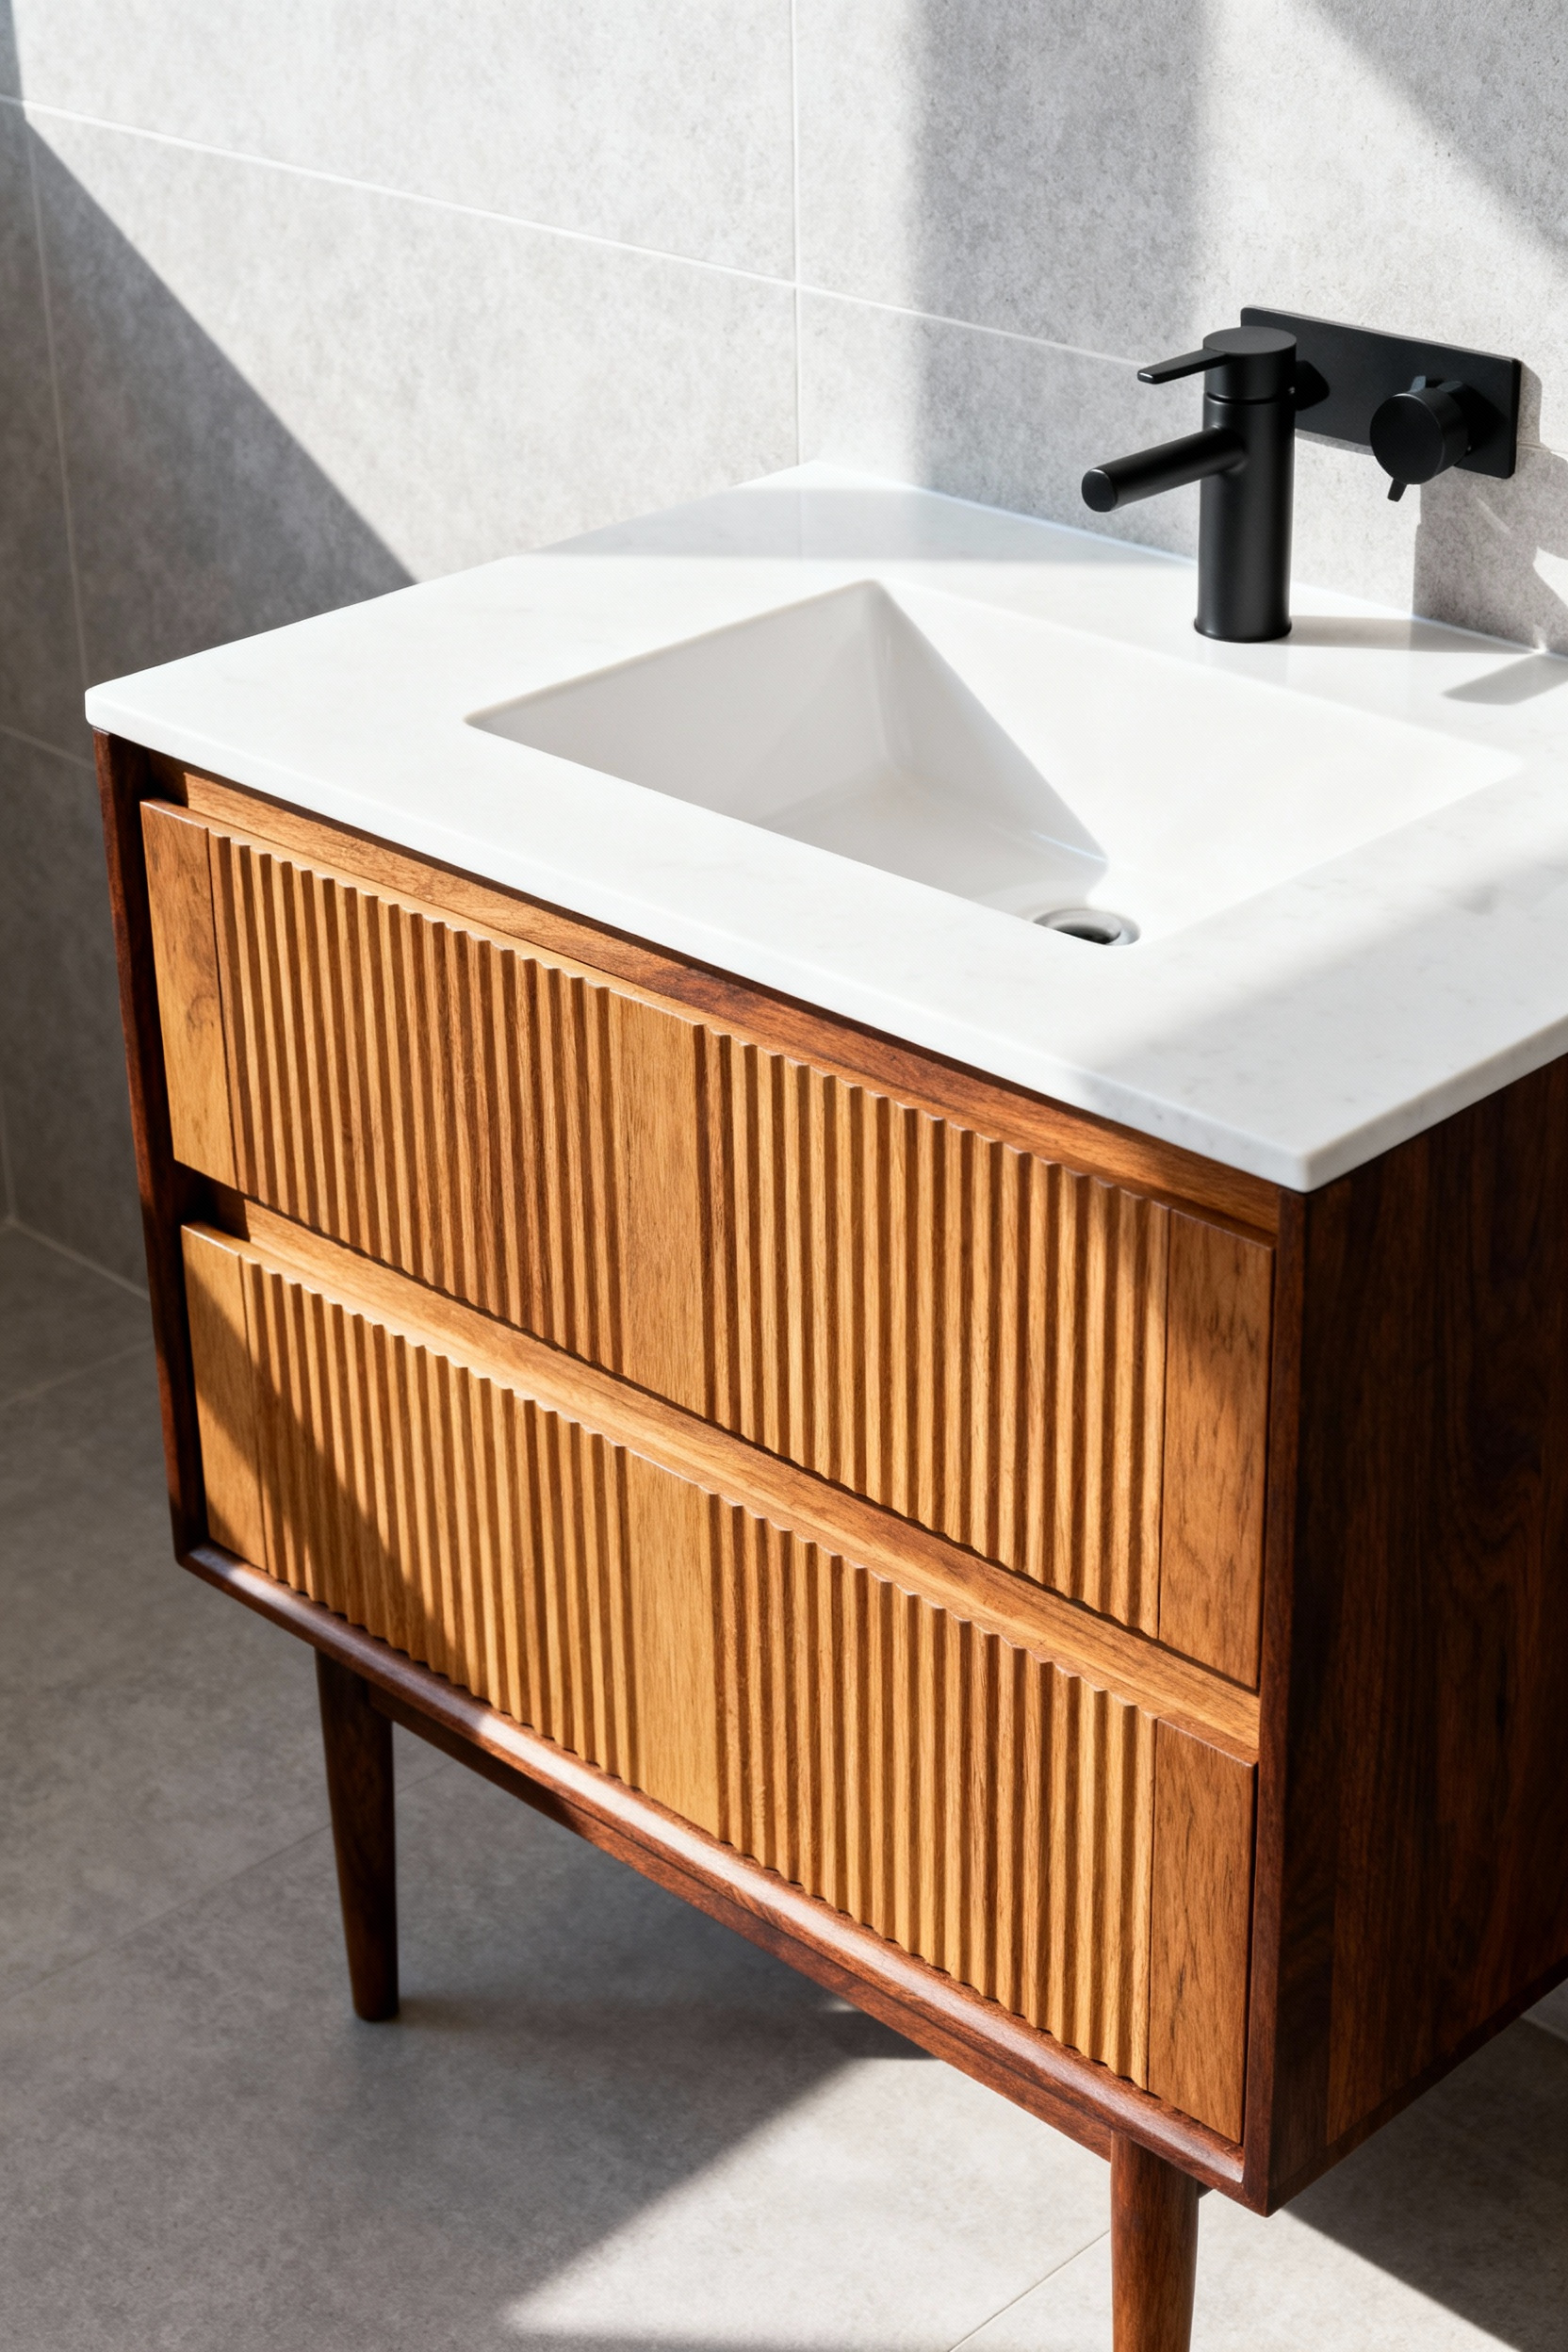
5. Elevating the Box: Adding Tapered Legs to Stock Cabinets
Transform a generic, builder-grade box into a soulful, furniture-style vanity by swapping the clunky toe-kick for elegant tapered legs. This simple shift mimics the airy silhouettes of mid-century sideboards and saves a perfectly good cabinet from the landfill. First, liberate the frame by carefully removing or trimming the existing base skirt. Since stock cabinets often rely on flimsy particleboard, you must reinforce the structure before attaching anything. Secure solid wood blocks inside the bottom corners to create a sturdy, reliable anchor for your new hardware.
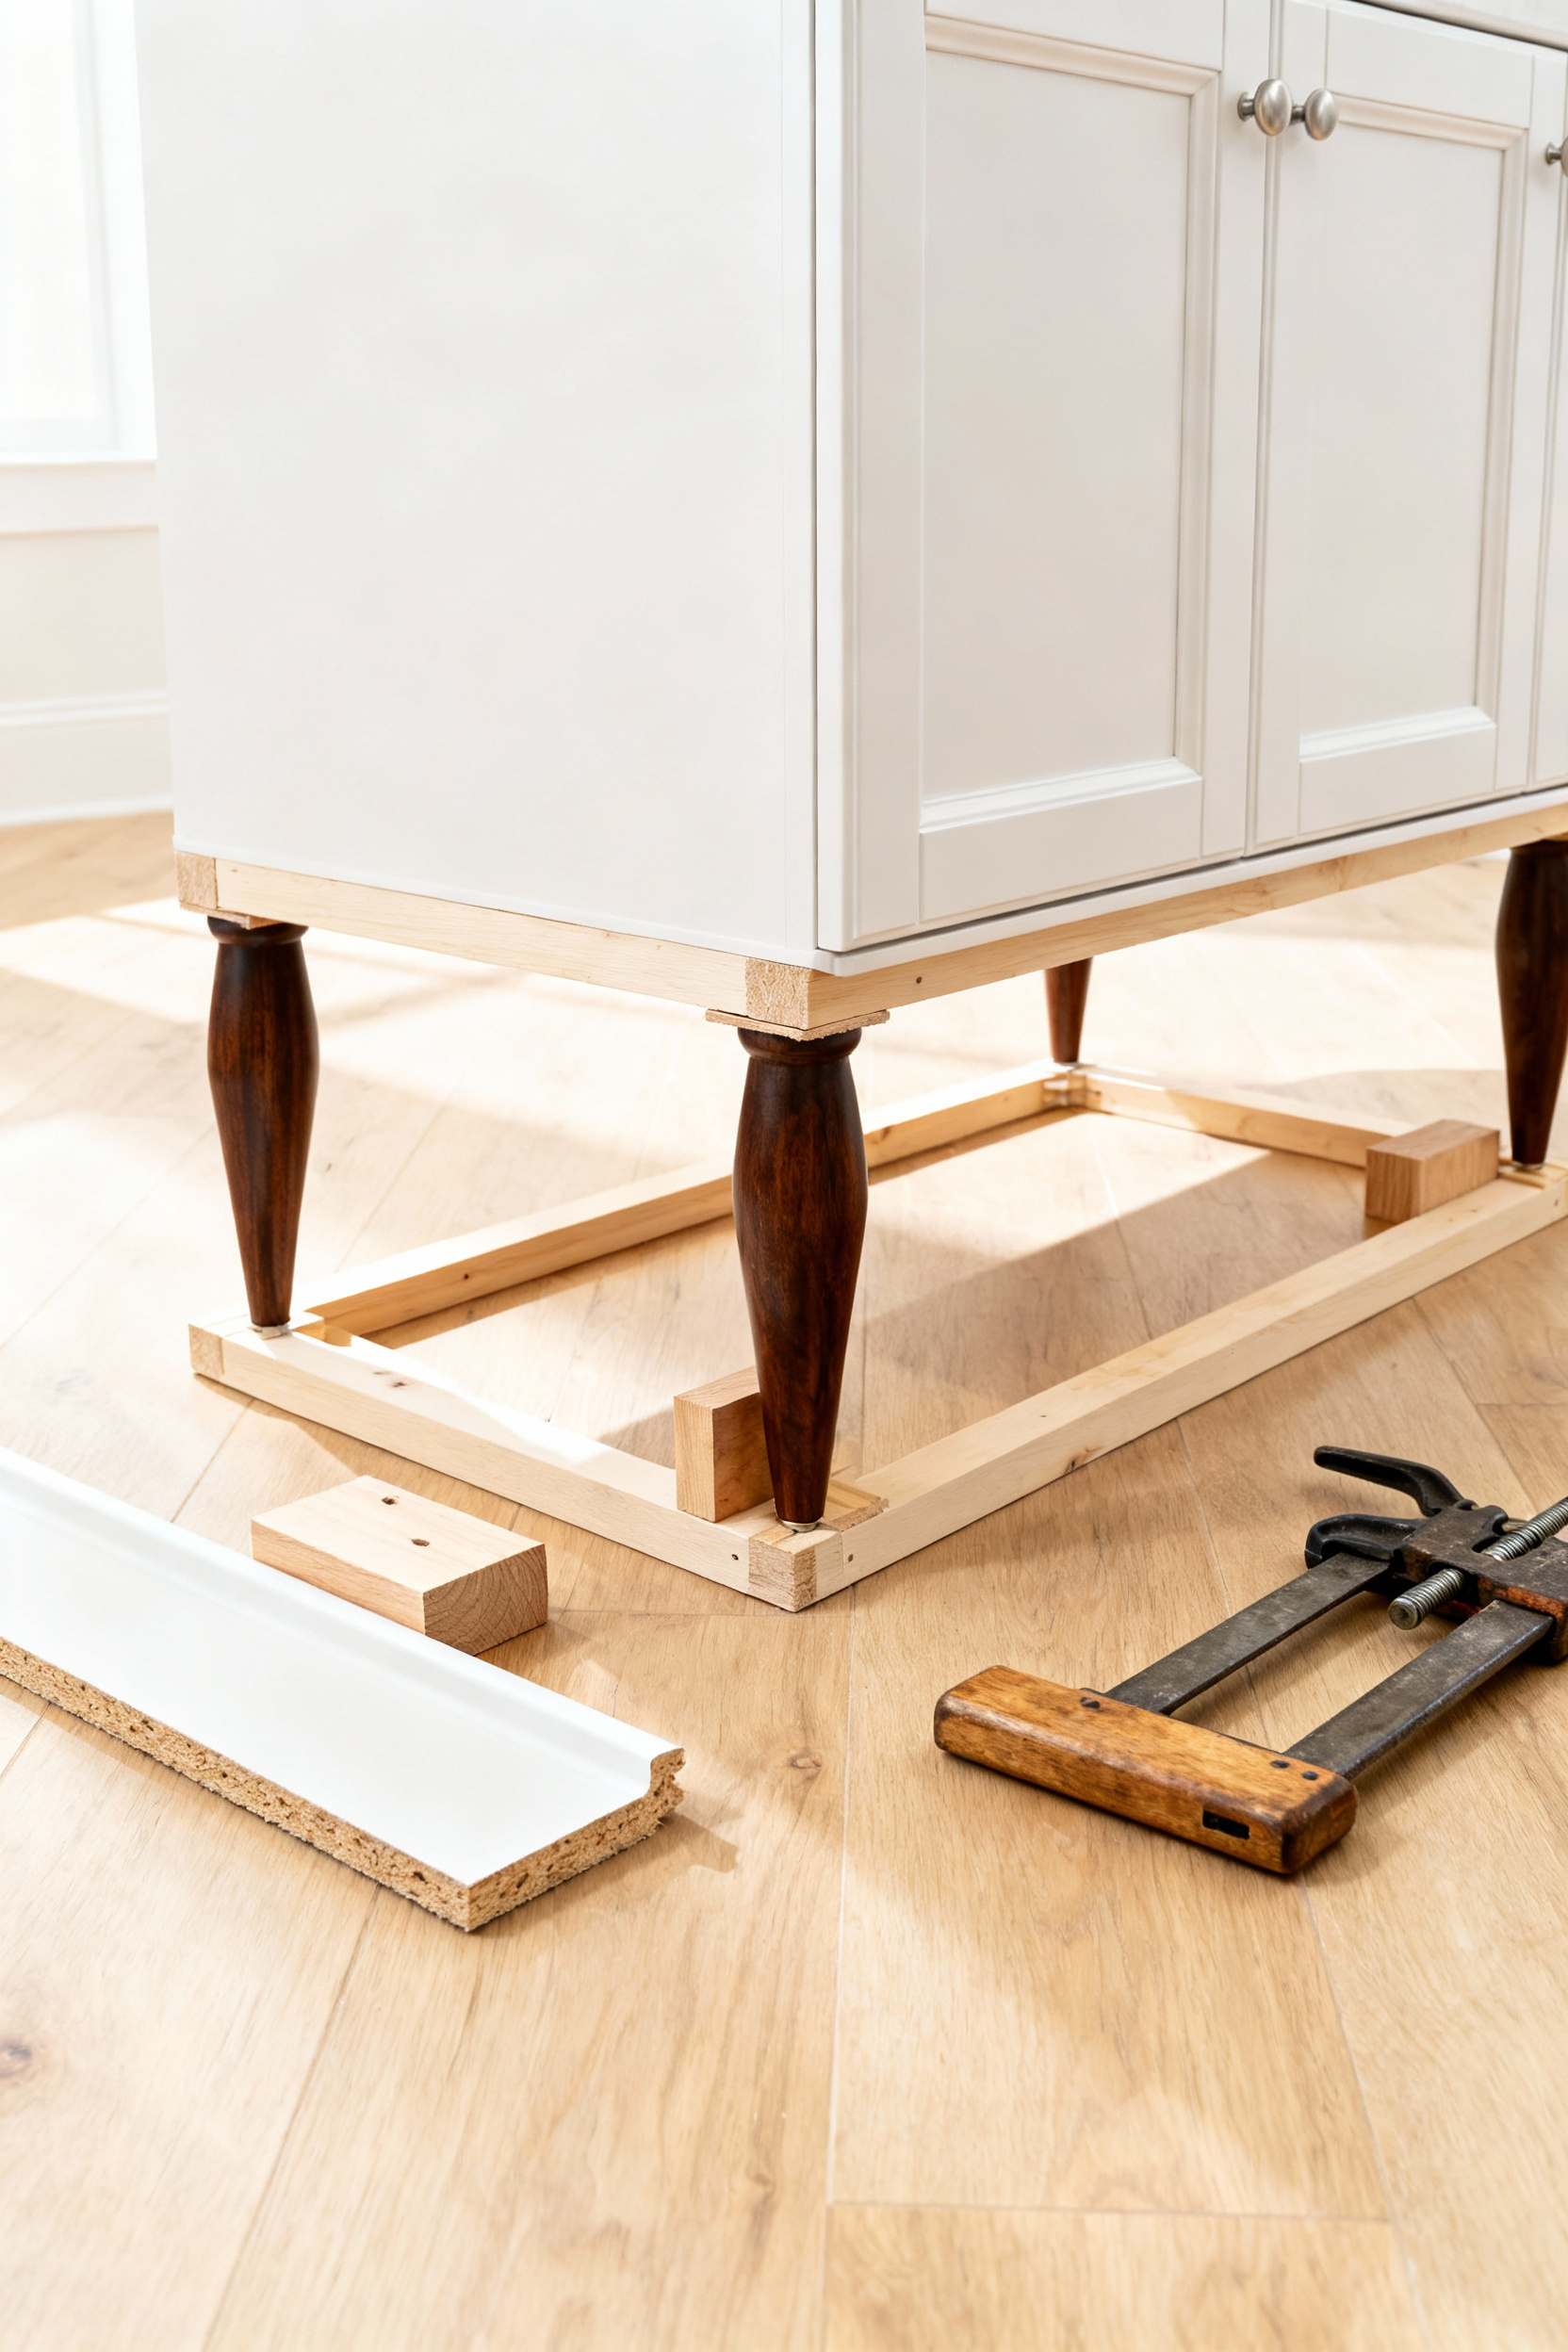
Next, select legs that honor your design vision. I often hunt for warm walnut tapered legs to evoke a nostalgic 1950s charm, though brushed brass offers a sleek, modern contrast. However, ensure your restoration meets practical needs:
- Mind the plumbing: Confirm the total height aligns with your existing P-trap and keeps the sink accessible.
- Level the ground: Choose legs with adjustable feet to compensate for the charming quirks of uneven vintage tile.
By elevating the cabinet, you expand the visual floor space and turn a utilitarian object into a custom, sustainable heirloom.
6. Texture Integration: Applying Cane Webbing or Fluting to Flat Doors
Don’t discard those plain vanity doors; reimagine them. Adding texture transforms mass-produced furniture into bespoke, sustainable heirlooms. For a nostalgic mid-century touch, I swear by cane webbing. This method requires a hollow frame, so carefully cut out the center panel of your door first. Then, always soak the cane in warm water for 20–30 minutes before stapling it to the back. This crucial step ensures the material shrinks as it dries, creating a drum-tight, professional finish that won’t sag over time.
Alternatively, embrace the architectural drama of fluting. This adds weight and warmth to flat surfaces without structural surgery. Simply glue half-dowels directly to the door face using construction adhesive. However, meticulous planning prevents headaches later:
- Dry-fit your dowels before applying any glue to verify spacing.
- Check hardware alignment so your pulls land on the center of a dowel, not awkwardly over a seam.
- Secure temporarily with a brad nailer while the adhesive cures.
This attention to detail honors the craftsmanship of the past while customizing your space for the future.
Phase II: Structural Evolution (Intermediate Skills)
Don’t toss that solid wood cabinet frame into the landfill. Good bones are rare, so preserve the structure while reinventing the skin. Refacing doors and drawer fronts offers the highest sustainable return on investment. I once rescued a battered mid-century vanity by simply swapping chipped veneer fronts for sleek, fluted oak. It saved the piece and kept fifty pounds of lumber out of the trash. You need basic carpentry skills here: measure twice, cut once, and use a jig for precise hinge placement. The result feels custom, not generic.
Next, elevate the daily experience. Swap the tired laminate countertop for a stone remnant or butcher block to anchor the design. This requires disconnecting the water supply and P-trap, but the visual payoff is immense. Finally, integrate functional upgrades to match the new look:
- Install soft-close hinges to eliminate jarring slams and protect the frame.
- Apply architectural trim, like beadboard or lattice, to add tactile character.
- Fit an undermount sink for a seamless, modern profile.
7. The Countertop Swap: Hunting for Stone Remnants at Local Yards
Forget the pristine showroom and head straight for the “boneyard” behind your local stone fabricator. These dusty aisles hold high-end remnants—leftovers from massive kitchen projects—waiting for a second life in your powder room. By choosing a remnant, you divert waste from landfills and secure luxury materials like Carrara marble or soapstone for 40% to 70% less than a full slab. I recently rescued a jagged piece of terrazzo that, once cut and polished, became the crowning jewel on a restored mid-century teak vanity. It brings history and sustainability together in one beautiful gesture.
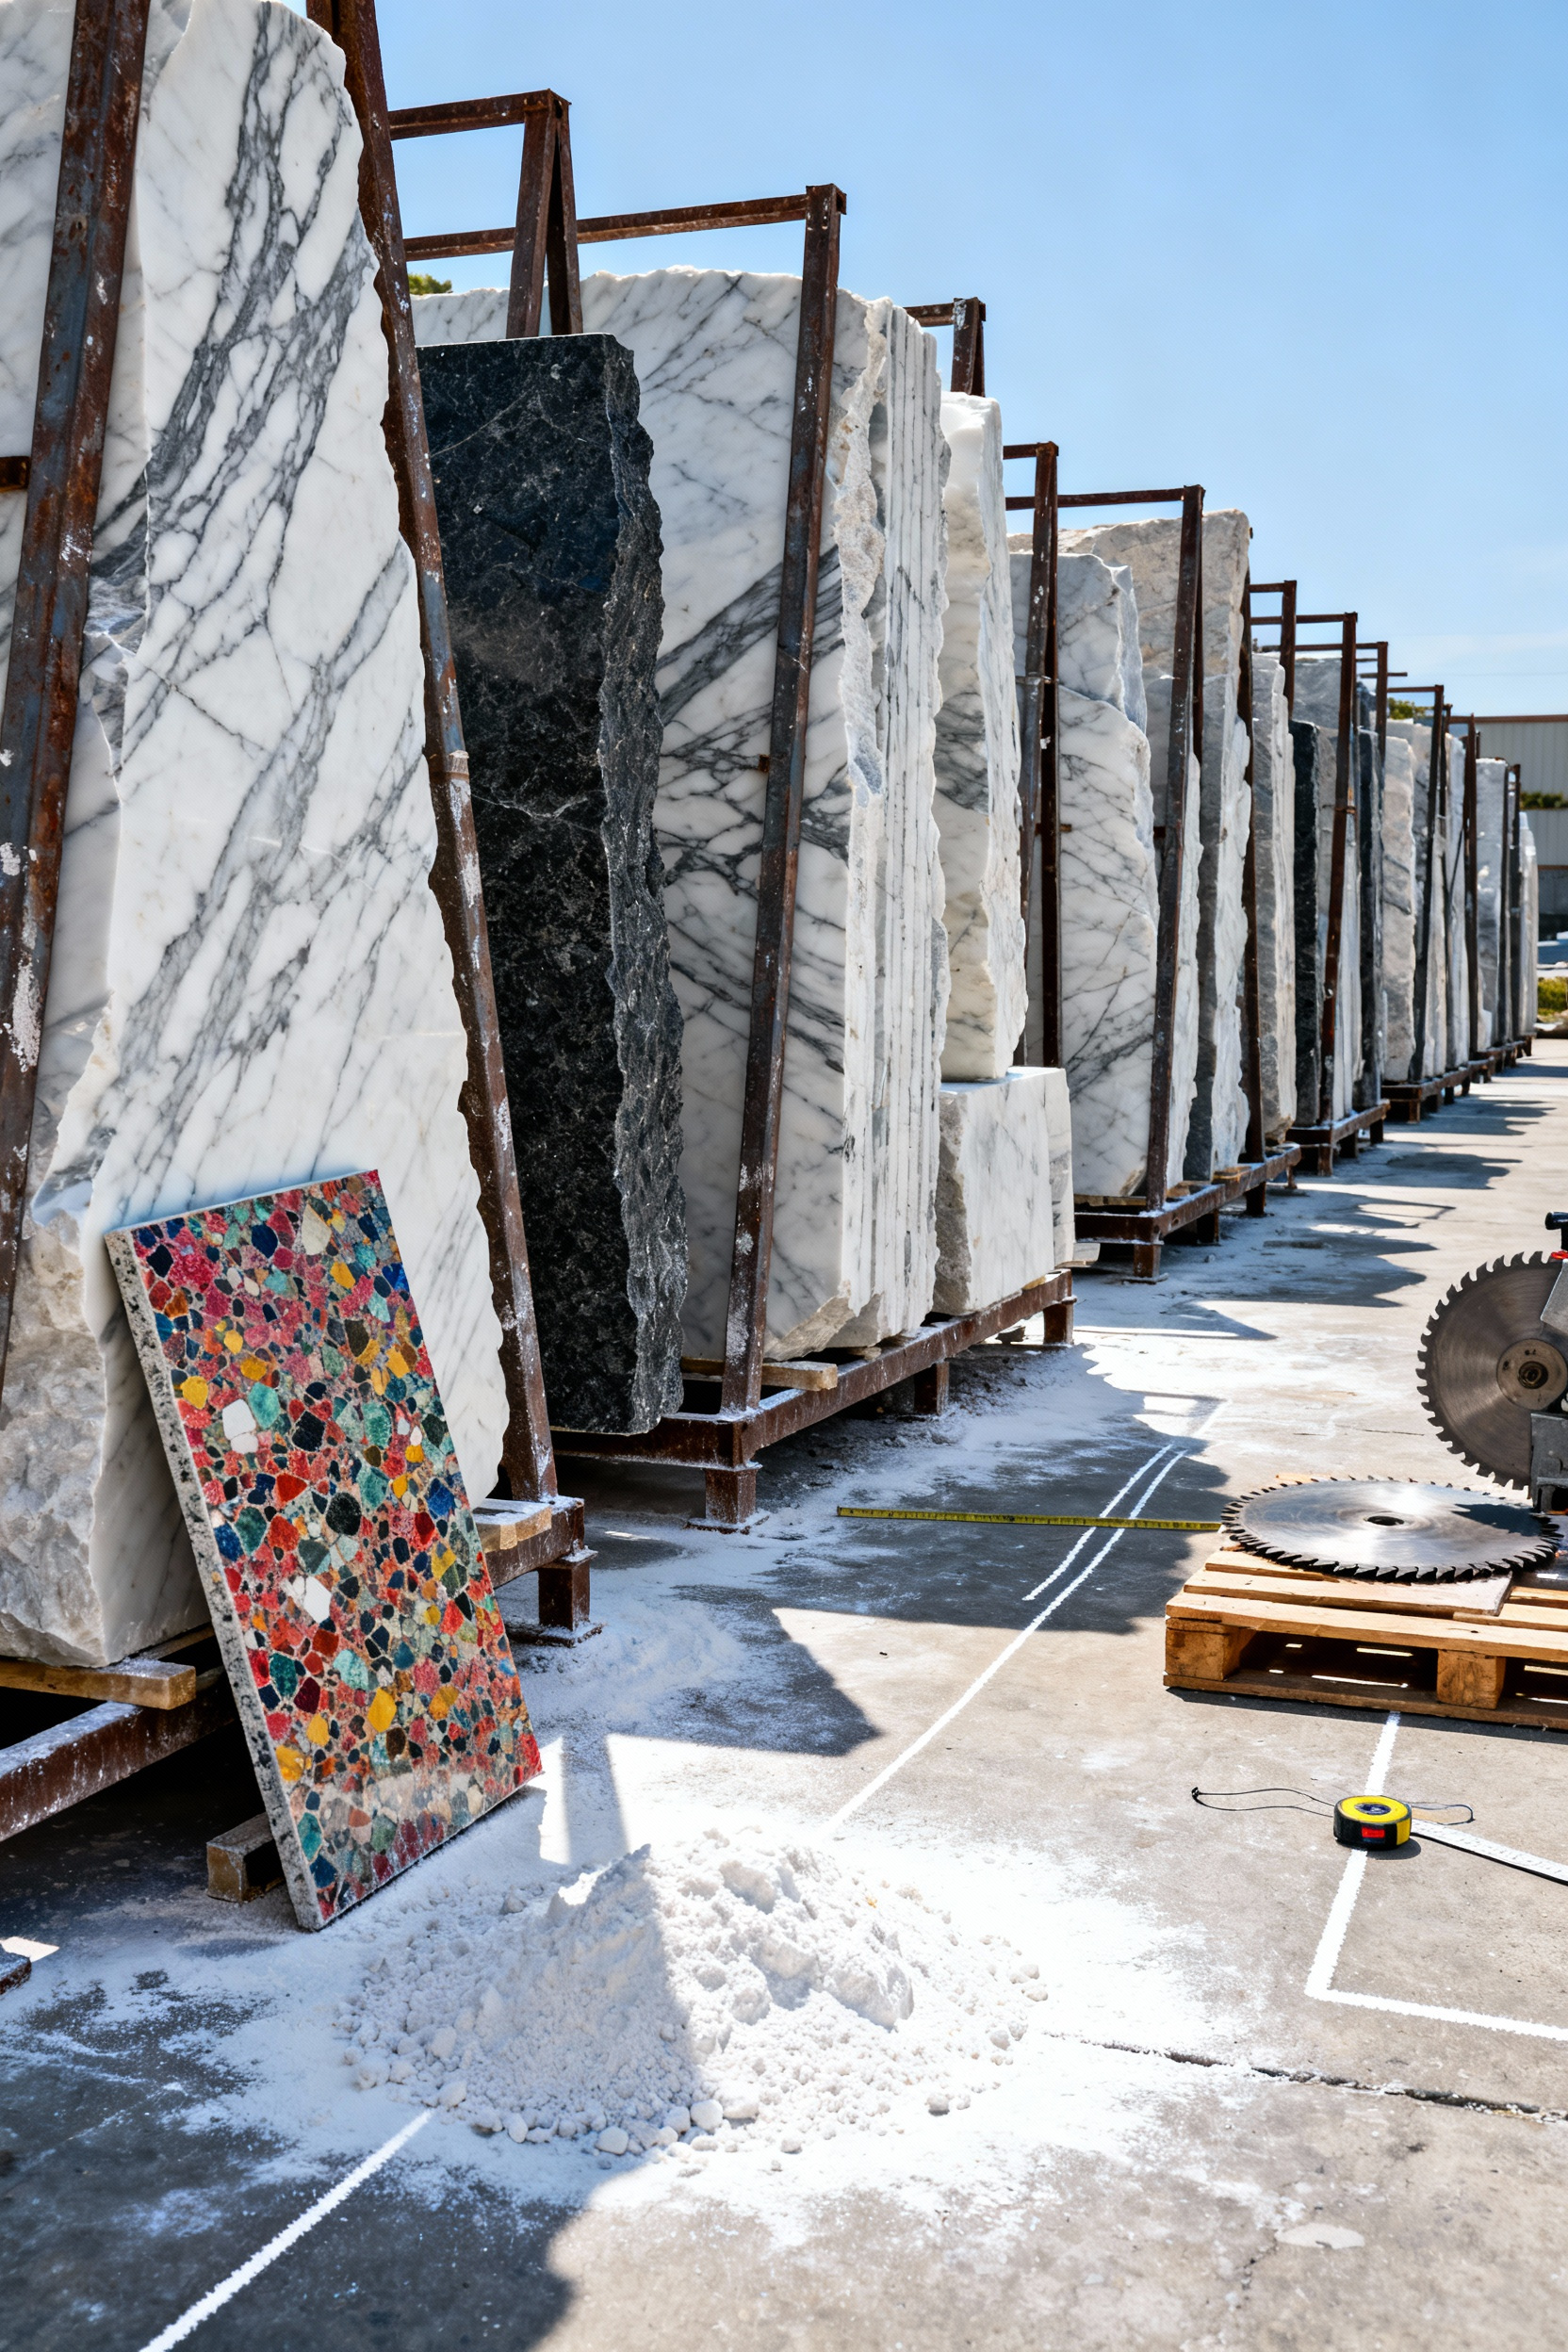
Success favors the prepared hunter, so arrive ready to claim your prize immediately.
- Bring your numbers: Carry exact dimensions and know your sink type (undermount vs. drop-in) to determine fit instantly.
- Check the finish: Inspect the slab closely for chips or fissures that fabrication can’t hide.
- Confirm the cut: Ask specifically about fabrication and edge profile costs, as these labor fees come on top of the stone price.
With a little digging, you transform industrial waste into a bespoke design statement.
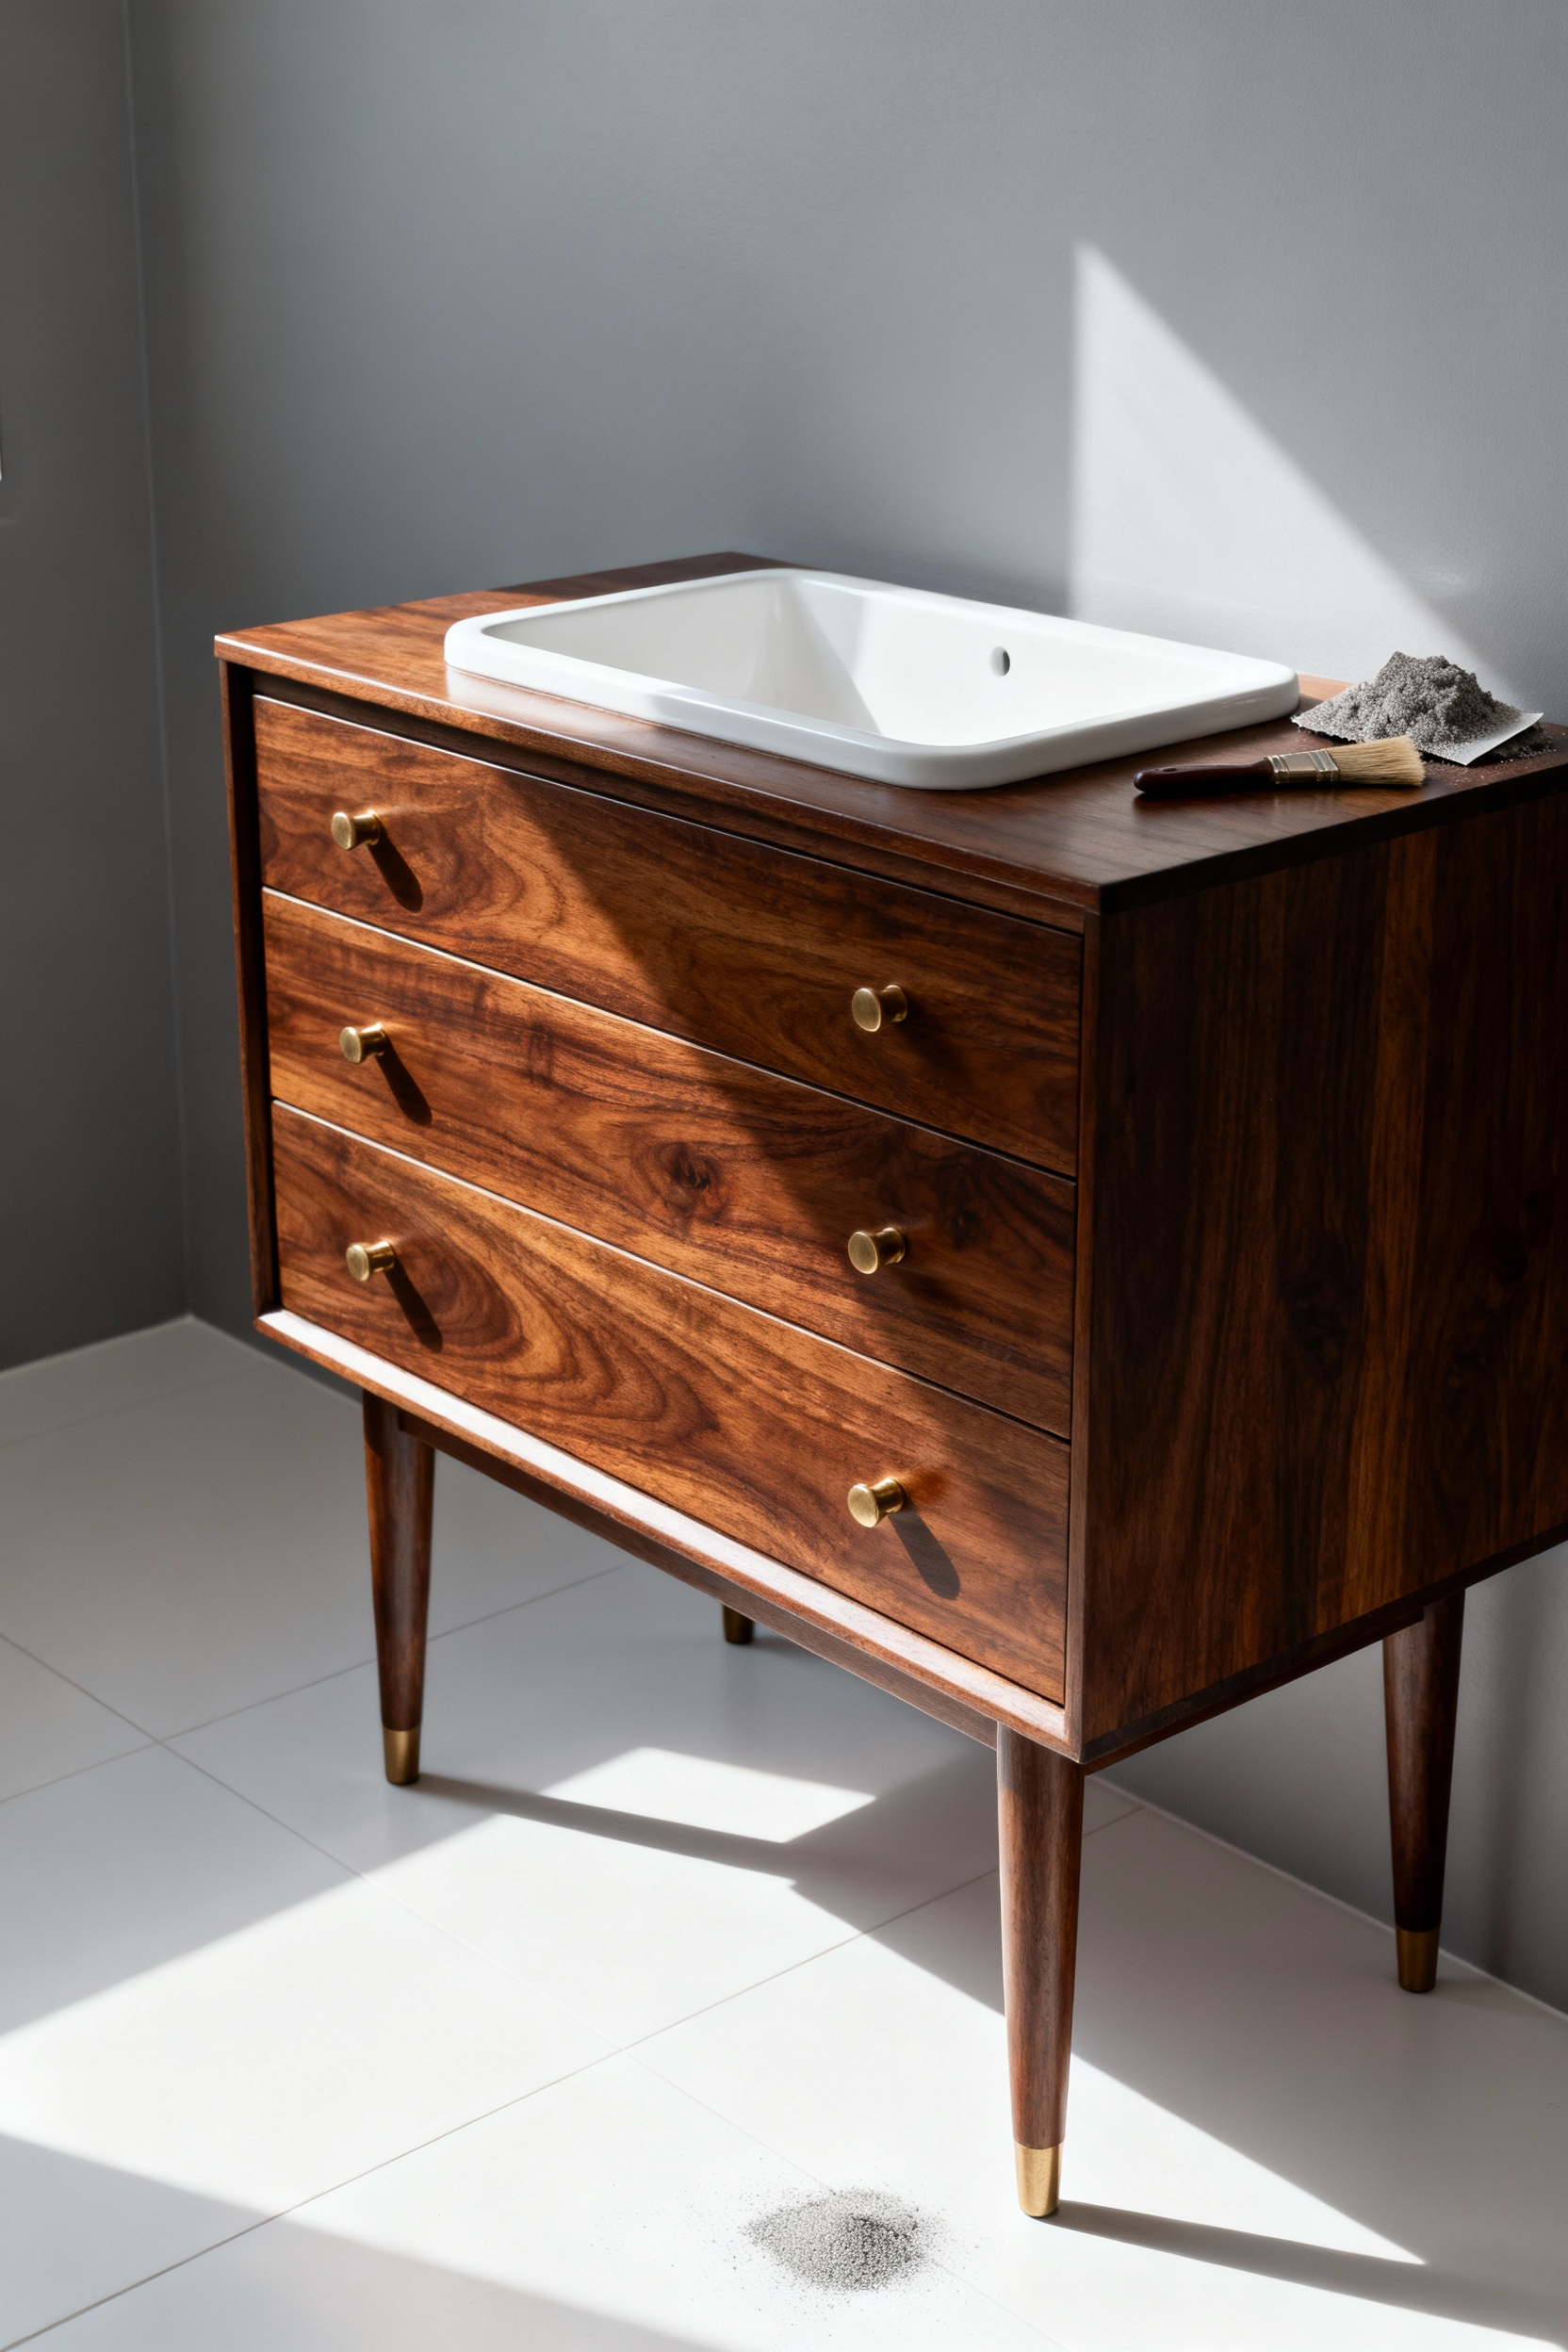
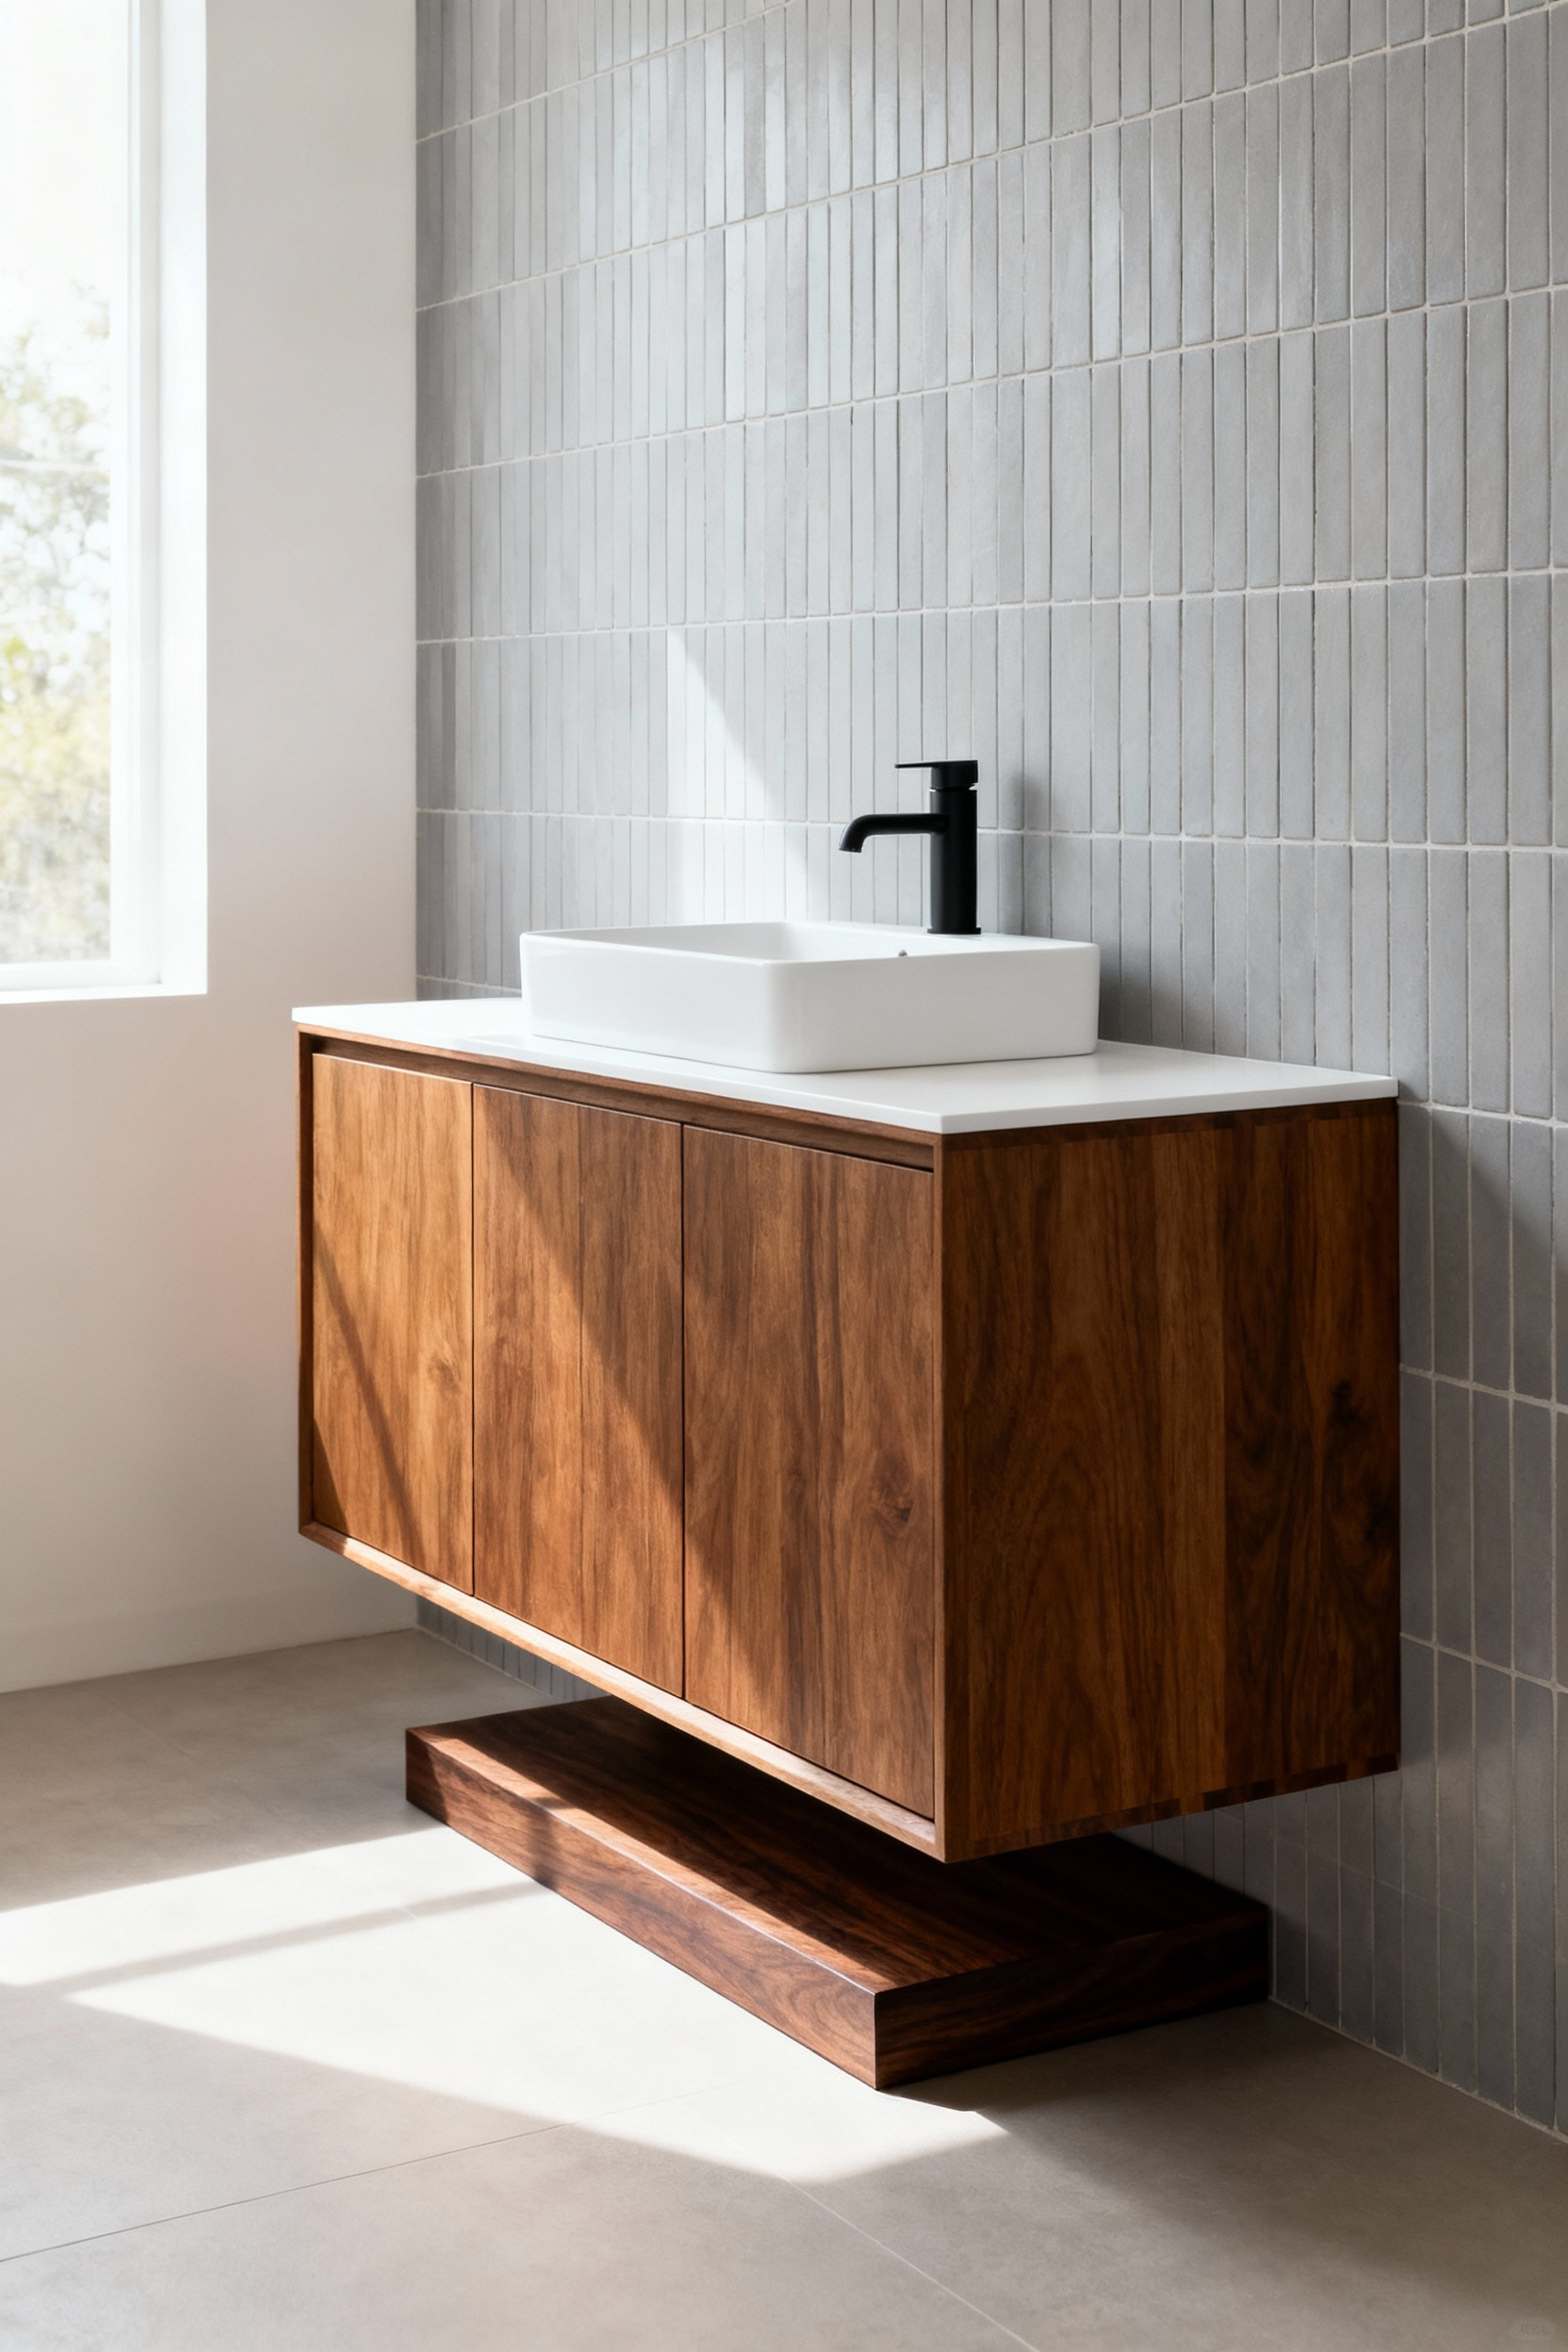
8. Sink Selection: Pairing Modern Vessels with Vintage Silhouettes
There is a distinct thrill in rescuing a discarded low-boy dresser and reimagining it as a high-end vanity. By mounting a modern vessel sink on top, you effortlessly bridge the gap between history and modern utility. This pairing thrives on contrast. Choose a crisp, white ceramic rectangle or a sleek concrete bowl to offset the swooping, ornate lines of a vintage piece. This artistic juxtaposition prevents the cabinet from looking dated and transforms a thrifted find into a sustainable, sculptural focal point.
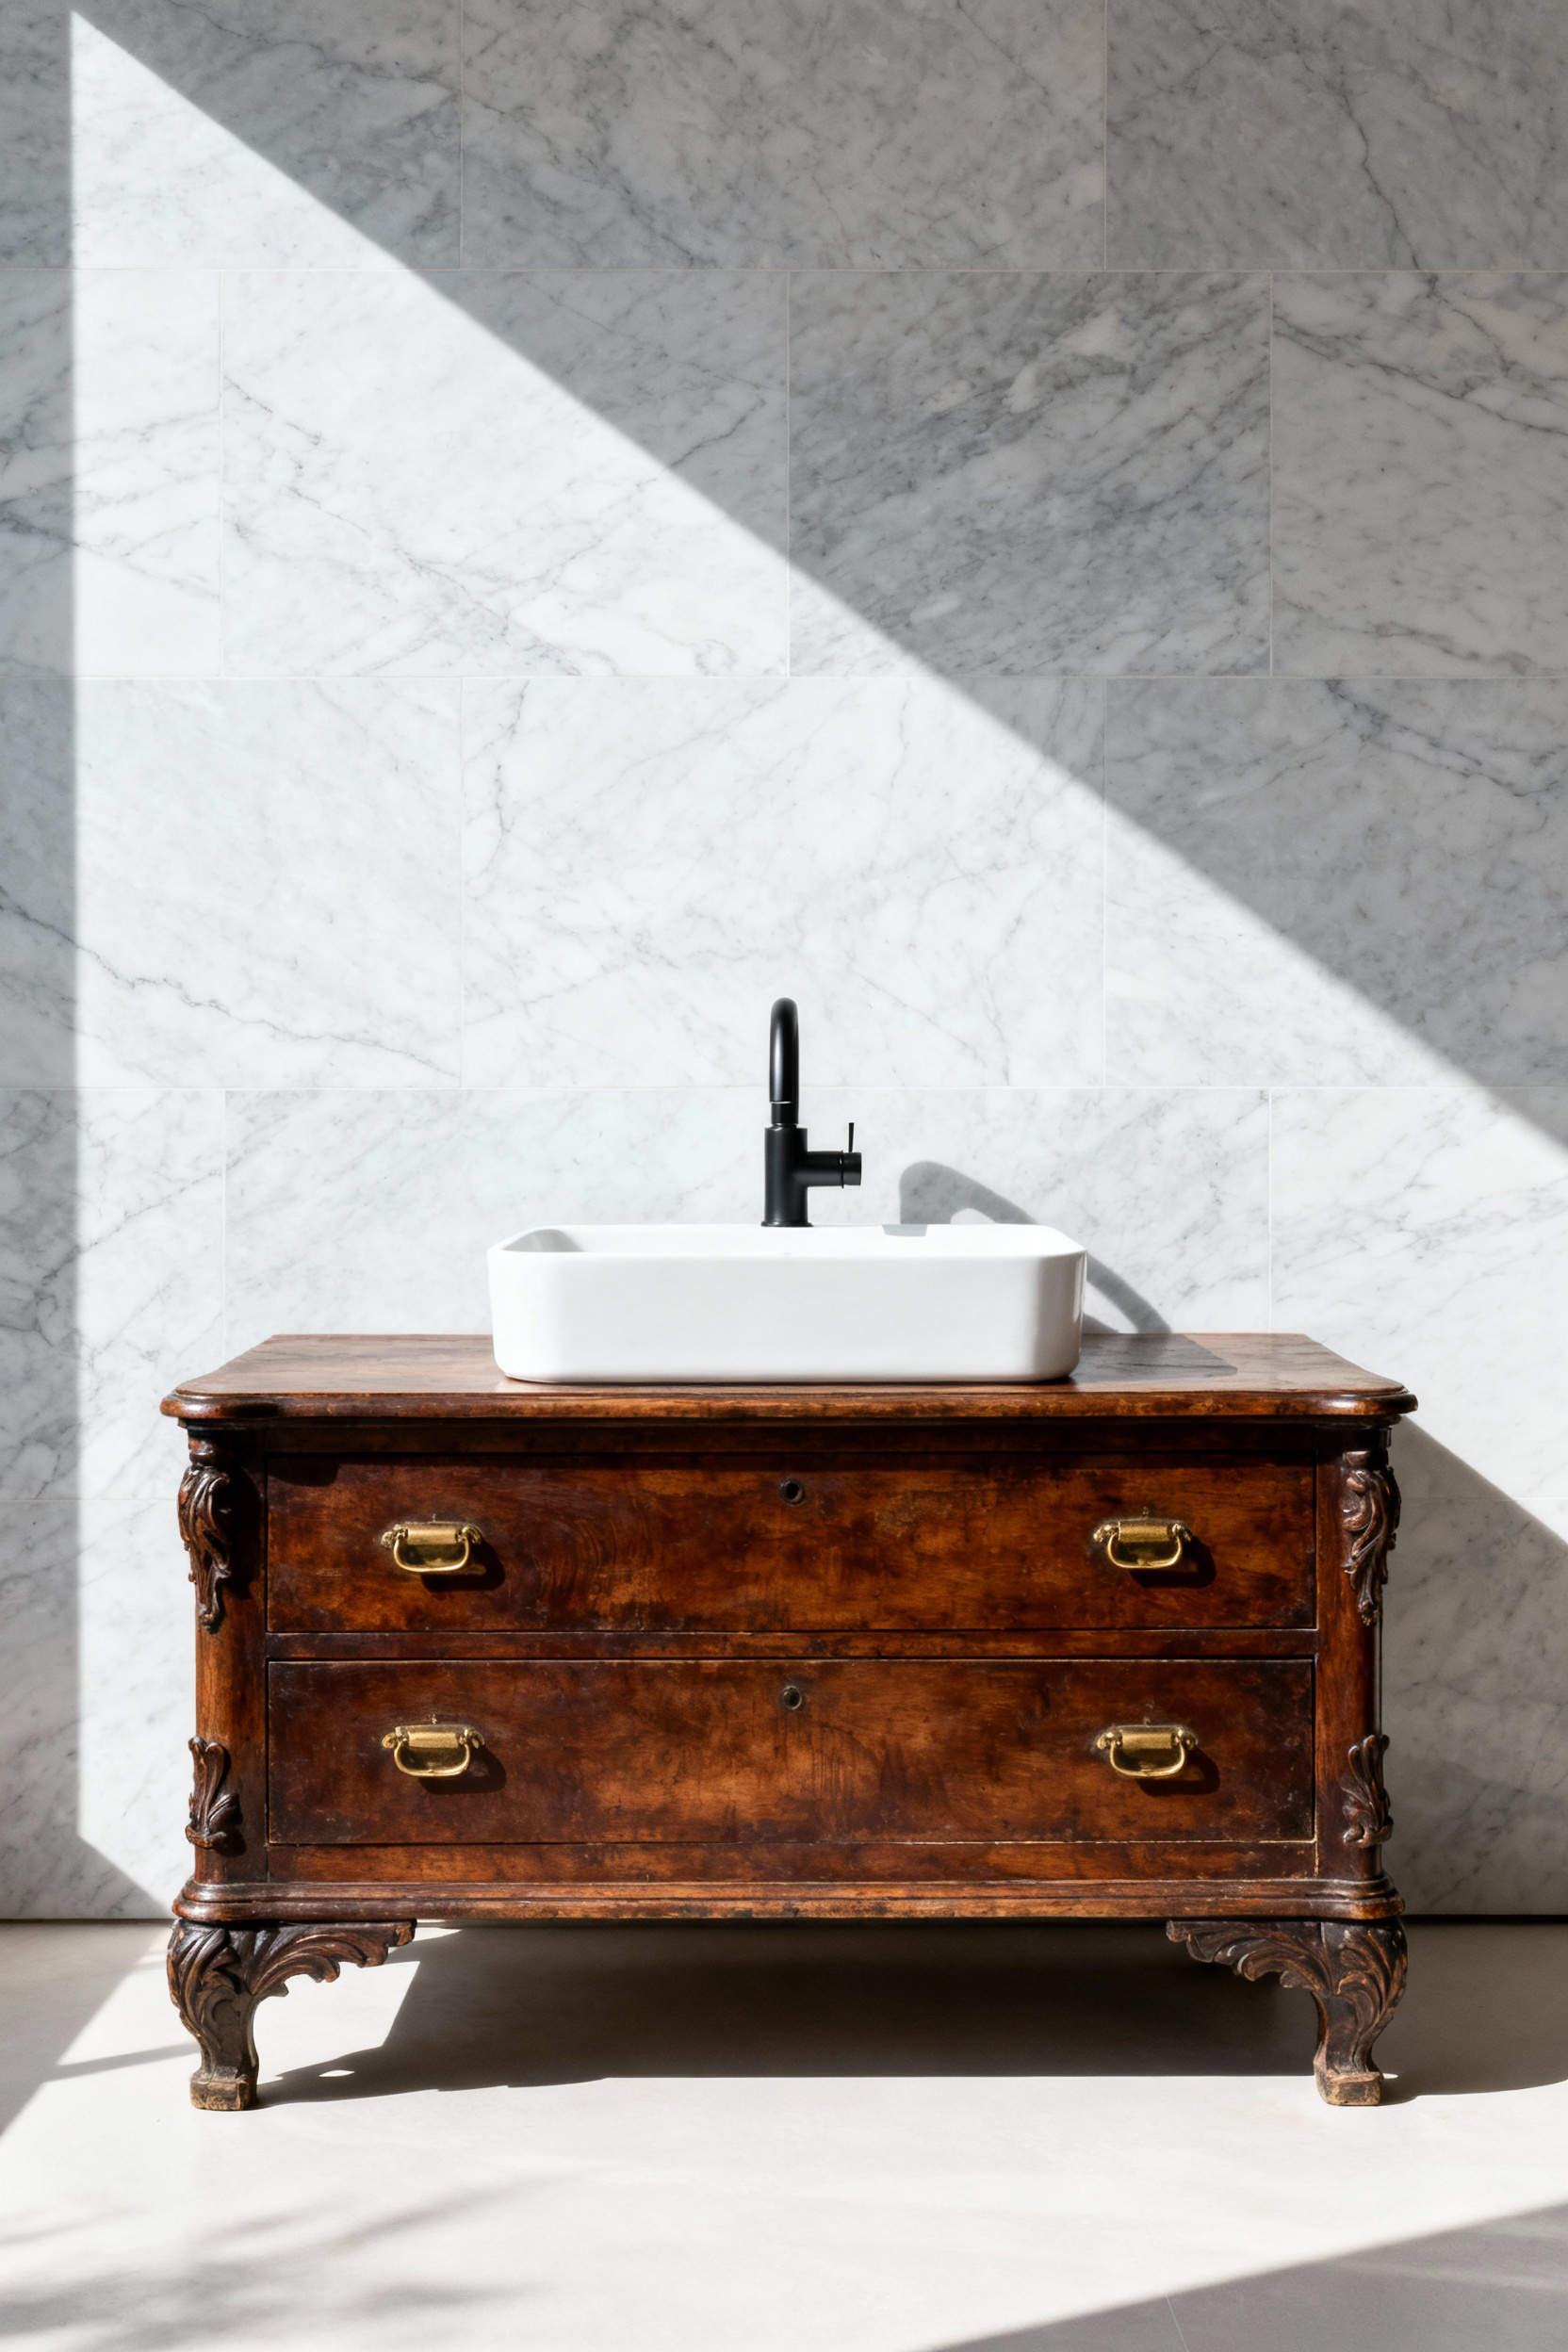
However, you must prioritize geometry over aesthetics to ensure comfort. Since vessel sinks sit entirely above the counter, the underlying cabinet height is critical.
- Hunt for shorter cabinets: Seek out vintage chests standing 30–32 inches tall; adding a 5-inch vessel brings the final rim height to a standard, comfortable 35-36 inches.
- Select the right spout: Install a tall, single-hole vessel faucet or a wall-mount fixture to clear the high rim of the bowl.
- Unify the eras: Coordinate your modern faucet finish, such as matte black or brushed gold, with the vanity’s original or updated drawer pulls.
By crunching these numbers early, you save a piece of design history without sacrificing ergonomics.
9. Faucet Fixtures: When to Restore Plating vs. Buying Reproduction
Don’t toss that tarnished spout just yet; the satisfying weight of an original mid-century fixture often signifies a quality of solid brass rarely found in today’s budget aisles. I always urge homeowners to rescue these historical gems, but you must weigh nostalgic charm against practicality. First, inspect the “guts” of the faucet. If the internal cartridges are obsolete or the antique valves can’t handle high modern water pressure, a high-quality reproduction ensures you won’t wake up to leaks. However, if the mechanics function well, professional replating offers a sustainable, cost-effective path to luxury.
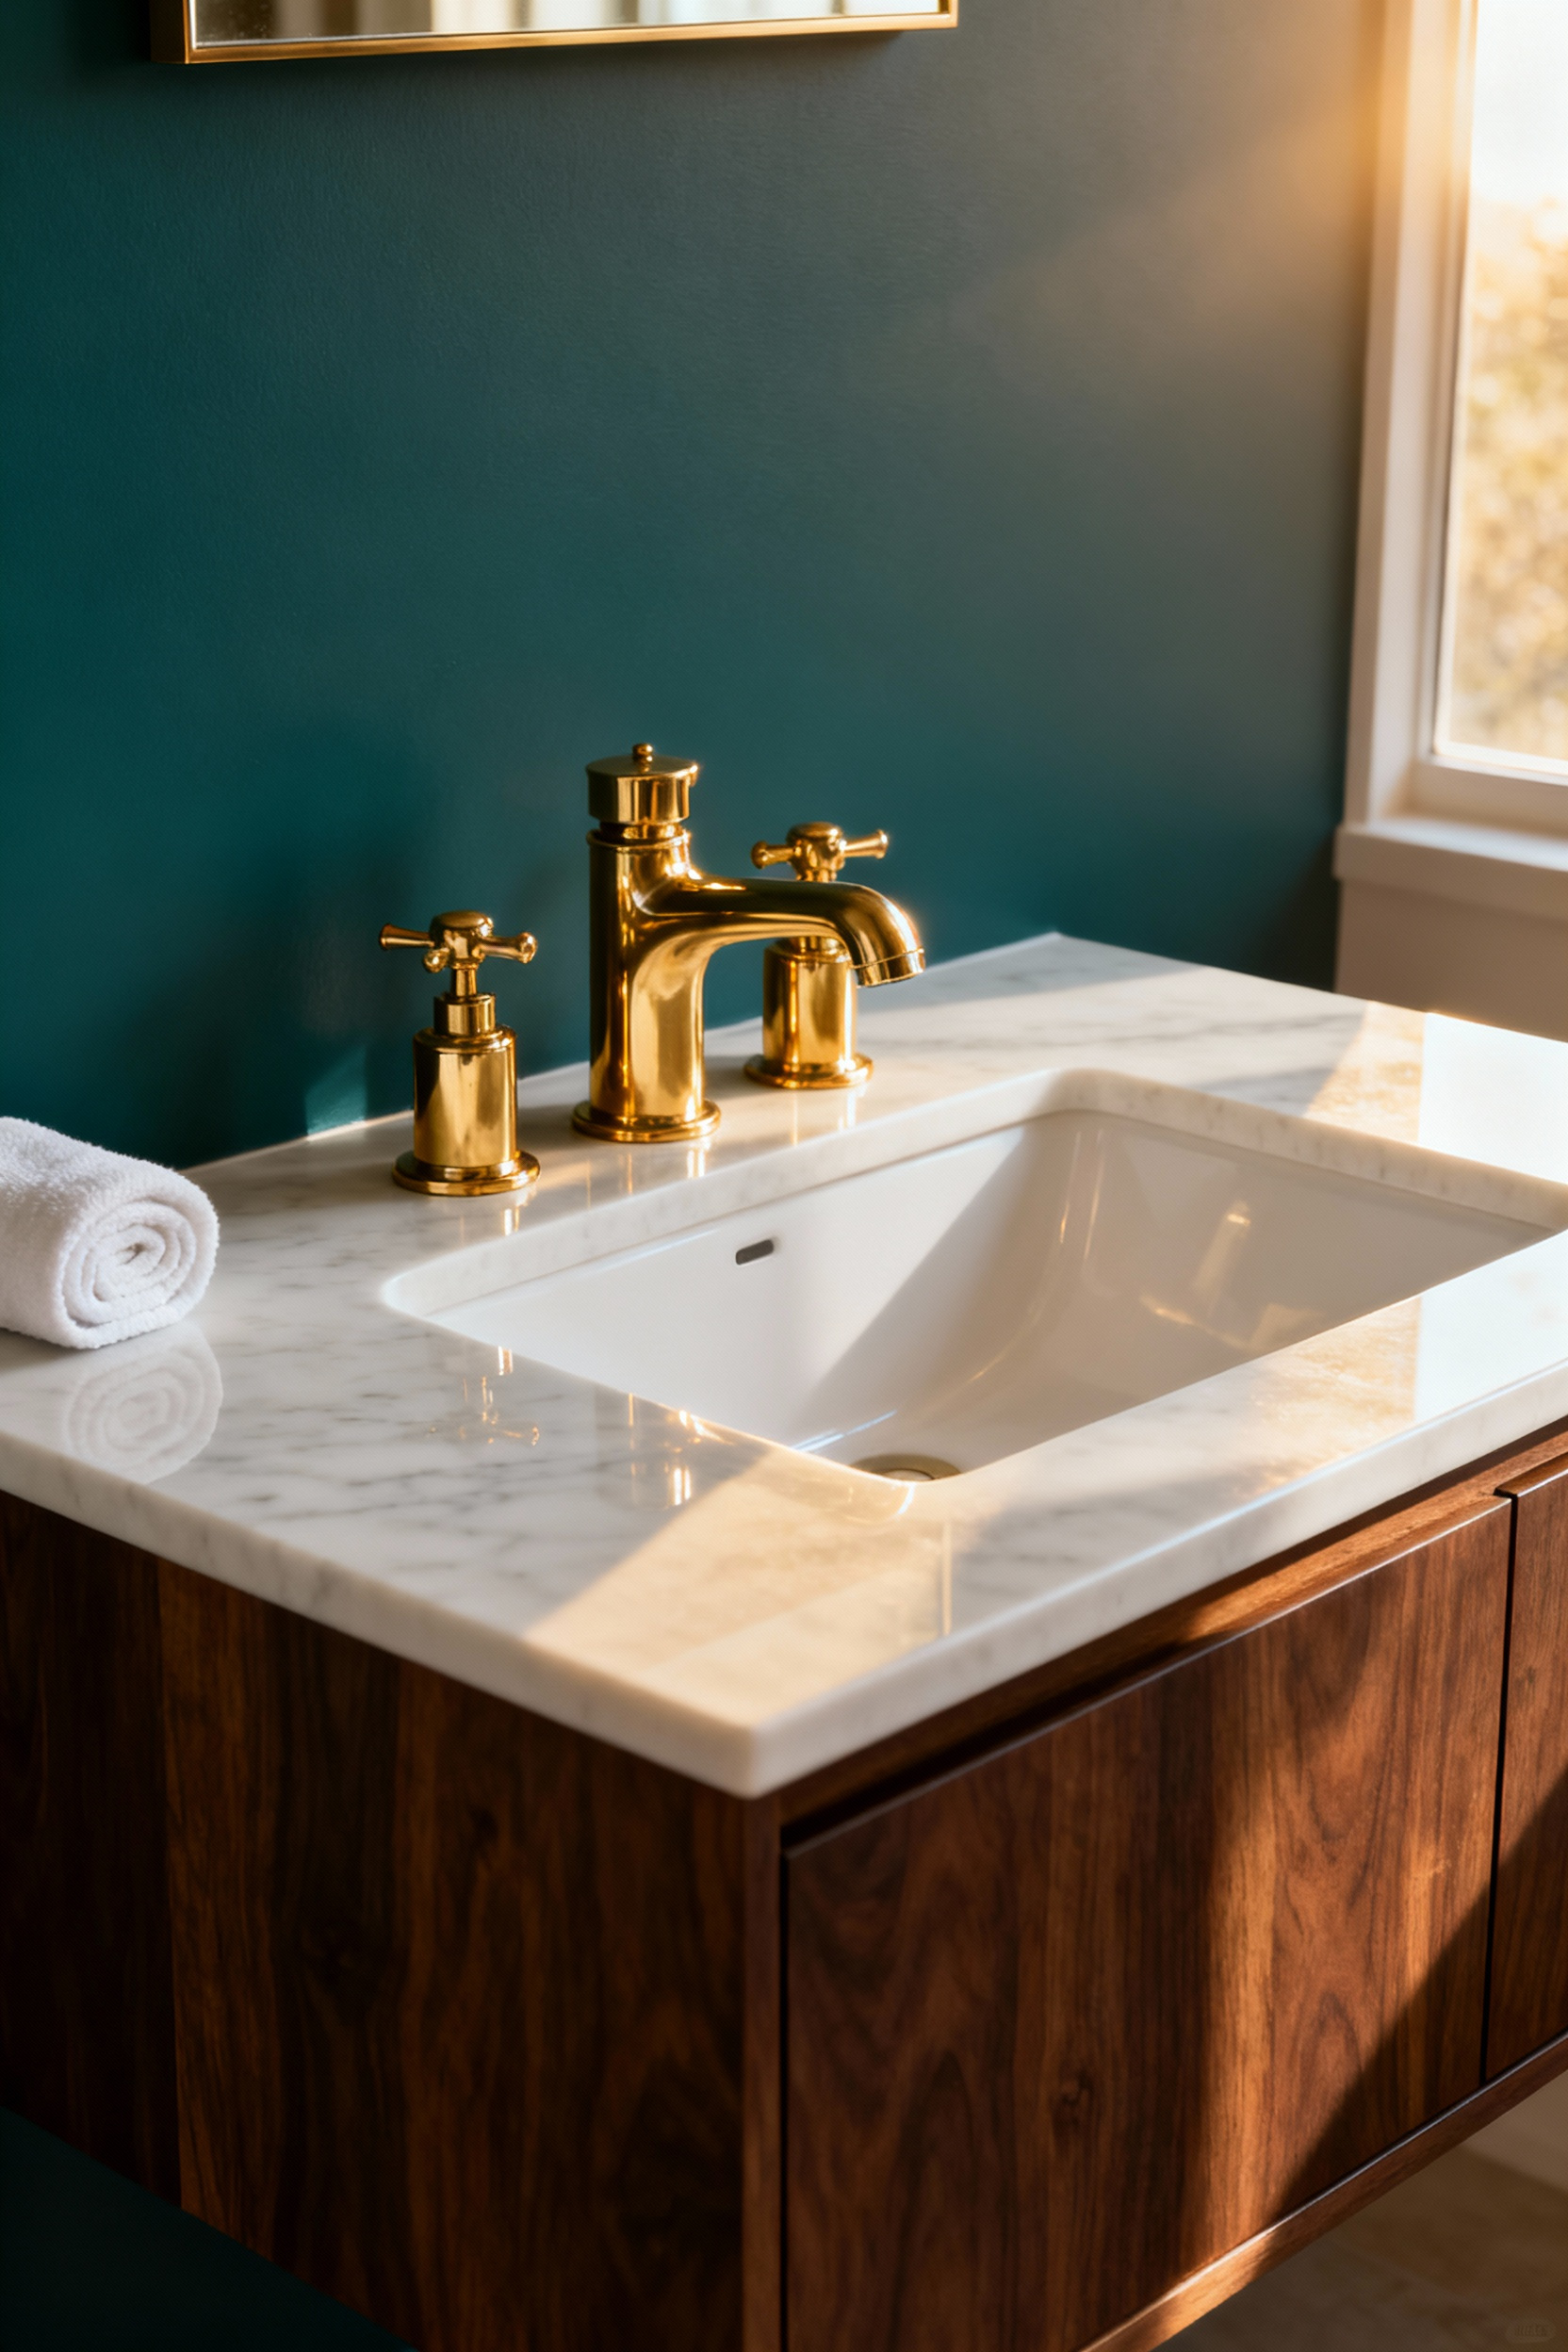
Consider restoring your vintage find instead of buying new when:
- You crave high-end finishes: Replating in gold or unlacquered brass typically costs $100–$500, saving you the thousands required for comparable luxury reproductions.
- The shape is unique: Rare, sculptural designs define a room’s character and are difficult to duplicate with generic modern stock.
- Durability matters: You want to avoid the waste of discarding solid metal components for plastic-filled replacements.
Finally, skip the DIY spray paint hacks. In a humid bathroom, paint peels quickly. Instead, invest in professional electroplating to seal the metal. This choice honors the design’s history while giving your vanity a durable, authentic piece of jewelry that withstands daily use.
10. Open Shelving Conversions: Removing Doors to Display Vintage Linens
Unhinge those tired cabinet doors to transform a standard vanity into a boutique display. This sustainable update reduces waste and highlights your hidden textile treasures. Since cabinet interiors often feature rough finishes, sand and paint the inside walls first to match the exterior. You can even apply a peel-and-stick wallpaper liner for a polished, custom-furniture feel. Crucially, you must conceal the unsightly plumbing. Construct a simple three-sided wooden box, paint it, and slide it over the P-trap to create a clean, distraction-free backdrop.
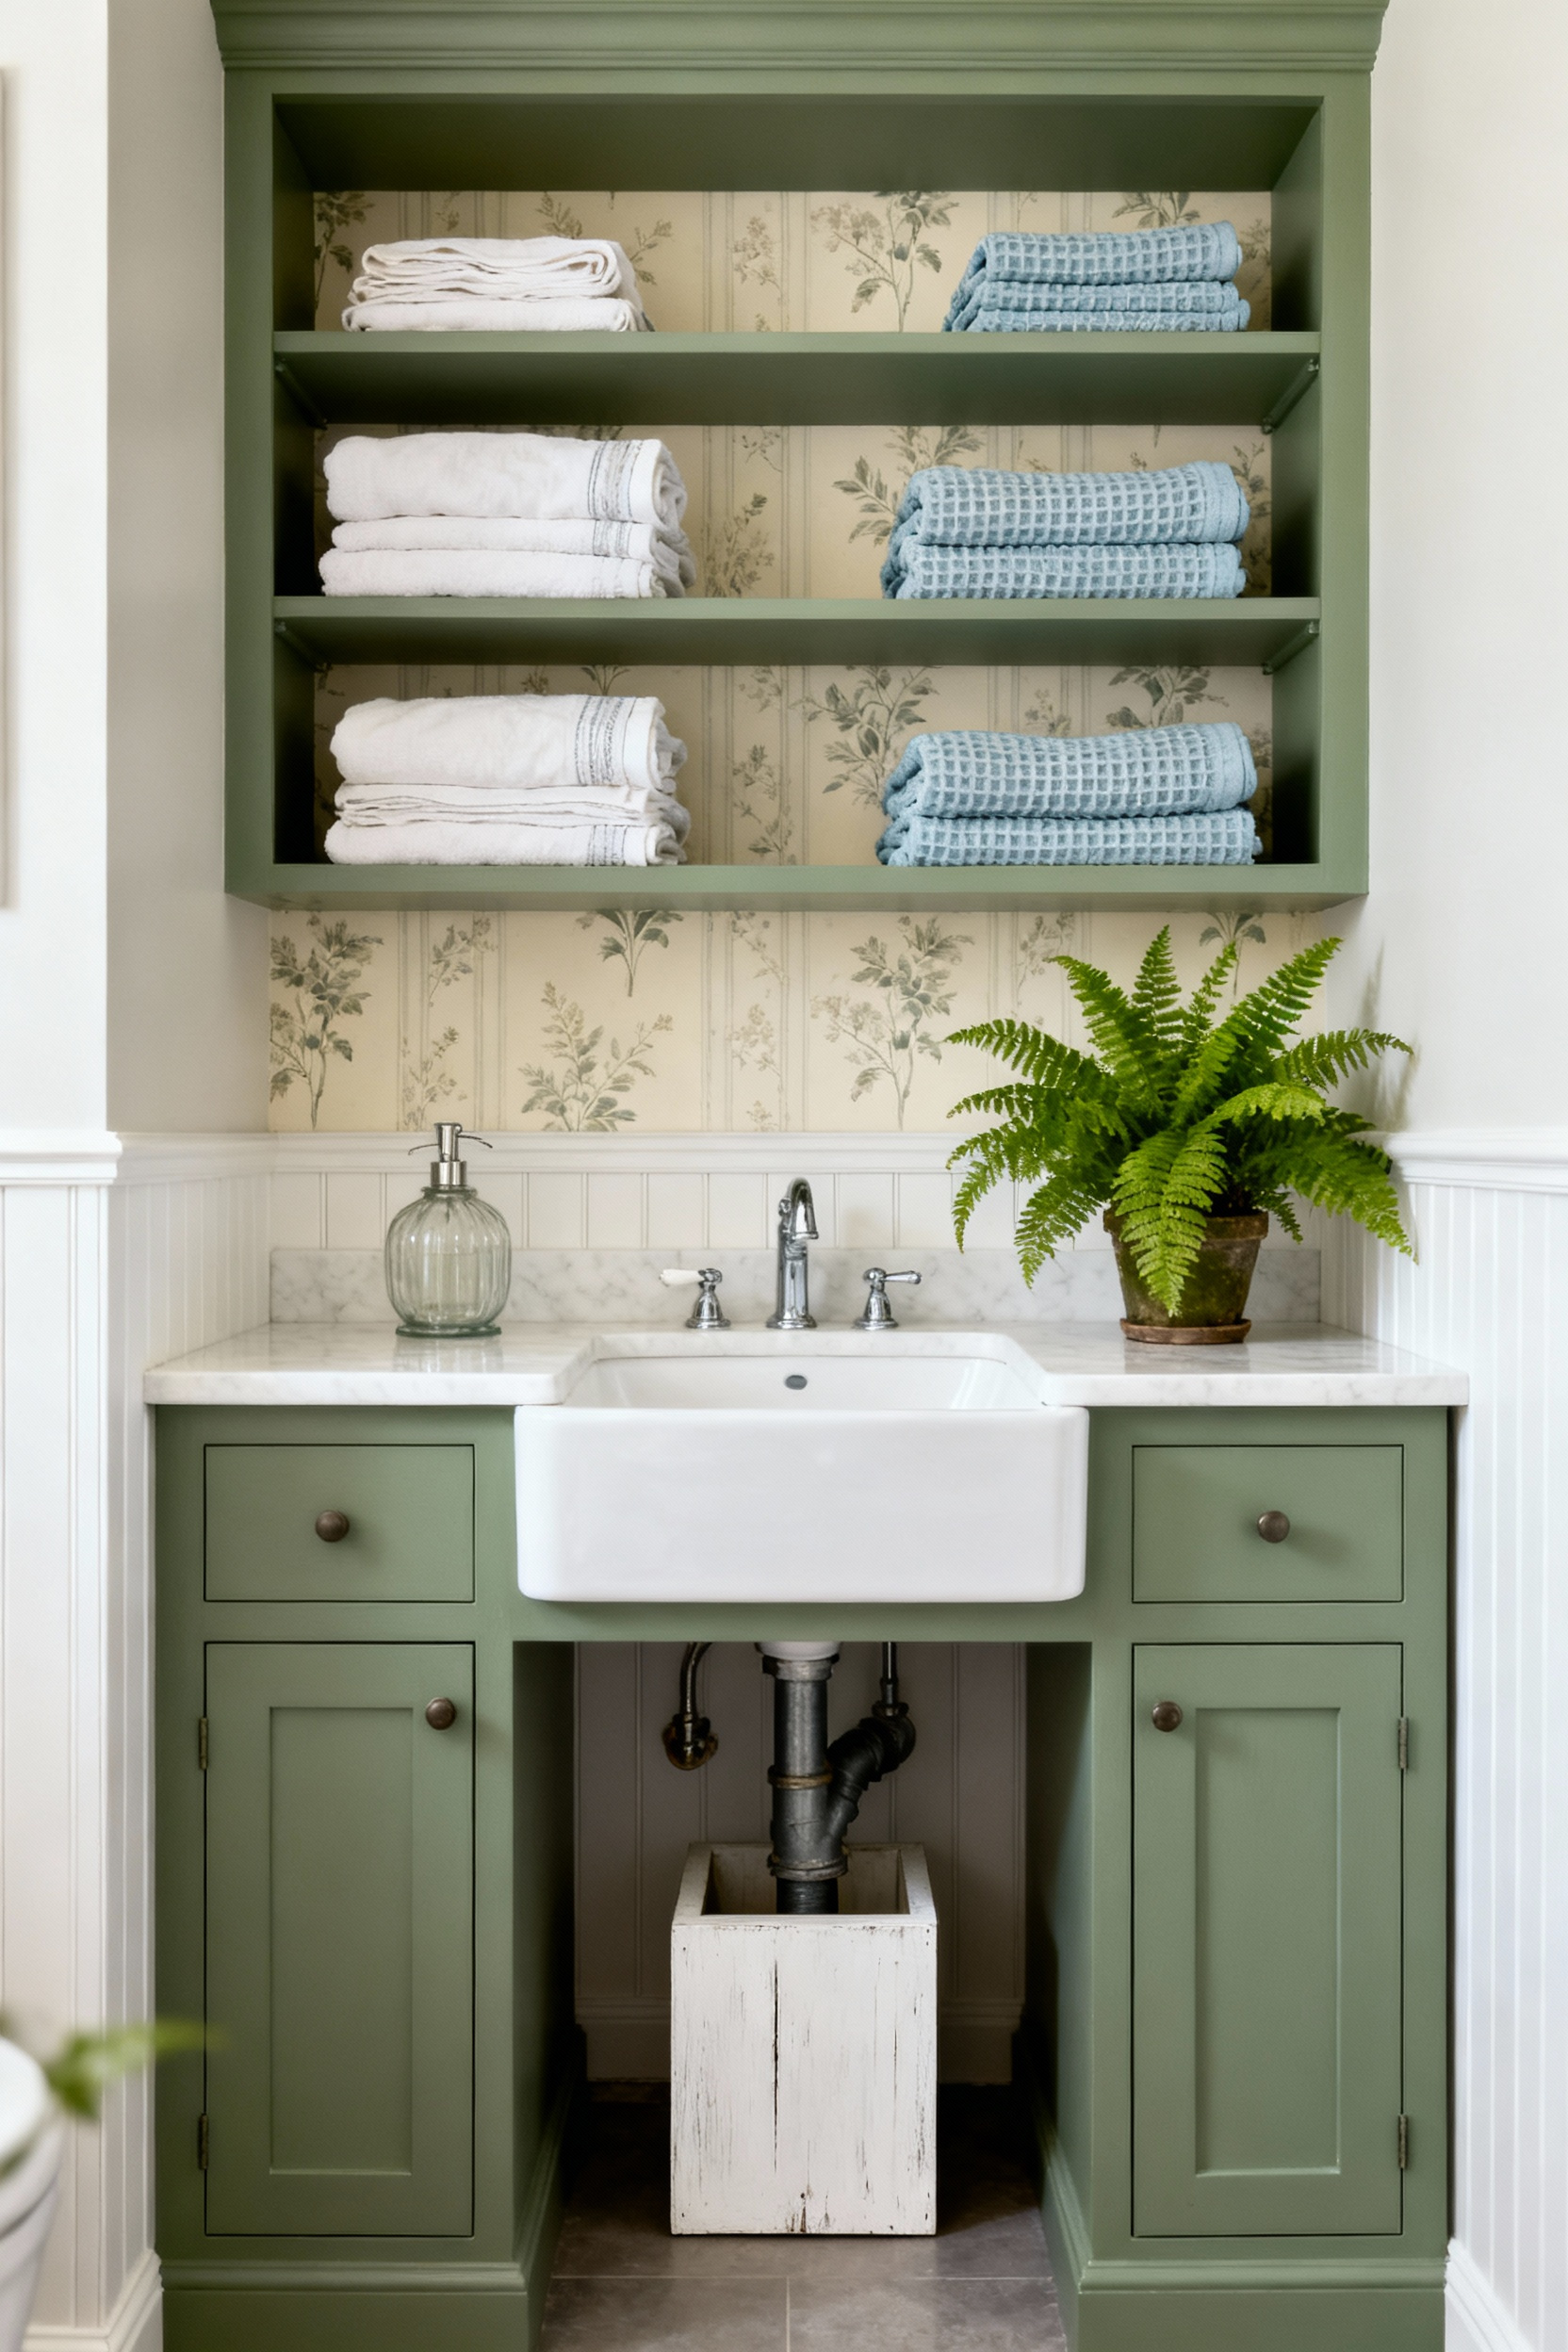
Curate your linens intentionally to master the open aesthetic. Stick to a cohesive palette, such as crisp whites or soft sages, and fold every towel with precise, sharp edges. I love giving my grandmother’s embroidered hand towels a second life here rather than hiding them in a dark closet. Finally, balance the soft fabrics with hard, collected accents:
- Nestle unsightly toiletries in wicker or water-hyacinth baskets.
- Style a stack of washcloths with a vintage silver-plated brush.
- Lean a small, antique botanical print against the back wall.
Phase III: The Dresser Conversion (Advanced Restoration)
Transforming a forgotten dresser requires more than just vision; it demands structure. I once rescued a stunning mid-century lowboy destined for the landfill, knowing that robust structural updates would honor its history better than a pristine finish alone. Start by modifying the drawers to accommodate plumbing without sacrificing storage. Measure your P-trap location, cut the drawer back, and rebuild the interior using 1/2-inch pine to create a “U” shaped channel. This resourceful tweak preserves the vintage soul while neatly housing modern mechanics.
Once the structure is sound, aggressively protect your find against moisture. Bathrooms are harsh environments for antique wood, so skip standard furniture waxes. Instead, prioritize long-term durability:
- Apply four coats of exterior-grade spar urethane to natural wood tops.
- Seal the unpainted interior base and back with polyurethane.
- Use waterborne alkyd paints for a hard, oil-like cure on the body.
Finally, confirm your ergonomics. If you install a trendy vessel sink, ensure the dresser stands near 30 inches so the rim remains accessible. These sustainable choices ensure your restored treasure survives another lifetime.
11. The Hunt: Identifying Vintage Dressers with Vanity Potential
Scouring estate sales for that perfect mid-century piece offers a distinct thrill, yet transforming a dresser into a vanity requires a critical eye. Don’t just fall for a pretty face; check the bones. I always pull out drawers to look for dovetail joints, ensuring the solid wood construction can support a heavy basin and withstand bathroom humidity. Before dragging a find home, confirm it meets these non-negotiable criteria:
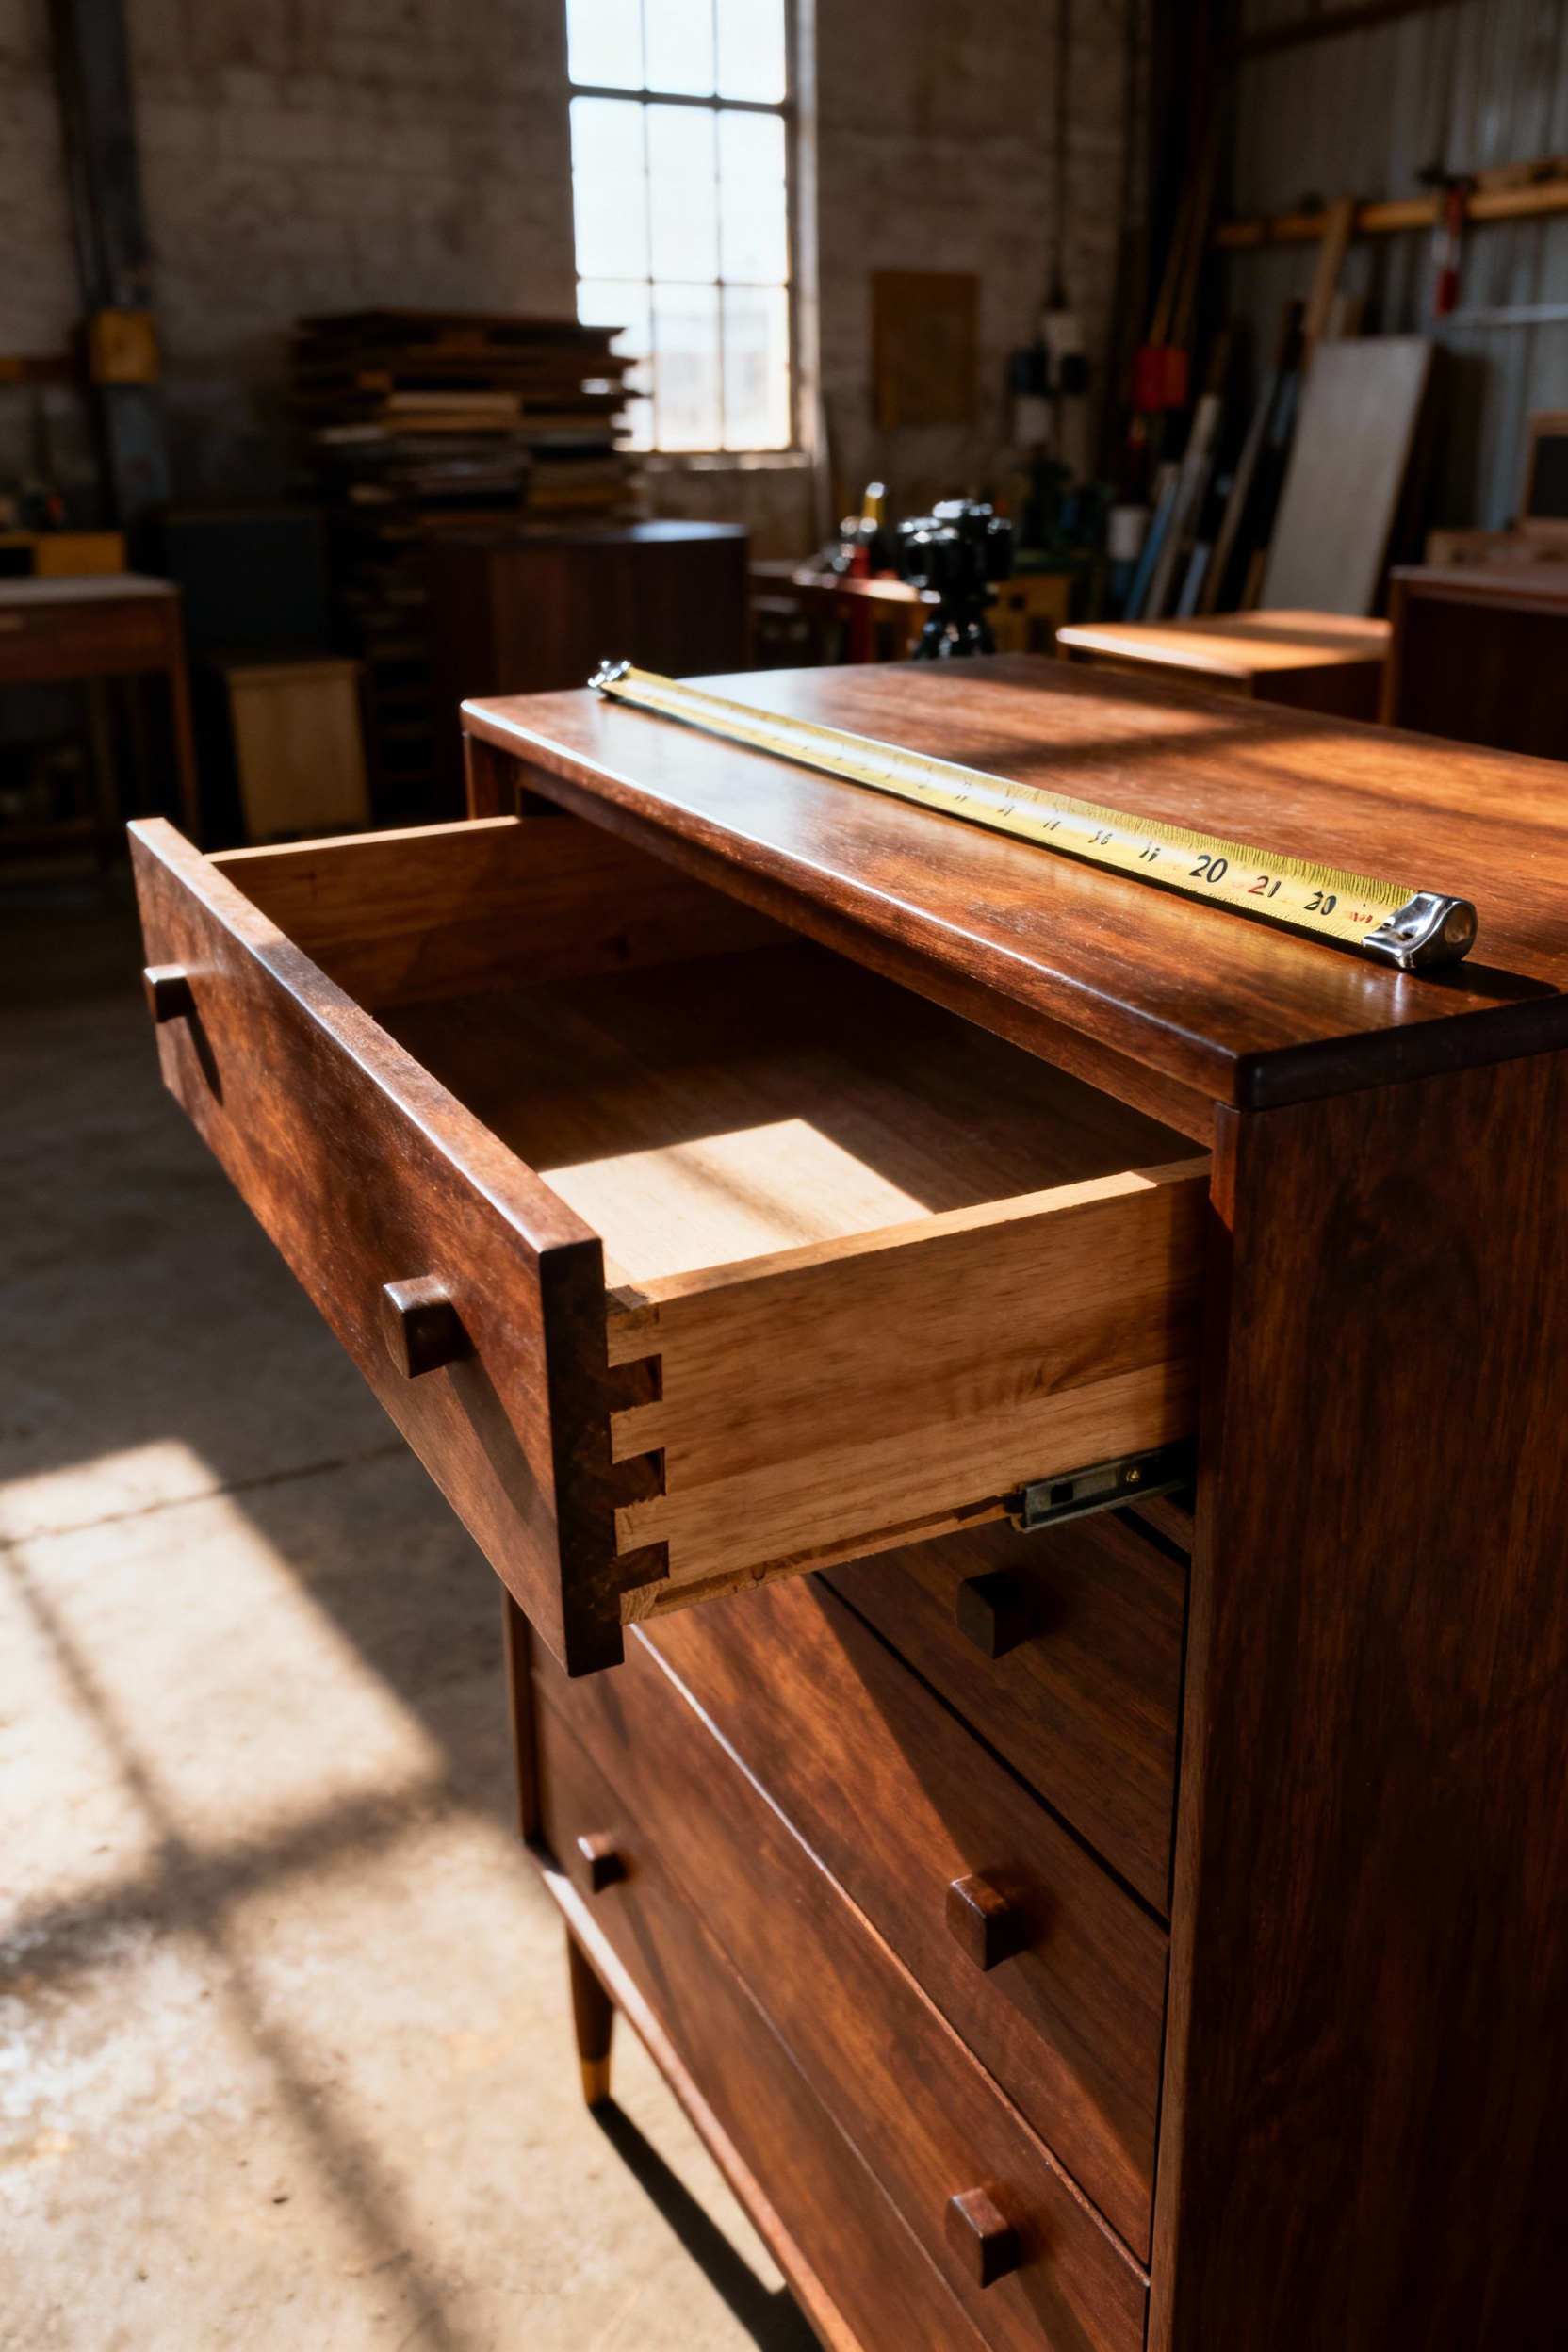
- Depth: Ensure at least 18–22 inches to accommodate a standard sink bowl without hitting drawer fronts.
- Height: Aim for 32–36 inches, or choose a shorter piece if you plan to install a vessel sink.
- Structure: Seek freestanding legs for easier plumbing access and a polished, furniture-style look.
Once you secure the piece, prioritize water protection immediately. While the warmth of original timber is beautiful, moisture relentlessly ruins wood surfaces. Swap the top for a durable marble offcut to blend sustainability with luxury, or apply a heavy-duty sealer if you keep the wood. Furthermore, decide on your sink type early. A vessel sink preserves more storage space, whereas undermount sinks often require sacrificing the top drawers for plumbing. Make these choices now to ensure your vintage treasure becomes a functional, lasting sanctuary.
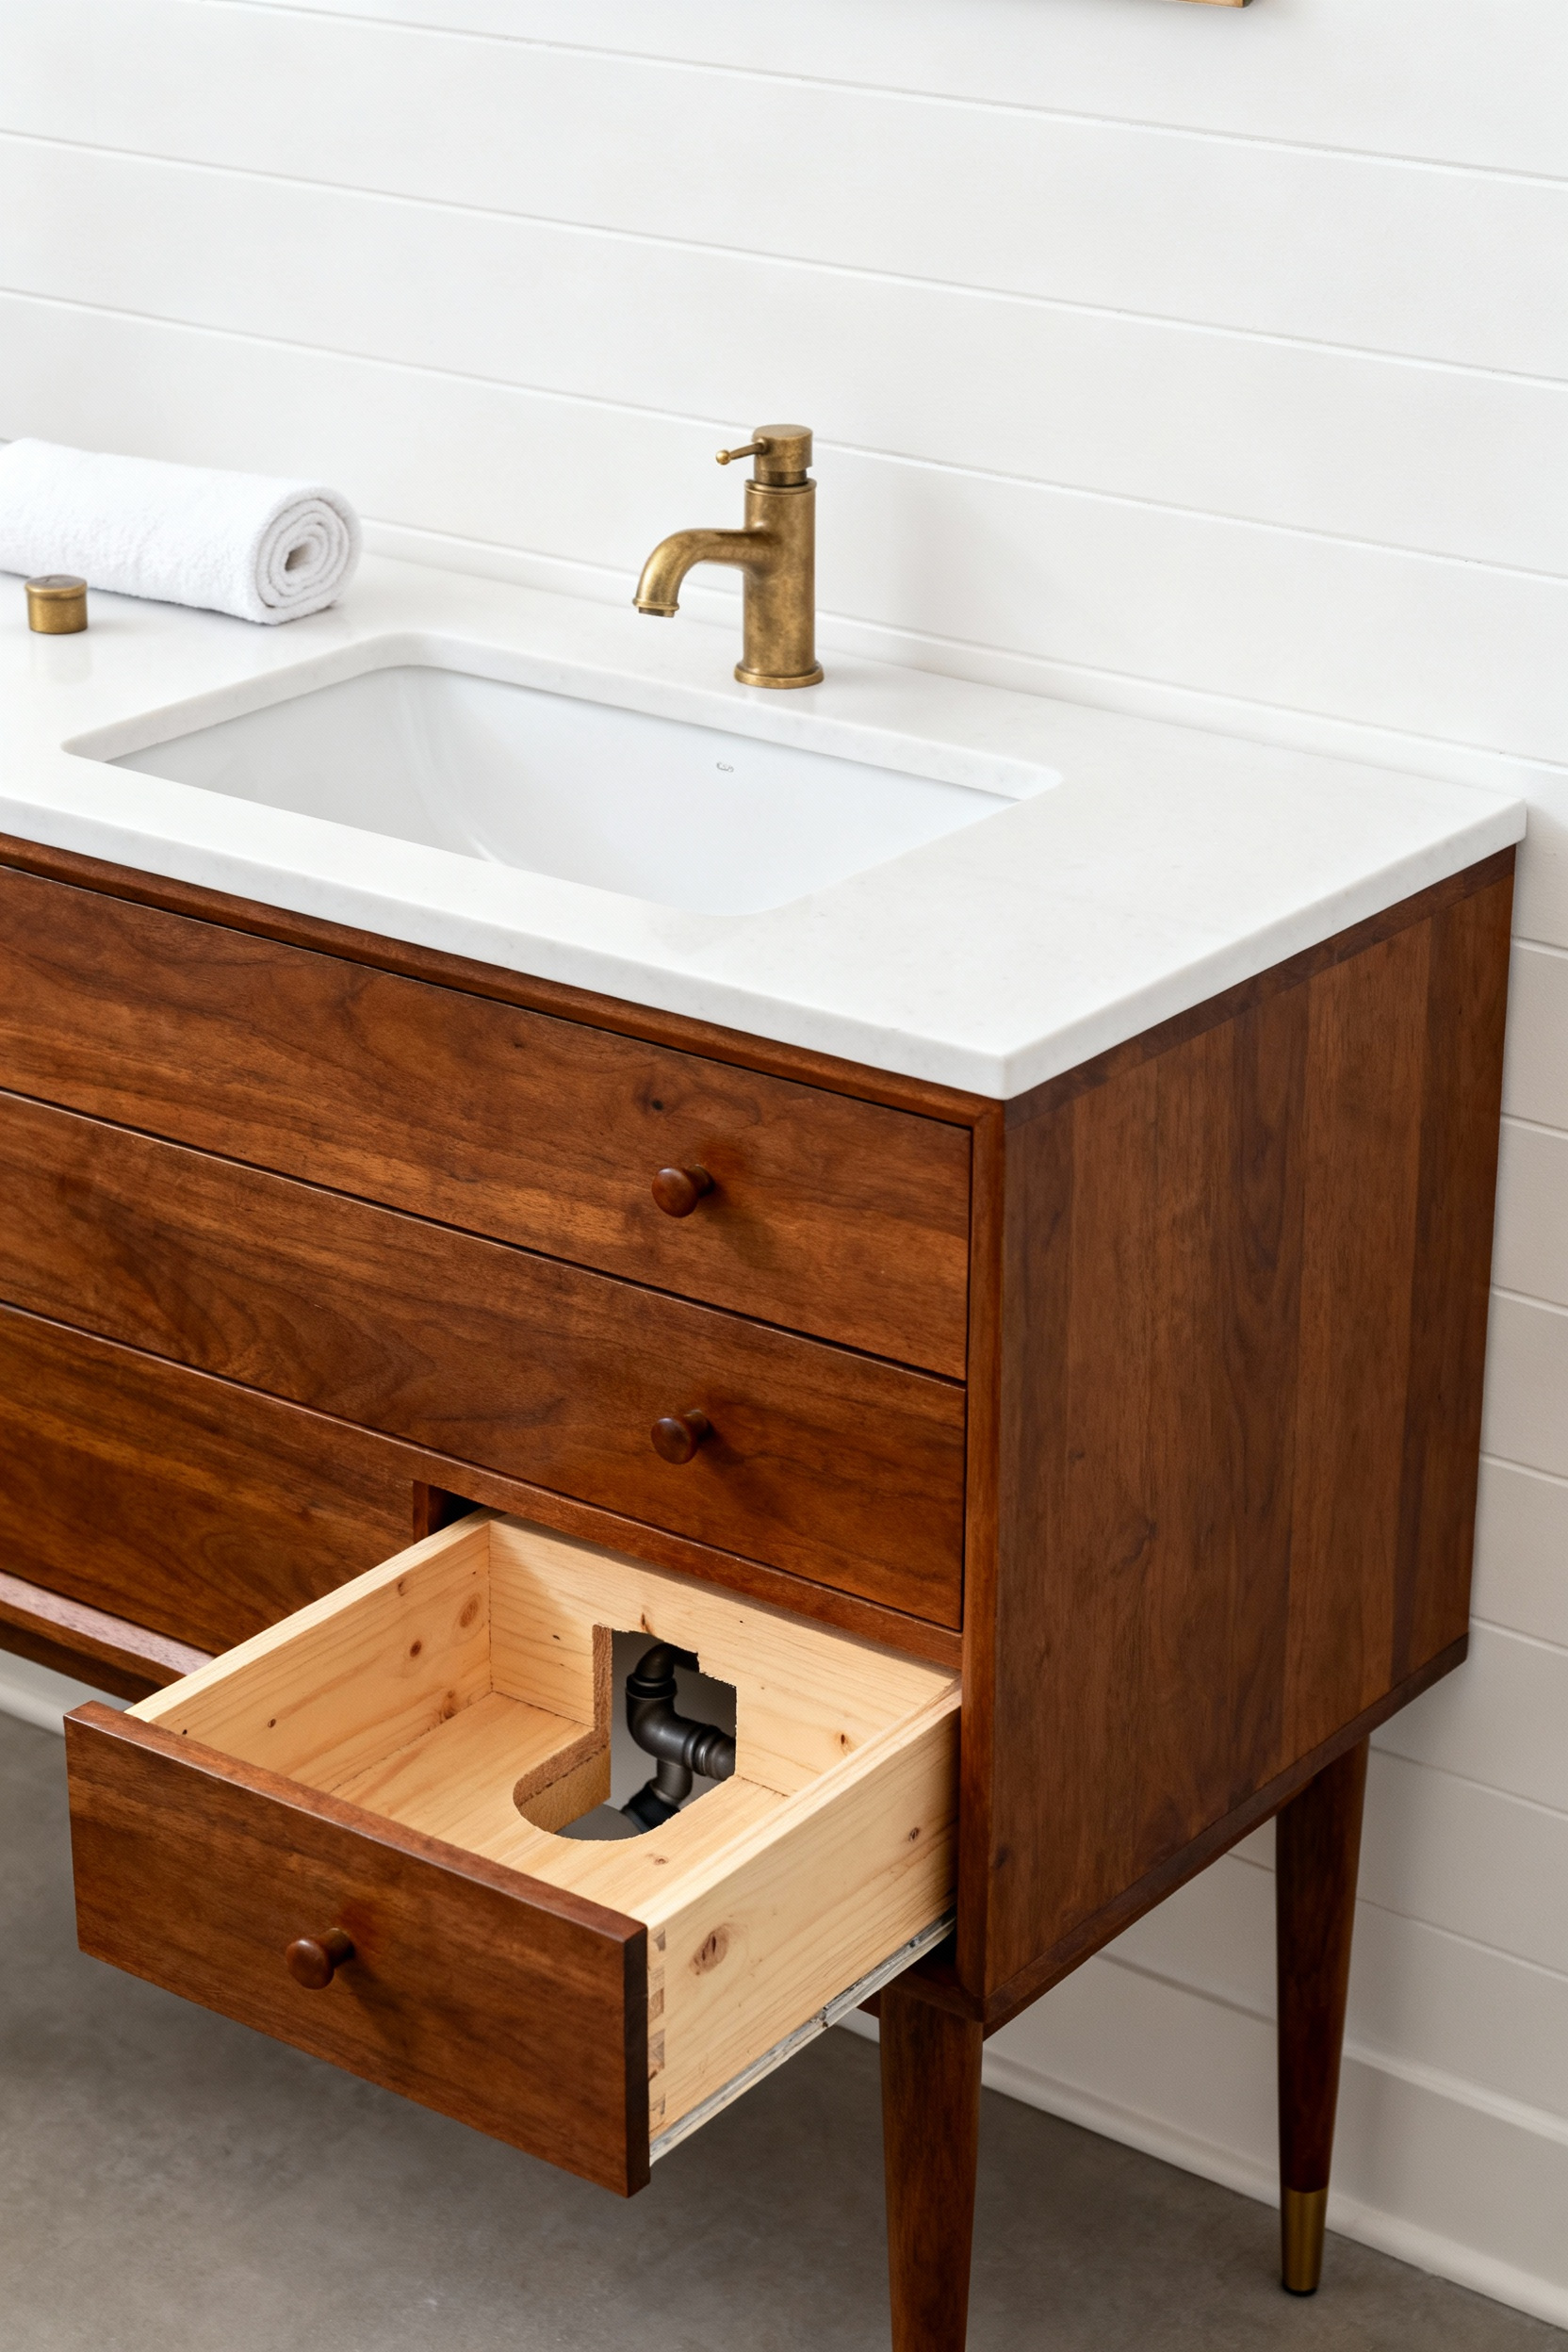
12. The Plumbing Puzzle: Modifying Drawers to Accommodate P-Traps
Salvaging a vintage dresser saves history from the landfill, but modern plumbing often clashes with old carpentry. Don’t sacrifice that beautiful top drawer; modify it. Wait until the sink and plumbing are fully installed, then measure the P-trap’s exact position. Add a minimum of 1.5 inches of clearance to these measurements. This critical buffer prevents friction and ensures the drawer slides smoothly without hitting the pipes.
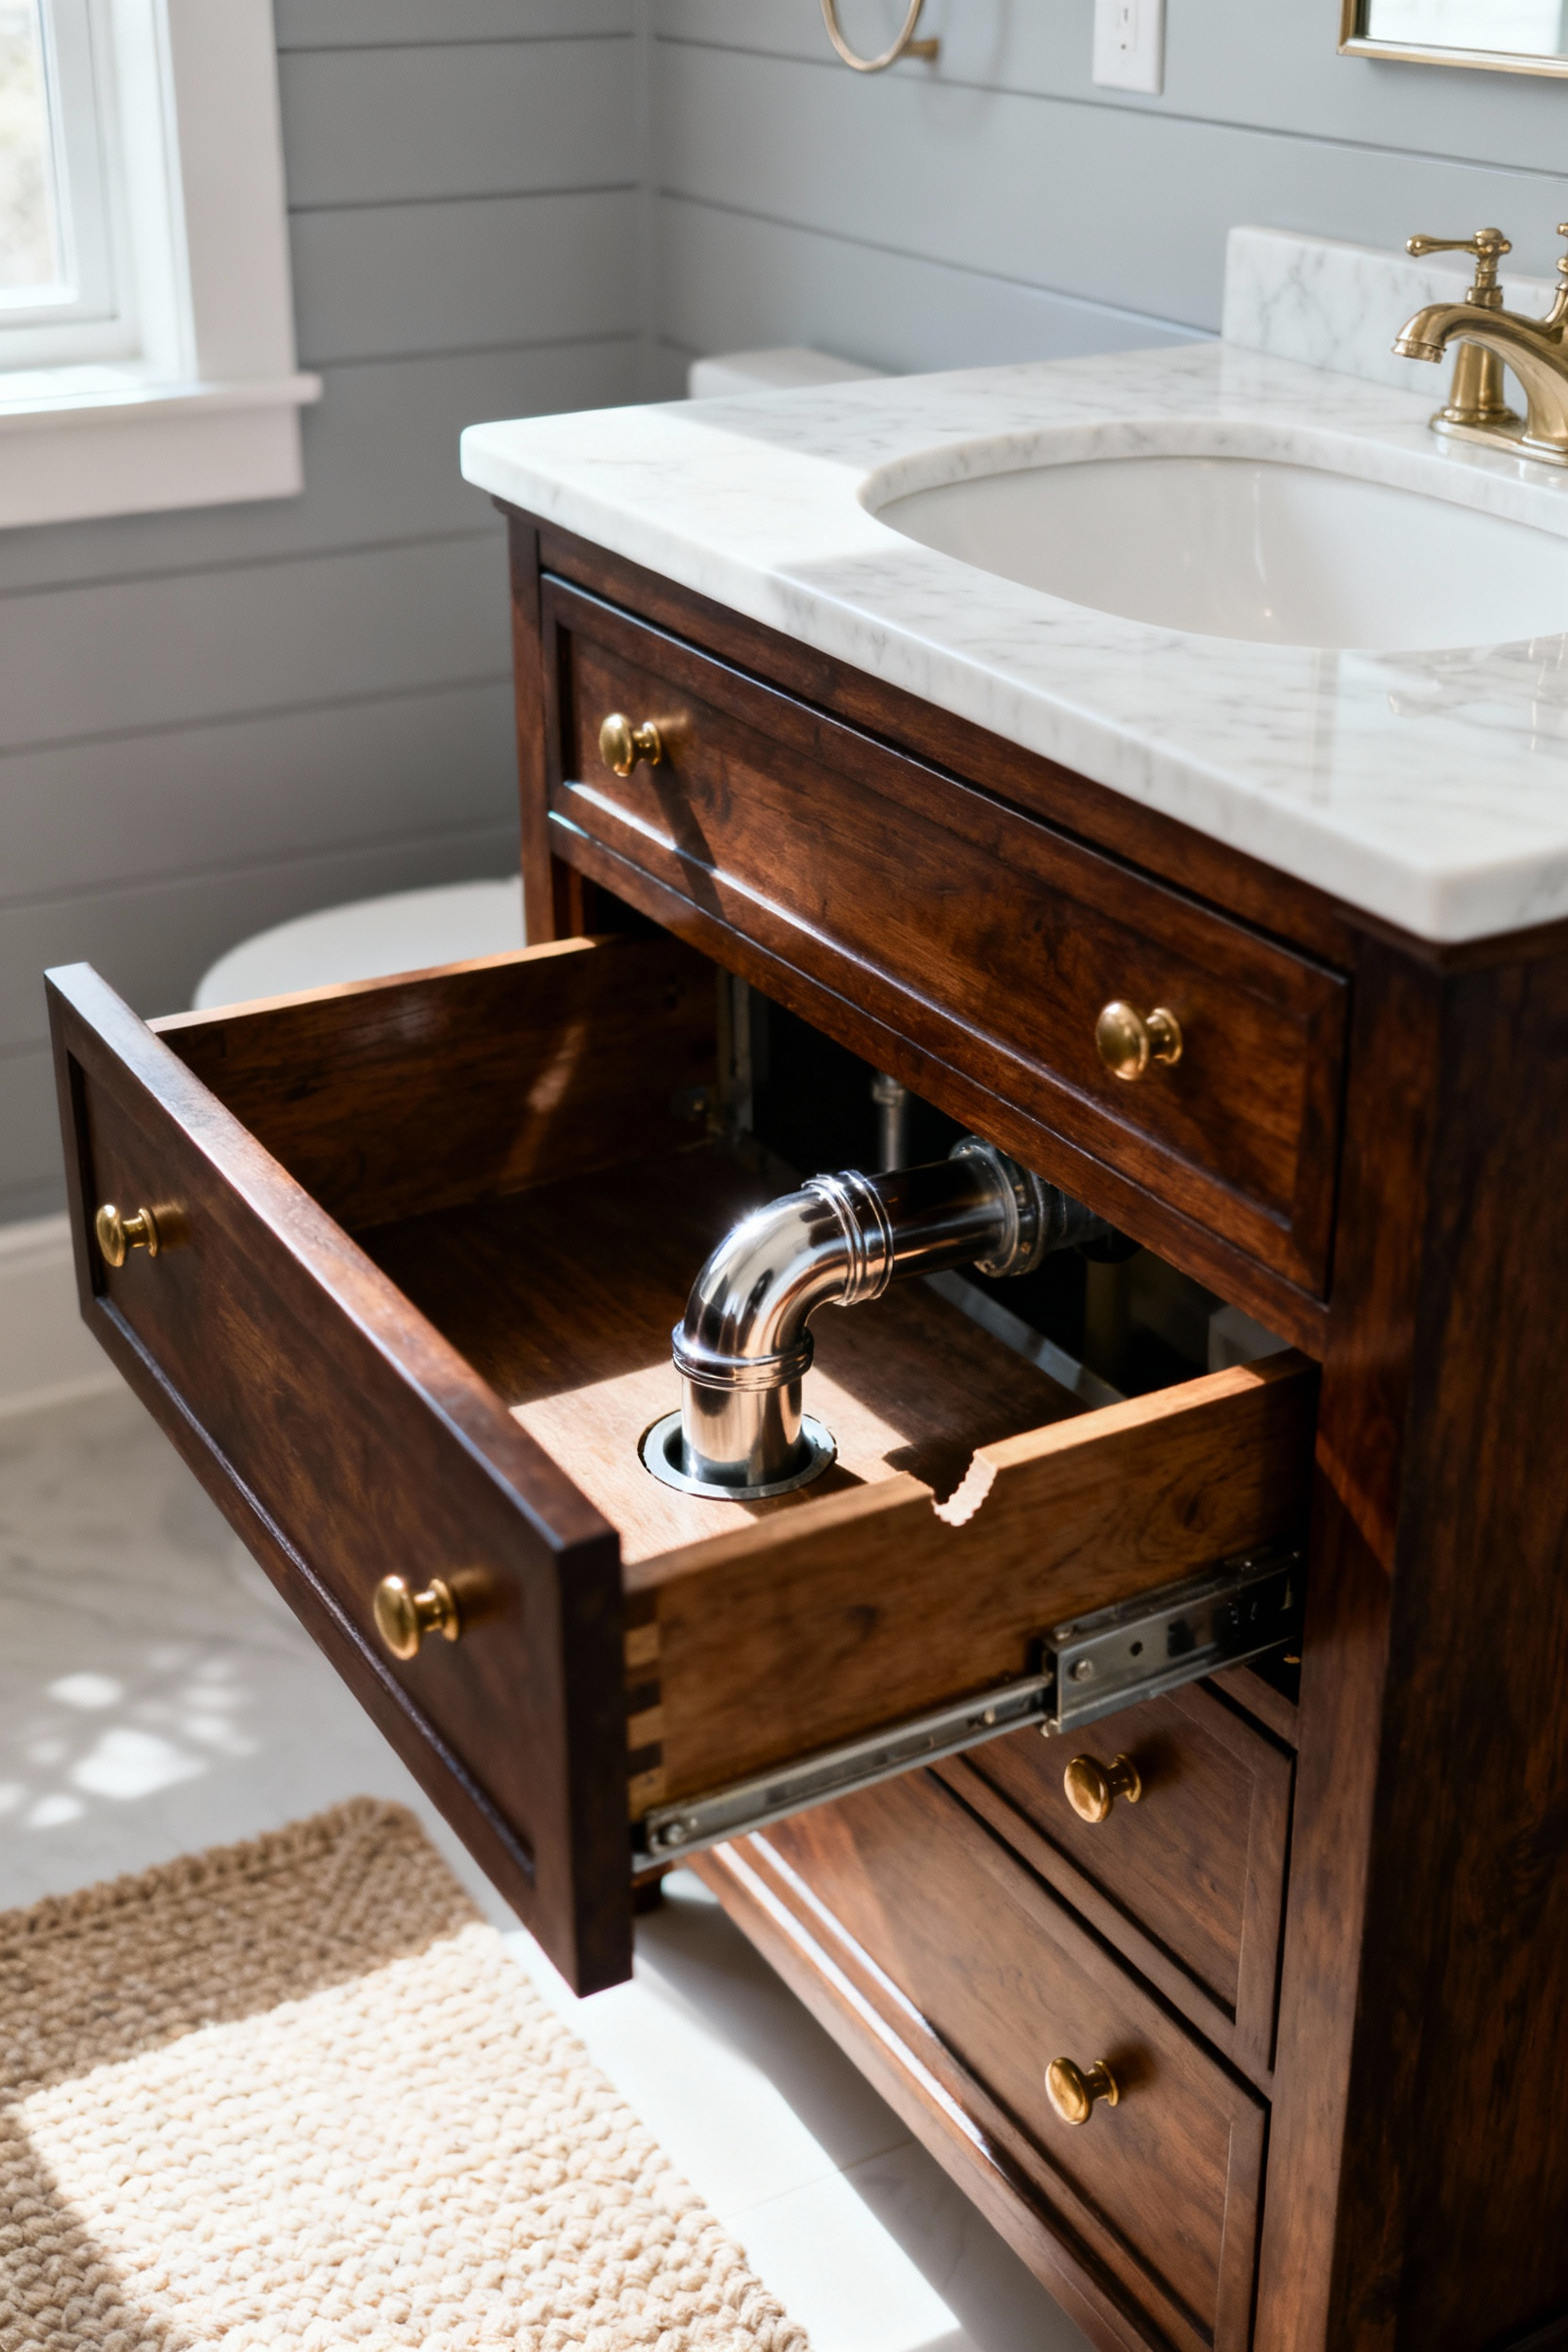
Next, grab your jigsaw for the “U-Cut” technique. Carve a clean U-shaped notch out of the drawer’s back and bottom to embrace the pipes rather than fight them.
- Cut carefully: Remove the material needed for the notch while preserving the drawer front and side rails.
- Reinforce immediately: Install new internal walls around the notch to create a barrier and restore structural integrity.
- Seal the wood: Coat raw edges to protect the vintage timber from bathroom humidity.
This resourceful modification maximizes storage for your toiletries while hiding unsightly plumbing. By adapting existing joinery, you successfully merge mid-century charm with modern utility.
13. Height Adjustments: Solving the 30-Inch vs. 36-Inch Dilemma
Vintage pieces often sit at a low 30 inches, yet modern ergonomics demand a “Comfort Height” of 34 to 36 inches. Do not abandon a soulful mid-century find just because it feels short. I once rescued a low-slung teak sideboard by simply adapting the base, effectively saving it from the landfill and my back from strain. Adapt your vanity with these sustainable fixes:
- Build a riser: Construct a wooden platform underneath to lift existing cabinets.
- Add a vessel sink: Use the bowl’s height to reach the target elevation on lower bases.
- Mount it: Convert standard cabinets into floating vanities for precise placement.
Measure the primary user’s elbow height before finalizing your design. Aim for a countertop roughly 4 to 6 inches below that point for the perfect fit. If the bathroom serves the whole family, settle on 34 inches as a versatile compromise. These small adjustments allow you to honor the past while designing for present-day comfort.
14. Moisture Defense: Marine-Grade Sealants for Wood in Humid Zones
When rescuing a vintage teak cabinet for a vanity project, I knew the bathroom’s steam threatened its survival. To protect your own reclaimed treasures from warping or rot, use what the boat builders use. Marine-grade varnish and spar varnish create a hard, film-building shell that encapsulates wood far better than standard sealers. Furthermore, modern eco-conscious formulas now utilize nanotechnology. This innovation offers a flexible barrier that blocks external water while allowing the wood to release internal moisture vapor, preventing the dreaded cupping that ruins vintage silhouettes.
Application requires patience, not speed. Don’t ruin a beautiful restoration with a single, thick layer. Instead, honor the material with these diligent steps:
- Apply 3-5 thin, even coats to build a durable, plastic-like shield.
- Saturate the end grain thoroughly, as these porous edges absorb moisture first.
- Select water-based, ultra-low VOC finishes to protect your home’s air quality alongside the furniture.
This careful process preserves the piece’s story and ensures it withstands the daily splash of modern life.
15. Reinforcement: Strengthening Vintage Frames for Stone Tops
Vintage furniture carries a soul, but it rarely carries the weight of a massive stone slab. Before crowning your rescued treasure, you must fortify it to ensure it endures. First, aggressively inspect every joint. Reinforce wobbly legs with wood glue and corner brackets to prevent buckling under the new load. Since cutting out drawers for plumbing compromises the original tension, construct a new internal skeleton using 2x4s or plywood. This invisible sub-structure bridges gaps and creates a solid foundation to distribute the stone’s heft evenly.
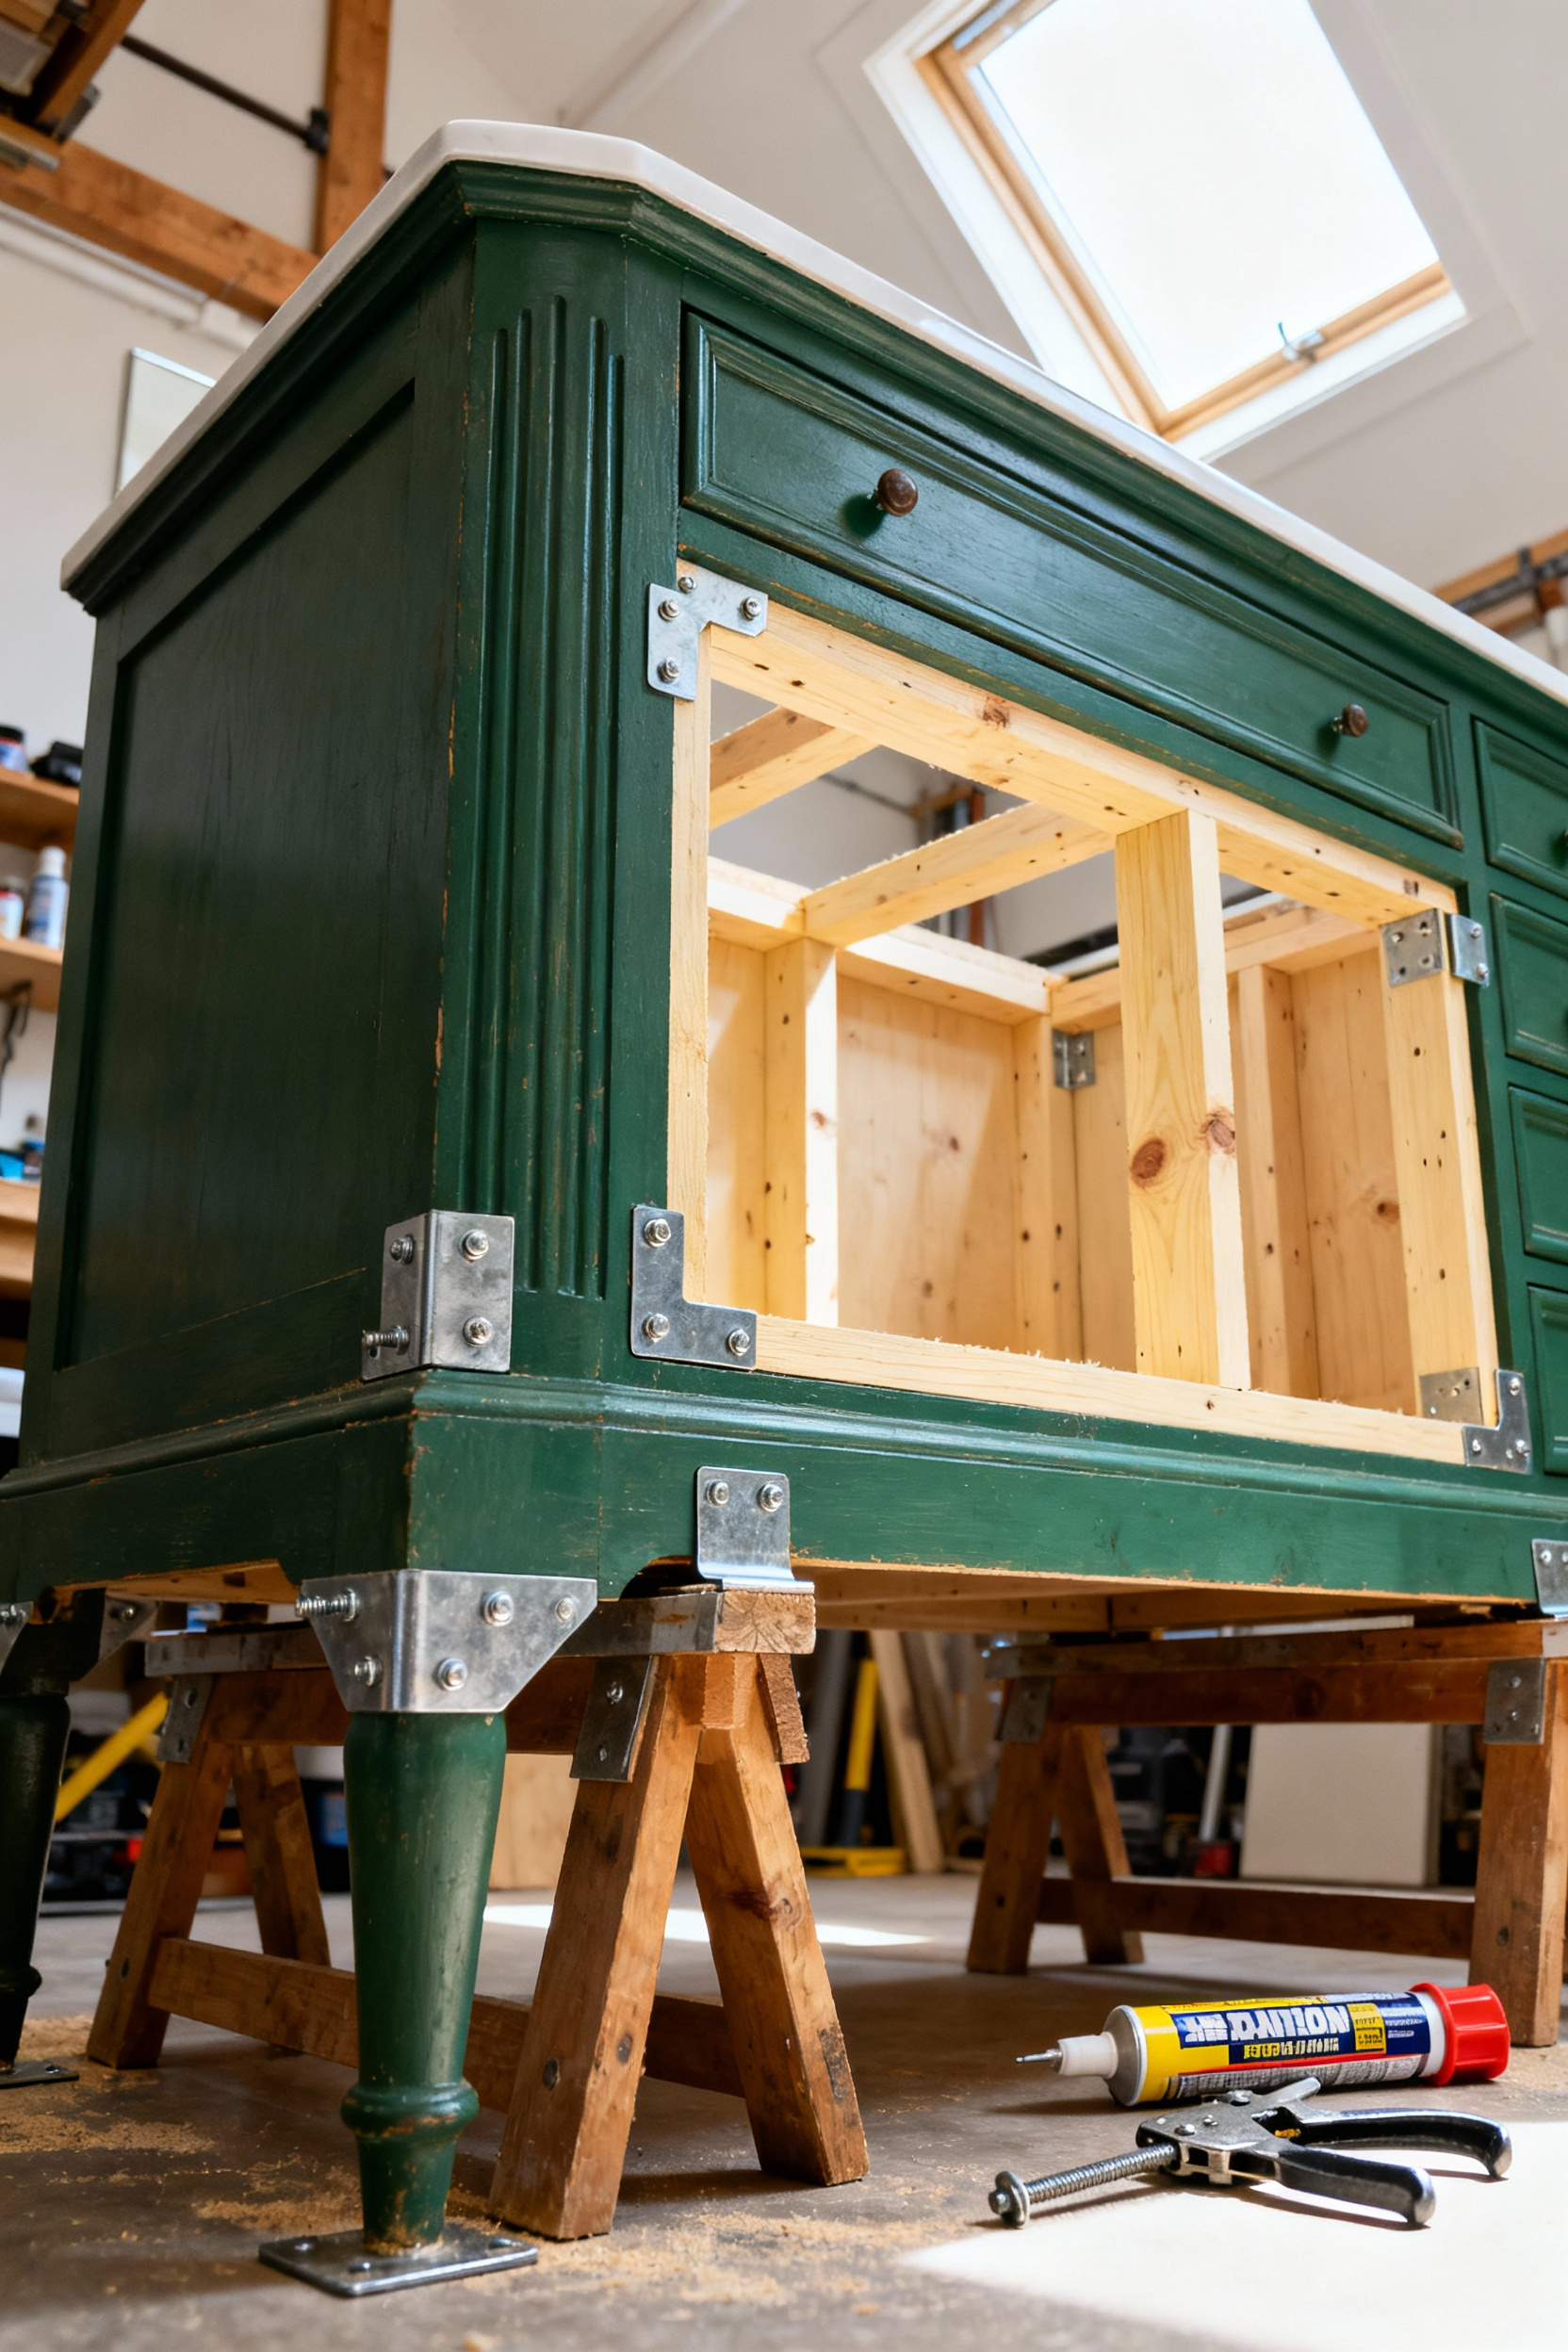
Once the interior is solid, lock everything in place to ensure safety and longevity:
- Anchor the frame directly to wall studs with structural screws to eliminate tipping risks.
- Bond the stone using a continuous bead of construction-grade silicone along the top rim.
I once salvaged a delicate Danish teak sideboard that seemed far too frail for quartz. By hiding sturdy bracing behind that warm veneer, I preserved its design history while giving it the strength of a modern tank. Sustainability means ensuring your find survives its next chapter, not just looking good for the reveal.
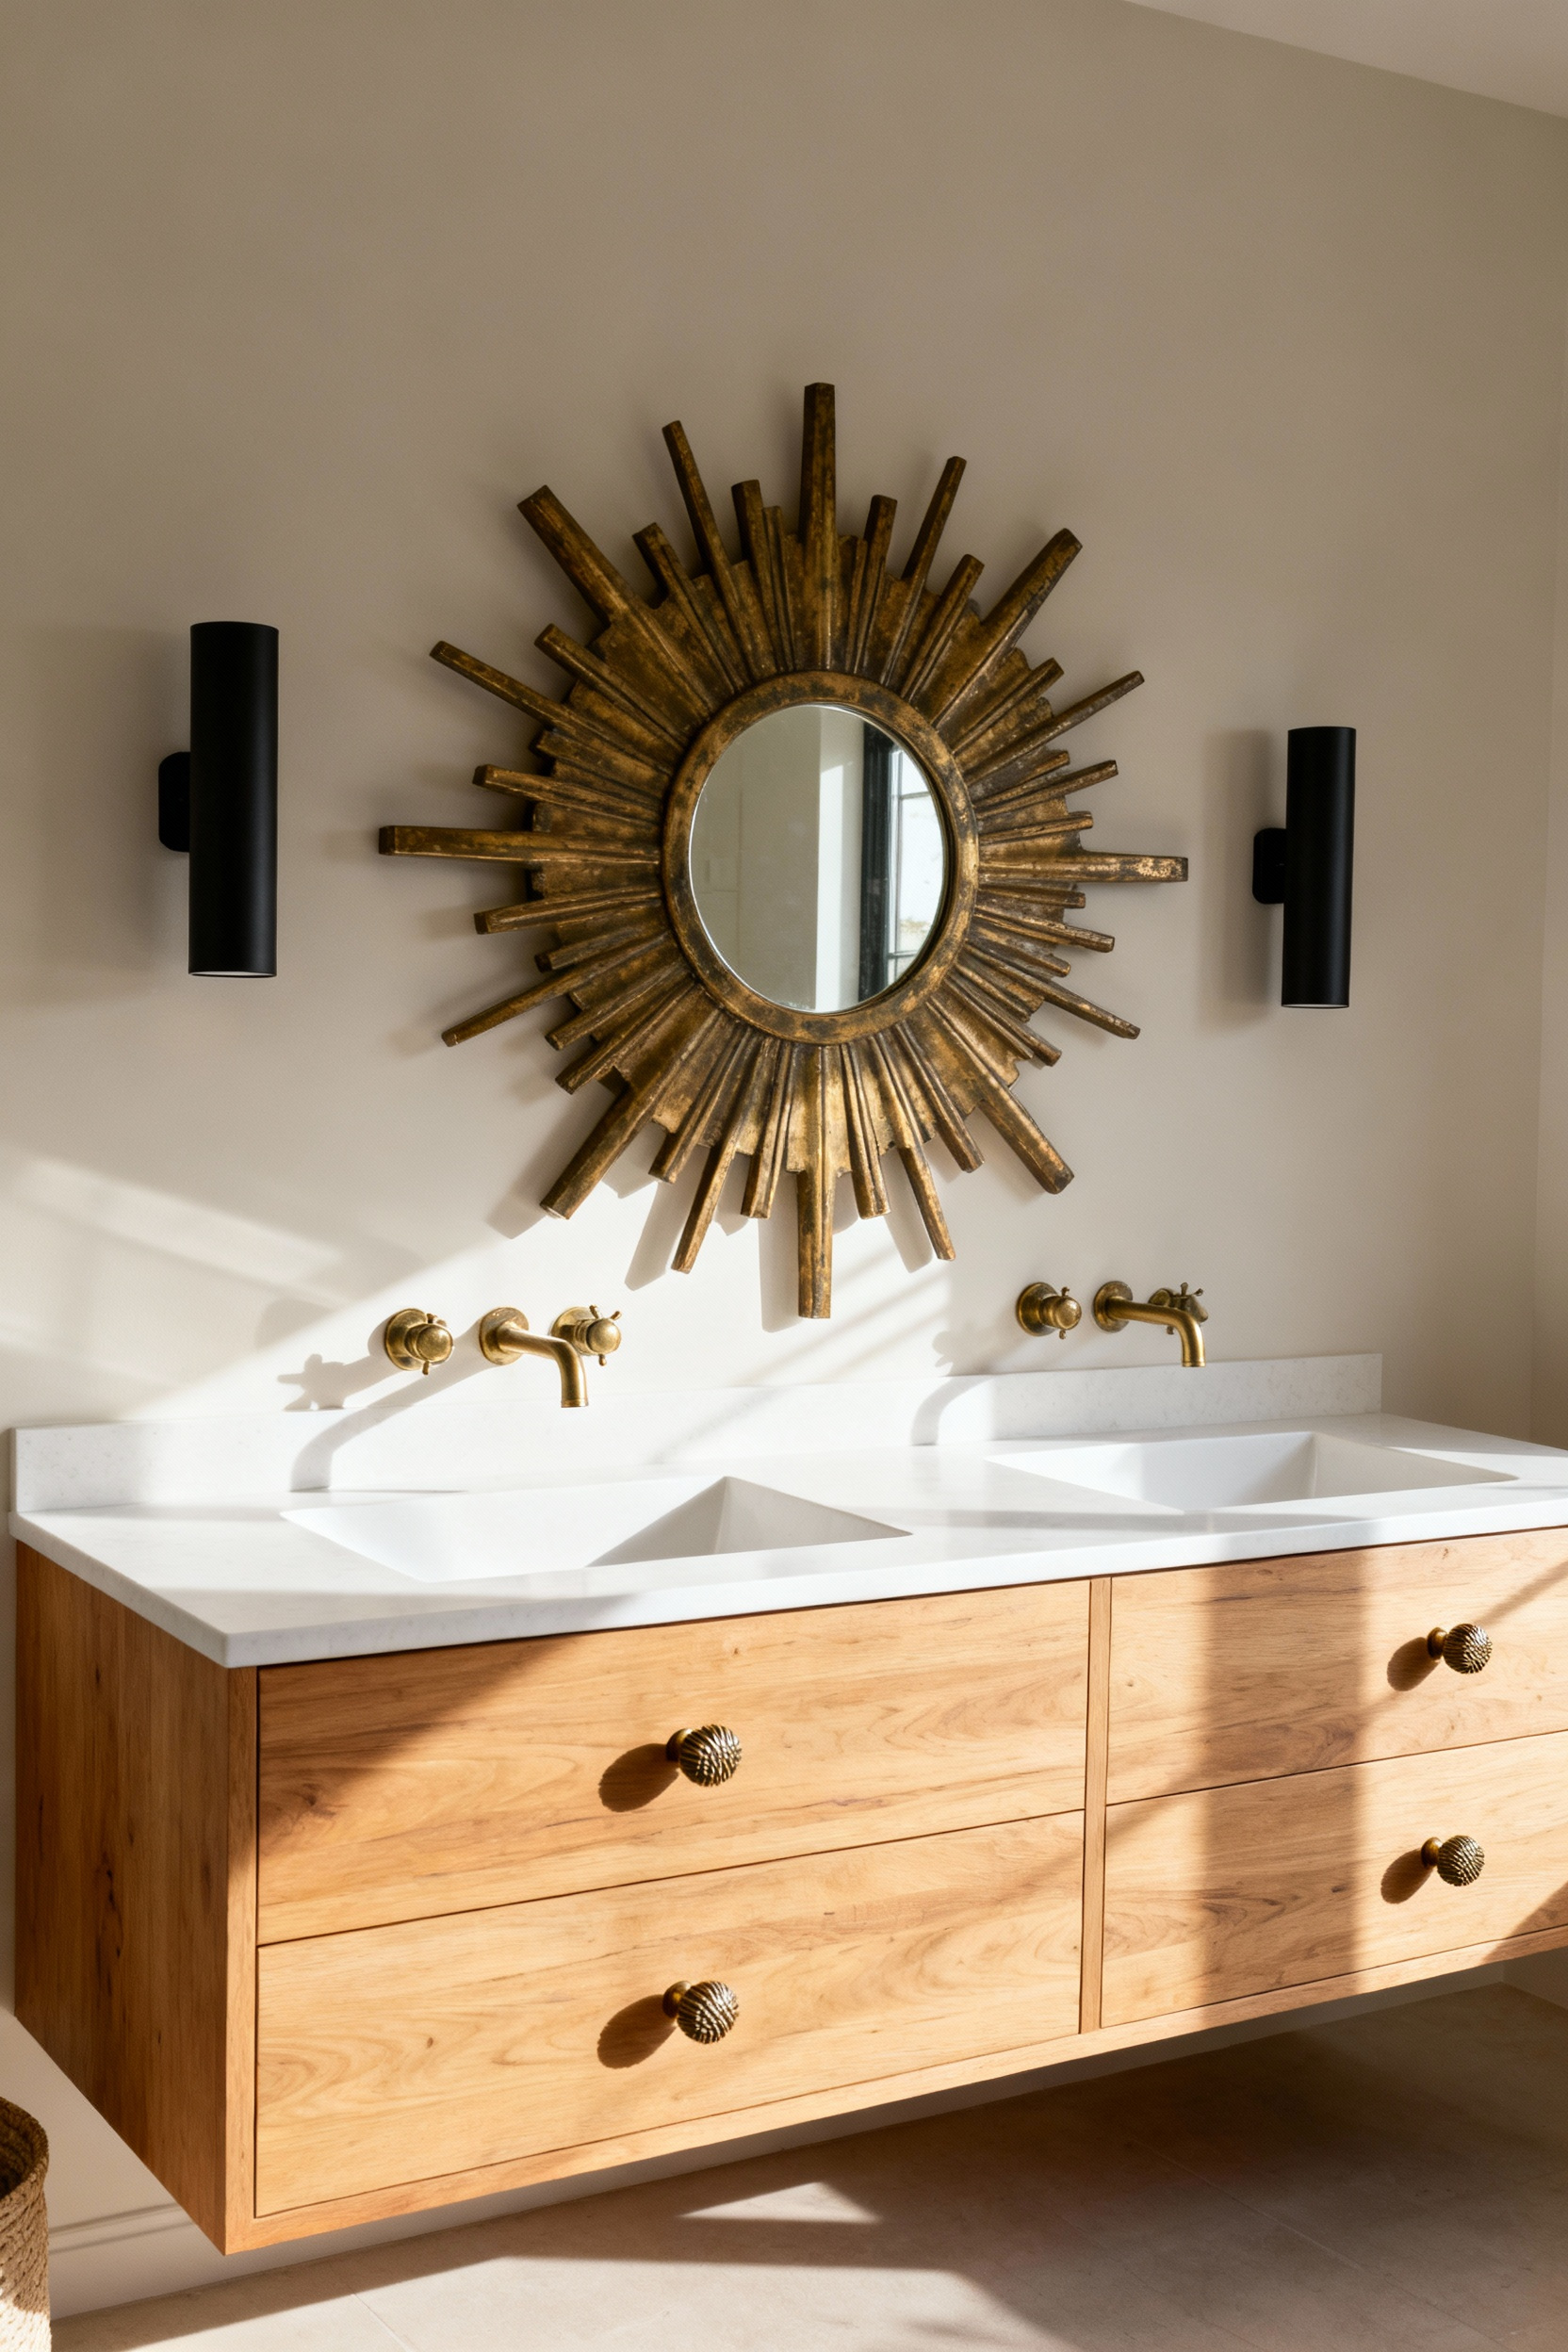
Phase IV: Styling the Era (The Finishing Touches)
Now, breathe soul back into your restored piece. I once salvaged a dusty mid-century sunburst mirror that, when paired with sleek sconces, completely transformed a dull vanity into a showstopper. Don’t let “builder-grade” fixtures dull your hard work. Swap flat sheet mirrors for framed vintage gems or LED-integrated options to instantly elevate the focal point. Furthermore, be bold with hardware. While matching finishes create calm, intentionally mixing matte black with aged brass adds a sophisticated, collected vibe that feels timeless rather than trendy.
Treat the countertop as a curated display rather than a catch-all for clutter. Small, sustainable choices make the biggest impact here:
- Curate Accessories: Decant soaps into reusable glass dispensers or organize essentials on a thrifted brass tray.
- Add Texture: Layer in organic cotton towels or a vintage runner to bring warmth to the room.
- Inject Life: Place a resilient pothos plant or a small art print nearby to soften hard edges.
These finishing touches honor the design’s history while making the space distinctly yours.
16. Lighting the Vanity: Sconces that Bridge Decades
Finding the perfect light fixture often feels like unearthing a hidden gem, but true longevity comes from balancing nostalgia with function. To bridge the gap between a mid-century aesthetic and modern utility, embrace transitional sconces. These versatile pieces merge the elegance of traditional bell shapes with the clean lines of contemporary design. I recently updated a vanity using matte black fixtures with simple globe shades; the mix of a trendy finish with a vintage silhouette instantly revitalized the space. This strategy keeps your design sustainable by ensuring the style remains relevant for years to come.
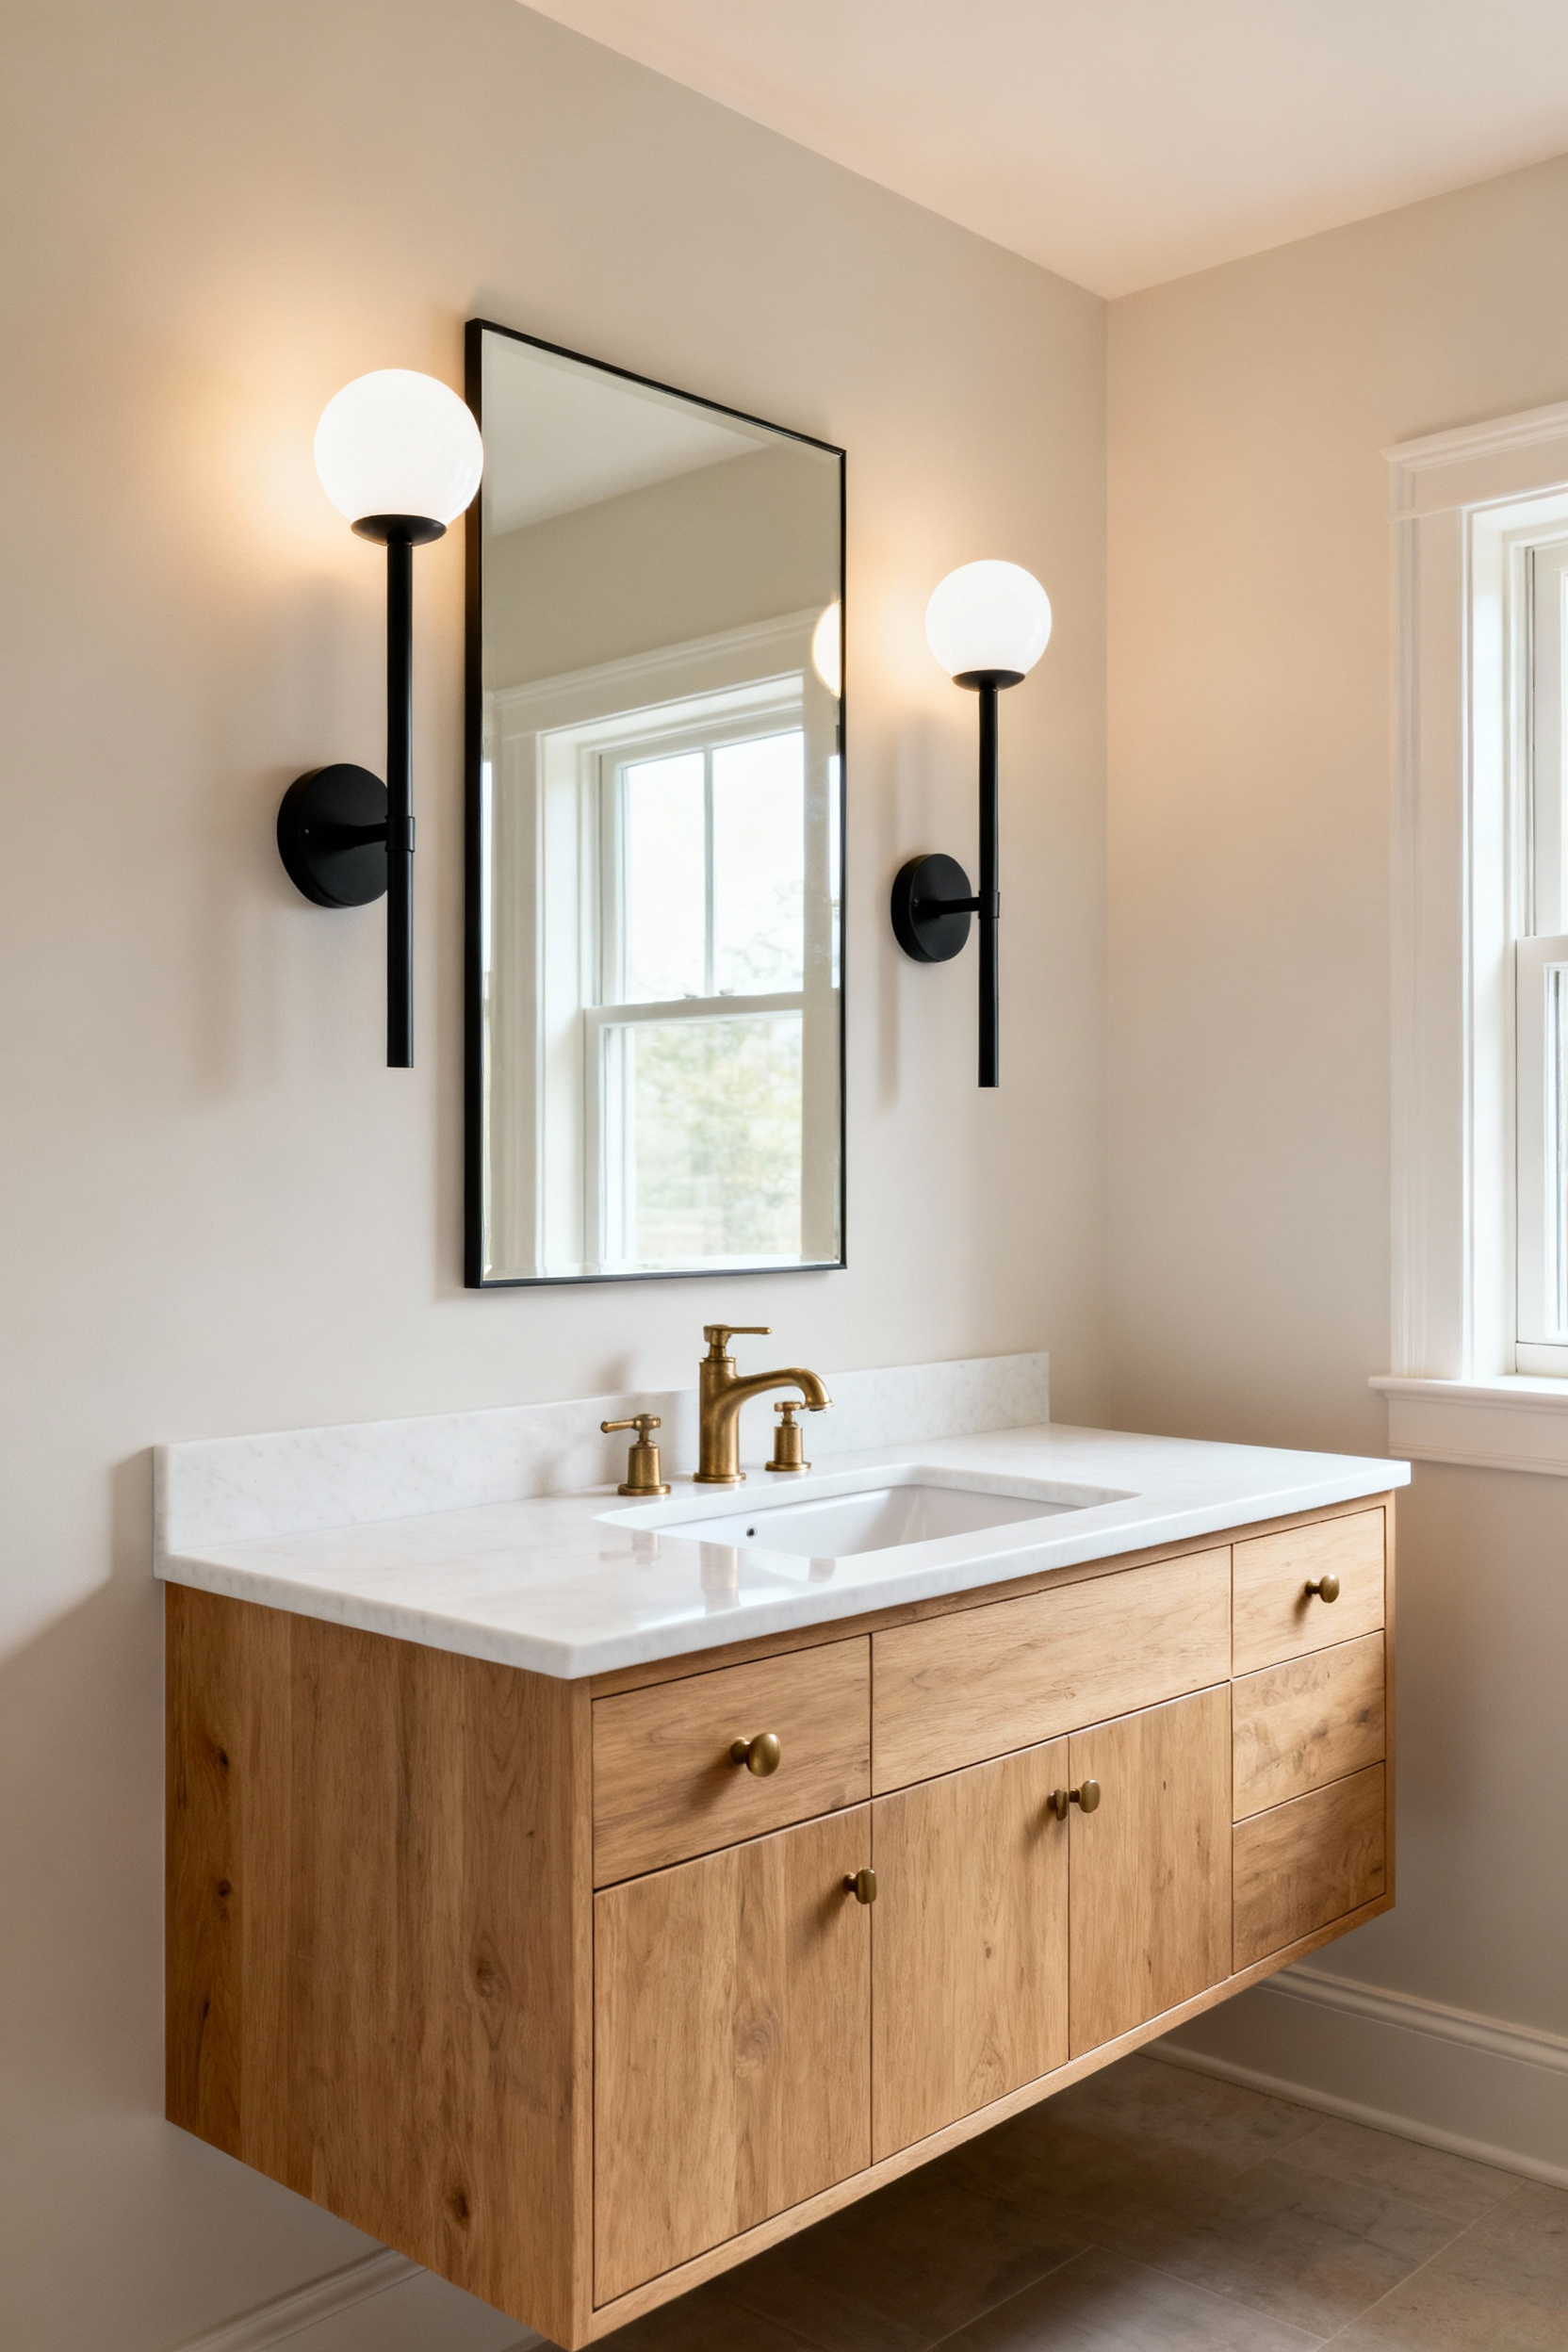
For the most flattering glow, functionality must lead. Mount your sconces vertically at eye level, roughly 60 to 70 inches from the floor. This specific placement eliminates unflattering shadows caused by overhead lights. Furthermore, prioritize these essential features:
- Opal or etched glass to soften the beam and reduce glare.
- Warm bulbs (2700K) to mimic natural candlelight.
- Dimmer switches to control ambiance and extend bulb life.
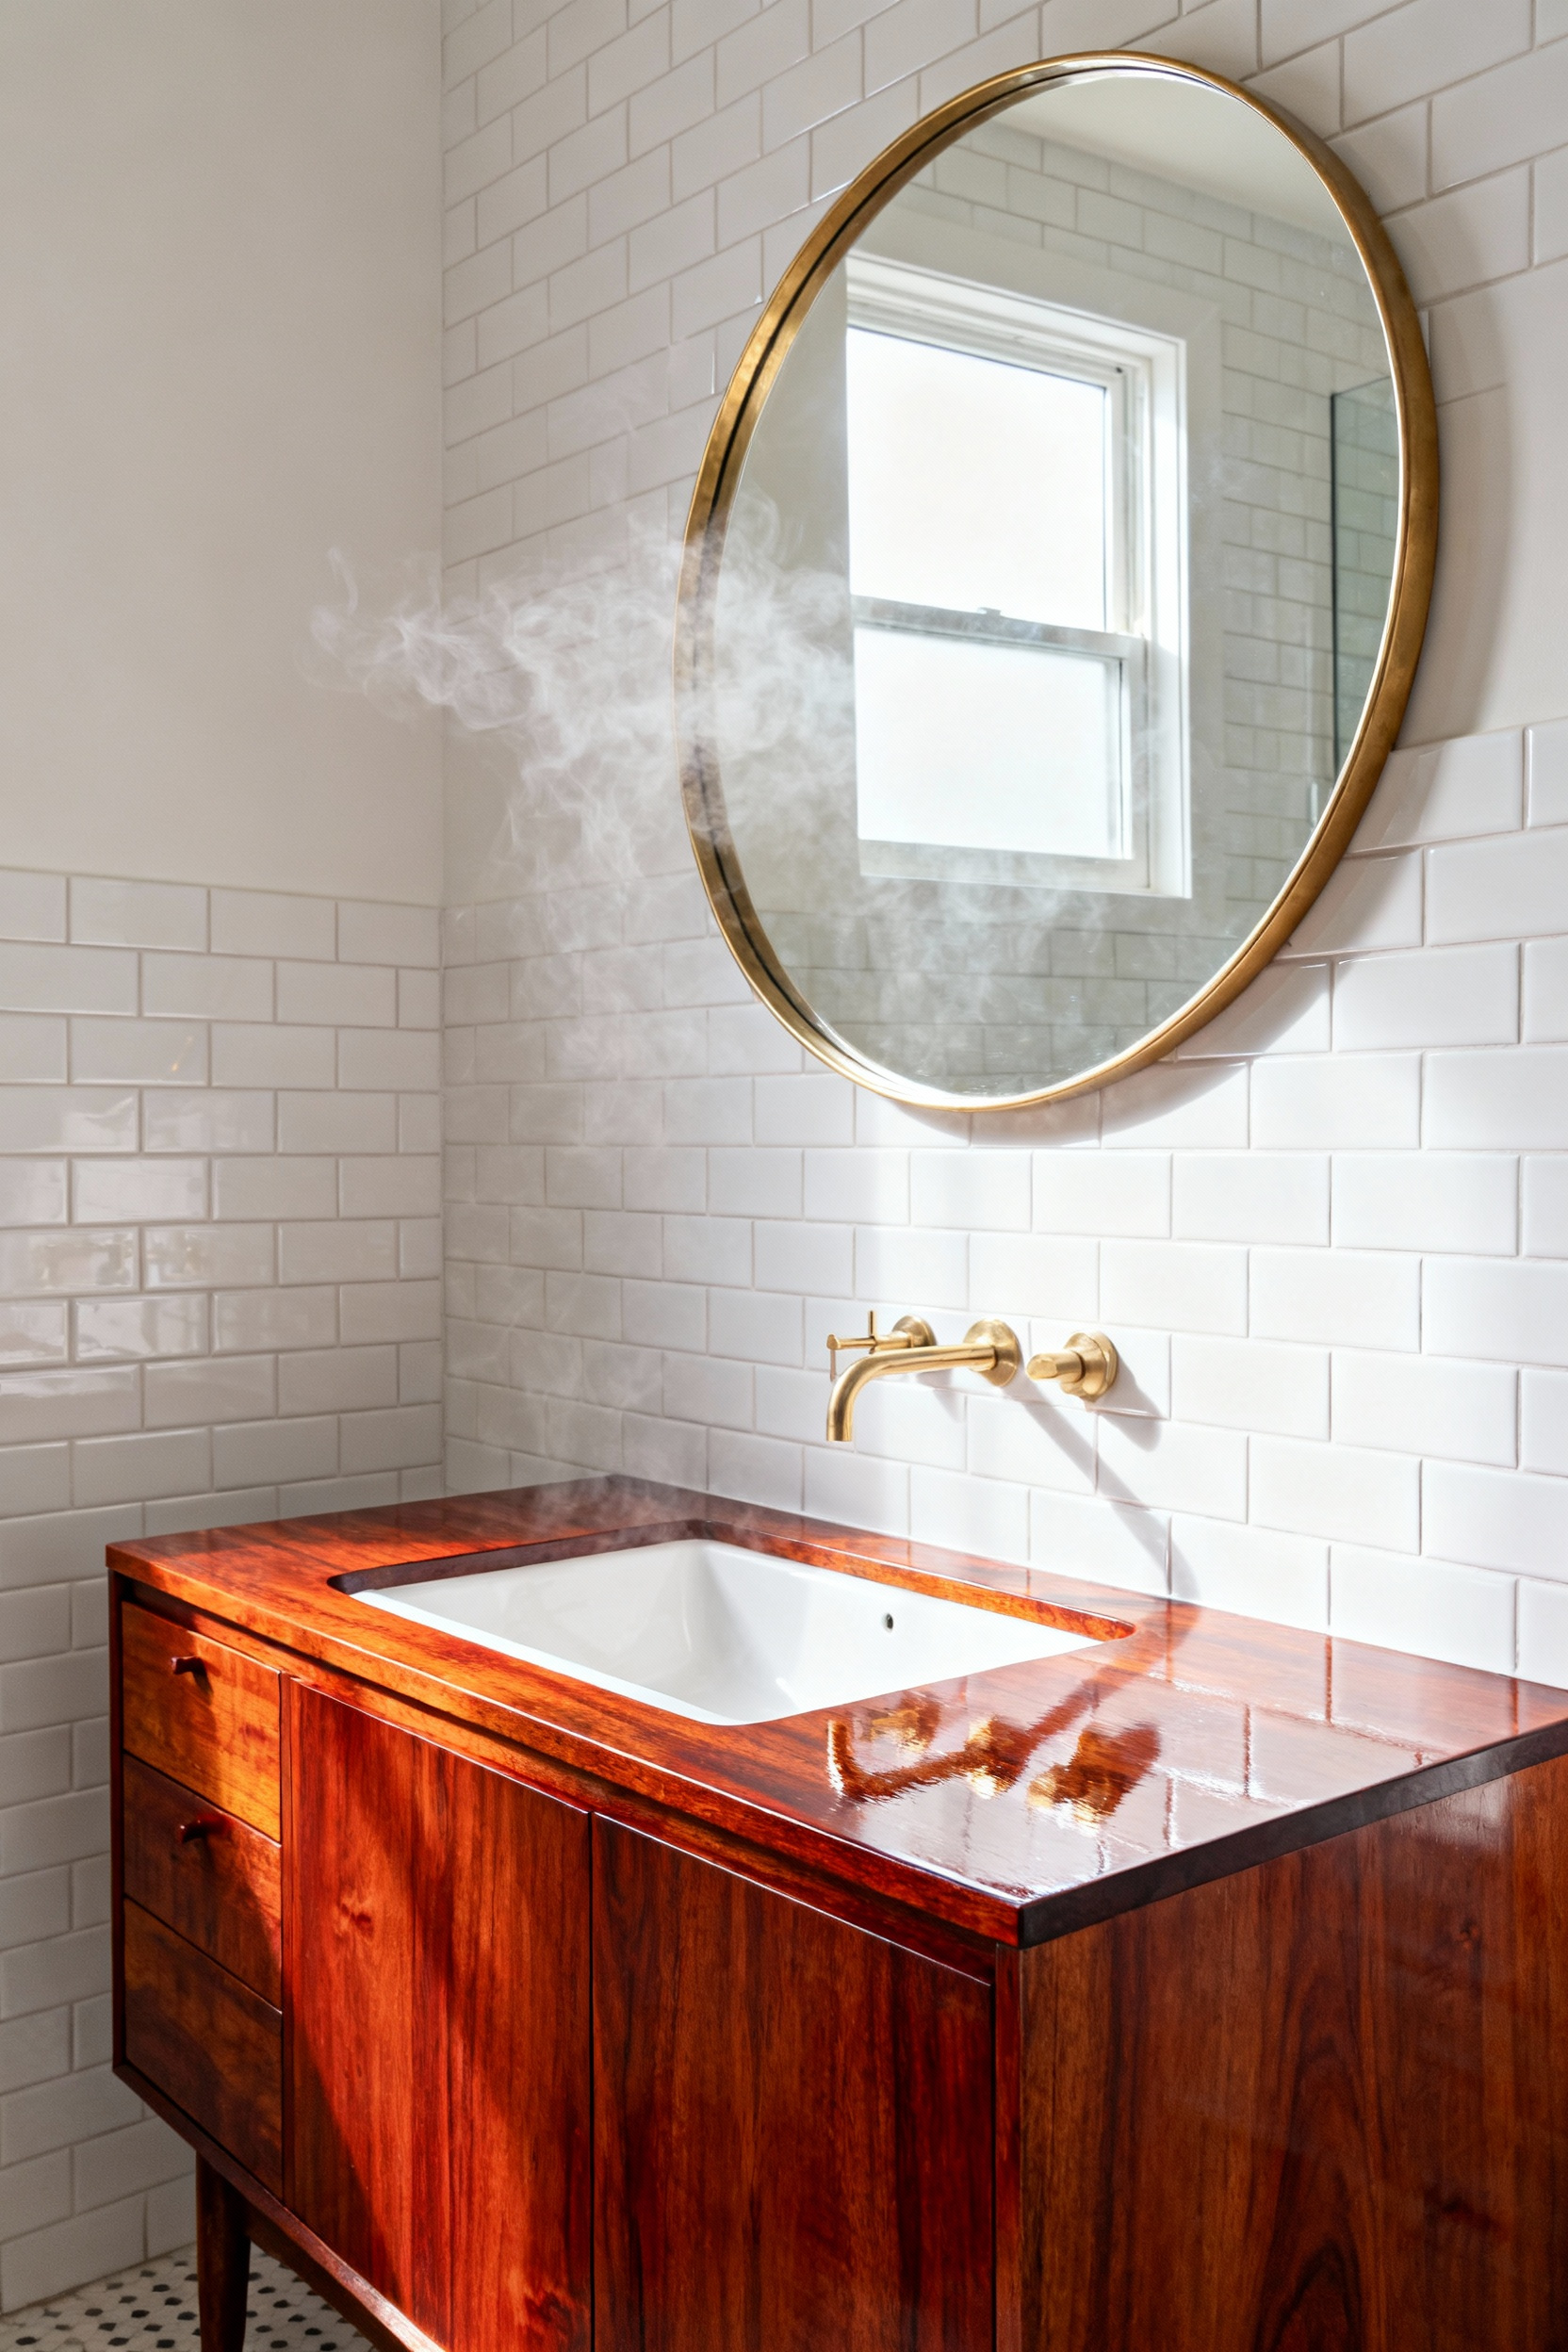
17. The Mirror Mix: Pairing Contemporary Shapes with Aged Wood
Reclaimed wood carries a soul that factory-made furniture simply cannot replicate. However, too much heavy texture can make a bathroom feel dated rather than timeless. Use the “Mirror Mix” to inject modern energy into these historic pieces without erasing their character. I recently restored a scarred mid-century oak chest, intentionally leaving the deep grain visible to honor its journey. Instead of a traditional rectangular glass, I mounted an oversized, thin-framed round mirror above it. The sleek curve of the glass immediately softened the rugged timber, creating a dynamic visual tension that feels curated, not cluttered.
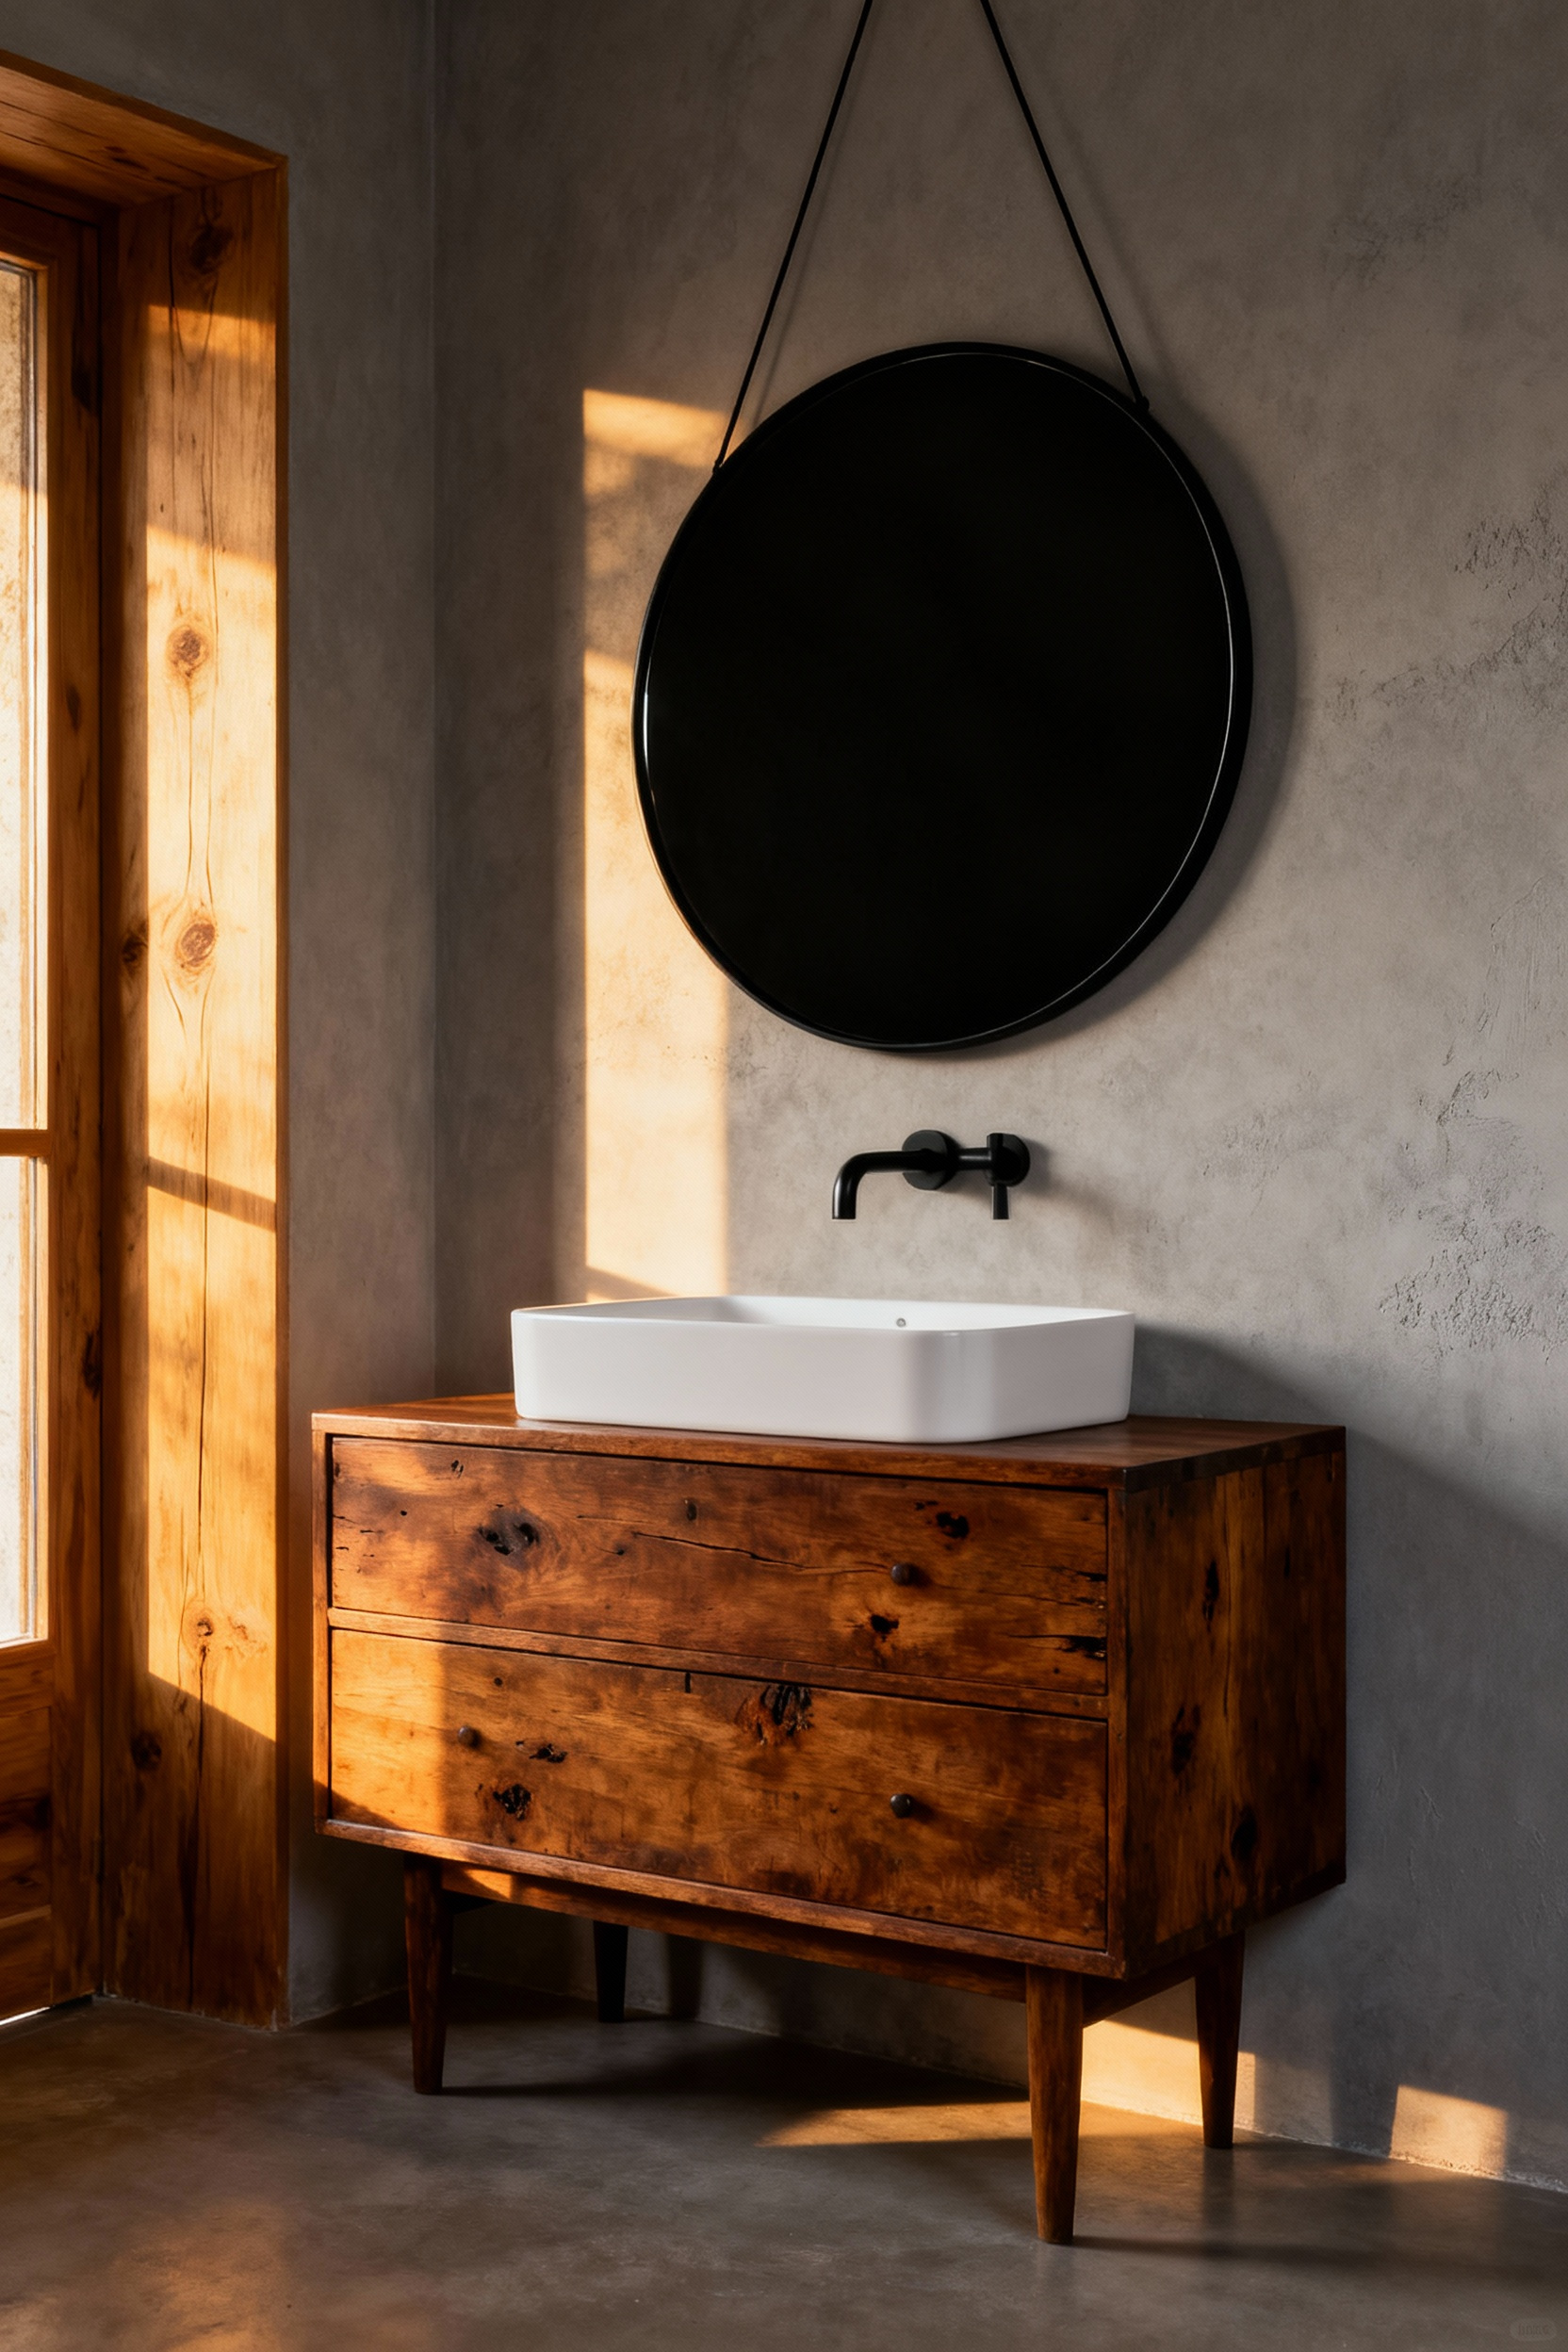
To master this high-contrast look in your own sustainable renovation, focus on three specific elements:
- Oppose the geometry: Pair the straight, blocky lines of the vanity with soft, fluid shapes like ovals or tall cathedral arches.
- Refine the rim: Select a mirror with a minimalist metal frame in brushed brass or matte black to visually “cut” through the weight of the wood.
- Unify the metals: Match your faucet and drawer hardware to the mirror’s finish to bridge the gap between the rustic and the modern.
This approach allows you to save tired furniture from the landfill while ensuring your space feels fresh and intentional.
Frequently Asked Questions About Bathroom Vanity Makeovers
How much does an effective DIY bathroom vanity makeover cost?
A budget-friendly DIY vanity makeover typically ranges from $100 to $400, depending on the scope. Surface-level changes like painting and new hardware are the most affordable, often costing less than $150. If you incorporate a stone remnant countertop or a new vessel sink, expect the cost to rise closer to $400–$800, still significantly cheaper than purchasing a brand new unit.
Can I paint my existing laminate or particle board bathroom vanity?
Yes, you can successfully paint laminate or particle board vanities, but prep work is crucial for long-term adhesion. First, lightly sand the glossy surface with 120-grit sandpaper, then clean thoroughly. You must apply a high-quality bonding primer (such as a shellac-based primer) before applying two coats of a durable waterborne alkyd or urethane enamel paint designed for high-humidity areas.
What is the most durable sealer for a reclaimed wood vanity?
For maximum durability and moisture defense in a bathroom environment, marine-grade varnish or spar urethane is highly recommended. These products are formulated for outdoor use and create a hard, plastic-like film that effectively prevents water penetration, warping, and mold growth on reclaimed wood surfaces.
What height should a repurposed dresser be to convert it into a comfortable vanity?
To achieve standard “Comfort Height” (34–36 inches), look for vintage dressers that are 30–32 inches tall. If you plan to use a vessel sink (which typically adds 4–6 inches of height), a shorter dresser is ideal. If using an undermount or drop-in sink, aim for a base height closer to 34 inches.
Conclusion: Your Vanity’s New Narrative
Your vanity is no longer just a construction zone; it has become a revived chapter in your home’s history. By choosing restoration over replacement, you have crafted a sanctuary that honors the past while serving your daily needs. This shift turns a simple washroom into a retreat that feels deeply personal. Soft textiles and a touch of greenery breathe life into the space, proving that the most meaningful luxury often comes from thoughtful, sustainable touches rather than a big budget.
Now, let the details tell the rest of the story. Clear away the clutter to let the vintage craftsmanship shine, and curate your countertop with a few meaningful treasures. Swap mismatched plastic for elegant, refillable glass vessels and adjust your lighting to cast a warm, nostalgic glow over the room. These small, eco-friendly adjustments create a cohesive look that allows the character of your restored piece to take center stage, completing your unique bathroom vanity makeover.
Ultimately, the most beautiful element in this room is the pride of preservation. You saw potential where others saw waste and gave forgotten materials a second life. So, light a non-toxic candle, exhale the stress of the day, and soak in the calm. Step into your new narrative and enjoy the quiet, timeless luxury you built with your own hands.